


目录
TensorFlow + JavaScript。现在,最流行、最先进的AI框架支持地球上使用最广泛的编程语言,因此,让我们在我们的web浏览器中通过深度学习实现奇迹,通过TensorFlow.js的WebGL GPU加速!
这是我们六个系列的第三篇文章:
- 使用TensorFlow.js在浏览器中进行深度学习入门
- 狗和披萨:使用TensorFlow.js在浏览器中实现计算机视觉
- 绒毛动物探测器:通过TensorFlow.js中的迁移学习识别浏览器中的自定义对象
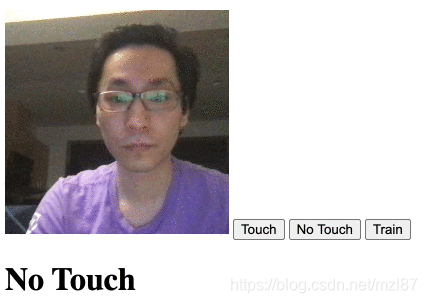
- 使用TensorFlow.js进行人脸触摸检测第1部分:将实时网络摄像头数据与深度学习配合使用
- 使用TensorFlow.js进行人脸触摸检测第2部分:使用BodyPix
- 使用TensorFlow.js进行AI在网络摄像头中翻译手势和手语
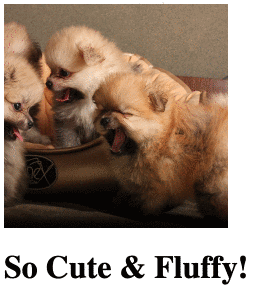
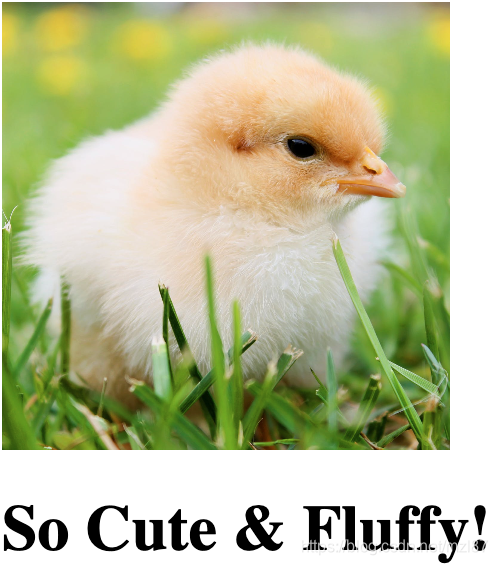
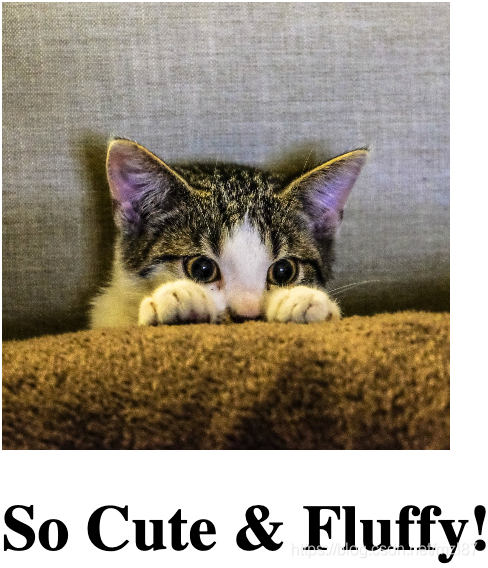
在Web浏览器中还有其他一些计算机视觉效果如何?这次,我们将构建一个蓬松的动物探测器,在这里,我将向您展示一种利用诸如MobileNet的预训练卷积神经网络(CNN)模型的方法。该模型将通过强大的处理能力对数百万张图像进行训练;我们将对其进行引导,以通过使用TensorFlow.js进行迁移学习来快速学习如何针对您的特定场景识别其他类型的对象。
起点
要开始基于预先训练的MobileNet模型训练自定义对象识别,我们需要:
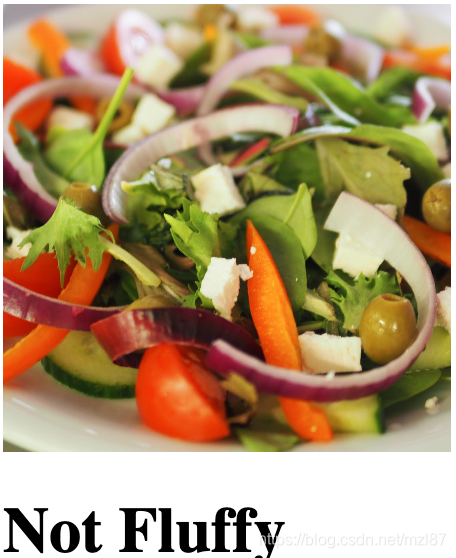
- 收集分类为“蓬松”和“不蓬松”的样本图像,包括一些不属于MobileNet预先训练类别的图像(我在本项目中使用的图像来自pexels.com)
- 导入TensorFlow.js
- 定义蓬松与不蓬松类别标签
- 随机选择并加载其中一张图像
- 以文字显示预测结果
- 加载经过预先训练的MobileNet模型并对图像进行分类
这将是该项目的起点:
<html>
    <head>
        <title>Fluffy Animal Detector: Recognizing Custom Objects in the Browser by Transfer Learning in TensorFlow.js</title>
        <script src="https://cdn.jsdelivr.net/npm/@tensorflow/tfjs@2.0.0/dist/tf.min.js"></script>
        <style>
            img {
                object-fit: cover;
            }
        </style>
    </head>
    <body>
        <img id="image" src="" width="224" height="224" />
        <h1 id="status">Loading...</h1>
        <script>
        const fluffy = [
            "web/dalmation.jpg", // https://www.pexels.com/photo/selective-focus-photography-of-woman-holding-adult-dalmatian-dog-1852225/
            "web/maltese.jpg", // https://www.pexels.com/photo/white-long-cot-puppy-on-lap-167085/
            "web/pug.jpg", // https://www.pexels.com/photo/a-wrinkly-pug-sitting-in-a-wooden-table-3475680/
            "web/pomeranians.jpg", // https://www.pexels.com/photo/photo-of-pomeranian-puppies-4065609/
            "web/kitty.jpg", // https://www.pexels.com/photo/eyes-cat-coach-sofa-96938/
            "web/upsidedowncat.jpg", // https://www.pexels.com/photo/silver-tabby-cat-1276553/
            "web/babychick.jpg", // https://www.pexels.com/photo/animal-easter-chick-chicken-5145/
            "web/chickcute.jpg", // https://www.pexels.com/photo/animal-bird-chick-cute-583677/
            "web/beakchick.jpg", // https://www.pexels.com/photo/animal-beak-blur-chick-583675/
            "web/easterchick.jpg", // https://www.pexels.com/photo/cute-animals-easter-chicken-5143/
            "web/closeupchick.jpg", // https://www.pexels.com/photo/close-up-photo-of-chick-2695703/
            "web/yellowcute.jpg", // https://www.pexels.com/photo/nature-bird-yellow-cute-55834/
            "web/chickbaby.jpg", // https://www.pexels.com/photo/baby-chick-58906/
        ];

        const notfluffy = [
            "web/pizzaslice.jpg", // https://www.pexels.com/photo/pizza-on-brown-wooden-board-825661/
            "web/pizzaboard.jpg", // https://www.pexels.com/photo/pizza-on-brown-wooden-board-825661/
            "web/squarepizza.jpg", // https://www.pexels.com/photo/pizza-with-bacon-toppings-1435900/
            "web/pizza.jpg", // https://www.pexels.com/photo/pizza-on-plate-with-slicer-and-fork-2260200/
            "web/salad.jpg", // https://www.pexels.com/photo/vegetable-salad-on-plate-1059905/
            "web/salad2.jpg", // https://www.pexels.com/photo/vegetable-salad-with-wheat-bread-on-the-side-1213710/
        ];

        // Create the ultimate, combined list of images
        const images = fluffy.concat( notfluffy );

        // Newly defined Labels
        const labels = [
            "So Cute & Fluffy!",
            "Not Fluffy"
        ];

        function pickImage() {
            document.getElementById( "image" ).src = images[ Math.floor( Math.random() * images.length ) ];
        }

        function setText( text ) {
            document.getElementById( "status" ).innerText = text;
        }

        async function predictImage() {
            let result = tf.tidy( () => {
                const img = tf.browser.fromPixels( document.getElementById( "image" ) ).toFloat();
                const normalized = img.div( 127 ).sub( 1 ); // Normalize from [0,255] to [-1,1]
                const input = normalized.reshape( [ 1, 224, 224, 3 ] );
                return model.predict( input );
            });
            let prediction = await result.data();
            result.dispose();
            // Get the index of the highest value in the prediction
            let id = prediction.indexOf( Math.max( ...prediction ) );
            setText( labels[ id ] );
        }

        // Mobilenet v1 0.25 224x224 model
        const mobilenet = "https://storage.googleapis.com/tfjs-models/tfjs/mobilenet_v1_0.25_224/model.json";

        let model = null;

        (async () => {
            // Load the model
            model = await tf.loadLayersModel( mobilenet );
            setInterval( pickImage, 5000 );
            document.getElementById( "image" ).onload = predictImage;
        })();
        </script>
    </body>
</html>
您可以更改图像数组以匹配测试图像的文件名。在浏览器中打开后,此页面将每五秒钟显示一次随机选择的不同图像。
在继续进行之前,请注意,为了使该项目正常运行,必须从Web服务器提供网页和图像(由于HTML5画布限制)。请参阅上一篇文章中的完整说明。
MobileNet v1体系结构上的迁移学习
在应用任何迁移学习之前,了解MobileNet模型的神经网络体系结构很重要。
MobileNets的设计考虑了迁移学习;它们先经过简单的顺序卷积层,然后再将其输出传递到一组最终的分类层,这些分类层确定了1000个类别的输出。
在运行model.summary()时查看此体系结构的打印视图:
_________________________________________________________________
图层(类型)输出形状参数#
======================================= =========================
input_1 (InputLayer) [null,224,224,3] 0
_________________________________________________________________
conv1 (Conv2D) [null,112,112,8] 216
_________________________________________________________________
conv1_bn (BatchNormalization [null,112,112,8] 32
_________________________________________________________________
conv1_relu (Activation) [null,112,112,8] 0
_________________________________________________________________
....
_________________________________________________________________
conv_pw_13_bn (BatchNormaliz [null,7,7,256] 1024
_________________________________________________________________
conv_pw_13_relu (Activation) [null,7,7,256] 0
_________________________________________________________________
global_average_pooling2d_1 ( [null,256] 0
_________________________________________________________________
reshape_1 (Reshape) [null,1,1,256] 0
_________________________________________________________________
dropout (Dropout) [null,1,1,256] 0
_________________________________________________________________
conv_preds (Conv2D) [null,1,1,1000] 257000
_________________________________________________________________
act_softmax (Activation) [null,1,1,1000] 0
_________________________________________________________________
reshape_2 (Reshape) [null,1000] 0
===================================== ===========================
总参数:475544
可训练参数:470072
非可训练参数:5472
所有的最高层次,它以conv开始,是网络层看像素的空间信息,最终编译与global_average_pooling2d_1分开始的分类,最后通过conv_preds层,输出1000原始类别MobileNet训练预测。
我们将在该conv_preds层之前(即,在“dropout”层中)拦截该模型,将新的分类层附加到“顶部”,然后仅训练这些层以仅预测两个类别——蓬松与不蓬松——同时保持预先训练的空间层完整无缺。
让我们开始吧!
修改模型
加载经过预先训练的MobileNet模型后,我们可以找到“瓶颈”层并创建一个新的、被截断的基本模型:
const bottleneck = model.getLayer( "dropout" ); // This is the final layer before the conv_pred pre-trained classification layer
const baseModel = tf.model({
    inputs: model.inputs,
    outputs: bottleneck.output
});接下来,让我们冻结所有“前瓶颈”层以保留模型的训练,以便我们可以利用已经放入模型这一块中的所有处理能力。
// Freeze the convolutional base
for( const layer of baseModel.layers ) {
    layer.trainable = false;
}然后,我们可以将由多层dense组成的自定义分类头附加到基础模型的输出,以用于训练成熟的新TensorFlow模型。
最终的密集层仅包含两个单位,分别对应于蓬松与非蓬松类别,并使用softmax激活将输出的总和标准化为等于1.0,这意味着我们可以将每个预测类别用作模型的预测置信度值。
// Add a classification head
const newHead = tf.sequential();
newHead.add( tf.layers.flatten( {
    inputShape: baseModel.outputs[ 0 ].shape.slice( 1 )
} ) );
newHead.add( tf.layers.dense( { units: 100, activation: 'relu' } ) );
newHead.add( tf.layers.dense( { units: 100, activation: 'relu' } ) );
newHead.add( tf.layers.dense( { units: 10, activation: 'relu' } ) );
newHead.add( tf.layers.dense( {
    units: 2,
    kernelInitializer: 'varianceScaling',
    useBias: false,
    activation: 'softmax'
} ) );
// Build the new model
const newOutput = newHead.apply( baseModel.outputs[ 0 ] );
const newModel = tf.model( { inputs: baseModel.inputs, outputs: newOutput } );为了保持代码干净,我们可以将其放入函数中并在加载MobileNet模型之后立即运行它:
function createTransferModel( model ) {
    // Create the truncated base model (remove the "top" layers, classification + bottleneck layers)
    const bottleneck = model.getLayer( "dropout" ); // This is the final layer before the conv_pred pre-trained classification layer
    const baseModel = tf.model({
        inputs: model.inputs,
        outputs: bottleneck.output
    });
    // Freeze the convolutional base
    for( const layer of baseModel.layers ) {
        layer.trainable = false;
    }
    // Add a classification head
    const newHead = tf.sequential();
    newHead.add( tf.layers.flatten( {
        inputShape: baseModel.outputs[ 0 ].shape.slice( 1 )
    } ) );
    newHead.add( tf.layers.dense( { units: 100, activation: 'relu' } ) );
    newHead.add( tf.layers.dense( { units: 100, activation: 'relu' } ) );
    newHead.add( tf.layers.dense( { units: 10, activation: 'relu' } ) );
    newHead.add( tf.layers.dense( {
        units: 2,
        kernelInitializer: 'varianceScaling',
        useBias: false,
        activation: 'softmax'
    } ) );
    // Build the new model
    const newOutput = newHead.apply( baseModel.outputs[ 0 ] );
    const newModel = tf.model( { inputs: baseModel.inputs, outputs: newOutput } );
    return newModel;
}

...

(async () => {
    // Load the model
    model = await tf.loadLayersModel( mobilenet );
    model = createTransferModel( model );
    setInterval( pickImage, 2000 );
    document.getElementById( "image" ).onload = predictImage;
})();
训练新模式
我们快完成了。只剩下一个步骤,那就是在我们的自定义训练数据上训练我们的新TensorFlow模型。
为了从自定义图像生成训练数据张量,让我们创建一个函数,将图像加载到网页的图像元素并获取标准化的张量:
async function getTrainingImage( url ) {
    return new Promise( ( resolve, reject ) => {
        document.getElementById( "image" ).src = url;
        document.getElementById( "image" ).onload = () => {
            const img = tf.browser.fromPixels( document.getElementById( "image" ) ).toFloat();
            const normalized = img.div( 127 ).sub( 1 );
            resolve( normalized );
        };
    });
}现在,我们可以使用此函数创建输入张量和目标张量的堆栈。您可能还记得,在本系列的第一篇文章中,我们在培训中使用了这些xs和ys。我们将仅使用来自每个类别的一半图像进行训练,以验证我们的新模型对新鲜图像做出了预测。
// Setup training data
const imageSamples = [];
const targetSamples = [];
for( let i = 0; i < fluffy.length / 2; i++ ) {
    let result = await getTrainingImage( fluffy[ i ] );
    imageSamples.push( result );
    targetSamples.push( tf.tensor1d( [ 1, 0 ] ) );
}
for( let i = 0; i < notfluffy.length / 2; i++ ) {
    let result = await getTrainingImage( notfluffy[ i ] );
    imageSamples.push( result );
    targetSamples.push( tf.tensor1d( [ 0, 1 ] ) );
}
const xs = tf.stack( imageSamples );
const ys = tf.stack( targetSamples );
tf.dispose( [ imageSamples, targetSamples ] );最后,我们编译模型并使之适合数据。多亏了MobileNet的所有预培训,这次我们仅需要大约30个纪元(而不是100个纪元)就可以可靠地区分类别。
model.compile( { loss: "meanSquaredError", optimizer: "adam", metrics: [ "acc" ] } );

// Train the model on new image samples
await model.fit( xs, ys, {
    epochs: 30,
    shuffle: true,
    callbacks: {
        onEpochEnd: ( epoch, logs ) => {
            console.log( "Epoch #", epoch, logs );
        }
    }
});将Marie Kondo的KonMari方法应用于代码,让我们通过在调用之前将上述所有代码放入函数中,让它看起来更有趣一些:
async function trainModel() {
    setText( "Training..." );

    // Setup training data
    const imageSamples = [];
    const targetSamples = [];
    for( let i = 0; i < fluffy.length / 2; i++ ) {
        let result = await getTrainingImage( fluffy[ i ] );
        imageSamples.push( result );
        targetSamples.push( tf.tensor1d( [ 1, 0 ] ) );
    }
    for( let i = 0; i < notfluffy.length / 2; i++ ) {
        let result = await getTrainingImage( notfluffy[ i ] );
        imageSamples.push( result );
        targetSamples.push( tf.tensor1d( [ 0, 1 ] ) );
    }
    const xs = tf.stack( imageSamples );
    const ys = tf.stack( targetSamples );
    tf.dispose( [ imageSamples, targetSamples ] );

    model.compile( { loss: "meanSquaredError", optimizer: "adam", metrics: [ "acc" ] } );

    // Train the model on new image samples
    await model.fit( xs, ys, {
        epochs: 30,
        shuffle: true,
        callbacks: {
            onEpochEnd: ( epoch, logs ) => {
                console.log( "Epoch #", epoch, logs );
            }
        }
    });
}
...
(async () => {
    // Load the model
    model = await tf.loadLayersModel( mobilenet );
    model = createTransferModel( model );
    await trainModel();
    setInterval( pickImage, 2000 );
    document.getElementById( "image" ).onload = predictImage;
})();
运行物体识别
有了所有的部件,我们应该能够运行我们的绒毛动物探测器,并看到它学会识别绒毛!从我的笔记本电脑上看看这些结果:
终点线
要结束我们的项目,这里是最终代码:
<html>
    <head>
        <title>Fluffy Animal Detector: Recognizing Custom Objects in the Browser by Transfer Learning in TensorFlow.js</title>
        <script src="https://cdn.jsdelivr.net/npm/@tensorflow/tfjs@2.0.0/dist/tf.min.js"></script>
        <style>
            img {
                object-fit: cover;
            }
        </style>
    </head>
    <body>
        <img id="image" src="" width="224" height="224" />
        <h1 id="status">Loading...</h1>
        <script>
        const fluffy = [
            "web/dalmation.jpg", // https://www.pexels.com/photo/selective-focus-photography-of-woman-holding-adult-dalmatian-dog-1852225/
            "web/maltese.jpg", // https://www.pexels.com/photo/white-long-cot-puppy-on-lap-167085/
            "web/pug.jpg", // https://www.pexels.com/photo/a-wrinkly-pug-sitting-in-a-wooden-table-3475680/
            "web/pomeranians.jpg", // https://www.pexels.com/photo/photo-of-pomeranian-puppies-4065609/
            "web/kitty.jpg", // https://www.pexels.com/photo/eyes-cat-coach-sofa-96938/
            "web/upsidedowncat.jpg", // https://www.pexels.com/photo/silver-tabby-cat-1276553/
            "web/babychick.jpg", // https://www.pexels.com/photo/animal-easter-chick-chicken-5145/
            "web/chickcute.jpg", // https://www.pexels.com/photo/animal-bird-chick-cute-583677/
            "web/beakchick.jpg", // https://www.pexels.com/photo/animal-beak-blur-chick-583675/
            "web/easterchick.jpg", // https://www.pexels.com/photo/cute-animals-easter-chicken-5143/
            "web/closeupchick.jpg", // https://www.pexels.com/photo/close-up-photo-of-chick-2695703/
            "web/yellowcute.jpg", // https://www.pexels.com/photo/nature-bird-yellow-cute-55834/
            "web/chickbaby.jpg", // https://www.pexels.com/photo/baby-chick-58906/
        ];

        const notfluffy = [
            "web/pizzaslice.jpg", // https://www.pexels.com/photo/pizza-on-brown-wooden-board-825661/
            "web/pizzaboard.jpg", // https://www.pexels.com/photo/pizza-on-brown-wooden-board-825661/
            "web/squarepizza.jpg", // https://www.pexels.com/photo/pizza-with-bacon-toppings-1435900/
            "web/pizza.jpg", // https://www.pexels.com/photo/pizza-on-plate-with-slicer-and-fork-2260200/
            "web/salad.jpg", // https://www.pexels.com/photo/vegetable-salad-on-plate-1059905/
            "web/salad2.jpg", // https://www.pexels.com/photo/vegetable-salad-with-wheat-bread-on-the-side-1213710/
        ];

        // Create the ultimate, combined list of images
        const images = fluffy.concat( notfluffy );

        // Newly defined Labels
        const labels = [
            "So Cute & Fluffy!",
            "Not Fluffy"
        ];

        function pickImage() {
            document.getElementById( "image" ).src = images[ Math.floor( Math.random() * images.length ) ];
        }

        function setText( text ) {
            document.getElementById( "status" ).innerText = text;
        }

        async function predictImage() {
            let result = tf.tidy( () => {
                const img = tf.browser.fromPixels( document.getElementById( "image" ) ).toFloat();
                const normalized = img.div( 127 ).sub( 1 ); // Normalize from [0,255] to [-1,1]
                const input = normalized.reshape( [ 1, 224, 224, 3 ] );
                return model.predict( input );
            });
            let prediction = await result.data();
            result.dispose();
            // Get the index of the highest value in the prediction
            let id = prediction.indexOf( Math.max( ...prediction ) );
            setText( labels[ id ] );
        }

        function createTransferModel( model ) {
            // Create the truncated base model (remove the "top" layers, classification + bottleneck layers)
            const bottleneck = model.getLayer( "dropout" ); // This is the final layer before the conv_pred pre-trained classification layer
            const baseModel = tf.model({
                inputs: model.inputs,
                outputs: bottleneck.output
            });
            // Freeze the convolutional base
            for( const layer of baseModel.layers ) {
                layer.trainable = false;
            }
            // Add a classification head
            const newHead = tf.sequential();
            newHead.add( tf.layers.flatten( {
                inputShape: baseModel.outputs[ 0 ].shape.slice( 1 )
            } ) );
            newHead.add( tf.layers.dense( { units: 100, activation: 'relu' } ) );
            newHead.add( tf.layers.dense( { units: 100, activation: 'relu' } ) );
            newHead.add( tf.layers.dense( { units: 10, activation: 'relu' } ) );
            newHead.add( tf.layers.dense( {
                units: 2,
                kernelInitializer: 'varianceScaling',
                useBias: false,
                activation: 'softmax'
            } ) );
            // Build the new model
            const newOutput = newHead.apply( baseModel.outputs[ 0 ] );
            const newModel = tf.model( { inputs: baseModel.inputs, outputs: newOutput } );
            return newModel;
        }

        async function getTrainingImage( url ) {
            return new Promise( ( resolve, reject ) => {
                document.getElementById( "image" ).src = url;
                document.getElementById( "image" ).onload = () => {
                    const img = tf.browser.fromPixels( document.getElementById( "image" ) ).toFloat();
                    const normalized = img.div( 127 ).sub( 1 );
                    resolve( normalized );
                };
            });
        }

        async function trainModel() {
            setText( "Training..." );

            // Setup training data
            const imageSamples = [];
            const targetSamples = [];
            for( let i = 0; i < fluffy.length / 2; i++ ) {
                let result = await getTrainingImage( fluffy[ i ] );
                imageSamples.push( result );
                targetSamples.push( tf.tensor1d( [ 1, 0 ] ) );
            }
            for( let i = 0; i < notfluffy.length / 2; i++ ) {
                let result = await getTrainingImage( notfluffy[ i ] );
                imageSamples.push( result );
                targetSamples.push( tf.tensor1d( [ 0, 1 ] ) );
            }
            const xs = tf.stack( imageSamples );
            const ys = tf.stack( targetSamples );
            tf.dispose( [ imageSamples, targetSamples ] );

            model.compile( { loss: "meanSquaredError", optimizer: "adam", metrics: [ "acc" ] } );

            // Train the model on new image samples
            await model.fit( xs, ys, {
                epochs: 30,
                shuffle: true,
                callbacks: {
                    onEpochEnd: ( epoch, logs ) => {
                        console.log( "Epoch #", epoch, logs );
                    }
                }
            });
        }

        // Mobilenet v1 0.25 224x224 model
        const mobilenet = "https://storage.googleapis.com/tfjs-models/tfjs/mobilenet_v1_0.25_224/model.json";

        let model = null;

        (async () => {
            // Load the model
            model = await tf.loadLayersModel( mobilenet );
            model = createTransferModel( model );
            await trainModel();
            setInterval( pickImage, 2000 );
            document.getElementById( "image" ).onload = predictImage;
        })();
        </script>
    </body>
</html>
下一步是什么?我们可以检测到脸部吗?
您是否对网页内的深度学习可能带来的好处感到惊讶,或者它的速度和便捷程度如何?接下来,我们将利用浏览器的易于使用的HTML5网络摄像头API来训练和运行实时图像的预测。
请紧跟本系列的下一篇文章,使用TensorFlow.js进行人脸触摸检测第1部分:将实时网络摄像头数据与深度学习配合使用。
https://www.codeproject.com/Articles/5272772/Fluffy-Animal-Detector-Recognizing-Custom-Objects


 807
807

 被折叠的 条评论
为什么被折叠?
被折叠的 条评论
为什么被折叠?
 到【灌水乐园】发言


