


大型项目中,可能存在多业务、多模块(比如一些公共模块,核心模块,用户管理、充值管理、订单管理等等),需要细分并委派给不同team进行开发。使用maven模块化管理,将各业务进行整合。
本文使用STS4 + JDK8 + Maven3.5.2搭建。
一、创建顶级父工程 (项目名:maven)
选择New > Maven Project:模版选择maven-archetype-quickstart,
创建完后,修改pom.xml中的 <packaging>jar</packaging> 为 <packaging>pom</packaging>,pom表示它是一个被继承的模块。
如下图:
二、创建顶级web工程 (项目名:web)
在maven项目右键选择New > Maven Module: 模版选择maven-archetype-webapp
三、创建公共模块(commons)、用户管理(userweb)、订单管理(前台:ordersweb,后台:orders)
注意:创建子web项目有两种情况,一种是前后台放一个工程(用户管理),另一种是前后台分离(订单管理)。
commons:在maven项目右键选择New > Maven Module: 模版选择maven-archetype-quickstart
userweb:在maven项目右键选择New > Maven Module: 模版选择maven-archetype-webapp
ordersweb:在maven项目右键选择New > Maven Module: 模版选择maven-archetype-webapp
orders:在maven项目右键选择New > Maven Module: 模版选择maven-archetype-quickstart
此时观察顶级父工程:

包含了我们创建的所有子模块,在sts中看,这些子模块又是一个个独立的项目
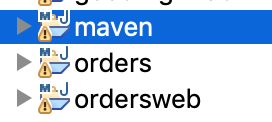
再根据路径打开maven:

事实上都被包含在maven目录下
四、配置子模块到父web工程
打开web的pom.xml,并在dependenceies中加入
		<dependency>
			<groupId>com.sishuok</groupId>
			<artifactId>customermgr</artifactId>
			<version>0.0.1-SNAPSHOT</version>
			<type>war</type>
		</dependency>
		<dependency>
			<groupId>com.sishuok</groupId>
			<artifactId>goodmgrweb</artifactId>
			<version>0.0.1-SNAPSHOT</version>
			<type>war</type>
		</dependency>
在build 》 plugins中加入覆盖规则
			<plugin>
				<groupId>org.apache.maven.plugins</groupId>
				<artifactId>maven-war-plugin</artifactId>
				<version>3.2.2</version>
				<configuration>
					<overlays>
						<overlay>
							<groupId>com.wzy</groupId>
							<artifactId>userweb</artifactId>
						</overlay>
						<overlay>
							<groupId>com.wzy</groupId>
							<artifactId>ordersweb</artifactId>
						</overlay>
					</overlays>
				</configuration>
			</plugin>
五、测试运行
直接右键父工程maven,选择run 》 maven install,如果build success,则成功。
至此,初步模型已搭建成功。
注意:如果多个war有同路径并且同名的文件,如果总的web里面有,那么总的那个会覆盖分支的;如果总的没有,那么看合并的顺序,留下第一个的文件;顺序就是web项目pom.xml中写的顺序(overlays中定义的)
六、使用jetty插件运行项目
在需要运行的项目中加入:
			<plugin>
				<groupId>org.mortbay.jetty</groupId>
				<artifactId>jetty-maven-plugin</artifactId>
				<version>8.1.16.v20140903</version>
				<configuration>
					<scanIntervalSeconds>10</scanIntervalSeconds>
					<stopPort>9999</stopPort>
					<webAppConfig>
						<contextPath>/</contextPath>
					</webAppConfig>
					<connectors>
						<connector
							implementation="org.eclipse.jetty.server.nio.SelectChannelConnector">
							<port>8080</port>
							<maxIdleTime>60000</maxIdleTime>
						</connector>
					</connectors>
				</configuration>
			</plugin>
contextPath 根据实际修改,以及启动的端口port。
这个是在web项目中配置,配置为跟路径,右击选择
Run Configurations > Maven Build > New Configuration

Base directory选择需要跑的项目,Goals 填: jetty:run
直接浏览器访问即可。
七、初步源码


 1914
1914


 被折叠的 条评论
为什么被折叠?
被折叠的 条评论
为什么被折叠?
 到【灌水乐园】发言


