


最近项目中修改个人资料等需要用到头像,这就需要用到截图,故留下这篇博文,供自己以后参考。
先上效果图:
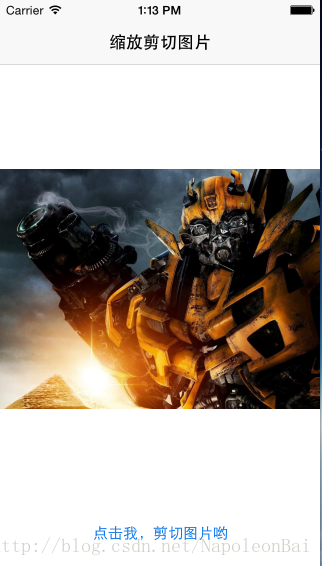
这里的图片显示效果就没有做过多处理了,因为小编直接采用的storyBoard布局,设置了图片的Mode为Aspect Fit,需要什么样的mode,可自行设置。
1.在控制器中设置一个UI ImageView和一个UIButton,UIImageView用来显示图片,UIButton用来进行截图跳转。小编这都是在storyboard中完成的,所以,只是在代码中进行了效果处理。
ViewController.h 中实现了截图控制器的代理等
//
//  ViewController.h
//  TestImageZoom
//
//  Created by NapoleonBai on 14-7-24.
//  Copyright (c) 2014年 NapoleonBai. All rights reserved.
//

#import <UIKit/UIKit.h>
#import "ImageCropper.h"
@interface ViewController : UIViewController<ImageCropperDelegate>
@property (weak, nonatomic) IBOutlet UIImageView *imageView;
- (IBAction)onClick:(id)sender;<span style="font-family: Arial, Helvetica, sans-serif;">//按钮点击事件</span>
@end//点击按钮方法
- (IBAction)onClick:(id)sender {
//打开缩放图片控制器
ImageCropper *cropper = [[ImageCropper alloc] initWithImage:[_imageView image]];
//设置代理
[cropper setDelegate:self];
//模态跳转
[self presentViewController:cropper animated:YES completion:nil];
}
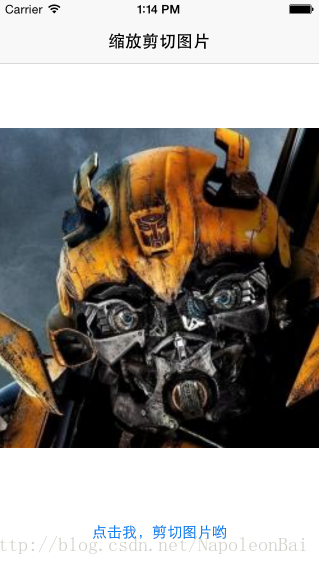
//实现协议方法,将剪切得到的图片,设置到当前界面的UIIamgeView上显示
- (void)imageCropper:(ImageCropper *)cropper didFinishCroppingWithImage:(UIImage *)image {
[_imageView setImage:image];
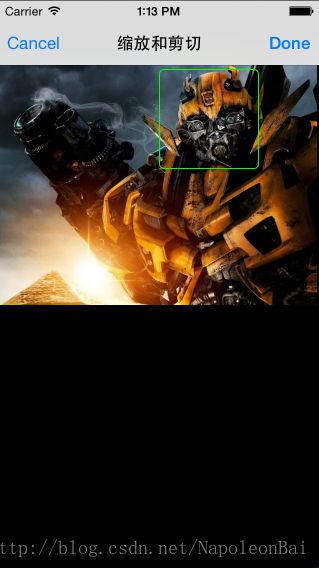
}2.处理截图控制器,这个截图控制器是使用的一个UIScroolView和一个UIImageView完成的基本构造,使用的UIView形成的固定截图框大小。这里就不做过多解释了,言语都在注释中。
在ImageCropper.h 中声明方法/属性等 和构建协议方法
//
//  ImageCropper.h
//  Created by NapoleonBai on 14-7-24.
//  Copyright (c) 2014年 NapoleonBai. All rights reserved.
//

#import <UIKit/UIKit.h>

@protocol ImageCropperDelegate;
@interface ImageCropper : UIViewController <UIScrollViewDelegate> {
	UIView *viewZoom;//缩放截图View
}
@property (nonatomic, strong) UIScrollView *scrollView;//滚动视图
@property (nonatomic, strong) UIImageView *imageView;//显示图片View
@property (nonatomic, assign) id <ImageCropperDelegate> delegate;
- (id)initWithImage:(UIImage *)image;//初始化方法
@end
//代理
@protocol ImageCropperDelegate <NSObject>
//完成剪切的代理方法
- (void)imageCropper:(ImageCropper *)cropper didFinishCroppingWithImage:(UIImage *)image;
@end
2.1完成初始化方法,在ImageCropper.m文件中
- (id)initWithImage:(UIImage *)image {
	self = [super init];
	if (self) {

		[[UIApplication sharedApplication] setStatusBarStyle:UIStatusBarStyleLightContent animated:YES];
		//初始化UIScrollView 大小可以自行设定
		_scrollView = [[UIScrollView alloc] initWithFrame:CGRectMake(0, 64, 320, 436)];
		[_scrollView setBackgroundColor:[UIColor blackColor]];
		[_scrollView setDelegate:self];
		[_scrollView setShowsHorizontalScrollIndicator:NO];
		[_scrollView setShowsVerticalScrollIndicator:NO];
		[_scrollView setMaximumZoomScale:2.0];
		//初始化图片View
		_imageView = [[UIImageView alloc] initWithImage:image];

        //设置图片现实大小等
		CGRect rect;
		rect.size.width = image.size.width;
		rect.size.height = image.size.height;
		[_imageView setFrame:rect];
		//设置UIScrollView的内容大小
		[_scrollView setContentSize:[_imageView frame].size];
        //设置最小缩放等级
		[_scrollView setMinimumZoomScale:[_scrollView frame].size.width / [_imageView frame].size.width];
        //设置初始等级
		[_scrollView setZoomScale:[_scrollView minimumZoomScale]];
        //添加到UIScrollView上
		[_scrollView addSubview:_imageView];

		[[self view] addSubview:_scrollView];

        //创建导航栏控制器
		UINavigationBar *navigationBar = [[UINavigationBar alloc] initWithFrame:CGRectMake(0, 0, 320, 64)];
		//设置导航栏标题
		UINavigationItem *aNavigationItem = [[UINavigationItem alloc] initWithTitle:@"缩放和剪切"];
        //设置取消按钮
		[aNavigationItem setLeftBarButtonItem:[[UIBarButtonItem alloc] initWithBarButtonSystemItem:UIBarButtonSystemItemCancel target:self action:@selector(cancelCropping)]];
        //设置确认剪切按钮
		[aNavigationItem setRightBarButtonItem:[[UIBarButtonItem alloc] initWithBarButtonSystemItem:UIBarButtonSystemItemDone target:self action:@selector(finishCropping)]];
		//添加到导航栏上
		[navigationBar setItems:[NSArray arrayWithObject:aNavigationItem]];
		//设置导航栏
		[[self view] addSubview:navigationBar];
		//初始化截图框
        [self initView];
	}

	return self;
}
//创建一个截图框
- (void)initView{
//初始化截图框信息
viewZoom=[[UIView alloc]initWithFrame:CGRectMake(10, 10, 100, 100)];
[viewZoom setBackgroundColor:[UIColor clearColor]];//清除背景色
viewZoom.layer.borderColor=[[UIColor greenColor]CGColor];//设置边框颜色
viewZoom.layer.borderWidth=1;//设置边框宽度
viewZoom.layer.cornerRadius=5;//设置圆角
[[self scrollView] addSubview:viewZoom];//添加到视图上
// 设置可操作 特别注意,这里必须这样,不然手势将不可用
[viewZoom setUserInteractionEnabled:YES];
//设置拖动手势事件方法
UIPanGestureRecognizer *panGestureRecognizer = [[UIPanGestureRecognizer alloc]
initWithTarget:self
action:@selector(handlePan:)];
//添加拖动手势
[viewZoom addGestureRecognizer:panGestureRecognizer];
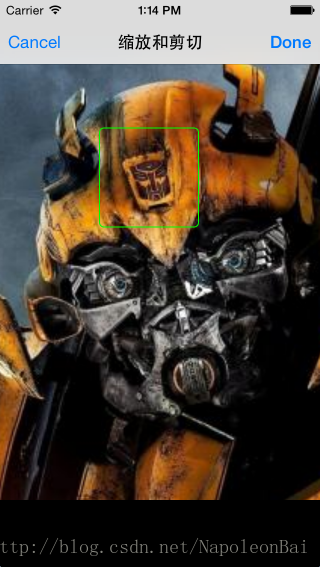
}2.3到这里,基本布局就算完成了,但是,为了方便,小编给截图框添加了一个拖动手势,这样就可拖动截图 框了。在拖动方法中,需要改变View 的坐标,小编是通过移 动的坐标点来重新设置View的坐标的,如下
//进行截图框拖放时执行
- (void)handlePan:(UIPanGestureRecognizer *)recognizer{
    //得到移动坐标点
    CGPoint translation = [recognizer translationInView:self.view];
    //设置拖动视图的中心坐标
    recognizer.view.center = CGPointMake(recognizer.view.center.x + translation.x,
                                         recognizer.view.center.y + translation.y);
    //重新设置视图位置
    [recognizer setTranslation:CGPointZero inView:self.view];
}#pragma 实现滚动视图的协议方法
//进行缩放时进入,返回图片View
- (UIView *)viewForZoomingInScrollView:(UIScrollView *)scrollViews {
return _imageView;
}
//滚动时候进入
- (void)scrollViewDidScroll:(UIScrollView *)scrollViews{
//得到截图框的frame
CGRect frame=viewZoom.frame;
//将截图框锁定在屏幕(x=10,y=10)的位置 可以根据自己需要自行设定
frame.origin.x=[self.scrollView contentOffset].x+10;
frame.origin.y=[self.scrollView contentOffset].y+10;
[viewZoom setFrame:frame];
}
//取消方法
- (void)cancelCropping {
    [self dismissViewControllerAnimated:NO completion:nil];
}

//这是点击截图按钮触发
- (void)finishCropping {
    //得到缩放级别
	float zoomScale = 1.0 / [_scrollView zoomScale];
    //得到需要的截图大小
	CGRect rect;
	rect.origin.x = viewZoom.frame.origin.x * zoomScale;
	rect.origin.y = viewZoom.frame.origin.y * zoomScale;
	rect.size.width = viewZoom.frame.size.width * zoomScale;
	rect.size.height = viewZoom.frame.size.height * zoomScale;
	//裁剪图片  需要裁剪的图片  裁剪的位置
	CGImageRef cr = CGImageCreateWithImageInRect([[_imageView image] CGImage], rect);
	//得到image
	UIImage *cropped = [UIImage imageWithCGImage:cr];
    //释放内存<span style="white-space:pre">	</span>这里可以不做出操作,但是为了内存的严谨,推荐释放
	CGImageRelease(cr);
	//使用代理将截图传回界面
	[self.delegate imageCropper:self didFinishCroppingWithImage:cropped];
    [self dismissViewControllerAnimated:NO completion:nil];
}
到这里就结束了截图和缩放功能
记下,只为了留下开发生涯中的点点滴滴;
可能不是最好,但小编已经全力以赴了。
谢谢,若有不对,烦劳路过的大牛指点一二。


 830
830

 被折叠的 条评论
为什么被折叠?
被折叠的 条评论
为什么被折叠?
 到【灌水乐园】发言


