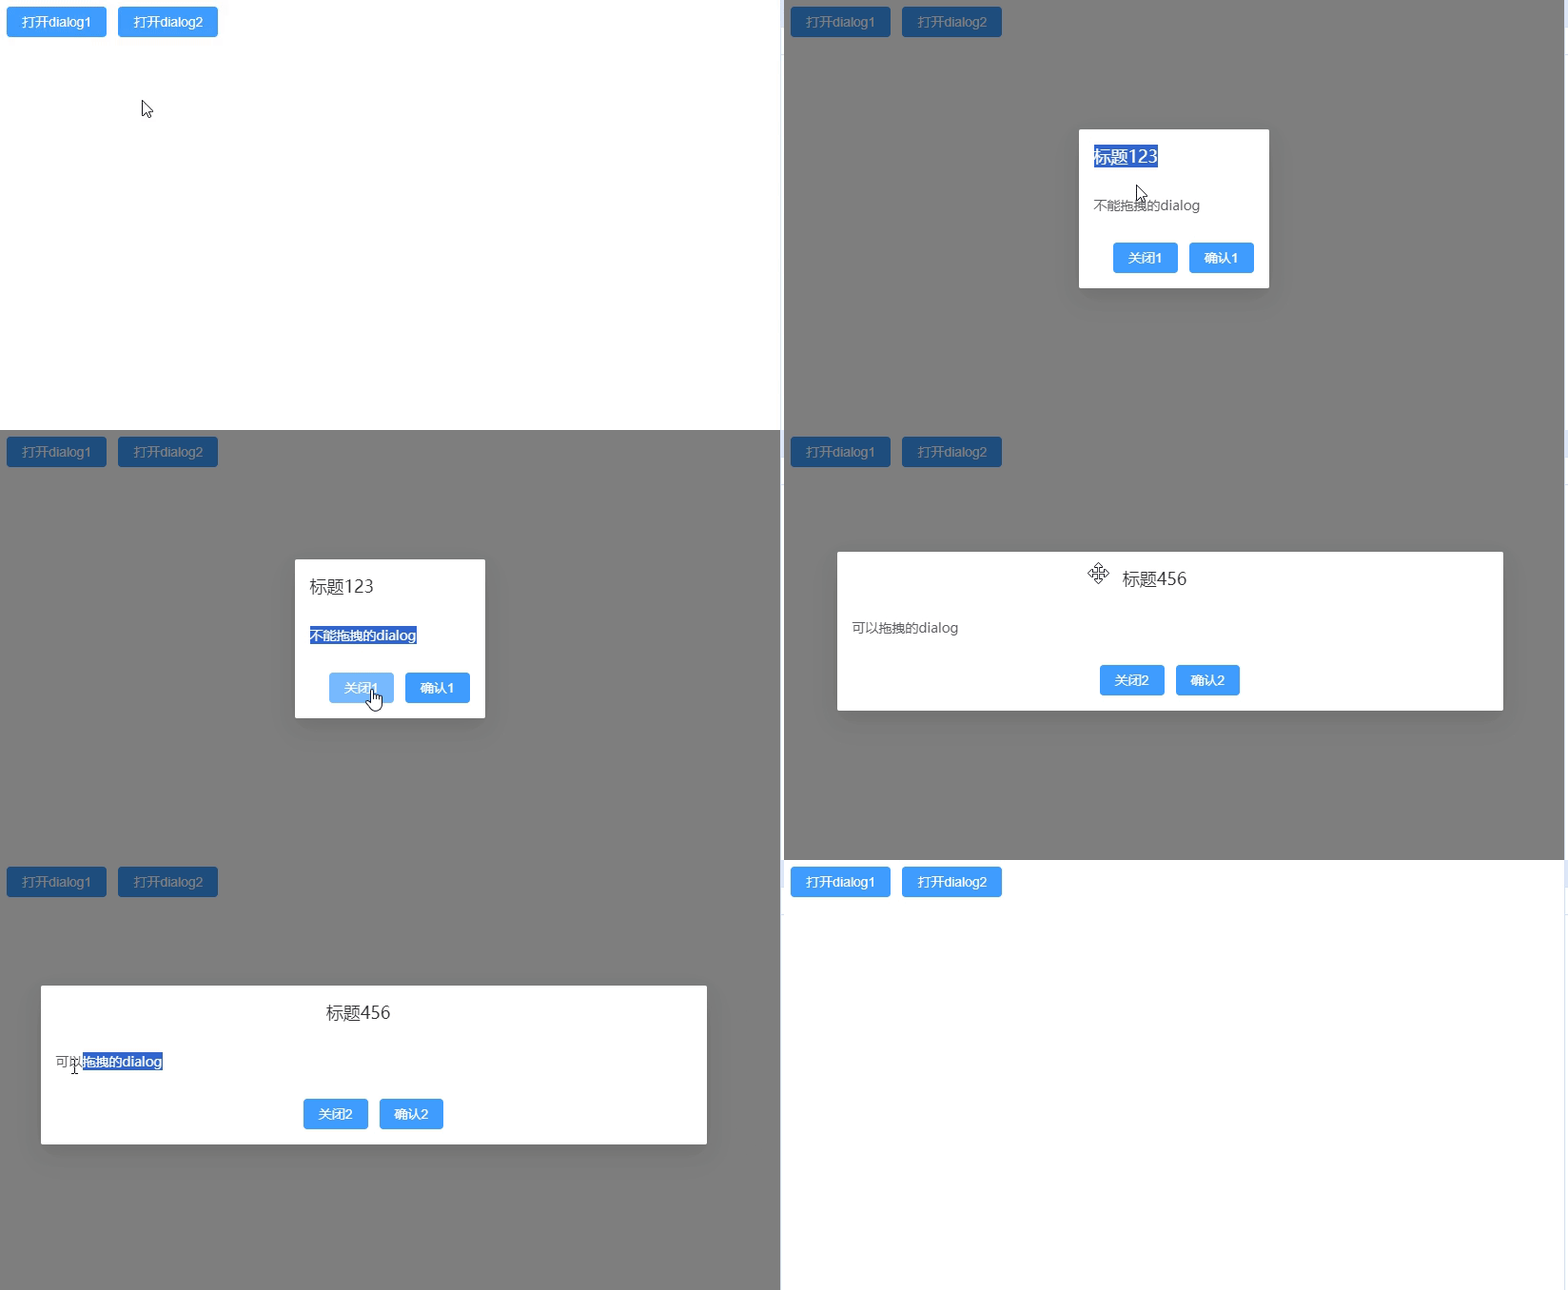
1、演示

2、子组件
在component文件夹下面新建一个文件夹,我这里是myDialog,在 myDialog文件夹创建index.vue文件。
<template>
  <el-dialog
    v-model="visible"
    :title="title"
    :width="width"
    :fullscreen="fullscreen"
    :top="top"
    :modal="modal"
    :modal-class="modalClass"
    :append-to-body="appendToBody"
    :append-to="appendTo"
    :lock-scroll="lockScroll"
    :custom-class="customClass"
    :open-delay="openDelay"
    :close-delay="closeDelay"
    :close-on-click-modal="closeOnClickModal"
    :close-on-press-escape="closeOnPressEscape"
    :show-close="showClose"
    :before-close="beforeClose"
    :draggable="draggable"
    :overflow="overflow"
    :center="center"
    :align-center="alignCenter"
    :destroy-on-close="destroyOnClose"
    :close-icon="closeIcon"
    :z-index="ZIndex"
    :header-aria-level="headerAriaLevel"
  >
    <slot name="content"></slot>
    <template #footer>
      <span>
        <slot name="footer"></slot>
      </span>
    </template>
  </el-dialog>
</template>

<script setup>
import { ref, reactive } from 'vue'
const visible = ref(false)

const props = defineProps({
  // 标题
  title: { required: true, type: String, default: '' },
  // 宽度
  width: { required: false, type: String, default: '50%' },
  // 是否全屏
  fullscreen: { required: false, type: Boolean, default: false },
  // 距离屏幕顶部距离
  top: { required: false, type: String, default: '15vh' },
  // 是否需要遮罩层
  modal: { required: false, type: Boolean, default: true },
  // 遮罩的自定义类名
  modalClass: { required: false, type: String, default: '' },
  // Dialog 自身是否插入至 body 元素上。嵌套的 Dialog 必须指定该属性并赋值为 true
  appendToBody: { required: false, type: Boolean, default: false },
  // Dialog 挂载到哪个 DOM 元素 将覆盖 append-to-body
  appendTo: { required: false, type: String, default: 'body' },
  // 是否在 Dialog 出现时将 body 滚动锁定
  lockScroll: { required: false, type: Boolean, default: true },
  // Dialog 的自定义类名
  customClass: { required: false, type: String, default: '' },
  // dialog 打开的延时时间,单位毫秒
  openDelay: { required: false, type: Number, default: 0 },
  // dialog 关闭的延时时间,单位毫秒
  closeDelay: { required: false, type: Number, default: 0 },
  // 是否可以通过点击 modal 关闭 Dialog
  closeOnClickModal: { required: false, type: Boolean, default: true },
  // 是否可以通过按下 ESC 关闭 Dialog
  closeOnPressEscape: { required: false, type: Boolean, default: true },
  // 是否显示关闭按钮
  showClose: { required: false, type: Boolean, default: true },
  // 关闭前的回调,会暂停 Dialog 的关闭. 回调函数内执行 done 参数方法的时候才是真正关闭对话框的时候.
  beforeClose: { required: false, type: Function, default: () => {} },
  // 为 Dialog 启用可拖拽功能
  draggable: { required: false, type: Boolean, default: false },
  // 拖动范围可以超出可视区
  overflow: { required: false, type: Boolean, default: false },
  // 是否让 Dialog 的 header 和 footer 部分居中排列
  center: { required: false, type: Boolean, default: false },
  // 是否水平垂直对齐对话框
  alignCenter: { required: false, type: Boolean, default: false },
  // 当关闭 Dialog 时,销毁其中的元素
  destroyOnClose: { required: false, type: Boolean, default: false },
  // 自定义关闭图标,默认 Close
  closeIcon: { required: false, type: String, default: 'Close' },
  // 和原生的 CSS 的 z-index 相同,改变 z 轴的顺序
  ZIndex: { required: false, type: Number, default: 999999 },
  // header 的 aria-level 属性
  headerAriaLevel: { required: false, type: String, default: '2' },
})
// 关闭dialog的函数
const close = () => {
  visible.value = false
}
// 打开dialog的函数
const open = () => {
  visible.value = true
}

defineExpose({
  close,
  open,
})
</script>

<style scoped lang="scss"></style>
1、定义dialog原先自带的一些属性
2、使用defineExpose将子组件中控制dialog显示隐藏的方法抛出去
3、可以在这个子组件内任意修改样式
3、父组件
随便在哪个父组件里面使用
<template>
  <div>
    <MyDialog title="标题123" ref="myDialog1" width="200px" :beforeClose="beforeClose1">
      <template v-slot:content>
        <p>不能拖拽的dialog</p>
      </template>
      <template v-slot:footer>
        <el-button type="primary" size="default" @click="closeMyDialog1">关闭1</el-button>
        <el-button type="primary" size="default" @click="closeMyDialog1">确认1</el-button>
      </template>
    </MyDialog>
    <MyDialog title="标题456" ref="myDialog2" draggable center width="700px" :beforeClose="beforeClose2">
      <template v-slot:content>
        <p>可以拖拽的dialog</p>
      </template>
      <template v-slot:footer>
        <el-button type="primary" size="default" @click="closeMyDialog2">关闭2</el-button>
        <el-button type="primary" size="default" @click="closeMyDialog2">确认2</el-button>
      </template>
    </MyDialog>
    <el-button type="primary" size="default" @click="openMyDialog1">打开dialog1</el-button>
    <el-button type="primary" size="default" @click="openMyDialog2">打开dialog2</el-button>
  </div>
</template>

<script setup>
import { ref, reactive } from 'vue'
import MyDialog from '@/components/myDialog/index.vue'
const myDialog1 = ref(null)
const myDialog2 = ref(null)
const openMyDialog1 = () => {
  myDialog1.value.open()
}
const openMyDialog2 = () => {
  myDialog2.value.open()
}

const closeMyDialog1 = () => {
  myDialog1.value.close()
}
const closeMyDialog2 = () => {
  myDialog2.value.close()
}

const beforeClose1 = done => {
  console.log(done)
}
const beforeClose2 = done => {
  console.log(done)
}
</script>

<style scoped lang="scss"></style>


 1897
1897


 被折叠的 条评论
为什么被折叠?


