


用户注册登录页面编写
过程
1、创建一个数据库
CREATE DATABASE `ssmmyself`;

USE `ssmmyself`;

DROP TABLE IF EXISTS `user`;

CREATE TABLE `user` (
                        `userID` INT(10) NOT NULL AUTO_INCREMENT COMMENT '用户id',
                        `userPhone` VARCHAR(13) NOT NULL COMMENT '用户的手机号',
                        `userName` VARCHAR(100) NOT NULL COMMENT '用户名',
                        `pwd` VARCHAR(200) NOT NULL COMMENT '密码',
                        KEY `userID` (`userID`)
) ENGINE=INNODB DEFAULT CHARSET=utf8;

INSERT INTO `user` (userPhone,userName,pwd) VALUES('19924685736','菜菜','123456');
2、创建一个空的maven项目并添加web框架支持,以及连接数据库
3、导入所需要的依赖
    <dependencies>
<!--        1、单元测试所需要的依赖-->
        <dependency>
            <groupId>junit</groupId>
            <artifactId>junit</artifactId>
            <version>4.13</version>
            <scope>test</scope>
        </dependency>
<!--        2、连接数据库所需要的依赖-->
        <dependency>
            <groupId>mysql</groupId>
            <artifactId>mysql-connector-java</artifactId>
            <version>8.0.23</version>
        </dependency>
<!--        3、数据库连接池-->
        <dependency>
            <groupId>com.mchange</groupId>
            <artifactId>c3p0</artifactId>
            <version>0.9.5.2</version>
        </dependency>
<!--        4、serlvet和jsp的支持-->
        <dependency>
            <groupId>javax.servlet</groupId>
            <artifactId>servlet-api</artifactId>
            <version>2.5</version>
        </dependency>
        <dependency>
            <groupId>javax.servlet.jsp.jstl</groupId>
            <artifactId>jstl-api</artifactId>
            <version>1.2</version>
        </dependency>
        <dependency>
            <groupId>javax.servlet.jsp</groupId>
            <artifactId>jsp-api</artifactId>
            <version>2.2</version>
        </dependency>
<!--        5、Mybatis依赖-->
        <dependency>
            <groupId>org.mybatis</groupId>
            <artifactId>mybatis</artifactId>
            <version>3.5.6</version>
        </dependency>
<!--        6、mybatis整合spring所需要的依赖-->
        <dependency>
            <groupId>org.mybatis</groupId>
            <artifactId>mybatis-spring</artifactId>
            <version>2.0.6</version>
        </dependency>
<!--        7、spring依赖-->
        <dependency>
            <groupId>org.springframework</groupId>
            <artifactId>spring-webmvc</artifactId>
            <version>5.3.6</version>
        </dependency>
<!--        声明式事务依赖-->
        <dependency>
            <groupId>org.aspectj</groupId>
            <artifactId>aspectjweaver</artifactId>
            <version>1.9.4</version>
        </dependency>
<!--        9、偷懒专用lombok-->
        <dependency>
            <groupId>org.projectlombok</groupId>
            <artifactId>lombok</artifactId>
            <version>1.18.20</version>
        </dependency>
<!--        10、Log4j日志依赖-->
        <dependency>
            <groupId>log4j</groupId>
            <artifactId>log4j</artifactId>
            <version>1.2.17</version>
        </dependency>
<!--        11、这里我想使用另外一个数据库连接池,别了,暂时还没学怎么用这个写,还是用上面那个c3p0吧-->
        <dependency>
            <groupId>com.alibaba</groupId>
            <artifactId>druid</artifactId>
            <version>1.0.29</version>
        </dependency>
    </dependencies>
为了防止静态资源过滤问题,最好配置过滤器
    <build>
        <resources>
            <resource>
                <directory>src/main/java</directory>
                <includes>
                    <include>**/*.xml</include>
                    <include>**/*.properties</include>
                </includes>
                <filtering>false</filtering>
            </resource>
            <resource>
                <directory>src/main/resources</directory>
                <includes>
                    <include>**/*.xml</include>
                    <include>**/*.properties</include>
                </includes>
                <filtering>false</filtering>
            </resource>
        </resources>
    </build>
4、搭建mybatis基本结构
4.1、建包
4.2、配置mybatis核心配置文件
<?xml version="1.0" encoding="UTF-8" ?>
<!DOCTYPE configuration
        PUBLIC "-//mybatis.org//DTD Config 3.0//EN"
        "http://mybatis.org/dtd/mybatis-3-config.dtd">
<configuration>
<!--    为实体类起别名,这样就不用写完全限定名了-->
    <typeAliases>
        <package name="com.caicai.pojo"/>
    </typeAliases>
</configuration>
4.3、建实体类
package com.caicai.pojo;

import lombok.AllArgsConstructor;
import lombok.Data;
import lombok.NoArgsConstructor;

@Data
@AllArgsConstructor
@NoArgsConstructor
public class User {
    private int userID;
    private String userName;
    private String pwd;
}
4.4、写Mapper接口
package com.caicai.Mapper;

import com.caicai.pojo.User;
import org.apache.ibatis.annotations.Param;

import java.util.List;

public interface UserMapper {
    //查询全部的用户
    List<User> getUserList();
    //注册时插入一个用户
    int addUser(User user);
    //注册完之后登陆,根据用户输入的手机号进行查找对应的用户
    User selectByPhone(@Param("phone") String userPhone);
    //根据输入的手机号进行查找用户如果密码相同则删除
    int deleteUser(@Param("phone")String userPhone);
}
4.4、编写Mapper.xml文件
<?xml version="1.0" encoding="UTF-8" ?>
<!DOCTYPE mapper
        PUBLIC "-//mybatis.org//DTD Config 3.0//EN"
        "http://mybatis.org/dtd/mybatis-3-mapper.dtd">
<mapper namespace="com.caicai.Mapper.UserMapper">
    <select id="getUserList" resultType="user">
        select * from `user`
    </select>
    <insert id="addUser" parameterType="user">
        insert into `user`(userPhone,userName,pwd) values (#{userPhone},#{userName},#{pwd});
    </insert>
    <select id="selectByPhone" parameterType="String" resultType="user">
        select  * from `user`where userPhone=#{phone}
    </select>
    <delete id="deleteUser" parameterType="String">
        delete * from `user` where userPhone=#{phone}
    </delete>
</mapper>
4.5、编写连接数据库的配置文件
driver=com.mysql.jdbc.Driver
url=jdbc:mysql://localhost:3306/ssmmyself?userSSL=false&useUnicode=true&characterEncoding=UTF8&serverTimezone=UTC
username=root
password=123456
# 但是我发现这样命名不行,连不上,只能下面这种形式命名
jdbc.driver=com.mysql.jdbc.Driver
# 如果使用的是MySQL8.0+,要增加一个时区的配置serverTimezone=UTC  Asia/Shanghai,而且com.mysql.cj.jdbc.Driver
jdbc.url=jdbc:mysql://localhost:3306/ssmmyself?useSSL=true&useUnicode=true&characterEncoding=utf8&serverTimezone=Asia/Shanghai
jdbc.user=root
jdbc.password=123456
4.6、修改一下Mapper.xml文件
PS:主要是考虑到是要整合Spring框架的所以一开并不想写数据库连接的配置到mybatis核心配置文件中的,但是考虑了一下为了更好掌握还是写了一下,等到整合的时候才删掉
<?xml version="1.0" encoding="UTF-8" ?>
<!DOCTYPE configuration
        PUBLIC "-//mybatis.org//DTD Config 3.0//EN"
        "http://mybatis.org/dtd/mybatis-3-config.dtd">
<configuration>
    <properties resource="db.properties"></properties>
    <settings>
        <!--        标准的日志工厂实现-->
        <setting name="logImpl" value="STDOUT_LOGGING"/>
    </settings>
    <typeAliases>
        <package name="com.caicai.pojo"/>
    </typeAliases>
    <environments default="development">
        <environment id="development">
            <transactionManager type="JDBC"></transactionManager>
            <dataSource type="POOLED">
                <property name="driver" value="${driver}"/>
                <property name="url" value="${url}"/>
                <property name="username" value="${username}"/>
                <property name="password" value="${password}"/>
            </dataSource>
        </environment>
    </environments>

    <!-- 绑定mapper.xml文件   -->
    <mappers>
        <mapper resource="com/caicai/Mapper/UserMapper.xml"></mapper>
<!--        <package name="com.caicai.Mapper"/>-->
<!--        <mapper class="com.caicai.Mapper.UserMapper"></mapper>-->
    </mappers>
</configuration>
4.7、编写mybatis工具类
package com.caicai.util;

import org.apache.ibatis.io.Resources;
import org.apache.ibatis.session.SqlSession;
import org.apache.ibatis.session.SqlSessionFactory;
import org.apache.ibatis.session.SqlSessionFactoryBuilder;
import org.mybatis.spring.SqlSessionFactoryBean;

import java.io.IOException;
import java.io.InputStream;

public class MybatisUtils {
    private static SqlSessionFactory sqlSessionFactory;
    static {
        String resource="mybatis-config.xml";
        try {
            InputStream inputStream = Resources.getResourceAsStream(resource);
            sqlSessionFactory = new SqlSessionFactoryBuilder().build(inputStream);
        } catch (IOException e) {
            e.printStackTrace();
        }
    }
    public static SqlSession getSqlSession(){
        return sqlSessionFactory.openSession(true);
    }
}
4.8、编写UserService接口
package com.caicai.service;

import com.caicai.pojo.User;
import org.apache.ibatis.annotations.Param;

import java.util.List;
//调用dao层
public interface UserService {
    //查询全部的用户
    List<User> getUserList();
    //注册时插入一个用户
    int addUser(User user);
    //注册完之后登陆,根据用户输入的手机号进行查找对应的用户
    User selectByPhone(String userPhone);
    //根据输入的手机号进行查找用户如果密码相同则删除
    int deleteUser(String userPhone);
}
4.9、编写UserService实现类,调用底下dao层即Mapper层实现
package com.caicai.service;

import com.caicai.Mapper.UserMapper;
import com.caicai.pojo.User;

import java.util.List;

public class UserServiceImpl implements UserService{
    //调用dao层的操作,设置一个set接口,方便Spring管理
    private UserMapper userMapper;

    public void setUserMapper(UserMapper userMapper) {
        this.userMapper = userMapper;
    }

    @Override
    public List<User> getUserList() {
        return userMapper.getUserList();
    }

    @Override
    public int addUser(User user) {
        return userMapper.addUser(user);
    }

    @Override
    public User selectByPhone(String userPhone) {
        return userMapper.selectByPhone(userPhone);
    }

    @Override
    public int deleteUser(String userPhone) {
        return userMapper.deleteUser(userPhone);
    }
}
4.10、测试
import com.caicai.Mapper.UserMapper;
import com.caicai.pojo.User;
import com.caicai.service.UserServiceImpl;
import com.caicai.util.MybatisUtils;
import org.apache.ibatis.session.SqlSession;
import org.junit.Test;
import org.springframework.context.ApplicationContext;
import org.springframework.context.support.ClassPathXmlApplicationContext;

import java.util.List;

public class Mytest {
    @Test
    public void test(){
        SqlSession sqlSession = MybatisUtils.getSqlSession();
        UserMapper mapper = sqlSession.getMapper(UserMapper.class);
        UserServiceImpl userService = new UserServiceImpl();
        userService.setUserMapper(mapper);
//        List<User> userList = userService.getUserList();
//        for (User user : userList) {
//            System.out.println(user);
//        }
//        userService.addUser(new User(0,"19216845456","菜虾","987654"));
//        userService.selectByPhone("19216845456");
//        userService.deleteUser("19216845456");
    }
}
5、搭建spring基本结构
5.1、编写实体类
已存在实体类User
5.2、编写Spring配置文件applicationContext.xml
<?xml version="1.0" encoding="UTF-8"?>
<beans xmlns="http://www.springframework.org/schema/beans"
       xmlns:xsi="http://www.w3.org/2001/XMLSchema-instance"
       xsi:schemaLocation="http://www.springframework.org/schema/beans
        https://www.springframework.org/schema/beans/spring-beans.xsd">
    <!-- 仅供测试使用   -->
    <bean id="user" class="com.caicai.pojo.User">
        <property name="userID" value="2"/>
        <property name="userName" value="菜虾"></property>
        <property name="userPhone" value="1921681235726"/>
        <property name="pwd" value="654321"/>
    </bean>

</beans>
5.3、测试
import com.caicai.Mapper.UserMapper;
import com.caicai.pojo.User;
import com.caicai.util.MybatisUtils;
import org.apache.ibatis.session.SqlSession;
import org.junit.Test;
import org.springframework.context.ApplicationContext;
import org.springframework.context.support.ClassPathXmlApplicationContext;

import java.util.List;

public class Mytest {
    @Test
    public void testSpring(){
        ApplicationContext context = new ClassPathXmlApplicationContext("applicationContext.xml");
        User user = context.getBean("user", User.class);
        System.out.println(user);
    }

}
6、Spring和Mybatis层整合
6.1、整合dao层(即Mapper层)
创建文件spring-dao.xml
<?xml version="1.0" encoding="UTF-8"?>
<beans xmlns="http://www.springframework.org/schema/beans"
       xmlns:xsi="http://www.w3.org/2001/XMLSchema-instance"
       xsi:schemaLocation="http://www.springframework.org/schema/beans
        https://www.springframework.org/schema/beans/spring-beans.xsd">

</beans>
6.1.1、关联数据库文件
记得导入context
    xmlns:context="http://www.springframework.org/schema/context"
    http://www.springframework.org/schema/context
    https://www.springframework.org/schema/context/spring-context.xsd
<context:property-placeholder location="classpath:db.properties"/>
6.1.2、设置数据库连接池
<bean id="dataSource" class="com.mchange.v2.c3p0.ComboPooledDataSource">
    <!-- 配置连接池属性 -->
    <property name="driverClass" value="${jdbc.driver}"/>
    <property name="jdbcUrl" value="${jdbc.url}"/>
    <property name="user" value="${jdbc.user}"/>
    <property name="password" value="${jdbc.password}"/>

    <!-- c3p0连接池的私有属性 -->
    <property name="maxPoolSize" value="30"/>
    <property name="minPoolSize" value="10"/>
    <!-- 关闭连接后不自动commit -->
    <property name="autoCommitOnClose" value="false"/>
    <!-- 获取连接超时时间 -->
    <property name="checkoutTimeout" value="10000"/>
    <!-- 当获取连接失败重试次数 -->
    <property name="acquireRetryAttempts" value="2"/>
</bean>
6.1.3、通过SqlSessionFactoryBean获取SqlSessionFactory
    <bean id="sqlSessionFactory" class="org.mybatis.spring.SqlSessionFactoryBean">
    <!-- 注入数据库连接池 -->
    <property name="dataSource" ref="dataSource"/>
    <!-- 配置MyBaties全局配置文件:mybatis-config.xml -->
    <property name="configLocation" value="classpath:mybatis-config.xml"/>
</bean>
6.1.4、通过SqlSessionFactory获取SqlSessionTemplate(相当于MyBatis的sqlSession)
    <bean id="sqlSession" class="org.mybatis.spring.SqlSessionTemplate">
    <constructor-arg index="0" ref="sqlSessionFactory"/>
</bean>
6.1.5、给接口增加实现类/配置了扫描Dao接口包
方式一:如果选择给Mapper接口增加实现类则:
实现接口(也有两种方式):
通过setSqlSessionTemplate的方法
package com.caicai.Mapper;

import com.caicai.pojo.User;
import org.mybatis.spring.SqlSessionTemplate;

import java.util.List;

public class UserMapperImpl implements UserMapper{
    //    在原来mybatis我们所有的操作都使用sqlsession来执行,现在都使用SqlSessionTemplate
    private SqlSessionTemplate sqlSessionTemplate;

    public void setSqlSessionTemplate(SqlSessionTemplate sqlSessionTemplate) {
        this.sqlSessionTemplate = sqlSessionTemplate;
    }

    @Override
    public List<User> getUserList() {
        return sqlSessionTemplate.getMapper(UserMapper.class).getUserList();
    }

    @Override
    public int addUser(User user) {
        return sqlSessionTemplate.getMapper(UserMapper.class).addUser(user);
    }

    @Override
    public User selectByPhone(String userPhone) {
        return sqlSessionTemplate.getMapper(UserMapper.class).selectByPhone(userPhone);
    }

    @Override
    public int deleteUser(String userPhone) {
        return sqlSessionTemplate.getMapper(UserMapper.class).deleteUser(userPhone);
    }
}
通过SqlSessionDaoSupport直接获取
package com.caicai.Mapper;

import com.caicai.pojo.User;
import org.mybatis.spring.support.SqlSessionDaoSupport;

import java.util.List;

public class UserMapperImpl2 extends SqlSessionDaoSupport implements UserMapper{
    @Override
    public List<User> getUserList() {
        return getSqlSession().getMapper(UserMapper.class).getUserList();
    }

    @Override
    public int addUser(User user) {
        return getSqlSession().getMapper(UserMapper.class).addUser(user);
    }

    @Override
    public User selectByPhone(String userPhone) {
        return getSqlSession().getMapper(UserMapper.class).selectByPhone(userPhone);
    }

    @Override
    public int deleteUser(String userPhone) {
        return getSqlSession().getMapper(UserMapper.class).deleteUser(userPhone);
    }
}
并且要记得注入到Spring容器中:
<bean id="UserMapperImpl" class="com.caicai.Mapper.UserMapperImpl">
    <property name="sqlSessionTemplate" ref="sqlSession"/>
</bean>
<bean id="UserMapperImpl2" class="com.caicai.Mapper.UserMapperImpl2">
    <property name="sqlSessionTemplate" ref="sqlSession"/>
</bean>
方式二:
<bean class="org.mybatis.spring.mapper.MapperScannerConfigurer">
    <!--        <property name="sqlSessionFactoryBeanName" value="sqlSessionFactory"/>-->
    <property name="sqlSessionTemplateBeanName" value="sqlSession"/>
    <property name="basePackage" value="com.caicai.Mapper"/>
</bean>
6.2、整合service层
6.2.1、配置扫描service包
<content:component-scan base-package="com.caicai.service"/>
6.2.2、将service层实现类注入到IOC容器中
<bean id="userServiceImpl" class="com.caicai.service.UserServiceImpl">
        <property name="userMapper" ref="userMapper"/>
</bean>
6.2.3、配置事务管理器
这里犯傻了>:_:<:
难怪一直导入事务管理器都报错,原来是没有导入spring使用数据库的包
<!--        12、导入spring使用数据库的包-->
        <dependency>
            <groupId>org.springframework</groupId>
            <artifactId>spring-jdbc</artifactId>
            <version>5.3.6</version>
        </dependency>
<bean class="org.springframework.jdbc.datasource.DataSourceTransactionManager" id="transactionManager">
        <property name="dataSource" ref="dataSource"/>
</bean>
6.3、将spring-dao.xml和spring-service.xml导入总的配置文件applicationContext.xml中
7、整合SpringMVC层
7.1、编写web.xml文件
记得创建对应的jsp文件夹
7.1.1、DispatcherServlet配置
<?xml version="1.0" encoding="UTF-8"?>
<web-app xmlns="http://xmlns.jcp.org/xml/ns/javaee"
         xmlns:xsi="http://www.w3.org/2001/XMLSchema-instance"
         xsi:schemaLocation="http://xmlns.jcp.org/xml/ns/javaee http://xmlns.jcp.org/xml/ns/javaee/web-app_4_0.xsd"
         version="4.0">
    <servlet>
        <servlet-name>springmvc</servlet-name>
        <servlet-class>org.springframework.web.servlet.DispatcherServlet</servlet-class>
        <init-param>
            <param-name>contextConfigLocation</param-name>
            <param-value>classpath:applicationContext.xml</param-value>
        </init-param>
        <load-on-startup>1</load-on-startup>
    </servlet>
    <servlet-mapping>
        <servlet-name>springmvc</servlet-name>
        <url-pattern>/</url-pattern>
    </servlet-mapping>
</web-app>
7.1.2、配置过滤器防止乱码
<?xml version="1.0" encoding="UTF-8"?>
<web-app xmlns="http://xmlns.jcp.org/xml/ns/javaee"
         xmlns:xsi="http://www.w3.org/2001/XMLSchema-instance"
         xsi:schemaLocation="http://xmlns.jcp.org/xml/ns/javaee http://xmlns.jcp.org/xml/ns/javaee/web-app_4_0.xsd"
         version="4.0">
    <filter>
        <filter-name>encodingFilter</filter-name>
        <filter-class>org.springframework.web.filter.CharacterEncodingFilter</filter-class>
        <init-param>
            <param-name>encoding</param-name>
            <param-value>utf-8</param-value>
        </init-param>
    </filter>
    <filter-mapping>
        <filter-name>encodingFilter</filter-name>
        <url-pattern>/*</url-pattern>
    </filter-mapping>
</web-app>
7.2、编写SpringMVC配置文件springmvc.xml
创建一个controller包
<?xml version="1.0" encoding="UTF-8"?>
<beans xmlns="http://www.springframework.org/schema/beans"
       xmlns:xsi="http://www.w3.org/2001/XMLSchema-instance"
       xmlns:context="http://www.springframework.org/schema/context"
       xmlns:mvc="http://www.springframework.org/schema/mvc"
       xsi:schemaLocation="http://www.springframework.org/schema/beans
        https://www.springframework.org/schema/beans/spring-beans.xsd
        http://www.springframework.org/schema/context
        http://www.springframework.org/schema/context/spring-context.xsd
        http://www.springframework.org/schema/mvc
        https://www.springframework.org/schema/mvc/spring-mvc.xsd">
    <!-- 1.开启SpringMVC注解驱动 -->
    <mvc:annotation-driven/>
    <!-- 2.静态资源默认servlet配置-->
    <mvc:default-servlet-handler/>
    <!-- 3.配置jsp 显示ViewResolver视图解析器 -->
    <bean class="org.springframework.web.servlet.view.InternalResourceViewResolver">
        <property name="prefix" value="/WEB-INF/jsp/"/>
        <property name="suffix" value=".jsp"/>
    </bean>
    <!-- 4.扫描web相关的bean -->
    <context:component-scan base-package="com.caicai.controller"/>

</beans>
导入总配置文件中
<import resource="classpath:springmvc.xml"/>
8、配置到此结束,开始controller和视图层的编写
8.1、登录界面
tips:先啥都不干,随便写个页面测试是否可以跳转。就是看配置是否正确。
8.1.1、jsp页面编写
注意:我这里没有判断两次密码是否相同,还有登录密码是否正确等,可以利用ajax
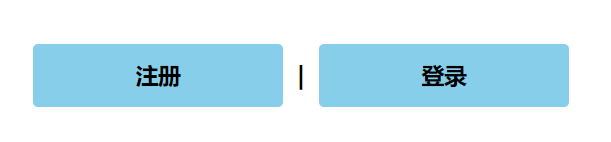
主页:
<%--
Created by IntelliJ IDEA.
User: hecaixia
Date: 2022/3/14
Time: 10:52
To change this template use File | Settings | File Templates.
--%>
<%@ page contentType="text/html;charset=UTF-8" language="java" %>
<html>
<head>
<title>首页</title>
<style type="text/css">
a {
display:inline-block;
text-decoration: none;
color: black;
width: 200px;
height: 50px;
font-size: 18px;
line-height: 50px;
background: skyblue;
border-radius: 4px;
}
h3{
margin: 100px auto;
text-align: center;
}
</style>
</head>
<body>
<h1></h1>
<h3 class="inline">
<a href="/toRegister">注册</a>
|
<a href="/toLogin">登录</a>
</h3>
</body>
</html>
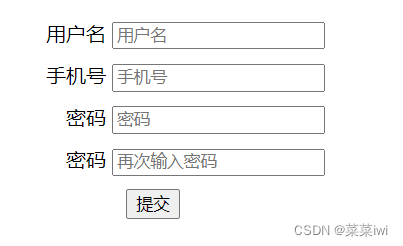
注册:
<%--
  Created by IntelliJ IDEA.
  User: hecaixia
  Date: 2022/3/15
  Time: 18:32
  To change this template use File | Settings | File Templates.
--%>
<%@ page contentType="text/html;charset=UTF-8" language="java" %>
<html>
<head>
    <title>注册页面</title>
    <style type="text/css">
        label{
            display:inline-block;
            width:100px;
            text-align:right;
        }
    </style>
</head>
<body>
<form action="${pageContext.request.contextPath}/register" style="margin-top: 50px" method="post">
    <div align="center">
        <div class="form-group" align="center" style="margin-bottom: 10px">
            <label for="userName">用户名</label>
            <input type="text" class="form-control" name="userName"  id="userName" placeholder="用户名">
        </div>
        <div class="form-group" align="center" style="margin-bottom: 10px">
            <label for="userPhone" style="text-align: right">手机号</label>
            <input type="text" class="form-control" name="userPhone" id="userPhone" placeholder="手机号">
        </div>
        <div class="form-group" align="center" style="margin-bottom: 10px">
            <label for="pwd">密码</label>
            <input type="password" class="form-control" name="pwd" id="pwd" placeholder="密码">
        </div>
        <div class="form-group" align="center" style="margin-bottom: 10px">
            <label for="rePwd">密码</label>
            <input type="password" class="form-control" id="rePwd" name="rePwd" placeholder="再次输入密码">
        </div>
        <button type="submit" class="btn btn-default">提交</button>
    </div>
</form>
</body>
</html>
登录:
<%--
Created by IntelliJ IDEA.
User: hecaixia
Date: 2022/3/15
Time: 17:45
To change this template use File | Settings | File Templates.
--%>
<%@ page contentType="text/html;charset=UTF-8" language="java" %>
<html>
<head>
<title>登录页面</title>
</head>
<body>
<form class="form-horizontal" action="${pageContext.request.contextPath}/Login/{phone}/{pwd}" method="get" style="margin-top: 80px">
<div class="form-group" align="center" style="margin-bottom: 5px">
<label for="phone" class="col-sm-2 control-label">手机号</label>
<div class="col-sm-10">
<input type="text" class="form-control" id="phone" name="phone" placeholder="手机号">
</div>
</div>
<div class="form-group" align="center" style="margin-bottom: 5px">
<label for="pwd" class="col-sm-2 control-label">密码</label>
<div class="col-sm-10">
<input type="password" class="form-control" id="pwd" placeholder="Password" name="pwd">
</div>
</div>
<div class="form-group" align="center" style="margin-bottom: 5px">
<div class="col-sm-offset-2 col-sm-10">
<div class="checkbox">
<label>
<input type="checkbox"> Remember me
</label>
</div>
</div>
</div>
<div class="form-group" align="center" style="margin-bottom: 5px">
<div class="col-md-4 column" class="form-inline">
<button type="submit" class="btn btn-default">提交</button>
|
<a class="btn btn-primary" href="${pageContext.request.contextPath}/toRegister">注册</a>
</div>
</div>
</form>
</body>
</html>
内容页:
<%--
  Created by IntelliJ IDEA.
  User: hecaixia
  Date: 2022/3/15
  Time: 18:59
  To change this template use File | Settings | File Templates.
--%>
<%@ page contentType="text/html;charset=UTF-8" language="java" %>
<html>
<head>
    <title>内容</title>
</head>
<body>
<h2>这是内容页~</h2>
</body>
</html>
8.1.2、控制器编写
注册控制器:
package com.caicai.controller;

import com.caicai.pojo.User;
import com.caicai.service.UserService;
import org.springframework.beans.factory.annotation.Autowired;
import org.springframework.beans.factory.annotation.Qualifier;
import org.springframework.stereotype.Controller;
import org.springframework.ui.Model;
import org.springframework.web.bind.annotation.RequestMapping;
//@Autowired
@Controller
public class RegisterController {
    @Autowired
    @Qualifier("userServiceImpl")
    private UserService userService;
    @RequestMapping("/toRegister")
    public String toRegister(){
        return "register";
    }
    @RequestMapping("/register")
    public String Register(User user, Model model){
        System.out.println("user=>"+user);
        System.out.println(userService);
        userService.addUser(user);
        return "login";
    }
}
登录控制器:
package com.caicai.controller;

import com.caicai.pojo.User;
import com.caicai.service.UserService;
import org.springframework.beans.factory.annotation.Autowired;
import org.springframework.beans.factory.annotation.Qualifier;
import org.springframework.stereotype.Controller;
import org.springframework.web.bind.annotation.RequestMapping;

@Controller
public class LoginController {
    @Autowired
    @Qualifier("userServiceImpl")
    private UserService userService;
    @RequestMapping("/toLogin")
    public String toLogin(){
        return "login";
    }
    @RequestMapping("/Login/{phone}/{pwd}")
    public String login(String phone,String pwd){
        User user = userService.selectByPhone(phone);
        if (user.getPwd().equals(pwd)){
            return "context";
        }
        return "login";
    }
}
9、完善,加上ajax判断
<%--
  Created by IntelliJ IDEA.
  User: hecaixia
  Date: 2022/3/15
  Time: 18:32
  To change this template use File | Settings | File Templates.
--%>
<%@ page contentType="text/html;charset=UTF-8" language="java" %>
<html>
<head>
    <title>注册页面</title>
    <script src="https://code.jquery.com/jquery-3.1.1.min.js"></script>
    <style type="text/css">
        label{
            display:inline-block;
            width:100px;
            text-align:right;
        }
    </style>
    <script>
        function a() {
            $.post({
                url:"${pageContext.request.contextPath}/a1",
                data:{'pwd':$("#pwd").val(),"repwd":$("#rePwd").val()},
                success:function (data,status) {
                    if (data!=null){
                        $("#info").css("color","red");
                        $("#info").html("");
                        $("#info").html(data);
                    }
                }
            });
        }
        function a2() {
            $.post({
                url:"${pageContext.request.contextPath}/a2",
                data:{'userPhone':$("#userPhone").val()},
                success:function (data,status) {
                    if (data==="false"){
                        $("#info").css("color","red");
                        $("#info").html("");
                        $("#info").html("手机号输入不正确!");
                    }
                }
            });
        }
    </script>
</head>
<body>
<form action="${pageContext.request.contextPath}/register" style="margin-top: 50px" method="post">
    <div align="center">
        <div class="form-group" align="center" style="margin-bottom: 10px">
            <label for="userName">用户名</label>
            <input type="text" class="form-control" name="userName"  id="userName" placeholder="用户名">
        </div>
        <div class="form-group" align="center" style="margin-bottom: 10px">
            <label for="userPhone" style="text-align: right">手机号</label>
            <input type="text" class="form-control" name="userPhone" id="userPhone" placeholder="手机号" onblur="a2()">
        </div>
        <div class="form-group" align="center" style="margin-bottom: 10px">
            <label for="pwd">密码</label>
            <input type="password" class="form-control" name="pwd" id="pwd" placeholder="密码">
        </div>
        <div class="form-group" align="center" style="margin-bottom: 10px">
            <label for="rePwd">密码</label>
            <input type="password" class="form-control" id="rePwd" name="rePwd" placeholder="再次输入密码" onblur="a()">
        </div>
        <div class="form-group" style="margin-bottom: 10px" align="center">
            <span id="info"></span>
        </div>
        <div class="form-group" style="margin-bottom: 10px">
            <button type="submit" class="btn btn-default">提交</button>
        </div>
    </div>
</form>
</body>
</html>
login.jsp:
<%--
Created by IntelliJ IDEA.
User: hecaixia
Date: 2022/3/15
Time: 17:45
To change this template use File | Settings | File Templates.
--%>
<%@ page contentType="text/html;charset=UTF-8" language="java" %>
<html>
<head>
<title>登录页面</title>
<script src="https://code.jquery.com/jquery-3.1.1.min.js"></script>
<script>
function a() {
$.post({
url:"${pageContext.request.contextPath}/a3",
data:{'pwd':$("#pwd").val(),"phone":$("#phone").val()},
success:function (data) {
alert(data);
if (data==="true"){
alert("进到这里");
$("#info").html('');
}else {
$("#info").css("color","red");
$("#info").html(data);
}
}
})
}
</script>
</head>
<body>
<form class="form-horizontal" action="${pageContext.request.contextPath}/Login/{phone}/{pwd}" method="get" style="margin-top: 80px">
<div class="form-group" align="center" style="margin-bottom: 10px">
<label for="phone" class="col-sm-2 control-label">手机号</label>
<div class="col-sm-10">
<input type="text" class="form-control" id="phone" name="phone" placeholder="手机号">
</div>
</div>
<div class="form-group" align="center" style="margin-bottom: 10px">
<label for="pwd" class="col-sm-2 control-label">密码</label>
<div class="col-sm-10">
<input type="password" class="form-control" id="pwd" placeholder="Password" name="pwd" onblur="a()">
</div>
</div>
<div class="form-group" align="center" style="margin-bottom: 10px">
<span id="info"></span>
</div>
<div class="form-group" align="center" style="margin-bottom: 10px">
<div class="col-sm-offset-2 col-sm-10">
<div class="checkbox">
<label>
<input type="checkbox"> Remember me
</label>
</div>
</div>
</div>
<div class="form-group" align="center" style="margin-bottom: 10px">
<div class="col-md-4 column" class="form-inline">
<button type="submit" class="btn btn-default">提交</button>
|
<a class="btn btn-primary" href="${pageContext.request.contextPath}/toRegister">注册</a>
</div>
</div>
</form>
</body>
</html>
AjaxController.java:
package com.caicai.controller;

import com.caicai.service.UserService;
import org.springframework.beans.factory.annotation.Autowired;
import org.springframework.beans.factory.annotation.Qualifier;
import org.springframework.stereotype.Controller;
import org.springframework.web.bind.annotation.RequestMapping;

import javax.servlet.http.HttpServletResponse;
import java.io.IOException;

@Controller
public class AjaxController {
    @Autowired
    @Qualifier("userServiceImpl")
    private UserService userService;
    @RequestMapping("/a1")
    public void pwdSame(String pwd, String repwd, HttpServletResponse rsp) throws IOException {
        rsp.setCharacterEncoding("utf-8");
        System.out.println("pwd=>"+pwd);
        System.out.println("repwd=>"+repwd);
        if (!pwd.equals(repwd)){
            rsp.getWriter().print("两次输入的密码不相同");
        }
    }
    @RequestMapping("/a2")
    public void pwdStand(String userPhone, HttpServletResponse rsp) throws IOException {
        rsp.setCharacterEncoding("utf-8");
        System.out.println(userPhone+" "+userPhone.length());
        if (userPhone.length()<13){
            rsp.getWriter().print(false);
        }else {
            rsp.getWriter().print(true);
        }
    }
    @RequestMapping("/a3")
    public void pwdJudge(String phone,String pwd,HttpServletResponse rsp) throws IOException {
        rsp.setCharacterEncoding("utf-8");
        System.out.println("phone=>"+phone+"pwd=>"+pwd);
        if (!userService.selectByPhone(phone).getPwd().equals(pwd)){
            rsp.getWriter().print("密码不正确!");
        }else {
            rsp.getWriter().print(true);
        }
    }
}
附上界面:

没啦,就这样啦~


 3623
3623


 被折叠的 条评论
为什么被折叠?
被折叠的 条评论
为什么被折叠?
 到【灌水乐园】发言


