


1、listbox数据绑定
1)后台数据绑定
namespace WpfListBoxTest
{
    /// <summary>
    /// MainWindow.xaml 的交互逻辑
    /// </summary>
    public partial class MainWindow : Window
    {
        public MainWindow()
        {
            InitializeComponent();
            this.listBox.ItemsSource = GetNumber();
        }
        private List<int> GetNumber()
        {
            List<int> listNumber = new List<int>();
            for(int i=0;i<99;i++)
            {
                listNumber.Add(i);
            }
            return listNumber;
        }
    }
}<Grid>
<ListBox Name="listBox"></ListBox>
</Grid>2)前台数据绑定
如果是用的类来存储数据
public partial class MainWindow : Window
    {
        public MainWindow()
        {
            InitializeComponent();
            this.listBox.ItemsSource=GetNumber();
        }
        private List<Model> GetNumber()
        {
            List<Model> listNumber = new List<Model>();
            for(int i=0;i<99;i++)
            {
                listNumber.Add(new Model() { Number=i});
            }
            return listNumber;
        }
    }
    public class Model
    {
        public int Number { get; set; }
}<Grid>
<ListBox Name="listBox" DisplayMemberPath="Number"></ListBox>
</Grid>一般第二种情况用的更多一些。
2、ListBox加上单选的radiobutton
这里用上了style这个属性。
<Window.Resources>
        <Style x:Key="radioButtonStyle" TargetType="{x:Type ListBox}">
            <Setter Property="ItemContainerStyle">
                <Setter.Value>
                    <Style TargetType="{x:Type ListBoxItem}">
                        <Setter Property="Template">
                            <Setter.Value>
                                <ControlTemplate TargetType="ListBoxItem">
                                    <RadioButton Focusable="False" IsChecked="{Binding Path=IsSelected,Mode=TwoWay,RelativeSource={RelativeSource TemplatedParent}}">
                                        <ContentPresenter></ContentPresenter>
                                    </RadioButton>
                                </ControlTemplate>
                            </Setter.Value>
                        </Setter>
                    </Style>
                </Setter.Value>
            </Setter>
        </Style>
    </Window.Resources>
    <Grid>
        <ListBox Name="listBox" Style="{StaticResource radioButtonStyle}" DisplayMemberPath="Number">
        </ListBox>
    </Grid>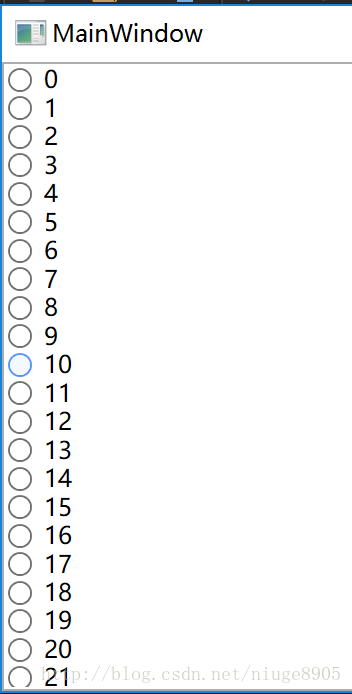
3、ListBox加上CheckBox,只需要稍微修改一下上面的代码即可
<Window.Resources>
        <Style x:Key="checkBoxStyle" TargetType="{x:Type ListBox}">
            <Setter Property="SelectionMode" Value="Multiple"></Setter>
            <Setter Property="ItemContainerStyle">
                <Setter.Value>
                    <Style TargetType="{x:Type ListBoxItem}">
                        <Setter Property="Template">
                            <Setter.Value>
                                <ControlTemplate TargetType="ListBoxItem">
                                    <CheckBox Focusable="False" IsChecked="{Binding Path=IsSelected,Mode=TwoWay,RelativeSource={RelativeSource TemplatedParent}}">
                                        <ContentPresenter></ContentPresenter>
                                    </CheckBox>
                                </ControlTemplate>
                            </Setter.Value>
                        </Setter>
                    </Style>
                </Setter.Value>
            </Setter>
        </Style>
    </Window.Resources>
    <Grid>
        <ListBox Name="listBox" Style="{StaticResource checkBoxStyle}" DisplayMemberPath="Number">
        </ListBox>
    </Grid>


 1万+
1万+

 被折叠的 条评论
为什么被折叠?
被折叠的 条评论
为什么被折叠?
 到【灌水乐园】发言


