1. 背景
组件(Component)是SAPUI5应用程序中独立且可重用的部件。
SAPUI5提供以下两类组件:
-
faceless组件 (class:
sap.ui.core.Component): 无界面组件即没有用户界面相关的元素,用于不需要UI元素编码的场景; -
UI组件 (class:
sap.ui.core.UICcomponent): UI组件用于表示应用程序界面上UI元素,例如按钮,以及相应的设置和元数据。
注意: 不能将“无界面组件”添加到组件容器
Component Container中;
sap.ui.core.UICcomponent 扩展了 sap.ui.core.Component,并在sap.ui.core.Component的基础上添加了屏幕渲染功能。
一般而言,应用程序中,一个完整的组件应包含两部分:组件控制器文件(component .js)和应用程序描述描述符文件(manifest.json)。
使用组件最大的好处就在于,封装好的组件可以被灵活地嵌入到不同的组件容器(Component Container)中。例如Fiori Launchpad就是一个组件容器;在应用程序的测试过程中,我们通常也会手动创建一个组件容器。
注意:在实例化组件容器时,会指定应用程序的命名空间,组件容器会通过此路径去查找组件控制器文件。
2. 示例
2.1 定义组件控制器文件
以下是一个组件控制器文件Component.js的例子:
sap.ui.define([
    "sap/ui/core/UIComponent",
    "sap/ui/model/json/JSONModel"
], function (UIComponent, JSONModel) {
    "use strict";

    return UIComponent.extend("my.namespace.demo.Component", {

        metadata : {
            manifest: "json"
        },

        init : function () {
            // call the init function of the parent
            UIComponent.prototype.init.apply(this, arguments);

            // set data model
            var oData = {
                recipient : {
                    name : "World"
                }
            };
            var oModel = new JSONModel(oData);
            this.setModel(oModel);
        }
    });
});
在这个例子中,我们首先定义了一个新的UI组件,然后在metadata属性中设置了manifest为json,这意味着我们将使用JSON格式的manifest文件来定义组件的配置。
然后在init函数中,我们首先调用了父类的init函数,然后设置JSON模型,并将其设置为组件的模型。这个模型包含了一个recipient对象,它有一个name属性,值为World。
2.2 加载组件
定义好组件文件后,我们会在应用程序的index.js文件中,实例化组件容器,并加载所创建的组件,将其加载至页面。
下面是index.js文件加载组件的一个示例:
sap.ui.define([
    "sap/ui/core/ComponentContainer"
], function (ComponentContainer) {
    "use strict";
    new ComponentContainer({
        name: "my.namespace.demo",
        settings : {
            id : "demo"
        },
        async: true
    }).placeAt("content");
});
3. 练习
在本篇博客的练习中,让我们将把所有UI元素封装到一个独立于index.html文件的组件中。
这样,无论何时访问资源,我们都将相对于组件(而不是相对于index.html)进行访问。
这种架构上的改变,相较于之前静态的index.html页面,应用程序的加载变得更灵活,比如可以直接嵌入到SAP Fiori launchpad这样的容器中。
3.1 创建Component.js文件
首先,让我们我们在webapp文件夹中创建了一个初始的Component.js文件,用来存放我们的应用程序设置。当组件实例化时,SAPUI5会自动调用组件的init函数。我们的组件继承自基类sap/ui/core/UICcomponent,在重写的init方法中应首先调用基类的init函数。
创建好的项目文件结构如下:

Component.js的代码如下:
sap.ui.define([
    "sap/ui/core/UIComponent"
], function (UIComponent) {
"use strict";

    return UIComponent.extend("zsapui5.test.Component", {
        init() {
            // call the init function of the parent
            UIComponent.prototype.init.apply(this, arguments);
        }
    });
});
3.2 向Component.js中添加metadata
接下来,让我们向Component.js文件中添加应用程序配置。
改动后的Component.js代码如下:
sap.ui.define([
    "sap/ui/core/UIComponent",
    "sap/ui/model/json/JSONModel",
    "sap/ui/model/resource/ResourceModel"
], function (UIComponent,JSONModel,ResourceModel) {
    "use strict";

    return UIComponent.extend("zsapui5.test.Component", {
        metadata: {
            "interfaces": ["sap.ui.core.IAsyncContentCreation"],
            "rootView": {
                "viewName": "zsapui5.test.view.App",
                "type": "XML",
                "id": "app"
            }
        },

        init() {
            //call  the init function of the parent
            UIComponent.prototype.init.apply(this, arguments);

            //set data model
            const oData = {
                recipient : {
                    name: "World"
                }
            };
            const oModel = new JSONModel(oData);
            this.setModel(oModel);

            //set i18n model
            const i18nModel = new ResourceModel({
                bundleName: "zsapui5.test.i18n.i18n"
            });
            this.setModel(i18nModel, "i18n");
        }
    });
});
改动后的component .js文件由两部分组成:元数据部分和组件初始化时调用的init函数部分。
元数据部分定义了对根视图App.view.xml文件的引用,这样组件就可以管理应用视图的显示,而不是像之前那样直接在index.js文件中直接创建并显示根视图。元数据定义部分还实现了sap.ui.core.IAsyncContentCreation接口,该接口允许完全异步地创建组件。
...
        metadata: {
            "interfaces": ["sap.ui.core.IAsyncContentCreation"],
            "rootView": {
                "viewName": "zsapui5.test.view.App",
                "type": "XML",
                "id": "app"
            }
...
请注意,sap.ui.core.IAsyncContentCreation接口隐式地将组件的rootView和它的路由器配置都设置为"async": true; 有关它的作用,我们将在后续有关“路由和导航”的博客中描述。
在init函数部分中,我们像之前在App.controller.js控制器文件中所做的那样,实例化数据模型oModel和i18n模型i18nModel。
...
        init() {
            //call  the init function of the parent
            UIComponent.prototype.init.apply(this, arguments);

            //set data model
            const oData = {
                recipient : {
                    name: "World"
                }
            };
            const oModel = new JSONModel(oData);
            this.setModel(oModel);

            //set i18n model
            const i18nModel = new ResourceModel({
                bundleName: "zsapui5.test.i18n.i18n"
            });
            this.setModel(i18nModel, "i18n");
        }
...
请注意,模型是直接绑定在组件上的,而非在组件的根视图上。然而,由于嵌套的控件会自动地继承父控件的承模型,因此模型在视图上也是可用的。
3.3 调整App.controller.js文件
因为我们已经在Component.js文件中实现了数据对象和i18n模型对象的绑定,让我们把之前写在App.controller.js控制器文件的逻辑移除,也即删除 onInit 函数和所需的模块引用。

改动后的代码效果如下:
sap.ui.define([
    "sap/ui/core/mvc/Controller",
    "sap/m/MessageToast"
], function (Controller, MessageToast) {
    "use strict";

    return Controller.extend("zsapui5.test.controller.App", {

        onShowHello: function () {
            // read msg from i18n model
            const oBundle = this.getView().getModel("i18n").getResourceBundle();
            const sRecipient = this.getView().getModel().getProperty("/recipient/name");
            const sMsg = oBundle.getText("helloMsg", [sRecipient]);

            // show message
            MessageToast.show(sMsg);
        }
    });
});
3.4 调整index.js文件
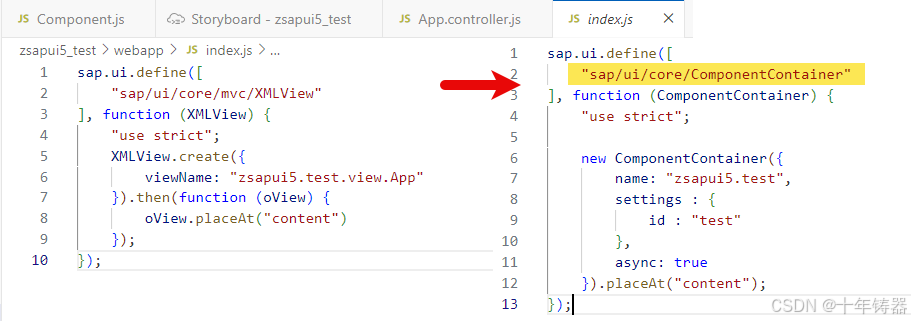
在之前的index.js文件中,我们直接实例化应用程序的视图对象XMLView。现在,让我们通过组件容器,来实例化了视图。
为此,我们将之前添加的视图依赖项替换为新的sap/ui/core/ComponentContainer依赖项。该组件容器充当应用程序组件的父组件,并处理其属性和导航事件。
创建一个组件容器的实例时,需要指定应用程序的命名空间也即zsapui5.test(它指向项目的webapp文件夹,这是component .js文件所在的位置)。

调整后的index.js文件效果如下:
sap.ui.define([
    "sap/ui/core/ComponentContainer"
], function (ComponentContainer) {
    "use strict";

    new ComponentContainer({
        name: "zsapui5.test",
        settings : {
            id : "test"
        },
        async: true
    }).placeAt("content");
});
3.5 一般约定
在封装应用程序的组件时,我们应遵循一下约定:
- 组件名为
Component .js - 组件应与应用程序所有UI资源一起,位于
webapp文件夹 - 如果要高效地使用index.html文件,它也位于
webapp文件夹中
3.6 运行
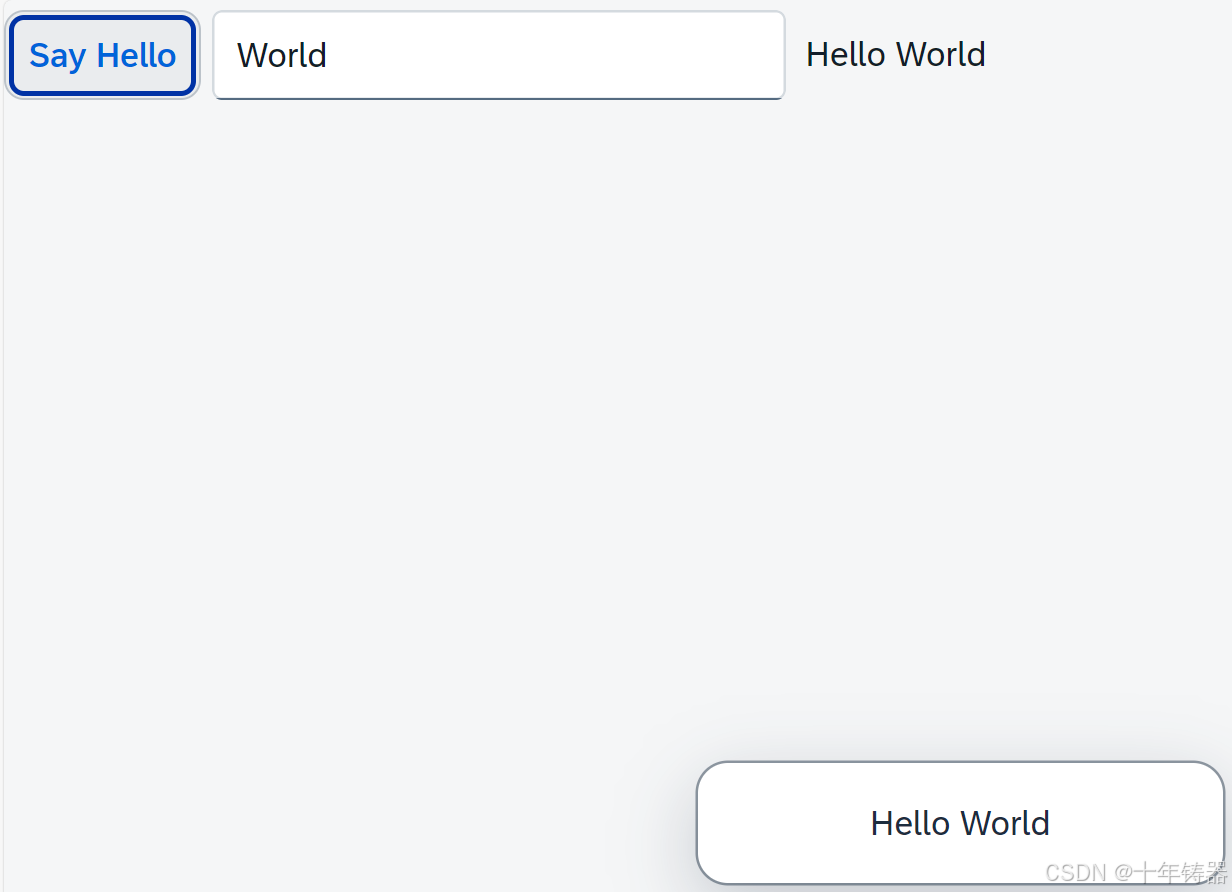
运行调整后的程序,效果如下:

与调整前相比,应用程序的运行效果是相同的。但如果通过ctrl + shift + alt + s打开诊断窗口来查看控件布局,我们可以发现以下不同。

新增的ComponentContainer是XMLView的父控件。

4. 小结
本文介绍了SAPUI5中组件的概念和封装方式,并通过一个示例展示了其用法。


 1688
1688

 被折叠的 条评论
为什么被折叠?


