


WRF(Weather Research & Forecasting)模式是一个专为气象研究和业务预报应用所研发的中尺度数值天气预报系统,它具有ARW(Advanced Research WRF)和 NMM(Nonhydrostatic Mesoscale Model)两种核心,一个数据同化系统,以及支持并行计算和系统可扩展性的软件架构。该模型适用于从几十米到数千公里的广泛气象应用。WRF可以根据实际大气条件(即观测和分析)或理想化条件进行模拟。WRF为操作预测提供了一个灵活且计算高效的平台。
官网 https://www.mmm.ucar.edu/models/wrf
WRF源代码和图形软件下载网址
https://www2.mmm.ucar.edu/wrf/users/download/get_source.html
在线手册
ARW OnLine Tutorial Introduction (ucar.edu)
进入WRF文件夹
cd WRF
WRF文件介绍:
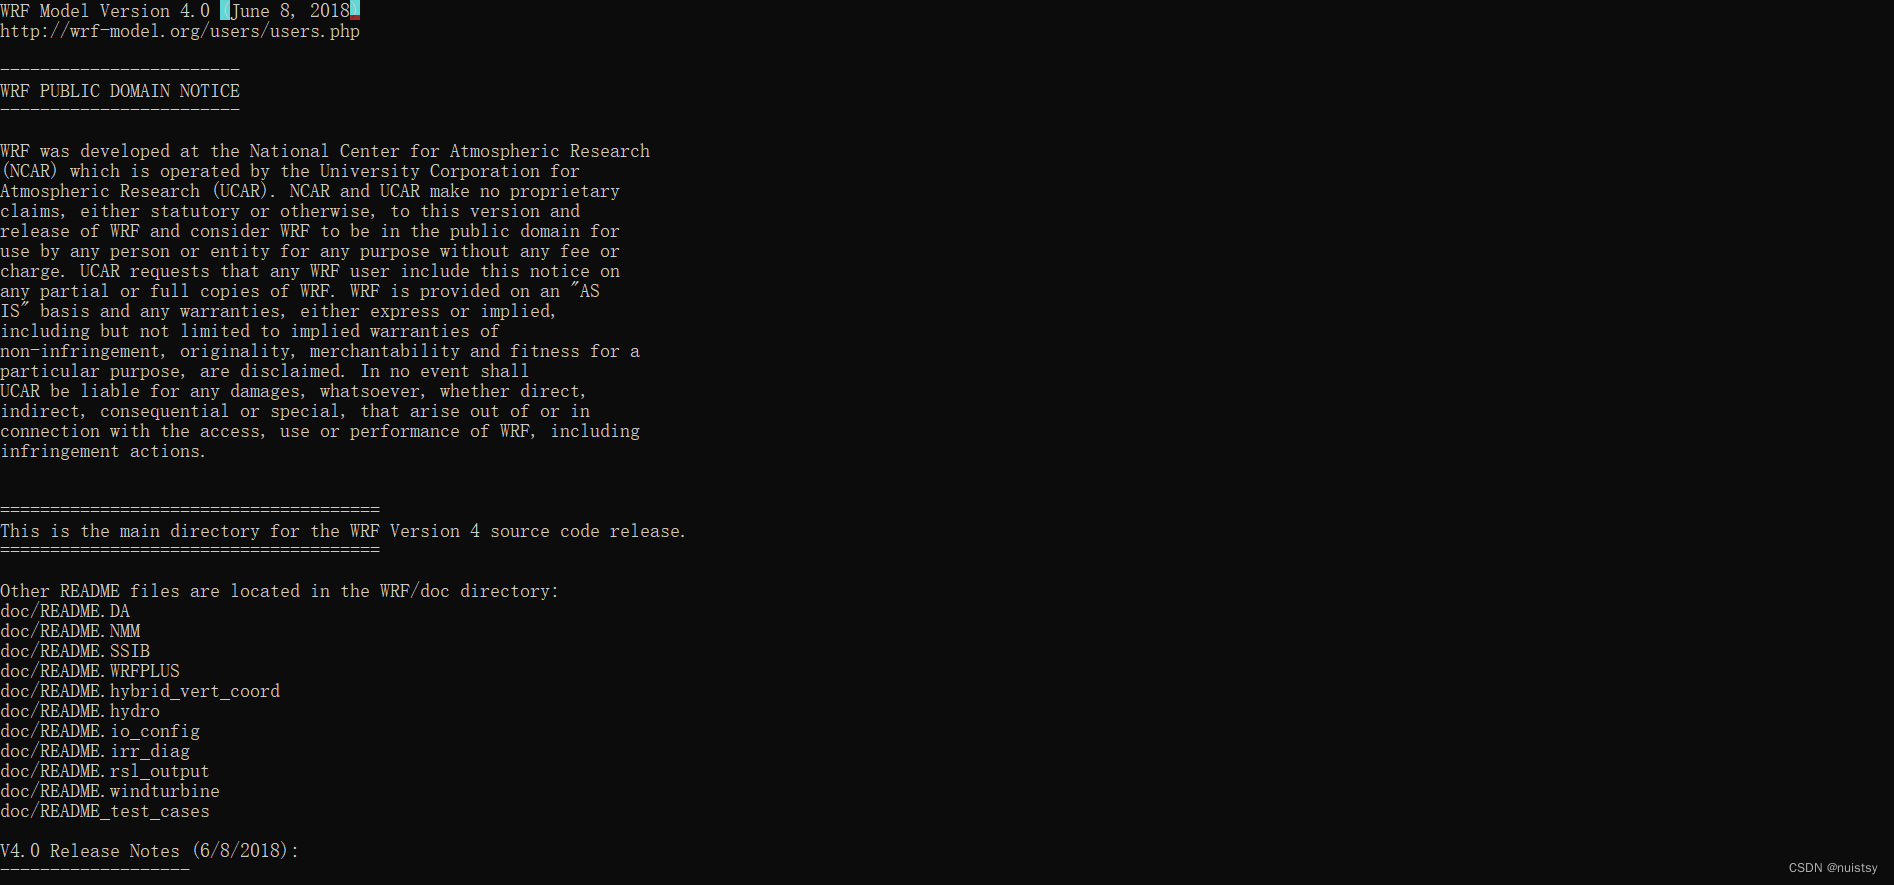
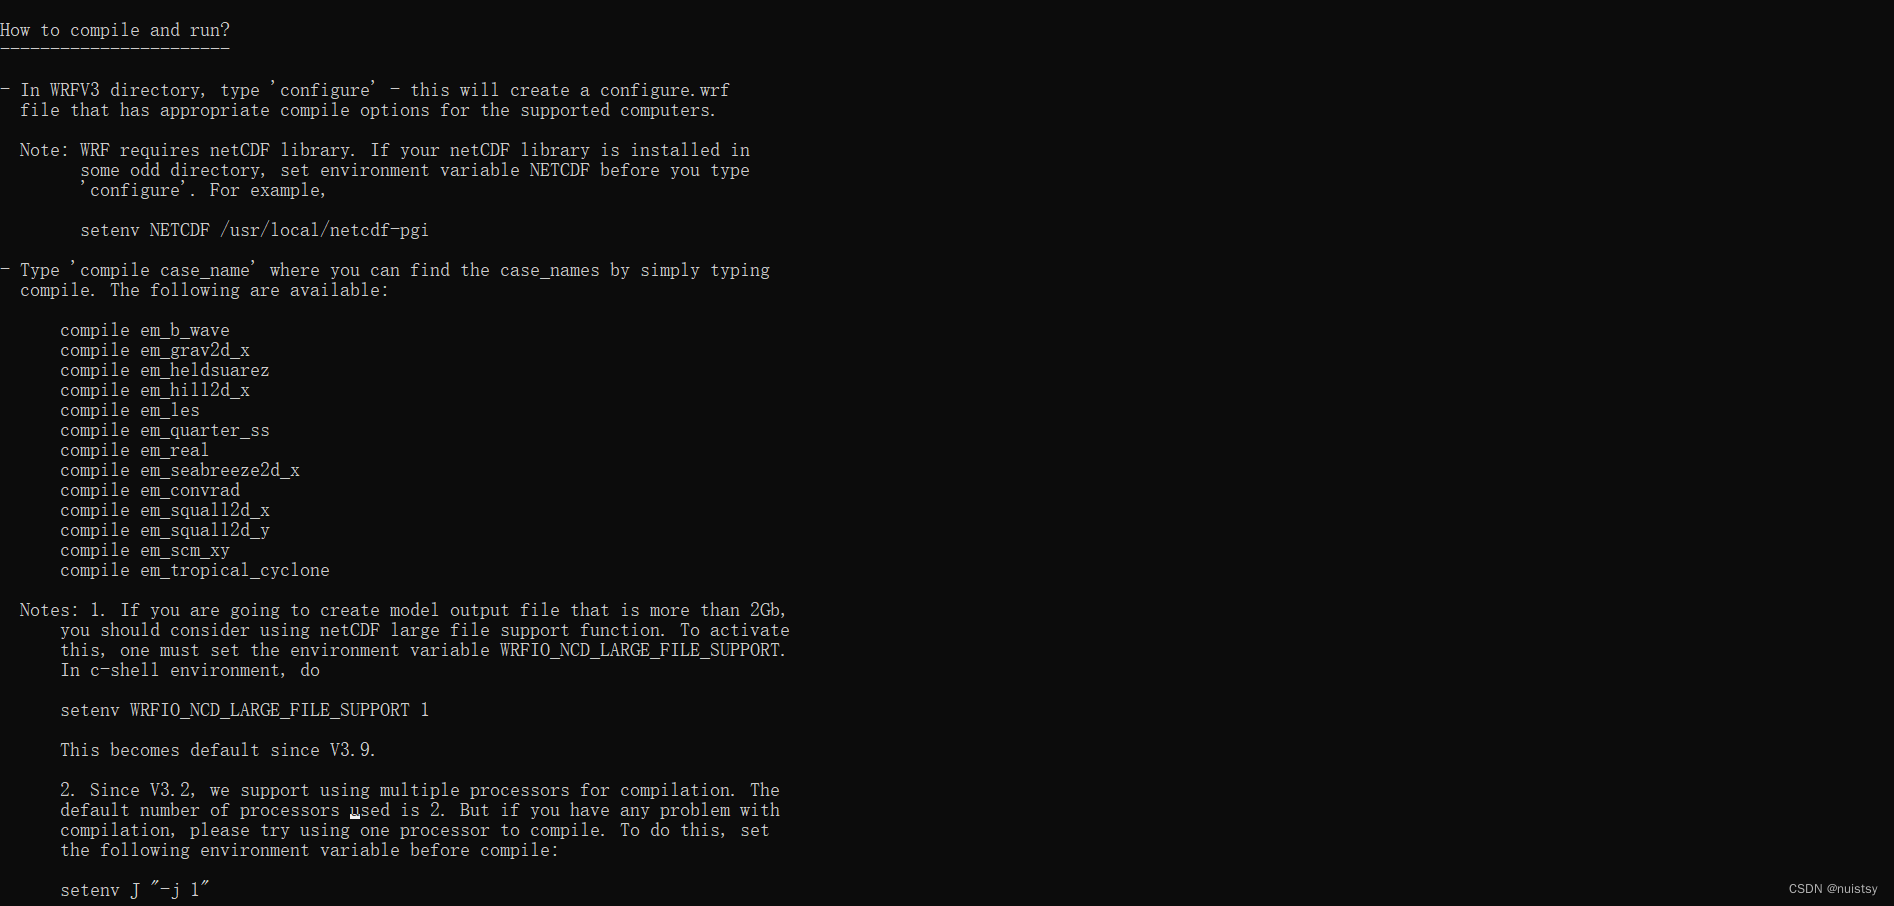
• README文件中包含了wrf的版本信息和如何安装和运行的代码
• 源码目录

dyn_em/: Directory for ARW dynamics and numerics
dyn_nmm/: Directory for NMM dynamics and numerics, which is no longer developed or supported
dyn_exp/: Directory for a 'toy' dynamic core
external/: Directory containing external packages, such as those for IO, time–keeping, and MPI
frame/: Directory containing modules for the WRF framework
inc/: Directory containing 'include' files
main/: Directory for main routines, such as wrf.F, and all executables after compilation
phys/: Directory for all physics modules
share/: Directory containing mostly modules for WRF mediation layer and WRF I/O
tools/: Directory containing tools for developers
• 脚本
clean/: Script to clean created files and executables
compile/: Script for compiling the WRF code
configure/: Script to create the configure.wrf file, which prepares for compilation
• Makefile: Top–level makefile
• Registry/: Directory for WRF Registry files
• arch/: Directory where compile options are gathered
• run/: Directory where one may run WRF
• test/: Directory that contains several test case directories, may also be used to run WRF
编译 WRF
You will first need to create a configuration file for your computer. This file will determine the type of compilation (i.e., parallel or serial), and what compiler to use.
Before you continue, ensure that your computer environment is set up correctly.Now that you have set up your environment, type:
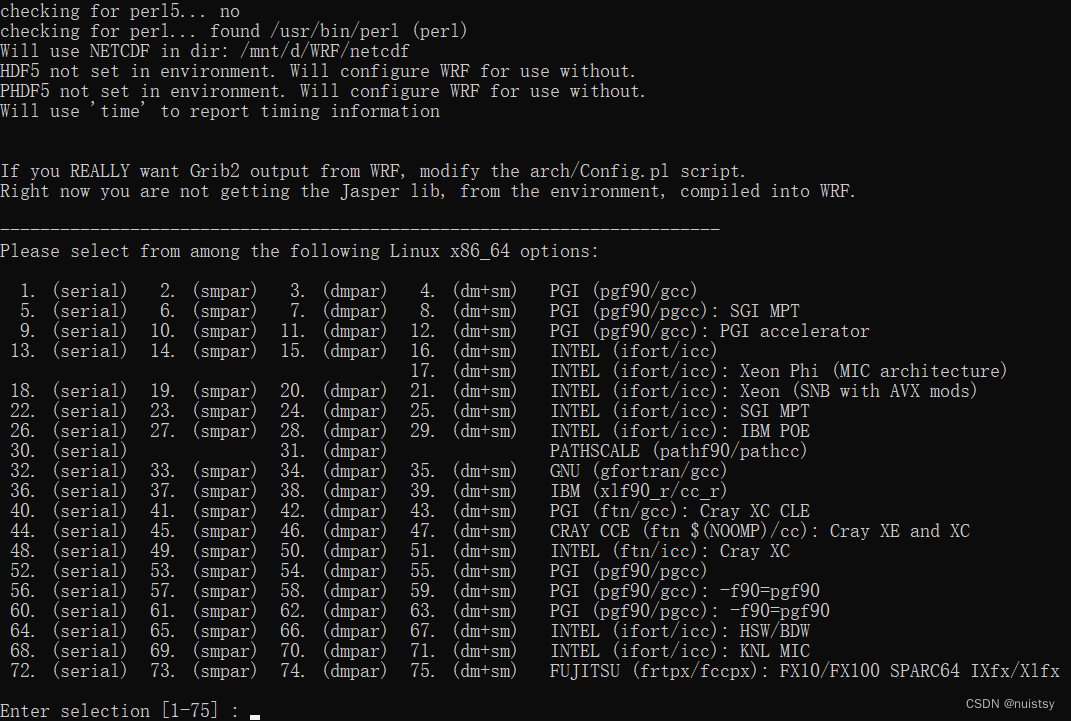
./configureYou will be given a list of choices for your computer. You must choose the compiler options best suited for your needs, and then you need to choose whether you plan to build in parallel (distributed memory [dmpar], OpenMP shared memory [smpar], or a combination of shared memory and distributed memory [dm+sm]), or serially. Below is an example from a Linux system (*Note: dmpar is the most highly tested and recommended mode for compiling in parallel):
Never compiled WRF before?
Pick a serial option, as this will reduce the number of possible problems you run into. Once you are proficient in compiling and running WRF, you can re-configure WRF for a more complex environment that requires a parallel build.NCAR – Cheyenne Users
Please see Notes for Using Cheyenne.For 2D Idealized Cases
Always pick a single–threaded, no–nesting option
serial: single processor
smpar: shared memory option (OpenMP)
dmpar: distributed memory option (MPI) **Recommended for parallel**
dm+sm: distributed memory with shared memory (for example, MPI across nodes with openMP within a node) – usually better performance is through dmpar only)
Once you have made your choice, you will be asked the type of nesting run you are interested in:
Compile for nesting? (0=no nesting, 1=basic, 2=preset moves, 3=vortex–following) [default 0]:
The most common option is "basic" (1).
(2) is used for a moving nest in which the user specifies the nest movement using namelist variables - Note: This was originally developed for testing purposes and is possible to use, but is very tedious, as you must specify every move.
(3) is primarily used for moving nests following a hurricane vortex, and the model automatically moves the nest
To read more about moving nests, click here.
The above will create a 'configure.wrf' file. If necessary, you can edit this file, and then save it before compiling. Click here to see an example of a configure.wrf file that was created on NCAR's Cheyenne supercomputer. This file will differ from platform to platform, and from version to version.


Compiling WRF for Real Data Cases
|
On some computers, it is necessary to set the following environment variable before compiling (if you are unsure, go ahead and set it, as it does not hurt to do so):setenv WRF_EM_CORE 1 |

Type:
./compile
You will be given the following choices:
Usage:
compile [-d] [-j n] wrf compile wrf in run dir (NOTE: no real.exe, ndown.exe, or ideal.exe generated)
or choose a test case (see README_test_cases for details) :
compile em_b_wave
compile em_convrad
compile em_esmf_exp
compile em_fire
compile em_grav2d_x
compile em_heldsuarez
compile em_hill2d_x
compile em_les
compile em_quarter_ss
compile em_real
compile em_scm_xy
compile em_seabreeze2d_x
compile em_squall2d_x
compile em_squall2d_y
compile em_tropical_cyclone
compile exp_real
compile nmm_real
compile nmm_tropical_cyclone
compile -d : to compile without optimization and with debugging
compile -j n : parallel make using n tasks if supported (default 2)
compile -h : help message
Since we are compiling a WRF ARW real data case, we are going to choose the "em_real" option (make sure to send the standard error and output to a log file as indicated below with the use of ">&". If anything goes wrong with the compilation, this file will be necessary for troubleshooting):
./compile em_real >& log.compile
If your compilation was successful, you should see the following executables in the WRF/main/ directory:
ndown.exe: Used for one-way nesting
tc.exe: TC Bogusing for adding or removing a tropical cyclone
real.exe: WRF initialization for eal data cases
wrf.exe: WRF model integration
Make sure the executables are not of zero–size!
These executables will be linked from the main/ directory to the directories run/ and test/em_real/. You can choose to run the code from either of these directories.
|
The executables were not createdCheck the log.compile file for any errors. The file is large, so you will want to do a search for the word 'Error' (with a capital 'E'. We are not concerned about errors with a lower–case 'e'). Click here to see an example compile log that was created on the NCAR Cheyenne supercomputer for a build with ifort. This file will vary among platforms, compilers, and versions. |

|
If you need to obtain help or support regarding a compiling problemRepeat what you have done one more time:./clean -aThen post a topic to the WRF/MPAS Support Forum, and be sure to attach the log.compile file, along with your configure.wrf file, and computer/compiler information. |

If WRF was successfully compiled, you are now ready to compile WPS.
Compiling WRF for Idealized Cases
|
On some computers (e.g., some Intel machines), it is necessary to set the following environment variable before compiling:setenv WRF_EM_CORE 1 |

Type:
./compile
You will be given the following choices:
Usage:
compile [-d] [-j n] wrf compile wrf in run dir (NOTE: no real.exe, ndown.exe, or ideal.exe generated)
or choose a test case (see README_test_cases for details) :
compile em_b_wave
compile em_convrad
compile em_esmf_exp
compile em_fire
compile em_grav2d_x
compile em_heldsuarez
compile em_hill2d_x
compile em_les
compile em_quarter_ss
compile em_real
compile em_scm_xy
compile em_seabreeze2d_x
compile em_squall2d_x
compile em_squall2d_y
compile em_tropical_cyclone
compile exp_real
compile nmm_real
compile nmm_tropical_cyclone
compile -d compile without optimization and with debugging
compile -j n parallel make using n tasks if supported (default 2)
compile -h help message
Pick the idealized case you want to run (e.g., the baroclinic wave case), and compile the code for this case:
./compile em_b_wave >& log.compile
If your compilation was successful, you should see these executables in the WRF/main/ directory:
WRF/main/ideal.exe: WRF initialization for idealized data cases
WRF/main/wrf.exe: WRF model integration
These executables will be linked from the WRF/main/ directory, to the directories run/ and test/em_your_case (e.g., for the baroclinic wave case, the executables will be linked to the directory test/em_b_wave, which is where you will be running the code).
|
If you change cases, remember that recompiling a new case will overwrite the 'ideal.exe' executable that you are now using. If you would like to keep the old 'ideal.exe,' move or rename it. Since 'ideal.exe' is linked from the WRF/main/ directory, into the directory you are using (e.g., test/em_b_wave), you can simply remove the link and copy 'ideal.exe' into the test/ case/ directory, so that it does not get overwritten when compiling a new case. |

|
The executables were not createdCheck the log.compile file for any errors. The file is large, so you may want to do a search for the word 'Error' (with a capital 'E'. We are not concerned about errors with a lower–case 'e'). |

|
If you need to report a problem to wrfhelp (wrfhelp at ucar dot edu)Repeat what you have done one more time:./clean -aThen send the log.compile file, together with your computer/compiler information to wrfhelp. |

You are now ready to run the WRF ARW model for your chosen idealized case.
Basics - WRF for Idealized Cases
The WRF model has 2 steps:
ideal.exe
Sets up initial conditions needed to run wrf.
Note: Not all idealized cases require a lateral boundary file because of the boundary condition choices they use, such as the periodic boundary condition option.
wrf.exe
Generates the model forecast.STEPS to Run WRF
1. After you have compiled the case of interest (remember to recompile the code if you change cases).
Move to the directory you plan to run the code (either test/em_xxxxxx/ or run/).
Both the directories run/ and test/em_xxxxxx/ will have all the files you need linked in,
so it does not matter in which one you choose to run the code.2. If there is a run_me_first.csh script in the directory - RUN IT (this will link in extra data files needed during the run).
./run_me_first.csh3. Edit the namelist.input file.
Use the default option if you have never run an idealized case before.
For detailed explanations of the namelist parameters, as well as some recommendations for best practices, see the Best Practice WRF Namelist page4. Run ideal.exe
- ideal.exe generally cannot be run in parallel. For parallel compiles, run this on a single processor.
- The exception is the quarter_ss case, which can now be run with MPI.Verify that the program ran correctly
- Check that the file wrfinput_d01 was generated.
- Idealized cases do not require a lateral boundary file because of the boundary condition choices they use, such as the periodic boundary condition option.
5. Run wrf.exe- Two-dimensional ideal cases cannot be run in MPI parallel. OpenMP is fine.
- Three-dimensional cases can be run with MPIVerify that the program ran correctly
- After successful completion, you should see wrfout_d01_0001-01-01* files
6. Use a post-processing tool to view the output.
Available Cases
compile em_b_wave
compile em_convrad
compile em_fire
compile em_grav2d_x
compile em_heldsuarez
compile em_hill2d_x
compile em_les
compile em_quarter_ss
compile em_scm_xy
compile em_seabreeze2d_x
compile em_squall2d_x
compile em_squall2d_y
compile em_tropical_cyclone
WRF Preprocessing System (WPS)The next step for real data cases is to compile WPS. Examine the WPS Source CodeMove into the WPS directory that you created: cd WPSNote: If you are still in the WRF/ directory, this should be one directory up from where you are (i.e., cd ../WPS). Inside this directory, you will find a number of files and directories. Below are desciptions of some of the files: – The README files contain useful information about the code and how to set up and run the model. – Source code directories: geogrid/ Directory containing code to create the static data – Scripts: clean Script to clean created files and executables – Others: arch Directory where compile options are gathered Environment Variable - netCDFThis has likely already been set prior to compiling WRF; however, you can check by issuing (e.g., with csh): echo $NETCDF If it is not set, issue the following command (typically the netCDF libraries are located in /usr/local/netcdf, but this may vary between systems - check to make sure): setenv NETCDF /usr/local/netcdf
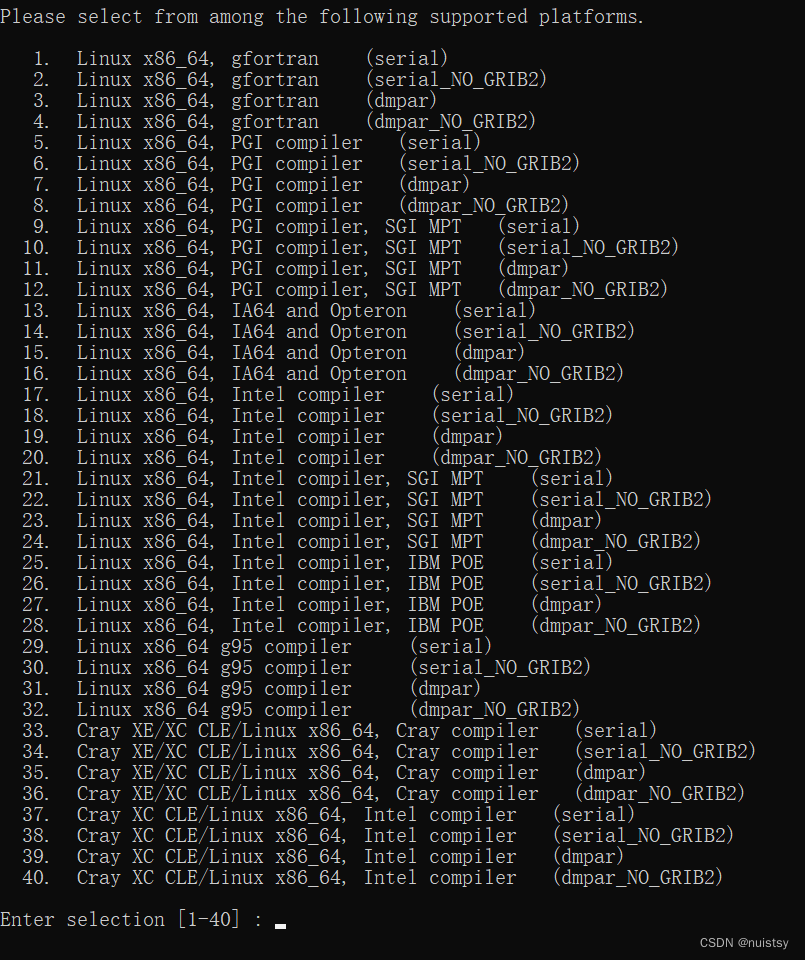
LINUX-environment UsersEnsure that your netCDF libraries were compiled with the same compiler that you are going to use to compile WRF (e.g., if you are compiling WRF with a PGI compiler, your netCDF libraries must also be compiled with PGI). NCAR – Cheyenne UsersOn NCAR's Cheyenne system, netCDF is installed in: /glade/u/apps/ch/opt/netcdf/ version/compiler/version_of_compiler above, 'version' is the version of netcdf you currently have loaded, the 'compiler' is the compiler you currently have loaded, and the 'version of compiler' is the version of the currently loaded compiler (ex. /4.4.1.1/intel/17.0.1). Configuring WPSThis step will create a configure file for your particular computer. The code has been ported to a wide variety of popular platforms. Type./configure You will be given a list of choices for your computer. These choices range from compiling for a single processor job, to using distributed-memory parallelization options for multiple processors. For example, the choices for a Linux computer may look similar to this (from NCAR'S Cheyenne machine):
You will see a configure.wps file created after configuring. If necessary, you may edit compile options/paths in this file.
Compile WPSTo compile WPS, issue the following command (make sure to send your standard error and output to a log file by utilizing the ">&" as shown below. If your compilation fails, you will need this file to troubleshoot): ./compile >& compile.logIf your compilation was successful, you should see these executables created (make sure they are not of size zero): geogrid.exe -> geogrid/src/geogrid.exe Generates static dataIf you do not see these files, check your compile.log file for any errors (seach for the word 'Error,' with a captial 'E'). A few utilities will also be linked under the util/ directory:
*Note: ./compile utility_of_your_choice >& log. utility_of_your_choiceIf you have NCL libraries installed, before compiling, it may be useful to type 'ncargf90'. This will tell you the correct libraries to use if you would like to compile these 2 programs. Then you will need to edit the following line in your configure.wps file to reflect those libraries (and then save the configure.wps file before compiling). NCARG_LIBS =
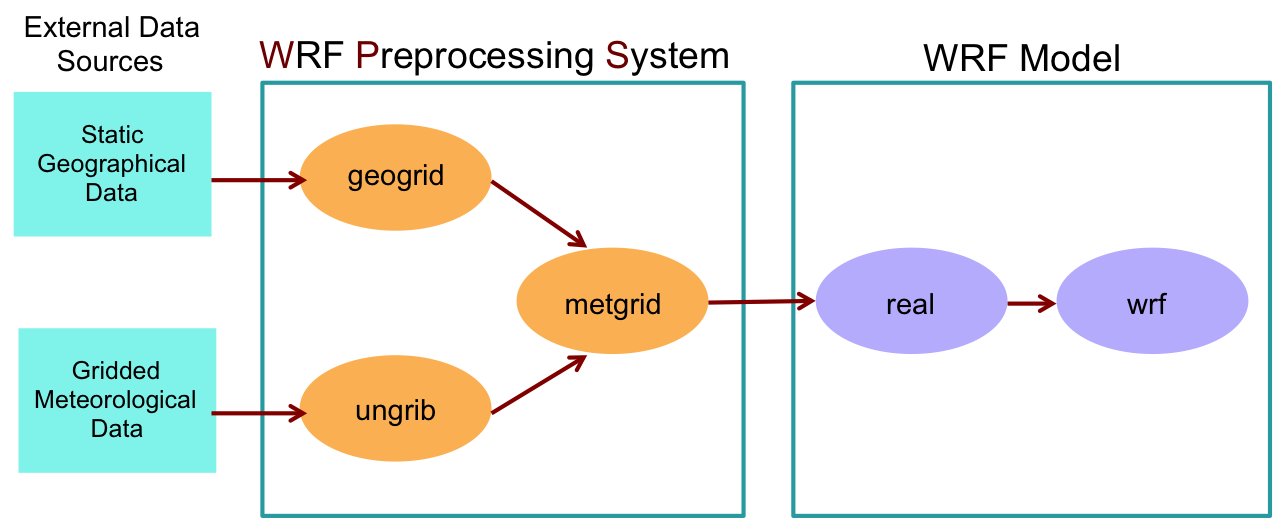
If your executables were created correctly, you are now ready to run the WRF ARW model. Basics for Running the ModelBelow is a description of the program flow during a typical model run:
WPSgeogrid.exe creates terrestrial data from static geographic data that is obtained from an external data source (this is available to download, and will be discussed in the case studies). WRFreal.exe vertically interpolates the data onto the model coordinates.
Before we run a specific case, let's first look at some details regarding each of the individual components. Basics: GeogridThe purpose of GEOGRID is to define the simulation domain(s), and interpolate various terrestrial data sets to the model grids. The simulation domain(s) are defined using information specified by the user in the "share" and "geogrid" sections of the WPS namelist. Please see our Best Practices WPS Namelist page for detailed explanations of these and other namelist.wps parameters, in addition to recommended practices. By default, in addition to computing latitude and longitude for every grid point, geogrid will interpolate soil categories, land use category, terrain height, annual mean deep-soil temperature, monthly vegetation fraction, monthly albedo, maximum snow albedo, and slope category to the model grids. STEPS to Run GEOGRID**Note: This is just a brief description of the basic steps - meant to help you understand the process. If you currently have no data, or simulation you would like to run, you can wait until you get to the 'case studies' section, later, to try to follow along. 1. Download the terrestrial input data
3. Run geogrid.exe (output is in the format of 'geo_em.dxx.nc' - one file for each domain) ./geogrid.exe |


 9678
9678


 被折叠的 条评论
为什么被折叠?
被折叠的 条评论
为什么被折叠?
 到【灌水乐园】发言


