


目录:
1. 屏幕适配的方式都有哪些?
1.1 方式之-dp
1.1.1 名词解释:
分辨率
480*800,1280*720,表示像素点的总和
px(pix)-像素
是屏幕里的最小单元
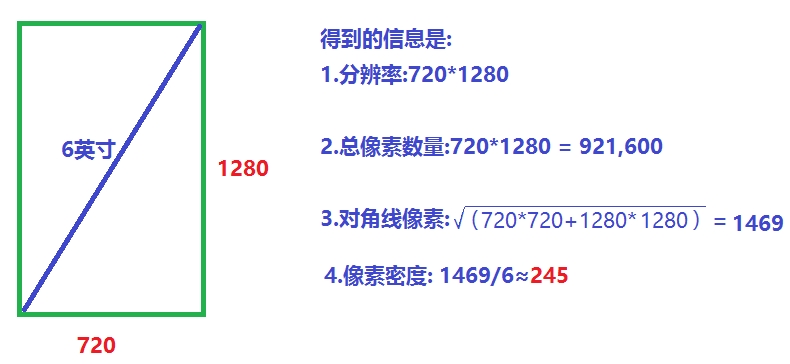
dpi-像素密度
- 每英寸屏幕具有的像素数量,像素密度越大,细节越丰富
- 公式:像素密度 = √{(长度像素数^2+宽度像素数^2)}/ 屏幕尺寸
- 尺寸单位为:英寸;屏幕尺寸为:对角线长度(如下图)
1.1.2 res文件夹下的目录分类
(如图)
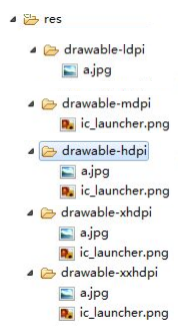
应用查找图片的顺序:
先从自己开始(没有)->逐个就往高的找(没有)->就往比自己低的找
1.1.3 Android中的像素密度/分辨率/dp和px的关系
| 类型 | dip | 分辨率 | dp和px比例 |
|---|---|---|---|
| ldip | 120 | 240*320 | 1dp = 0.75px |
| mdip(标准) | 160 | 320*480 | 1dp = 1px |
| hdip | 240 | 480*800 | 1dp = 1.75px |
| xhdip | 320 | 720*1280 | 1dp = 2px |
| xxhdip | 480 | 1080*1920 | 1dp = 3px |
比例图如下:
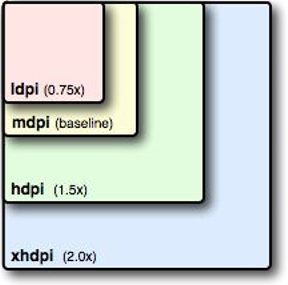
- 由上面的标准mdip,那么如果在320*480的手机上,只需要dp就等效于px,因为1:1
- 我们在代码运算过程中经常要做dp和px的互换,根据上面的比例特点.我们只需通过获取资源.获取屏幕分辨率.获取比例即可
/*
       density   分辨率       dp和px的转换
ldip    120     240*320     1dp = 0.75px
mdip    160     320*480     1dp = 1px
hdip    240     480*800     1dp = 1.5px
xhdip   320     720*1280    1dp = 2px
xxhdip  480     1080*1920   1dp = 3px

px和dip的转换,只需获取比例值即可;得出dp和px
参考标准的mhdip,额算出其他:pixels=dips*(density/160)
如果是240*320的求得density肯定是1;
1.获取比例值-自动根据当前的手机获取比例值
(不同分辨率得到的不同,比如我的模拟器720*1280返回2)
(PS:传入dp得px:乘以比例即可;传入px得dp:除以比例即可),写成工具类
2.四舍五入

*/
public class DensityUtil {

    /**
     * 根据手机的分辨率从 dip 的单位 转成为 px(像素)
     */
    public static int dip2px(Context context, float dpValue) {

        final float scale = context.getResources().getDisplayMetrics().density;
        return (int) (dpValue * scale + 0.5f);
    }

    /**
     * 根据手机的分辨率从 px(像素) 的单位 转成为 dp
     */
    public static int px2dip(Context context, float pxValue) {

        final float scale = context.getResources().getDisplayMetrics().density;
        return (int) (pxValue / scale + 0.5f);
    }
}
1.1.4布局里的160dp和180dp的
160dp:
- 设置一个按钮的宽度为160dp,在320*480分辨率的机器里,那么正好是一半(因为1:1)
- 在240*320的机器里,正好也显示一半,因为(1:0.75),160dp = 120px
- 在480*800的机器里,也是一半,因为(1:1.5).160dp = 240px
- 所以在以上三种分辨率下设置多少dp是等效的,归为一档.
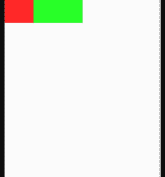
<Button
android:background="#ff0000"
android:layout_width="60dp"
android:layout_height="wrap_content"/>
<Button
android:background="#00ff00"
android:layout_width="100dp"
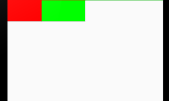
android:layout_height="wrap_content"/>三种分辨率同样的代码都显示这样的效果:
180dp:
- 如果将上面的160dp,放到720*1280或者1920 *1080,那么得到的效果和以上机器是不同的
- 设置180dp宽度的按钮,在这两者里面的效果是一样的
- 因为:720*1280(比例是:1:2)所以180dp = 360px,就是一半
- 1920*1080(比例是:1:3)所以180dp = 540px,也是一半
- 所以这两种分辨率下设置的dp是等效的,也是一档
    <Button
        android:background="#ff0000"
        android:layout_width="80dp"
        android:layout_height="wrap_content"/>
    <Button
        android:background="#00ff00"
        android:layout_width="100dp"
        android:layout_height="wrap_content"/>
两种分辨率下都显示同样效果
2.方式之-dimens(尺寸)
- (PS:根据上一节的160dp和180dp的讲解,我们现在通过自动dimens解决自动适配问题)
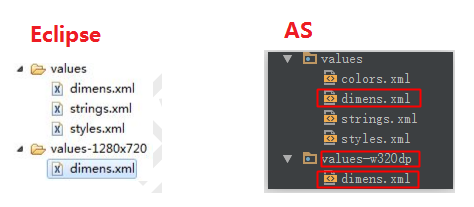
- 1.在res目录下有默认的values文件夹和dimens.xml文件
- 2.为了自动适配1280 *720和1920 *1080分辨率,我们分边创建各自的文件夹
- values-1280x720(eclipase写法),Android Studio写成values-w320dp
- values-1280x720(eclipase写法),Android Studio写成values-w320dp
3.把刚才的dimens.xml复制一份到目标文件夹
- 默认的dimens.xml写成160dp,移到新文件的定义成180dp;
- 默认的dimens.xml写成160dp,移到新文件的定义成180dp;
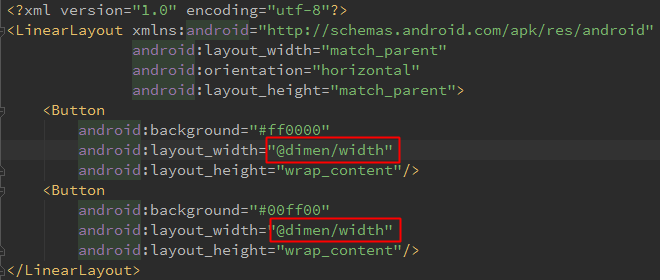
4.最后在布局文件中写单位大小时,用@dimens/width即可,自动根据屏幕灵活调用
(PS:因为有默认的和指定各种分辨率(另外写1920*1080的,虽然和720等效,但是还是要写,否则他就用默认的了)的文件夹,所以找不到指定的就用默认的)

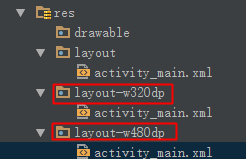
3.方式之-layout
- 原理和上述情况一样,些不同的layout,会根据分辨率自动找到合适的layout
4.方式之-代码适配
- 需求:通过代码设置,让一个TextView的宽和高都为屏幕的一半;
- 初始:布局是默认的包裹,如下:
<RelativeLayout xmlns:android="http://schemas.android.com/apk/res/android"
                xmlns:tools="http://schemas.android.com/tools"
                android:layout_width="match_parent"
                android:layout_height="match_parent"
                tools:context=".MainActivity">
    <!-- 现在是默认的包裹 -->
    <TextView
        android:id="@+id/tv"
        android:layout_width="wrap_content"
        android:layout_height="wrap_content"
        android:background="#e18080"
        android:text="hello_world"/>
</RelativeLayout>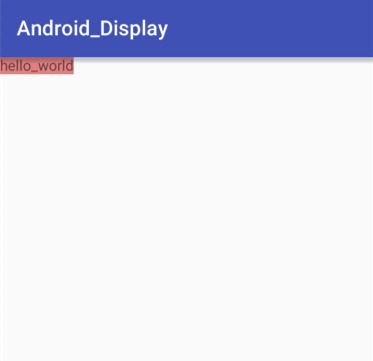
* 步骤:
* 1.获取tv控件
* 2.获取当前机器的分辨率.
* 3.新建一个和跟布局一样(根是线性就线性,是关系就设置关系)的参数,构造传入长和宽(分辨率的一半)
* 4.再让tv控件设置参数即可.
*代码如下:
public class MainActivity extends AppCompatActivity {

    @Override
    protected void onCreate(Bundle savedInstanceState) {
        super.onCreate(savedInstanceState);
        setContentView(R.layout.activity_main);
        //1.
        TextView tv = (TextView) findViewById(R.id.tv);
        //2.
        int height = getWindowManager().getDefaultDisplay().getHeight();
        int width = getWindowManager().getDefaultDisplay().getWidth();
        //3.
        RelativeLayout.LayoutParams params = new RelativeLayout.LayoutParams((int) ((float)width/2+0.5), (int) ((float)height/2+0.5));
        //4.
        tv.setLayoutParams(params);
    }
}
效果:

5.方式之-weight权重
(PS:必须是线性布局)
1.多个相对的标准权重
如果是横向:把高度设置为0dp
如果是竖向:把宽度设置为0dp
然后色字不同控件所占的权重
    <Button
        android:layout_weight="1"
        android:text="bt1"
        android:layout_width="0dp"
        android:layout_height="wrap_content"/>
    <Button
        android:text="bt2"
        android:layout_weight="2"
        android:layout_width="0dp"
        android:layout_height="wrap_content"/>
 </LinearLayout>
效果:
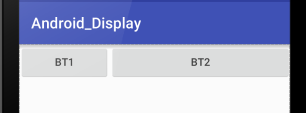
2.单个相对父布局的权重
- 1.设置父布局的总权重:SumWeight
- 2.设置自己的所占的权重即可
<LinearLayout
    android:weightSum="3"
    android:layout_width="match_parent"
    android:layout_height="wrap_content"
    android:orientation="horizontal">
    <Button
        android:layout_weight="2"
        android:layout_width="0dp"
        android:layout_height="wrap_content"
        android:text="bt1"/>
</LinearLayout>
效果:
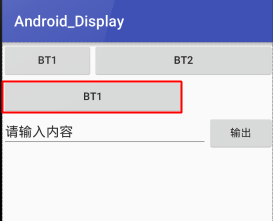
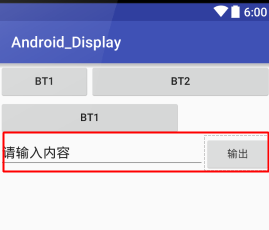
3.自动权重
- 想让前面的完全填充,并且设置权重
- 然后后面的用包裹即可
<LinearLayout
    android:layout_width="match_parent"
    android:layout_height="wrap_content"
    android:orientation="horizontal">
    <EditText
        android:text="请输入内容"
        android:layout_weight="1"
        android:layout_width="match_parent"
        android:layout_height="wrap_content"/>
    <Button
        android:layout_width="wrap_content"
        android:layout_height="wrap_content"
        android:text="输出"/>
</LinearLayout>
效果如下:
二.屏幕适配的处理技巧都有哪些?
横竖屏的切换
(正常情况下,每次横竖屏切换都会导致Activity的重新创建)
- 1.在活动销毁前保存活动状态(重写onSaveInstanceState方法),可以参考前面我们讲的思维(点击访问).
@Override
protected void onCreate(Bundle savedInstanceState) {
    super.onCreate(savedInstanceState);
    setContentView(R.layout.activity_main);
    //切换屏幕后获取信息
    if (savedInstanceState != null) {
        System.out.println(savedInstanceState.get("height")+"-------");
        System.out.println(savedInstanceState.get("width")+"-------");
    }
}
    //保存信息
    @Override
    protected void onSaveInstanceState(Bundle outState) {
        outState.putInt("height", 100);
        outState.putInt("width", 50);
        super.onSaveInstanceState(outState);
    }
2.在清单文件把方向写死:
- android:screenOrientation=”portrait”(landscape是横向,portrait是纵向)
3.如果不想重新让Activity调用,就设置配置更改
在清单文件设置三个参数:
方向|按键隐藏|屏幕尺寸
android:configChanges="orientation|keyboardHidden|screenSize"
- 另外重写Activity里的更改方法
-
- 如果切换横竖屏,之后重新调用这个方法
@Override
public void onConfigurationChanged(Configuration newConfig) {
    super.onConfigurationChanged(newConfig);
    if (this.getResources().getConfiguration().orientation == Configuration.ORIENTATION_LANDSCAPE) {
        //横向就干嘛 TODO
    }
    else if(this.getResources().getConfiguration().orientation == Configuration.ORIENTATION_PORTRAIT){
        //竖向就干嘛 TODO
    }
}
权重的反比例
经过改善一般我们都是设置0dp,然后使用权重,占多少就占用多少部分
如果反比例,比如按钮A权重是1,按钮B是2,那么就反过来了,代码和效果图如下.
就是不用0dp,而改用填充
        <Button
            android:layout_width="match_parent"
            android:layout_height="wrap_content"
            android:layout_weight="1"
            android:text="bt1"/>

        <Button
            android:layout_width="match_parent"
            android:layout_height="wrap_content"
            android:layout_weight="2"
            android:text="bt2"/>
    </LinearLayout>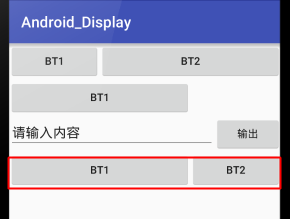


 7622
7622

 被折叠的 条评论
为什么被折叠?
被折叠的 条评论
为什么被折叠?
 到【灌水乐园】发言


