


近期开始学习SpringBoot,记录一下SpringBoot Project的基础内容
目录
1、idea SpringInitializer
建立一个新的project,Maven项目

选择所需的初步依赖,这里因为是第一个hello project,所以只选了基础的Spring Web

2、 pom依赖
这里因为建立项目时已经选了Spring Web,所以idea已经给自动生成好了所需依赖
<?xml version="1.0" encoding="UTF-8"?>
<project xmlns="http://maven.apache.org/POM/4.0.0"
         xmlns:xsi="http://www.w3.org/2001/XMLSchema-instance"
         xsi:schemaLocation="http://maven.apache.org/POM/4.0.0 http://maven.apache.org/xsd/maven-4.0.0.xsd">
    <modelVersion>4.0.0</modelVersion>

    <groupId>com.itheima</groupId>
    <artifactId>springboot-helloworld</artifactId>
    <version>1.0-SNAPSHOT</version>

    <!--springboot工程需要继承的父工程-->
    <parent>
        <groupId>org.springframework.boot</groupId>
        <artifactId>spring-boot-starter-parent</artifactId>
        <version>2.1.8.RELEASE</version>
    </parent>

    <dependencies>
        <!--web开发的起步依赖-->
        <dependency>
            <groupId>org.springframework.boot</groupId>
            <artifactId>spring-boot-starter-web</artifactId>
        </dependency>
    </dependencies>

</project>
3、引导类
创建项目后,idea自动生成
import org.springframework.boot.SpringApplication;
import org.springframework.boot.autoconfigure.SpringBootApplication;
/**
 * 引导类。 SpringBoot项目的入口
 */
@SpringBootApplication
public class HelloApplication {
    public static void main(String[] args) {
        SpringApplication.run(HelloApplication.class,args);
    }
}
4、Controller
编写Controller,添加@RestController注解,通过@RequestMapping指定请求地址映射
import org.springframework.web.bind.annotation.RequestMapping;
import org.springframework.web.bind.annotation.RestController;
@RestController
public class HelloController {
@RequestMapping("/hello")
public String hello(){
return " hello Spring Boot !";
}
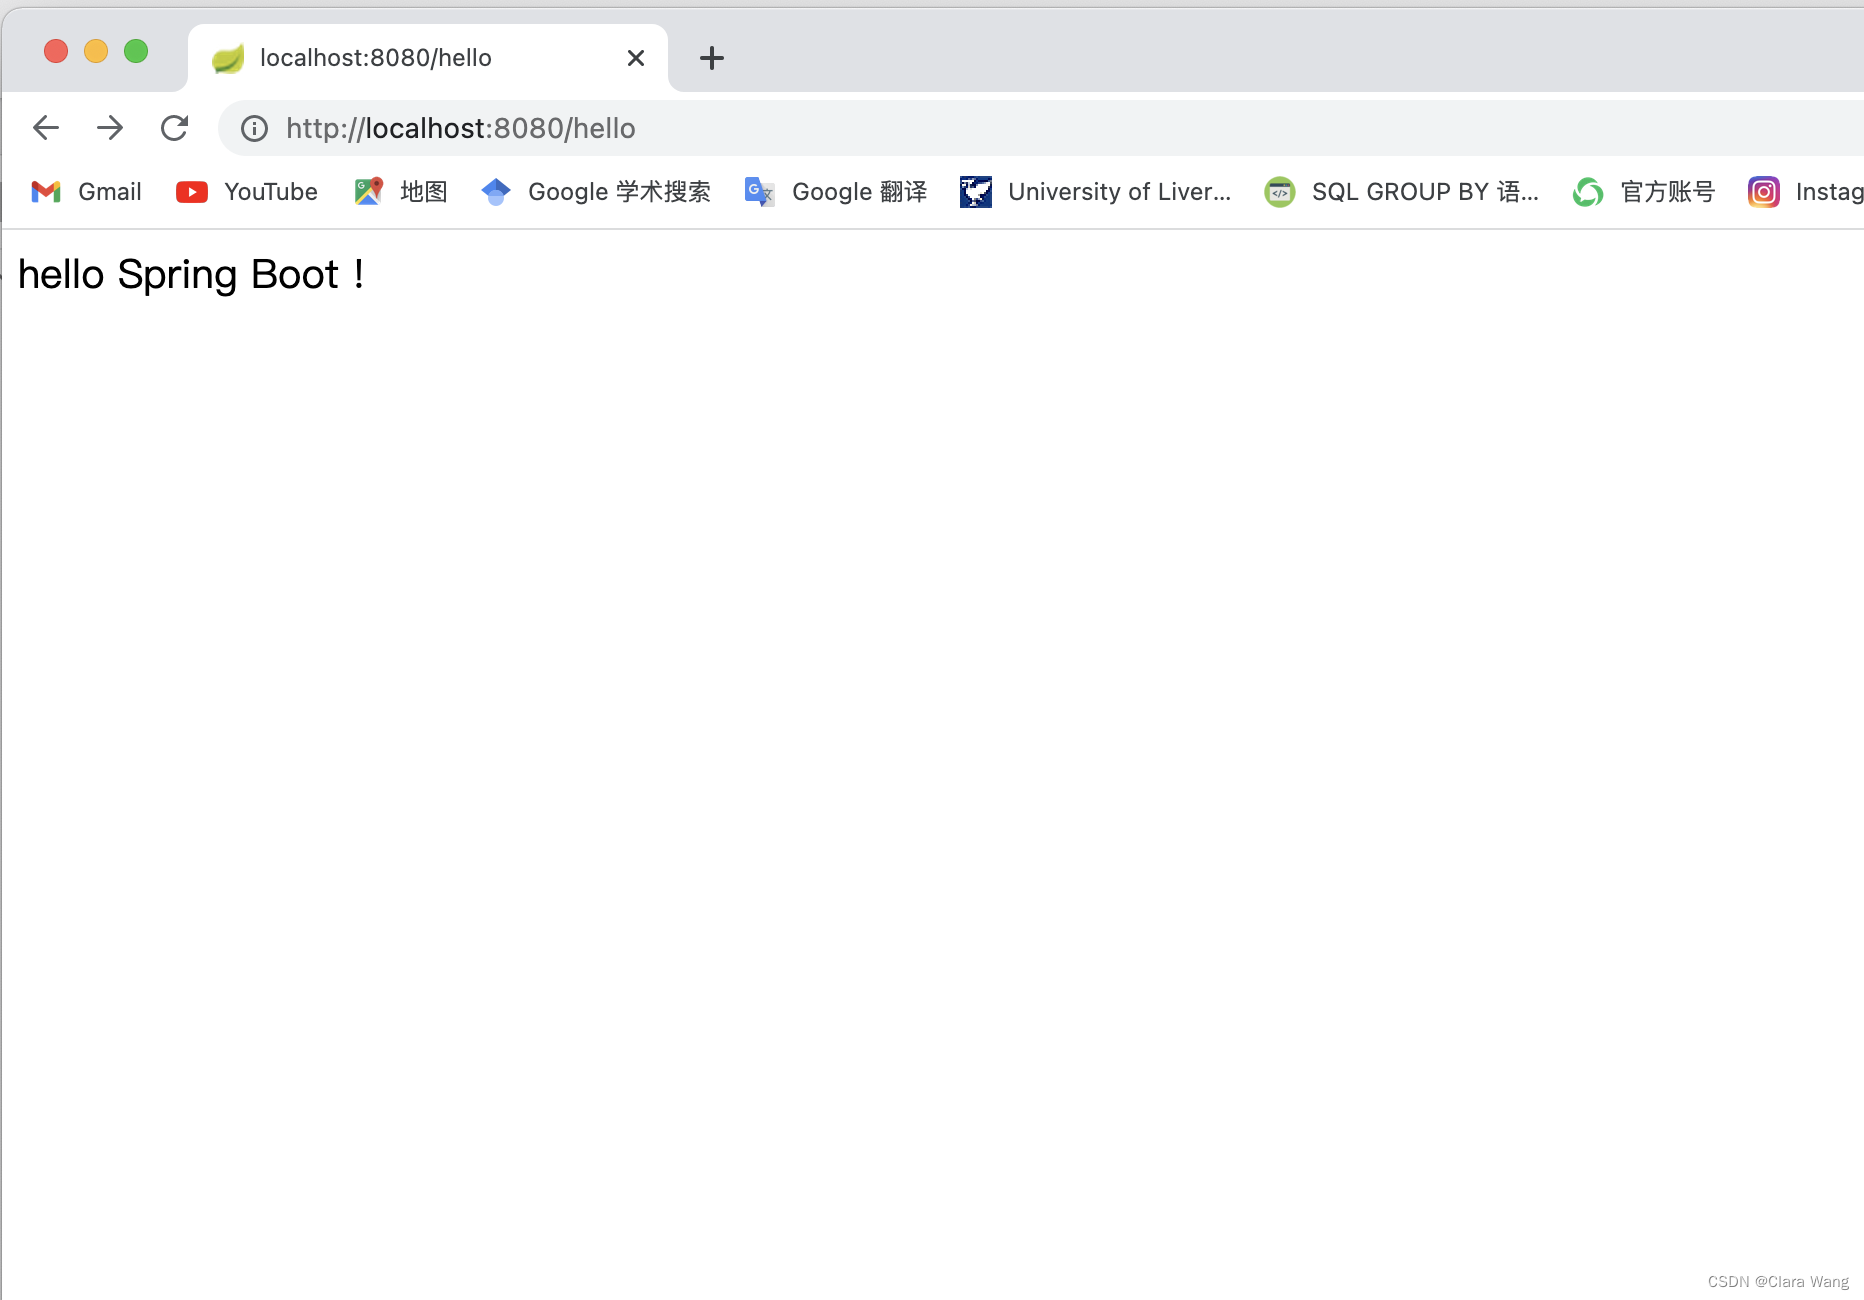
}5、启动运行project
默认端口号为8080,输入localhost:8080/hello
6、Yaml配置文件
- 大小写敏感
- 使用缩进表示层级关系(缩进只允许用空格,相同层级的元素左对齐)
- ‘#’ 表示注释
6.1 普通的值(数字、字符串、布尔):
key: value
name: abc"": 不会转义特殊字符
name: "123 \n abc" 输出:123 换行 abc
'': 转义特殊字符
name: "123 \n abc" 输出:123 \n abc
6.2 对象、Map
key: value
friend:
  lastname: abc
  age: 24

friend: {lastname: abc,age: 24}
6.3 数组(List, Set)
pets:
- cat
- dog
- pig
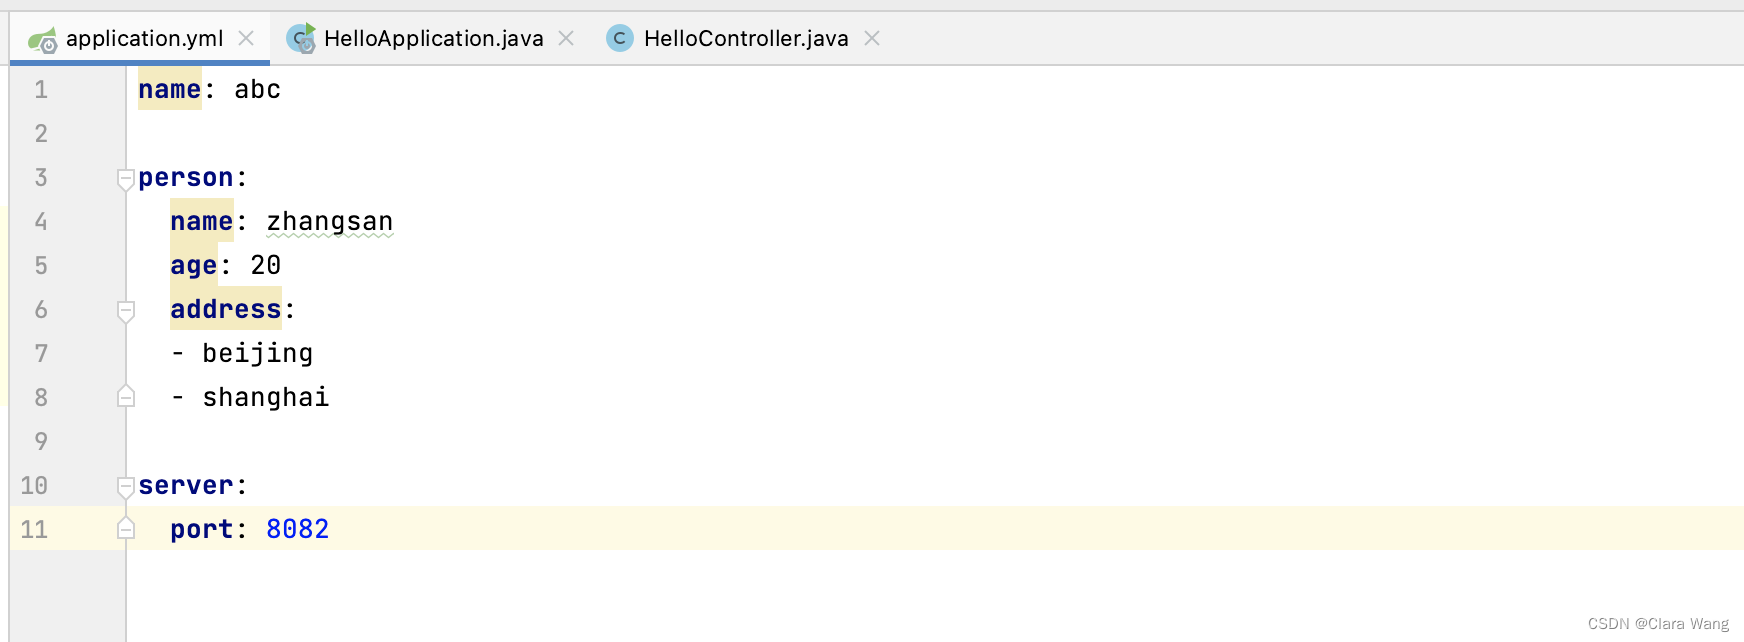
pets: [cat, dog, pig]6.4 yaml配置传参demo
通过yaml配置文件配置端口号,传入参数等
编写Controller类,依赖注入
@Value注解:用来映射配置文件中参数的值,可以写在实例变量、只有一个参数的实例方法(包括构造方法)、构造方法的参数上。
@Autowired注解:可以写在实例变量、有一个或多个参数的实例方法(包括构造方法),或者构造方法的参数上。
import org.springframework.beans.factory.annotation.Autowired;
import org.springframework.beans.factory.annotation.Value;
import org.springframework.web.bind.annotation.RequestMapping;
import org.springframework.web.bind.annotation.RestController;

@RestController
public class HelloController {

    @Value("${name}")
    private String name;

    @Autowired
    private Person person;

    @RequestMapping("/hello2")
    public String hello2() {

        System.out.println(name);
        System.out.println(person);
        String[] address = person.getAddress();
        for (String s : address) {
            System.out.println(s);
        }
        return "hello Spring Boot 222!";
    }
}
编写一个Java Bean :
通过@ConfigurationProperties(prefix = "")注解自动进行将配置文件中的对象与Java Bean映射
import org.springframework.boot.context.properties.ConfigurationProperties;
import org.springframework.stereotype.Component;
@Component
@ConfigurationProperties(prefix = "person")
public class Person {
private String name;
private int age;
private String[] address;
public String getName() {
return name;
}
public void setName(String name) {
this.name = name;
}
public int getAge() {
return age;
}
public void setAge(int age) {
this.age = age;
}
public String[] getAddress() {
return address;
}
public void setAddress(String[] address) {
this.address = address;
}
@Override
public String toString() {
return "Person{" +
"name='" + name + '\'' +
", age=" + age +
'}';
}
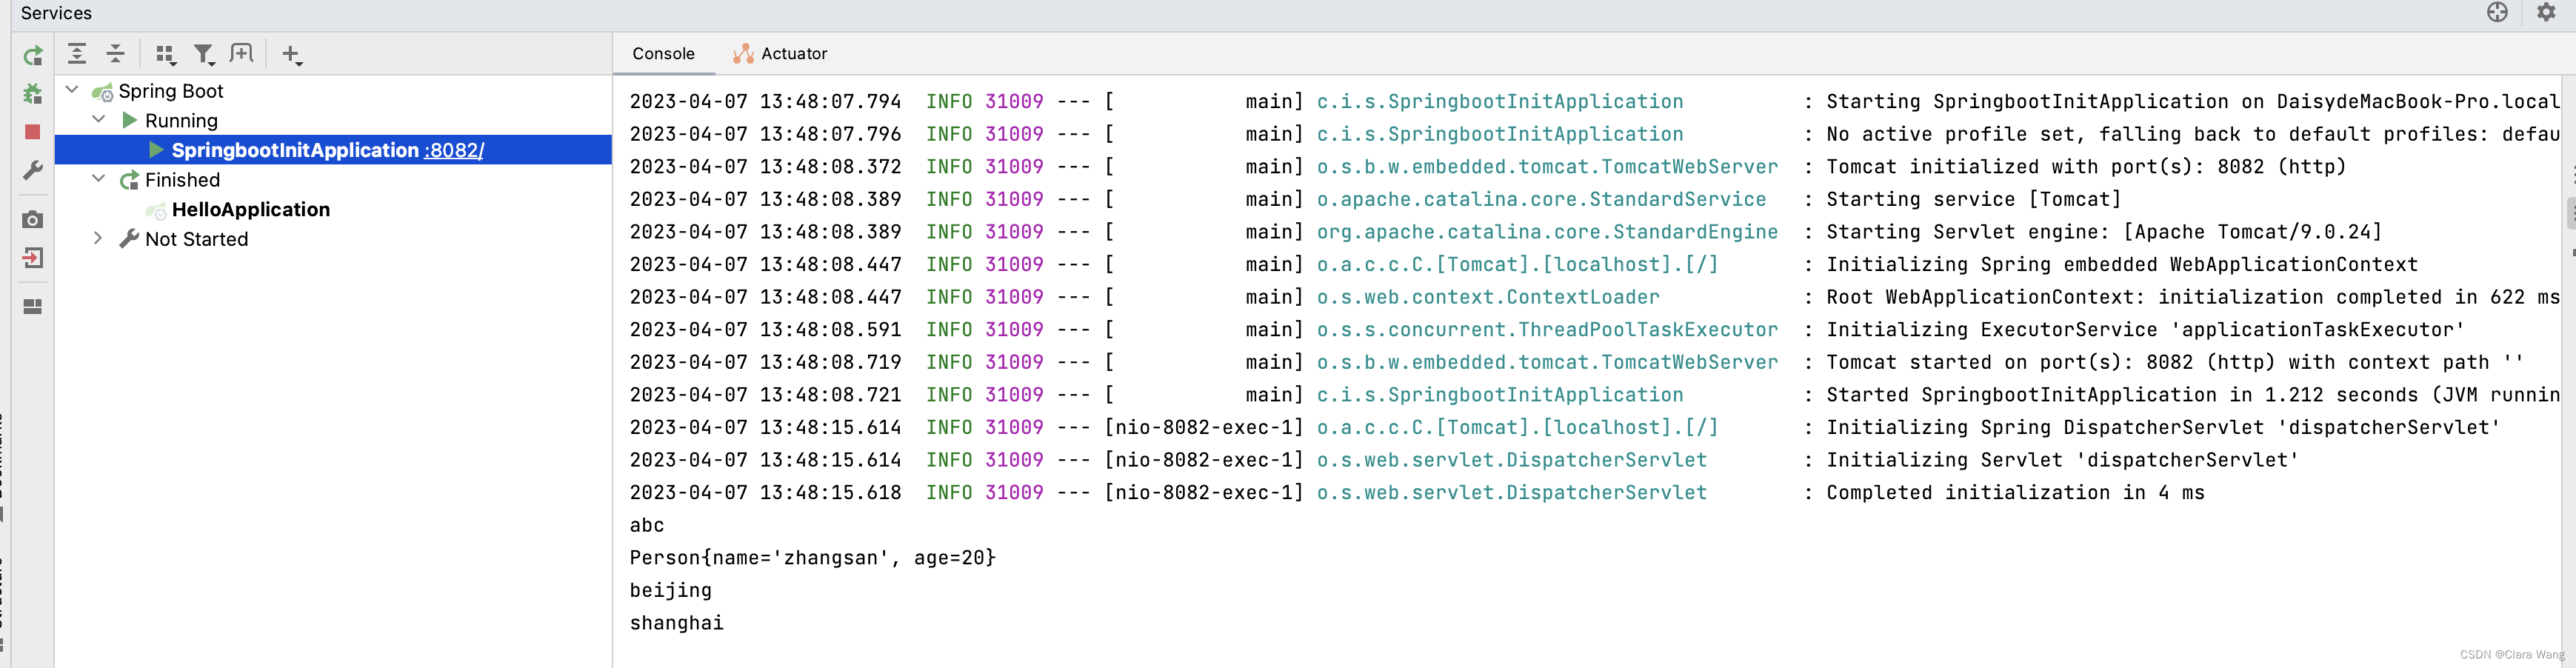
}运行Spring project,浏览器中输入地址

查看控制台输出:


 3729
3729


 被折叠的 条评论
为什么被折叠?
被折叠的 条评论
为什么被折叠?
 到【灌水乐园】发言


