在component工程中导入PageHelper的依赖
< dependency> < groupId> </ groupId> < artifactId> </ artifactId> </ dependency> Spring的配置文件中,在 SqlSessionFactoryBean 中配置 PageHelper 插件
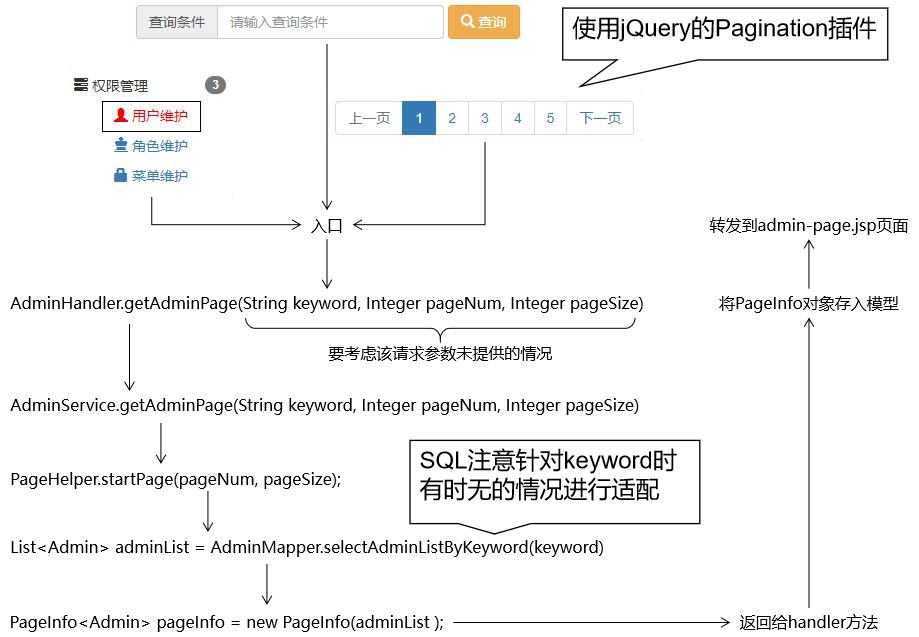
< beanid = " sqlSessionFactoryBean" class = " org.mybatis.spring.SqlSessionFactoryBean" > < propertyname = " dataSource" ref = " dataSource" /> < propertyname = " configLocation" value = " classpath:mybatis-config.xml" /> < propertyname = " mapperLocations" value = " classpath:mybatis/mapper/*Mapper.xml" /> < propertyname = " plugins" > < array> < beanclass = " com.github.pagehelper.PageHelper" > < propertyname = " properties" > < props> < propkey = " dialect" > </ prop> < propkey = " reasonable" > </ prop> </ props> </ property> </ bean> </ array> </ property> </ bean> 在AdminMapper接口中添加selectAdminByKeyword方法声明,该方法根据关键字搜索用户
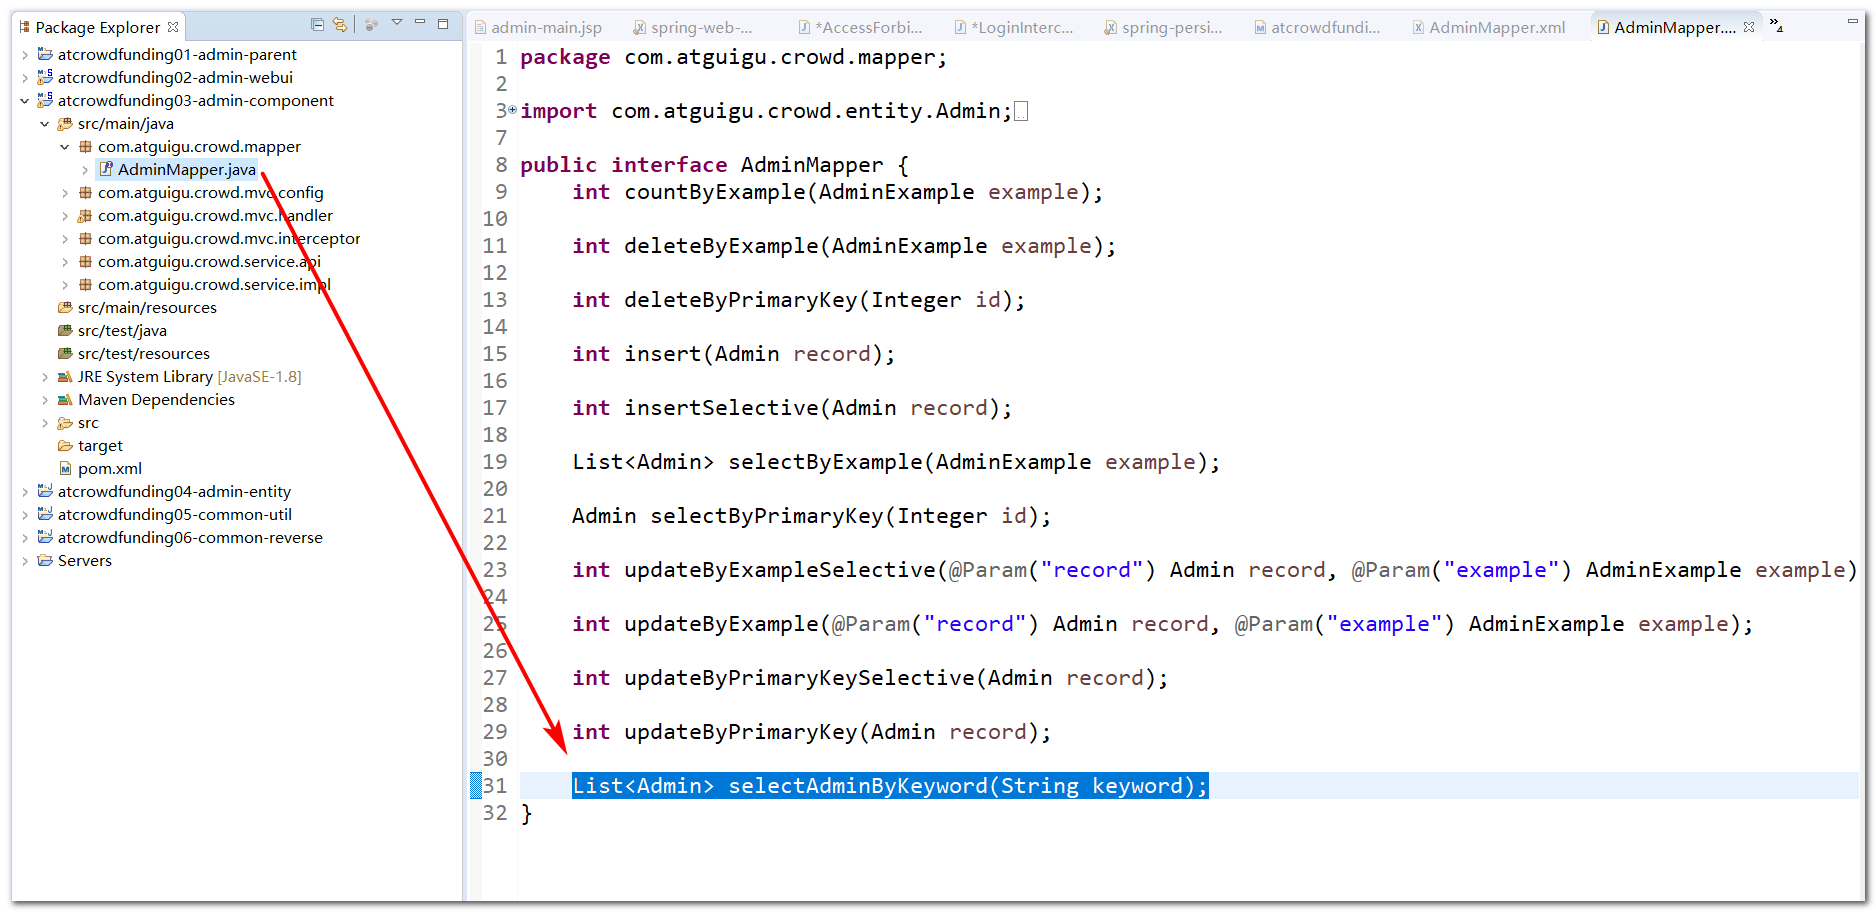
List< Admin> selectAdminByKeyword ( String keyword) ;
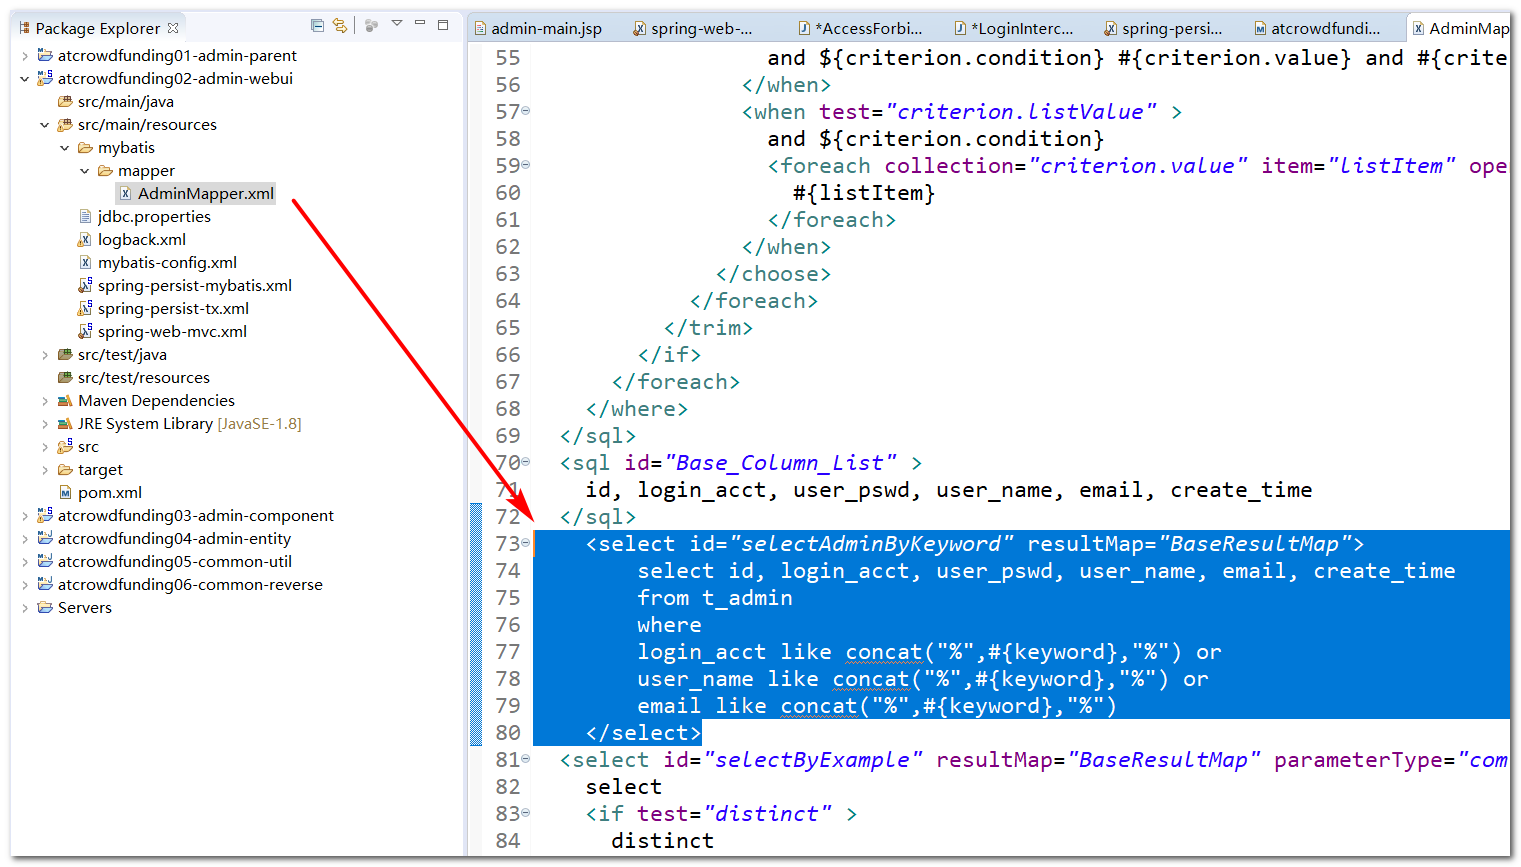
在AdminMapper.xml中添加selectAdminByKeyword方法对应的查询SQL语句
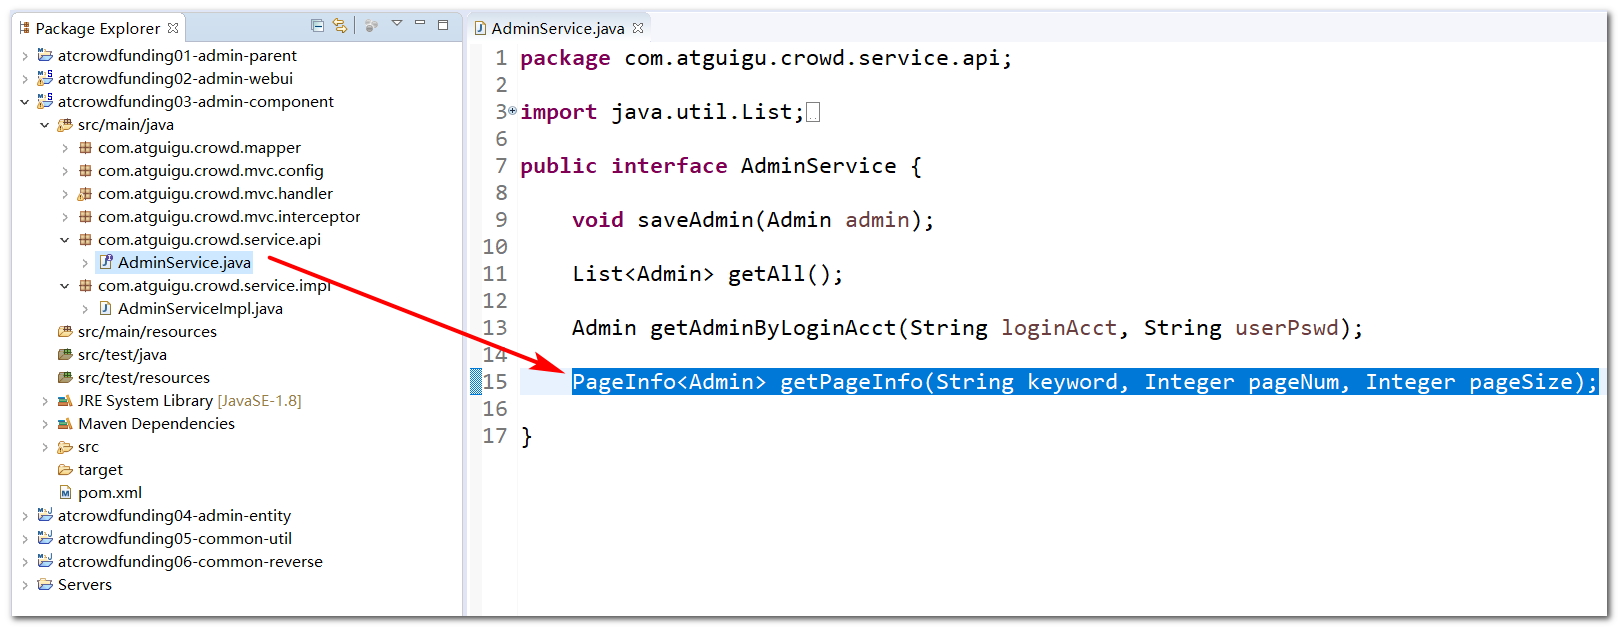
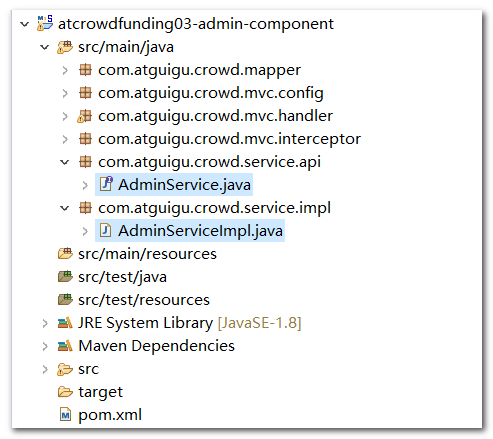
< selectid = " selectAdminByKeyword" resultMap = " BaseResultMap" > </ select> 在AdminService.java接口下添加getPageInfo方法,用于查询管理员分页数据
PageInfo< Admin> getPageInfo ( String keyword, Integer pageNum, Integer pageSize) ;
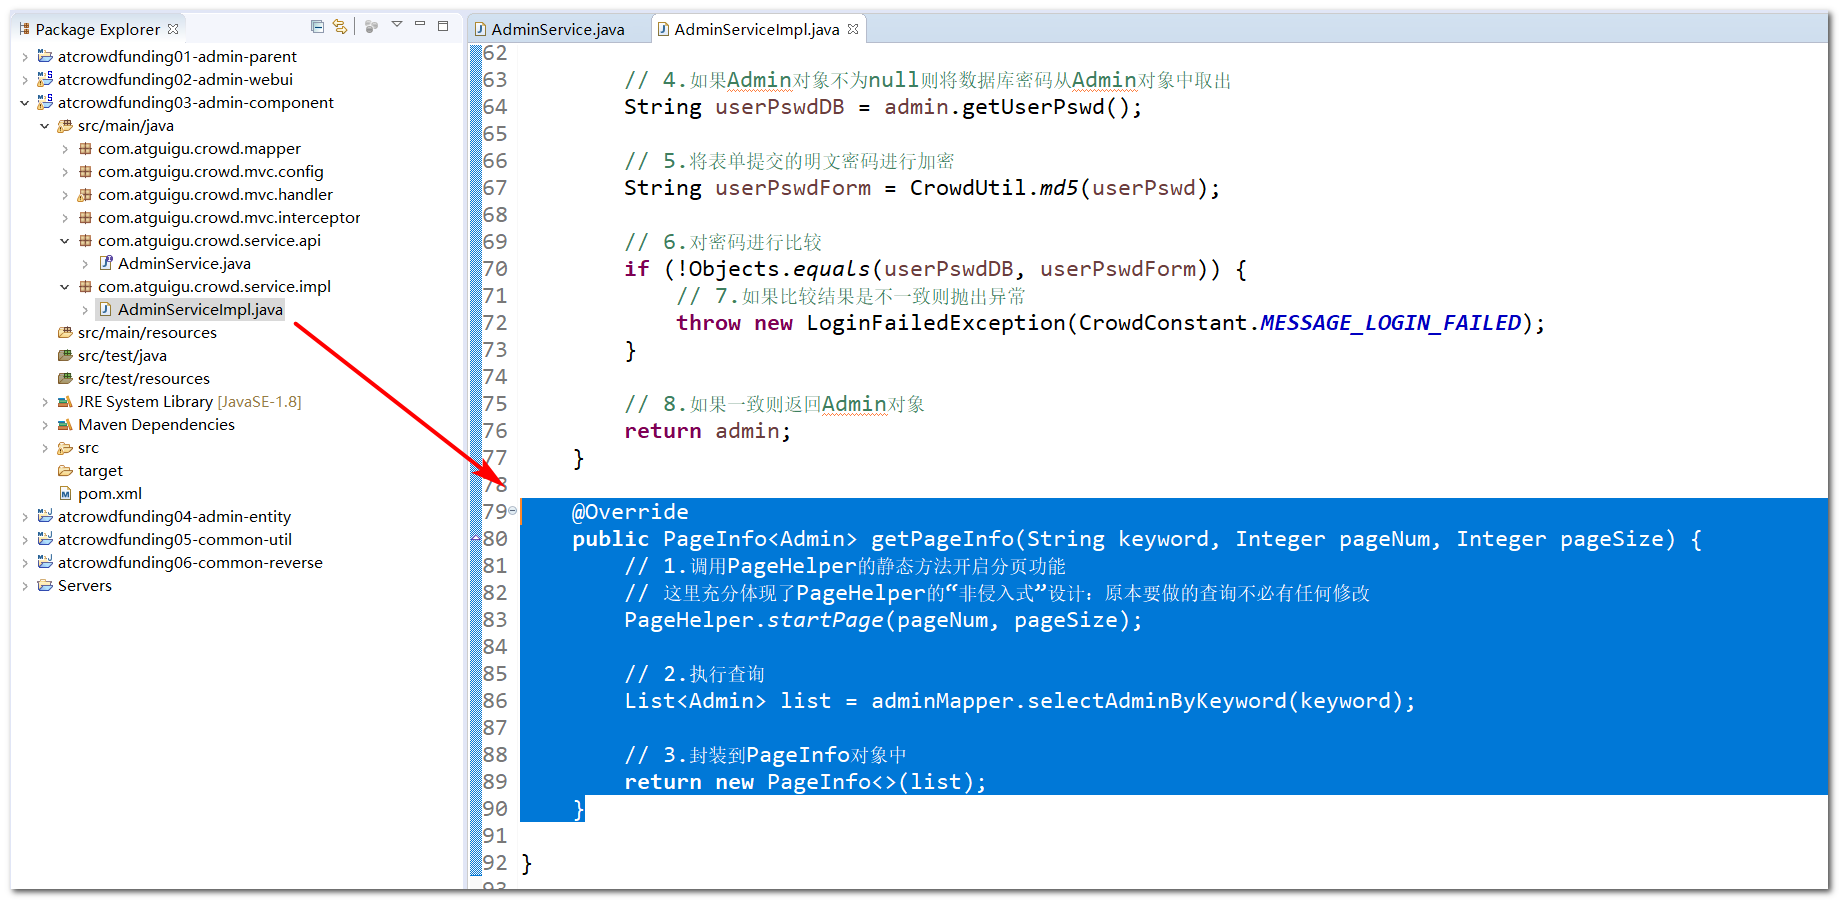
在AdminServiceImpl.java中实现上述方法
@Override
public PageInfo< Admin> getPageInfo ( String keyword, Integer pageNum, Integer pageSize) {
PageHelper. startPage ( pageNum, pageSize) ;
List< Admin> = adminMapper. selectAdminByKeyword ( keyword) ;
return new PageInfo < > ( list) ;
}
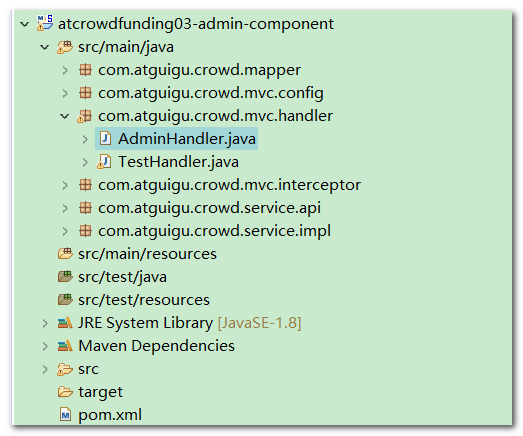
在AdminHandler调用AdminService获取数据
@RequestMapping ( "/admin/get/page.html" )
public String getPageInfo (
@RequestParam ( value= "keyword" , defaultValue= "" ) String keyword,
@RequestParam ( value= "pageNum" , defaultValue= "1" ) Integer pageNum,
@RequestParam ( value= "pageSize" , defaultValue= "5" ) Integer pageSize,
ModelMap modelMap
) {
PageInfo< Admin> = adminService. getPageInfo ( keyword, pageNum, pageSize) ;
modelMap. addAttribute ( CrowdConstant. ATTR_NAME_PAGE_INFO, pageInfo) ;
return "admin-page" ;
}
在component工程的pom文件中引入JSTL标签库依赖
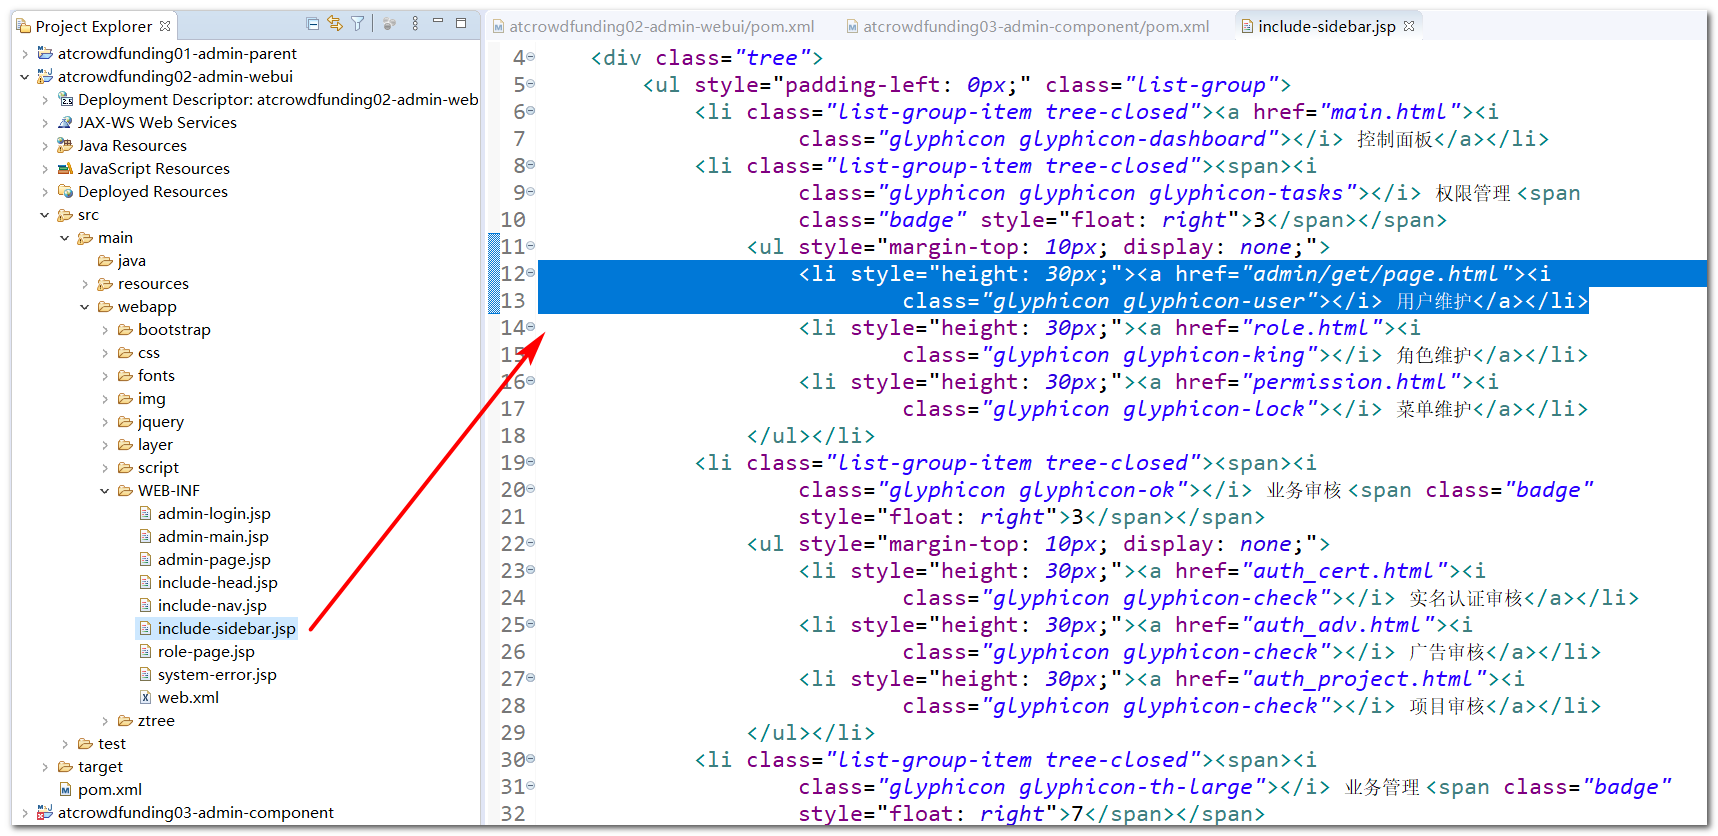
< dependency> < groupId> </ groupId> < artifactId> </ artifactId> </ dependency> 在include-sidebar.jsp页面中添加跳转地址
< li style =" height : 30px; " > < ahref = " admin/get/page.html" > < iclass = " glyphicon glyphicon-user" > </ i> </ a> </ li> 在admin-page.jsp页面中取出数据并显示
<%@ page language="java" contentType="text/html; charset=UTF-8"
pageEncoding="UTF-8"%>
<%@ taglib uri="http://java.sun.com/jsp/jstl/core" prefix="c"%>
<!DOCTYPE html>
< htmllang = " zh-CN" > < body> < divclass = " container-fluid" > < divclass = " row" > < divclass = " col-sm-9 col-sm-offset-3 col-md-10 col-md-offset-2 main" > < divclass = " panel panel-default" > < divclass = " panel-heading" > < h3class = " panel-title" > < iclass = " glyphicon glyphicon-th" > </ i> </ h3> </ div> < divclass = " panel-body" > < formclass = " form-inline" role = " form" style =" float : left; " > < divclass = " form-group has-feedback" > < divclass = " input-group" > < divclass = " input-group-addon" > </ div> < inputclass = " form-control has-success" type = " text" placeholder = " 请输入查询条件" > </ div> </ div> < buttontype = " button" class = " btn btn-warning" > < iclass = " glyphicon glyphicon-search" > </ i> </ button> </ form> < buttontype = " button" class = " btn btn-danger"
style =" float : right; margin-left : 10px; " > < iclass = " glyphicon glyphicon-remove" > </ i> </ button> < buttontype = " button" class = " btn btn-primary"
style =" float : right; " onclick = " window.location.href=' add.html' " > < iclass = " glyphicon glyphicon-plus" > </ i> </ button> < br> < hr style =" clear : both; " > < divclass = " table-responsive" > < tableclass = " table table-bordered" > < thead> < tr> < thwidth = " 30" > </ th> < thwidth = " 30" > < inputtype = " checkbox" > </ th> < th> </ th> < th> </ th> < th> </ th> < thwidth = " 100" > </ th> </ tr> </ thead> < tbody> < c: iftest = " ${empty requestScope.pageInfo.list }" > < tr> < tdcolspan = " 6" align = " center" > </ td> </ tr> </ c: if> < c: iftest = " ${!empty requestScope.pageInfo.list }" > < c: forEachitems = " ${requestScope.pageInfo.list }" var = " admin" varStatus = " myStatus" > < tr> < td> </ td> < td> < inputtype = " checkbox" > </ td> < td> </ td> < td> </ td> < td> </ td> < td> < buttontype = " button" class = " btn btn-success btn-xs" > < iclass = " glyphicon glyphicon-check" > </ i> </ button> < buttontype = " button" class = " btn btn-primary btn-xs" > < iclass = " glyphicon glyphicon-pencil" > </ i> </ button> < buttontype = " button" class = " btn btn-danger btn-xs" > < iclass = " glyphicon glyphicon-remove" > </ i> </ button> </ td> </ tr> </ c: forEach> </ c: if> </ tbody> < tfoot> < tr> < tdcolspan = " 6" align = " center" > < ulclass = " pagination" > < liclass = " disabled" > < ahref = " #" > </ a> </ li> < liclass = " active" > < ahref = " #" > < spanclass = " sr-only" > </ span> </ a> </ li> < li> < ahref = " #" > </ a> </ li> < li> < ahref = " #" > </ a> </ li> < li> < ahref = " #" > </ a> </ li> < li> < ahref = " #" > </ a> </ li> < li> < ahref = " #" > </ a> </ li> </ ul> </ td> </ tr> </ tfoot> </ table> </ div> </ div> </ div> </ div> </ div> </ div> </ body> </ html>
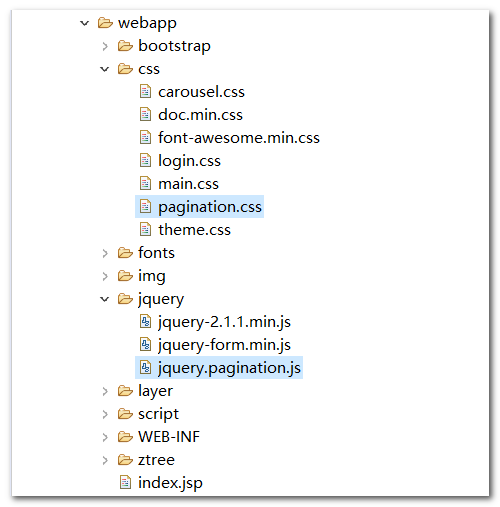
以上部分均为day02内容,以下部分才是day03内容 在webapp目录下引入Pagination所需要的js和css库
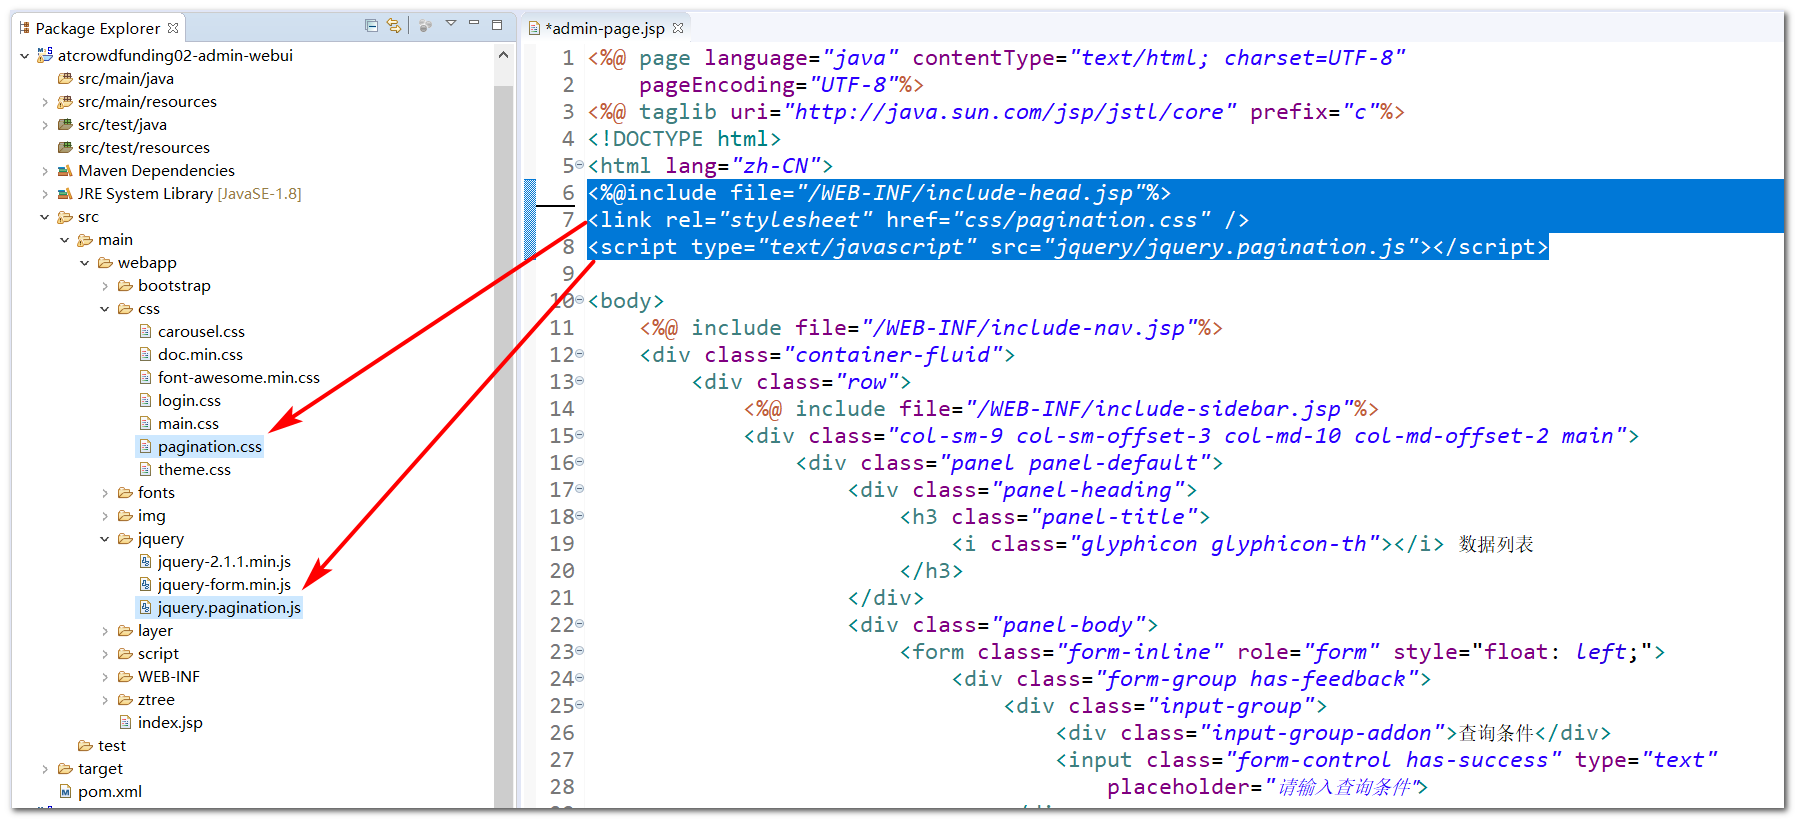
在admin-page.jsp页面引入相关的资源,由于<%@include%>引入了jQuery,将资源的引入jQuery的后面
<%@include file="/WEB-INF/include-head.jsp" %>
<link rel="stylesheet" href="css/pagination.css" />
<script type="text/javascript" src="jquery/jquery.pagination.js" ></script>
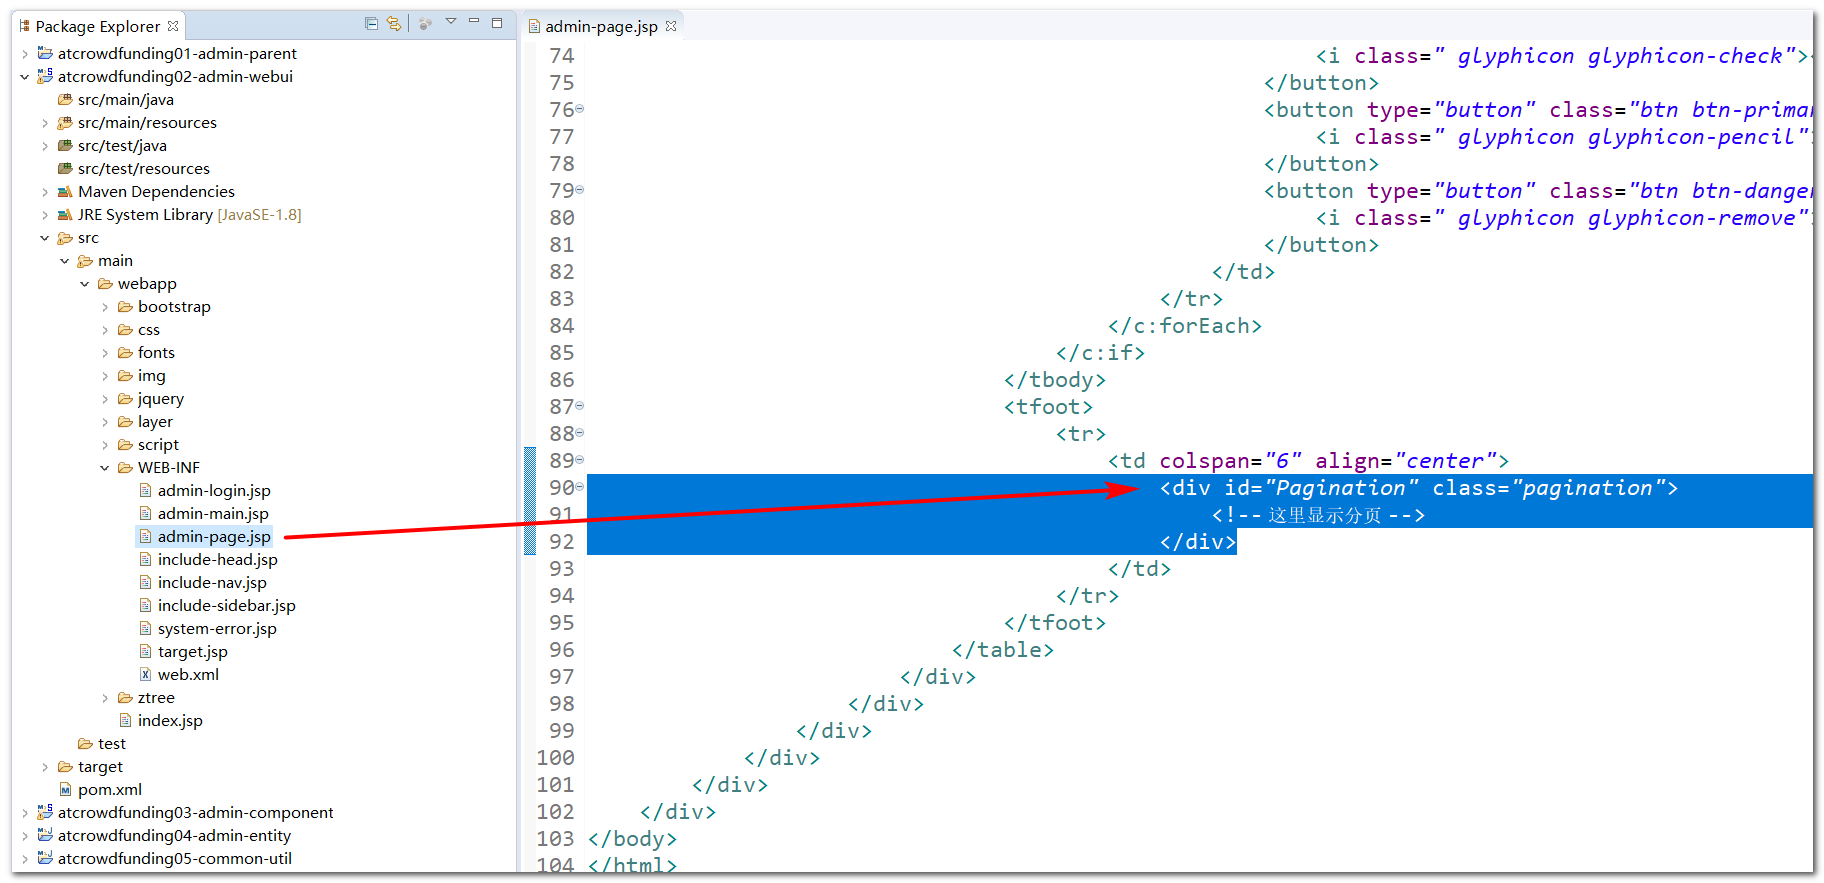
< tfoot> < tr> < tdcolspan = " 6" align = " center" > < divid = " Pagination" class = " pagination" > </ div> </ td> </ tr> </ tfoot> 2.4、使用Pagination
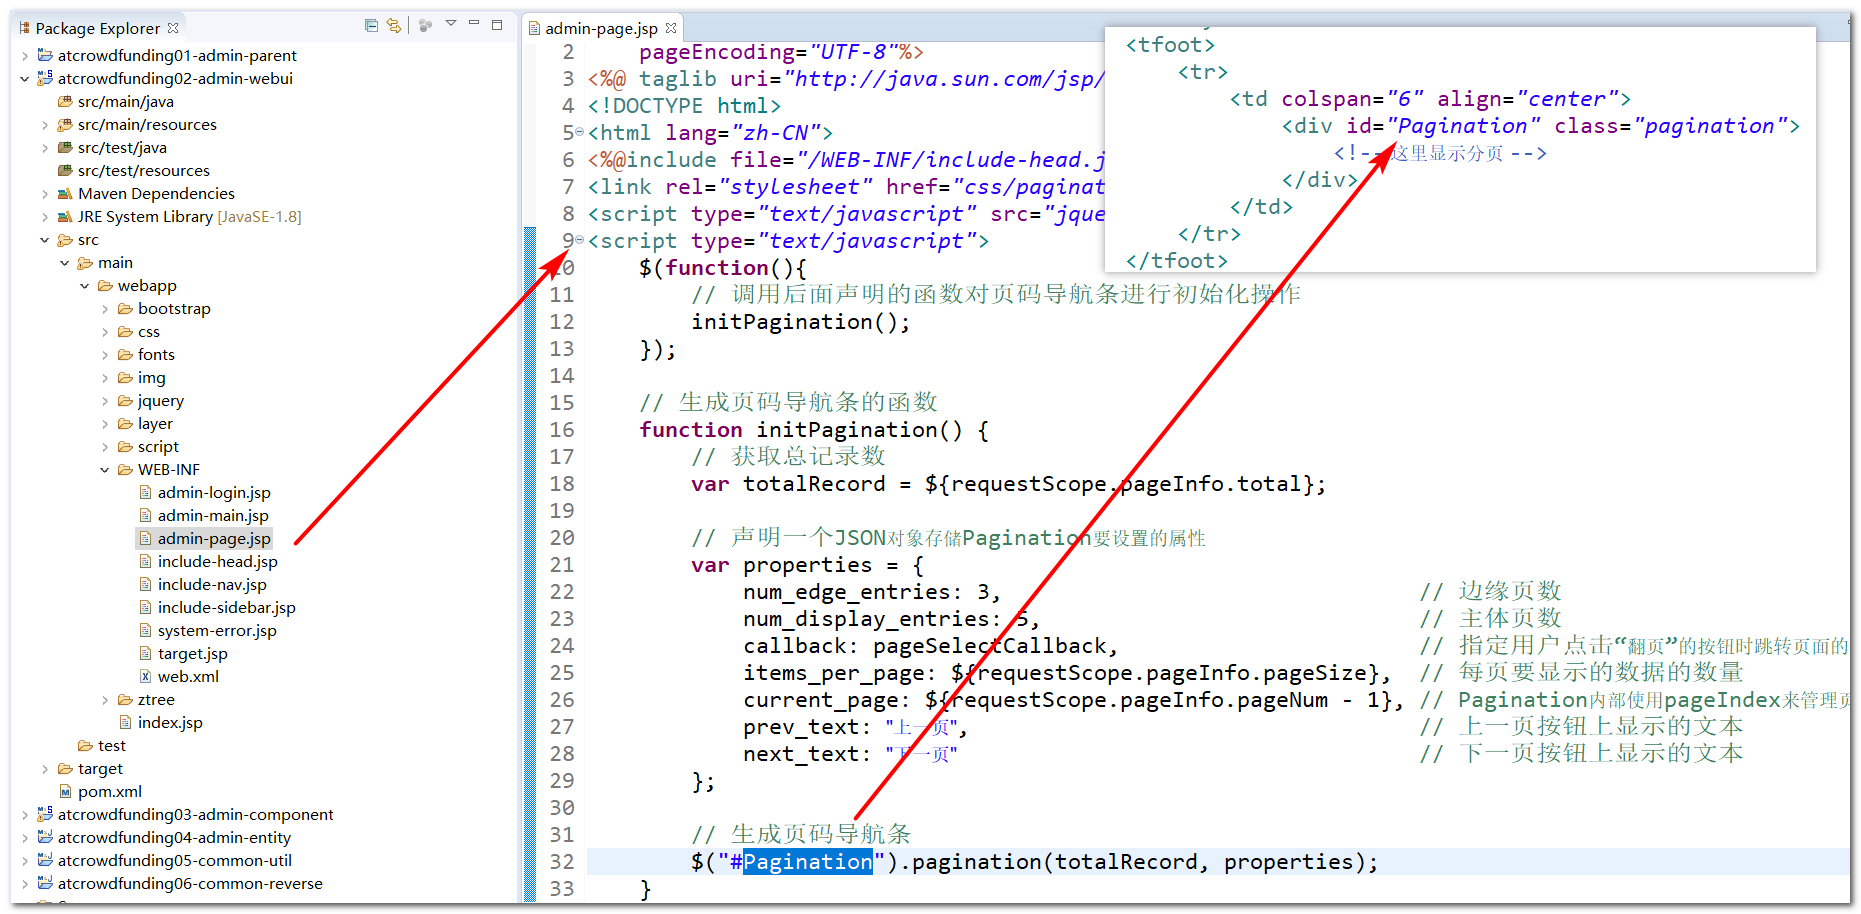
在admin-page.jsp页面下添加如下代码,使用Pagination生成分页条
<script type="text/javascript">
$(function() {
// 调用后面声明的函数对页码导航条进行初始化操作
initPagination ( ) ;
} ) ;
// 生成页码导航条的函数
function initPagination() {
// 获取总记录数
var totalRecord = $ { requestScope.pageInfo.total} ;
// 声明一个JSON对象存储Pagination要设置的属性
var properties = {
num_edge_entries: 3, // 边缘页数
num_display_entries: 5, // 主体页数
callback: pageSelectCallback, // 指定用户点击“翻页”的按钮时跳转页面的回调函数
items_per_page: $ { requestScope.pageInfo.pageSize} , // 每页要显示的数据的数量
current_page: $ { requestScope.pageInfo.pageNum - 1} , // Pagination内部使用pageIndex来管理页码,pageIndex从0开始,pageNum从1开始,所以要减一
prev_text : "上一页" , // 上一页按钮上显示的文本
next_text : "下一页" // 下一页按钮上显示的文本
} ;
// 生成页码导航条
$( "#Pagination" ) .pagination ( totalRecord, properties) ;
}
// 回调函数的含义:声明出来以后不是自己调用,而是交给系统或框架调用
// 用户点击“上一页、下一页、1、2、3……”这样的页码时调用这个函数实现页面跳转
// pageIndex是Pagination传给我们的那个“从0开始”的页码
function pageSelectCallback(pageIndex, jQuery) {
// 根据pageIndex计算得到pageNum
var pageNum = pageIndex + 1;
// 跳转页面
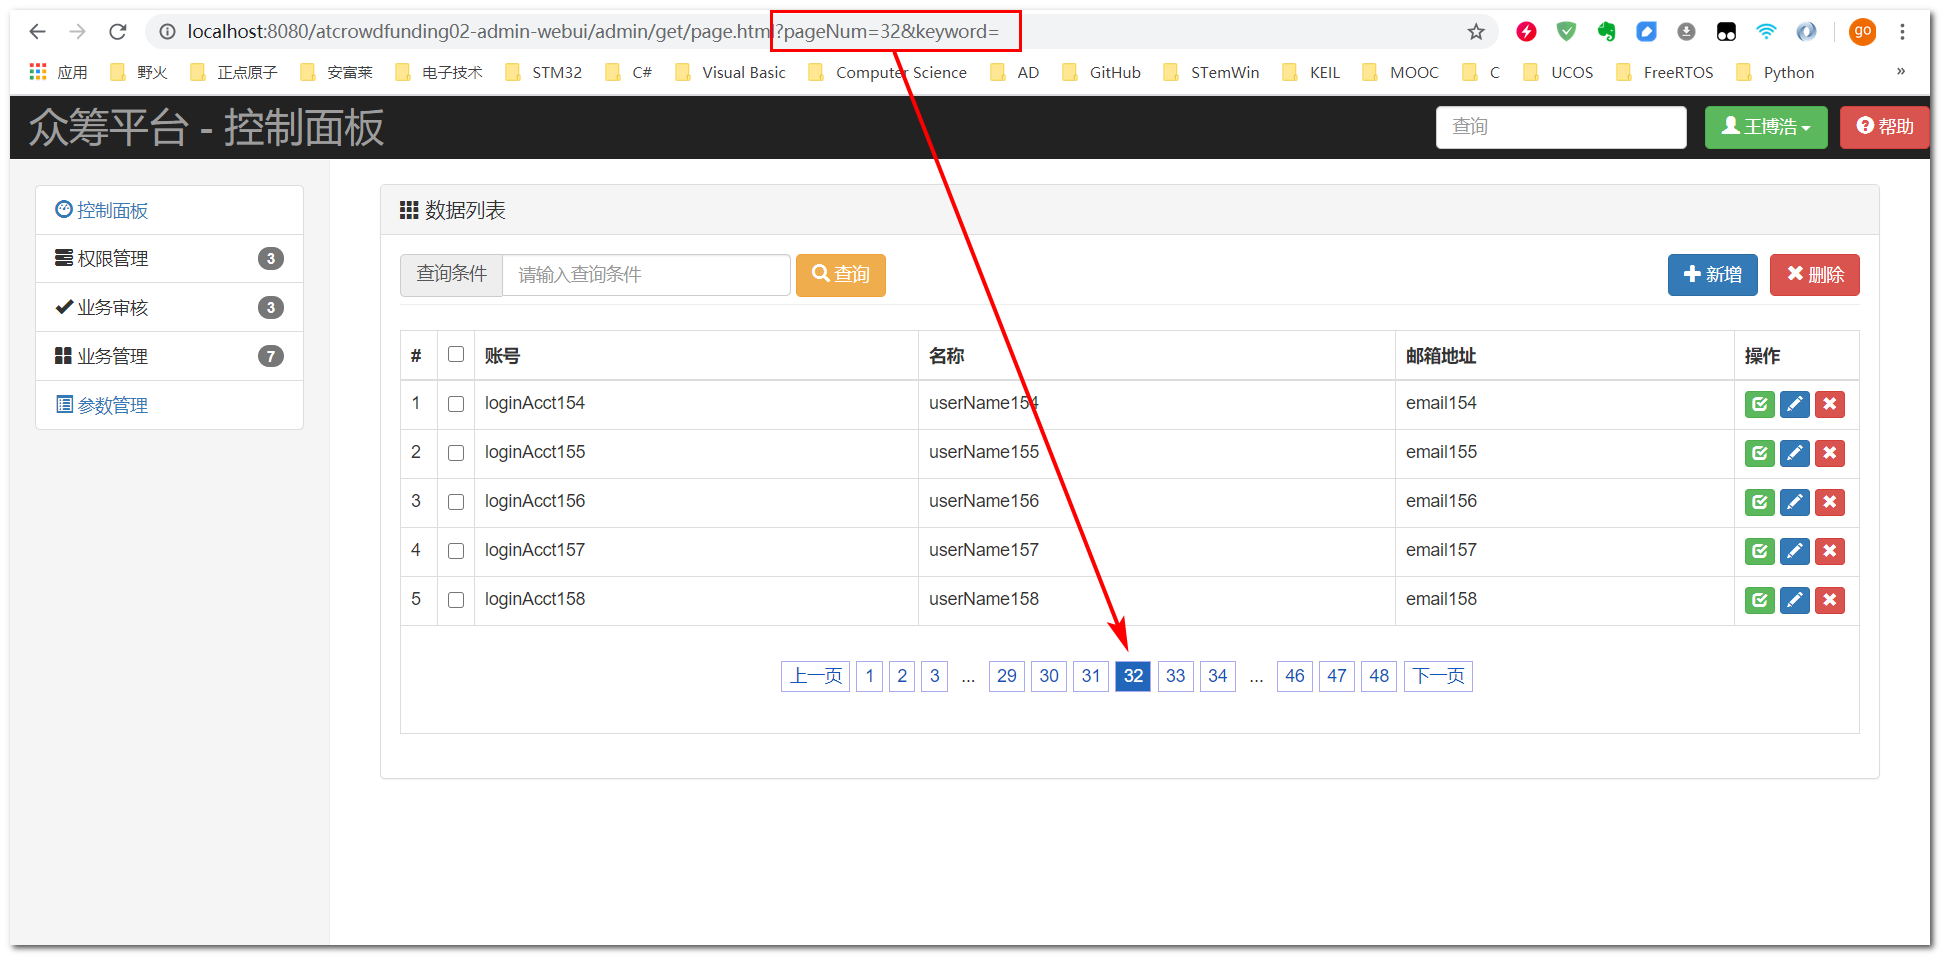
window.location.href = "admin/get/page.html?pageNum=" +pageNum;
// 由于每一个页码按钮都是超链接,所以在这个函数最后取消超链接的默认行为
return false;
}
</script>
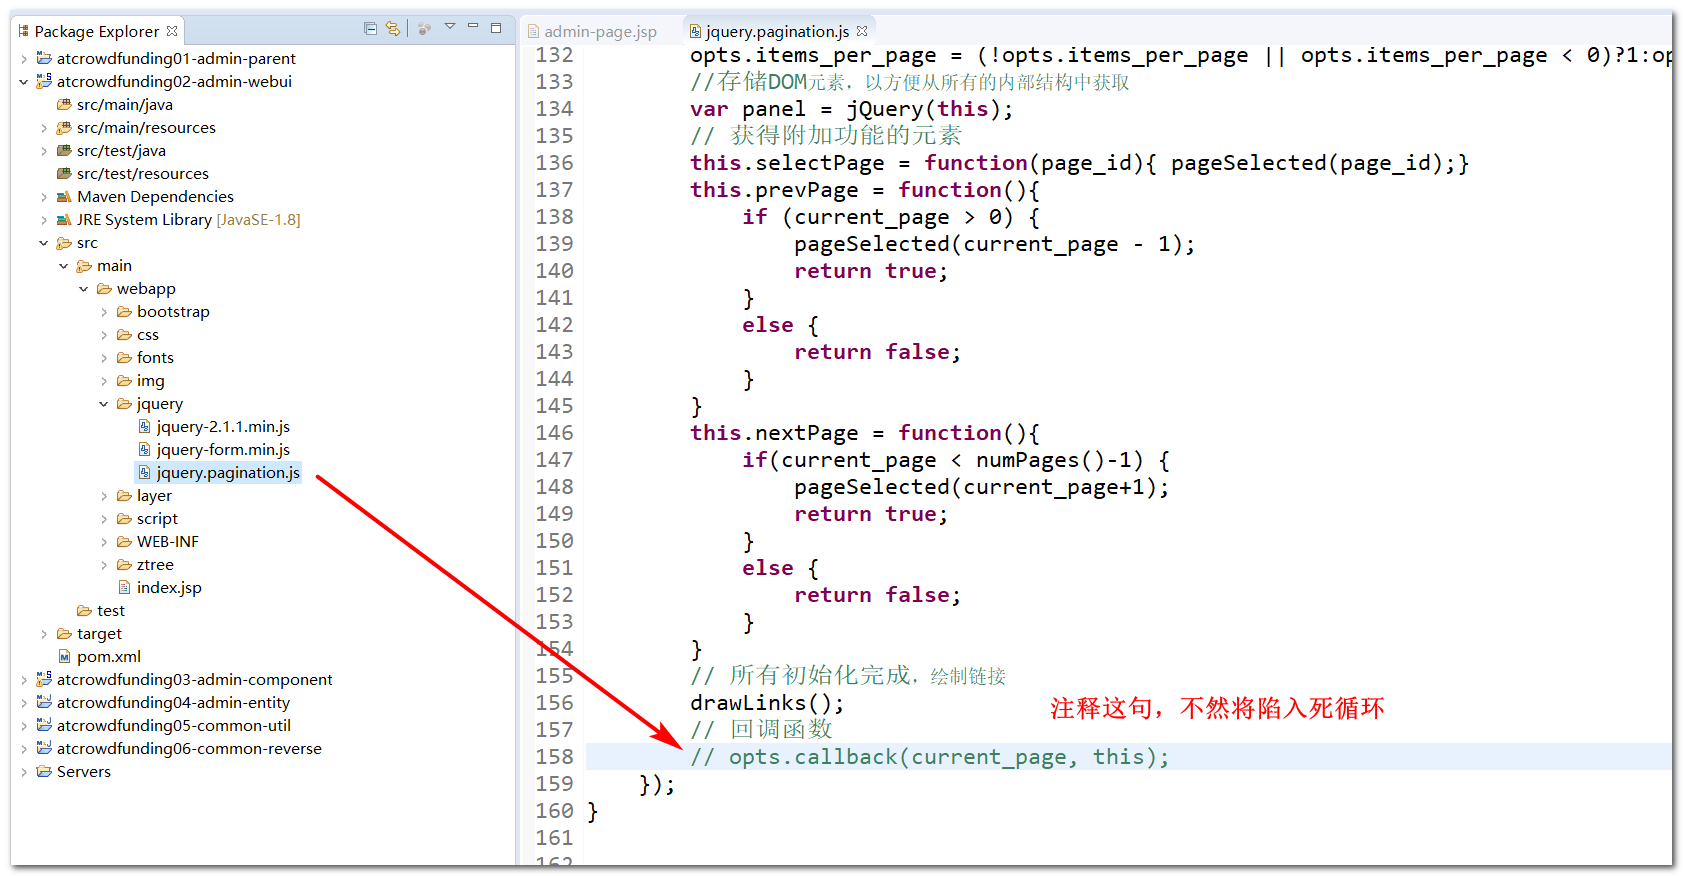
2.5、修复Pagination Bug
Bug产生原因:请求页面 --> 绘制分页条 --> 调用回调函数 --> 页面跳转 --> 请求页面 --> 绘制分页条 --> 调用回调函数 --> 页面跳转 … 就这样陷入了陷入死循环
修改admin-page.jsp中查询表单
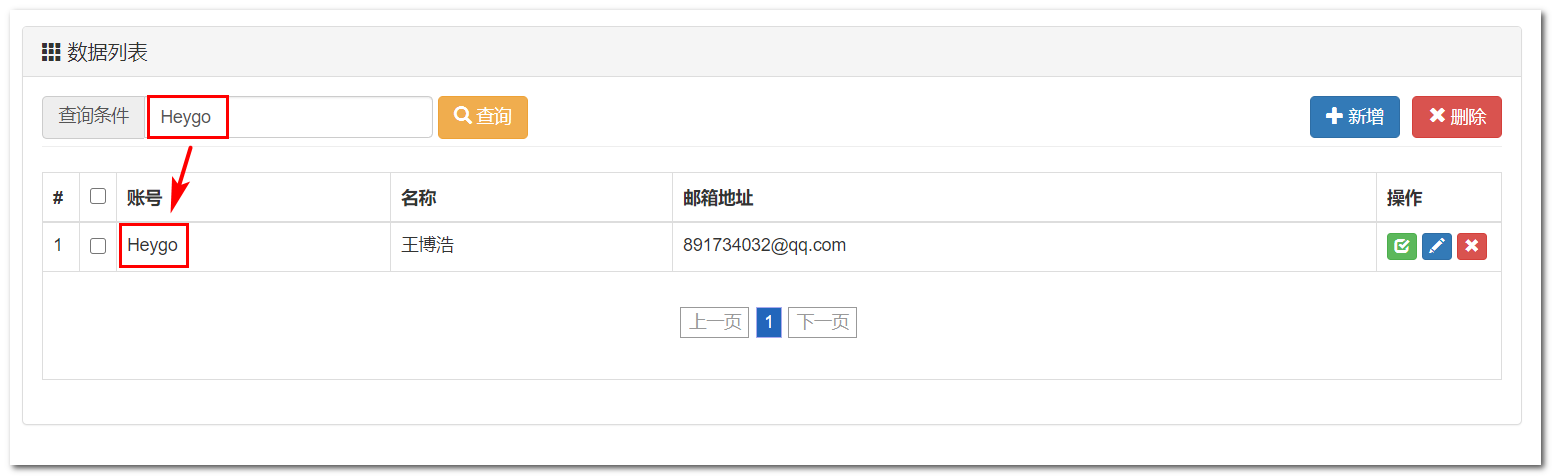
表单提交URI为admin/get/page.html <input name="keyword"/>:输入框名称需要与Handler参数名称对应<button type="submit">:submit按钮用于提交表单 < formaction = " admin/get/page.html" class = " form-inline" role = " form"
style =" float : left; " > < divclass = " form-group has-feedback" > < divclass = " input-group" > < divclass = " input-group-addon" > </ div> < inputname = " keyword" class = " form-control has-success" type = " text" placeholder = " 请输入查询条件" value = " ${param.keyword }" > </ div> </ div> < buttontype = " submit" class = " btn btn-warning" > < iclass = " glyphicon glyphicon-search" > </ i> </ button> </ form> 由于搜索关键词之后,并没有进行重定向操作,所以都是同一次请求,直接从请求参数中取出搜索关键词即可
< script type= "text/javascript" >
$ ( function ( ) {
initPagination ( ) ;
} ) ;
function initPagination ( ) {
var totalRecord = ${ requestScope. pageInfo. total} ;
var properties = {
num_edge_entries: 3 ,
num_display_entries: 5 ,
callback: pageSelectCallback,
items_per_page: ${ requestScope. pageInfo. pageSize} ,
current_page: ${ requestScope. pageInfo. pageNum - 1 } ,
prev_text: "上一页" ,
next_text: "下一页"
} ;
$ ( "#Pagination" ) . pagination ( totalRecord, properties) ;
}
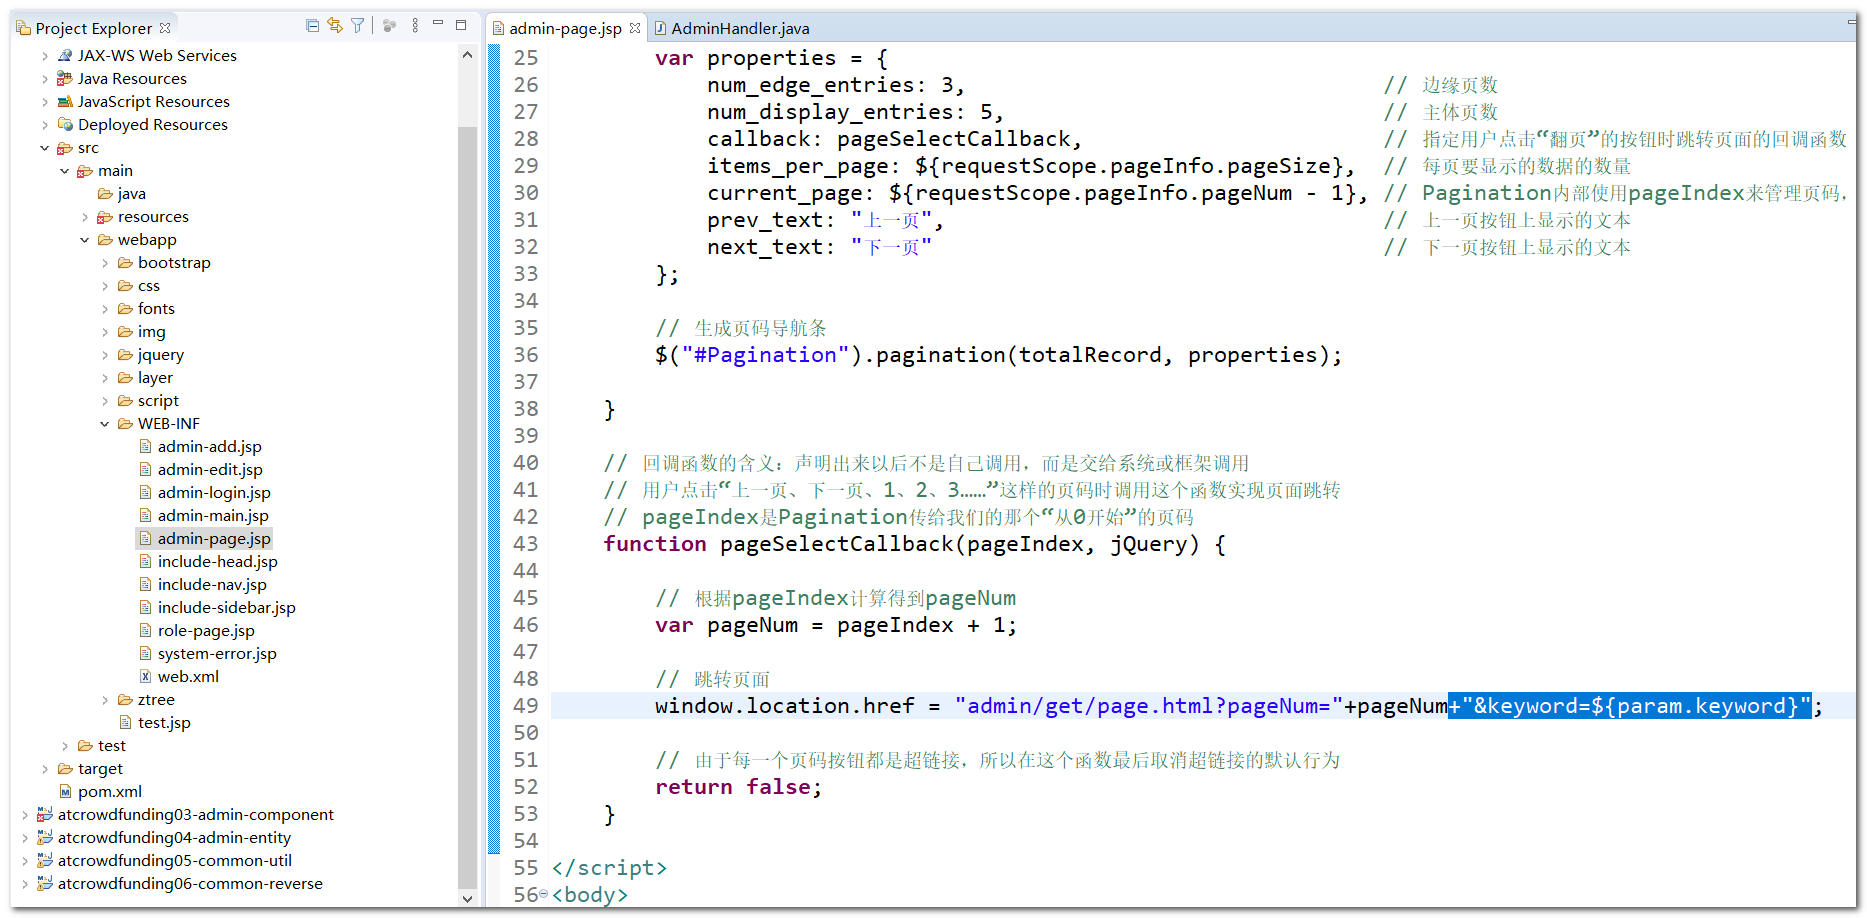
function pageSelectCallback ( pageIndex, jQuery) {
var pageNum = pageIndex + 1 ;
window. location. href = "admin/get/page.html?pageNum=" + pageNum+ "&keyword=${param.keyword}" ;
return false ;
}
< / script>
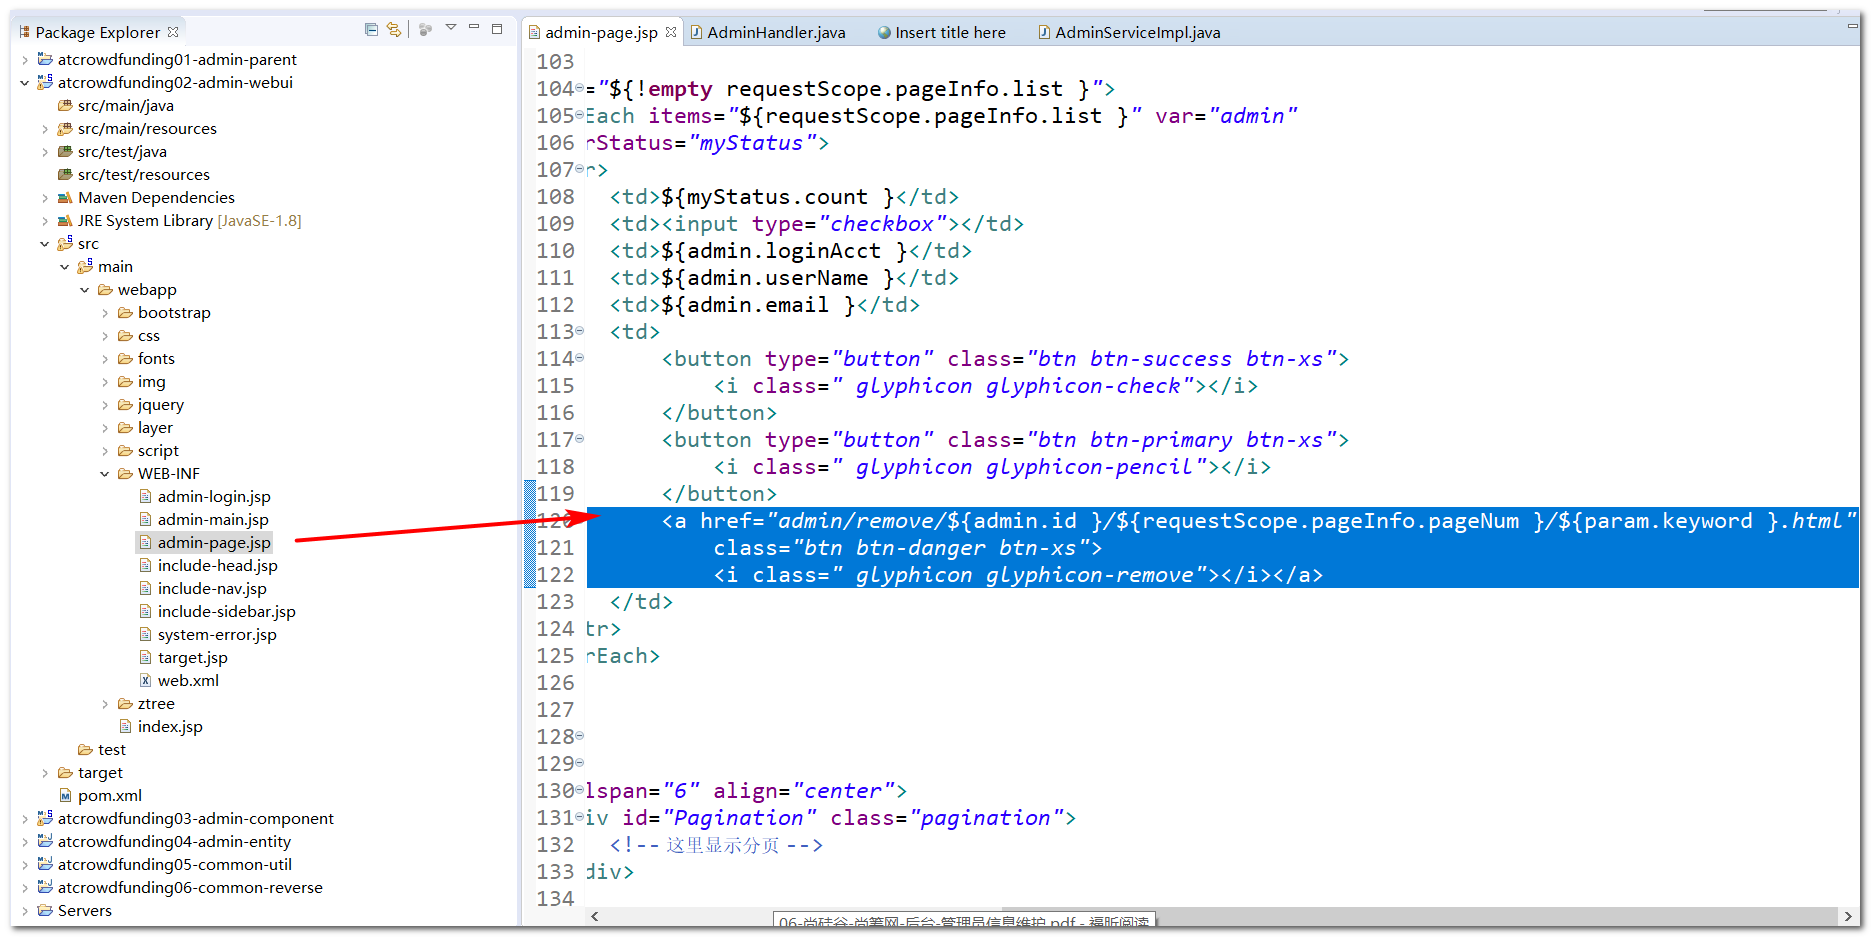
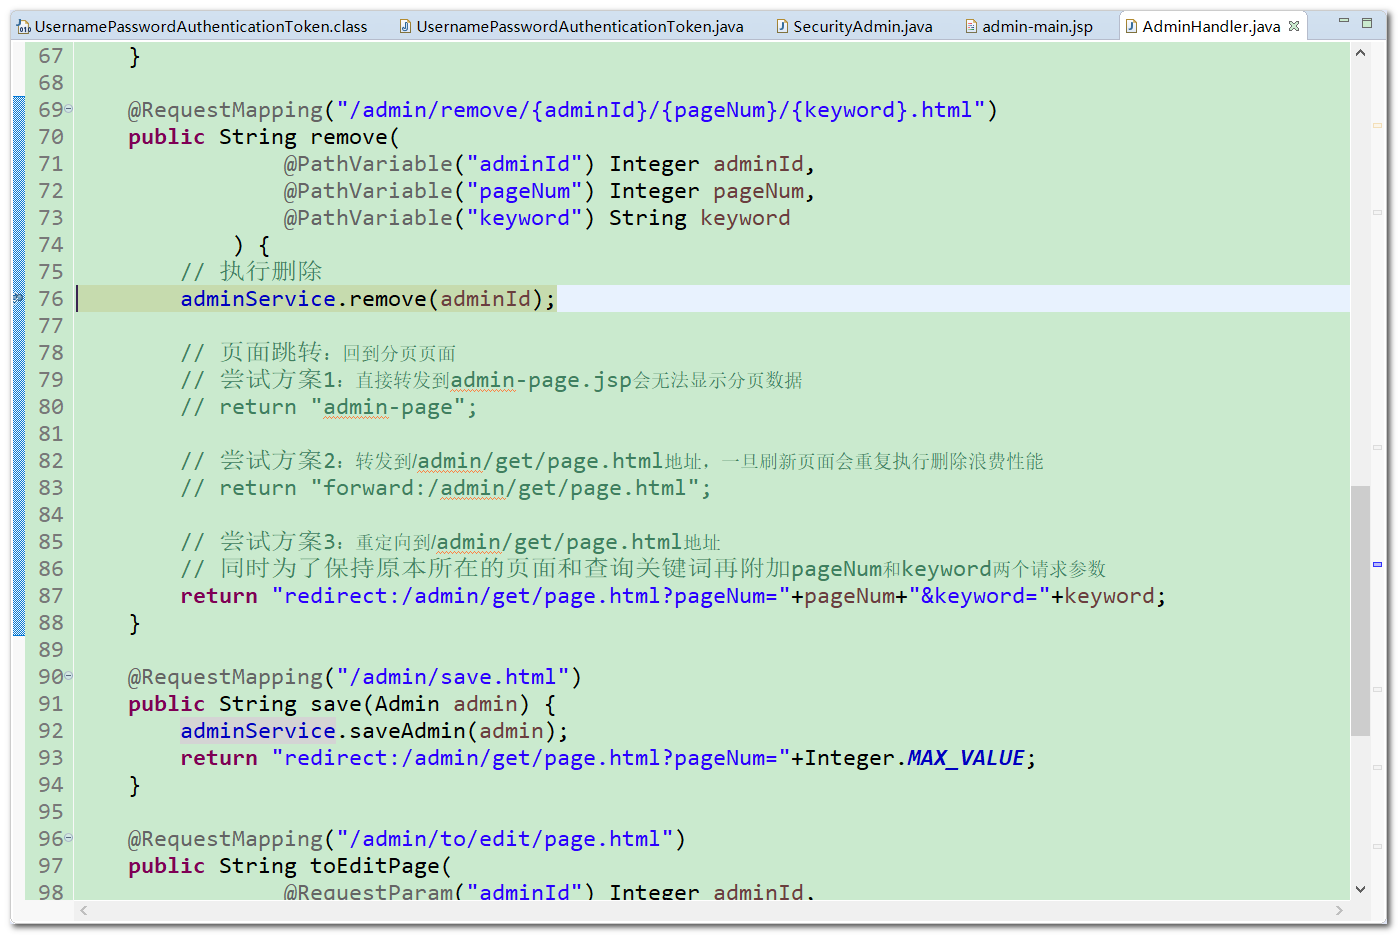
在admin-page.jsp页面,添加提交删除请求的a标签,删除管理员时,除了要携带管理员Id:id,还需要附带当前页码:pageNum,当前查询关键词:keyword
< ahref = " admin/remove/${admin.id }/${requestScope.pageInfo.pageNum }/${param.keyword }.html" class = " btn btn-danger btn-xs" > < iclass = " glyphicon glyphicon-remove" > </ i> </ a> 在AdminHandler中添加remove方法,从路径变量中取出所需的参数即可
@RequestMapping ( "/admin/remove/{adminId}/{pageNum}/{keyword}.html" )
public String remove (
@PathVariable ( "adminId" ) Integer adminId,
@PathVariable ( "pageNum" ) Integer pageNum,
@PathVariable ( "keyword" ) String keyword
) {
adminService. remove ( adminId) ;
return "redirect:/admin/get/page.html?pageNum=" + pageNum+ "&keyword=" + keyword;
}
在Service接口中声明remove方法,在Service实现类中实现remove方法
@Override
public void remove ( Integer adminId) {
adminMapper. deleteByPrimaryKey ( adminId) ;
}
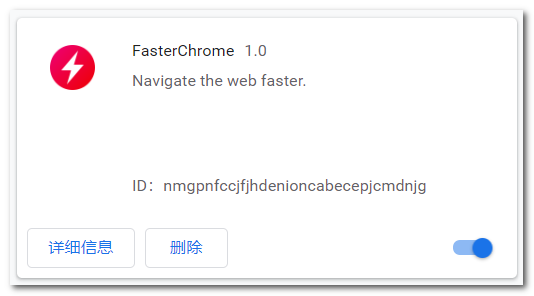
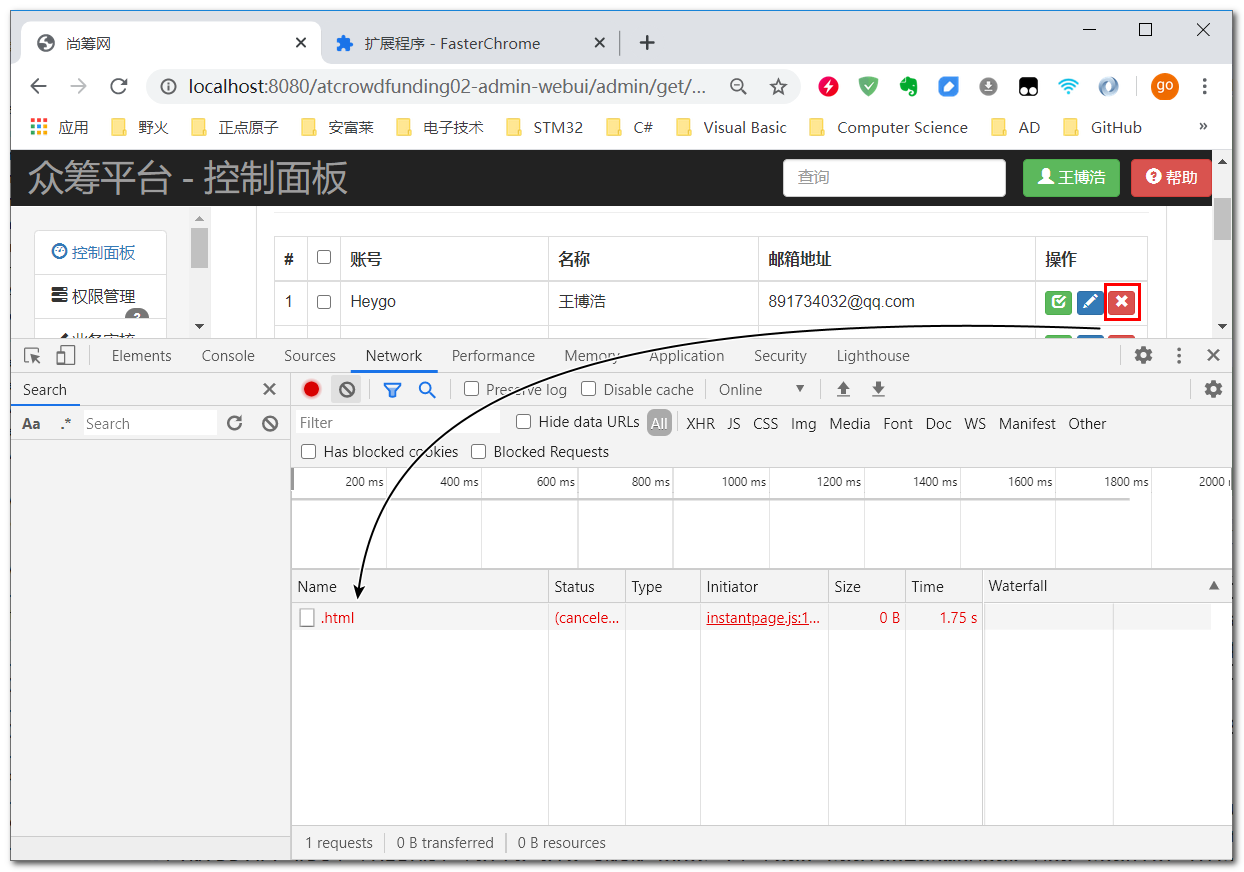
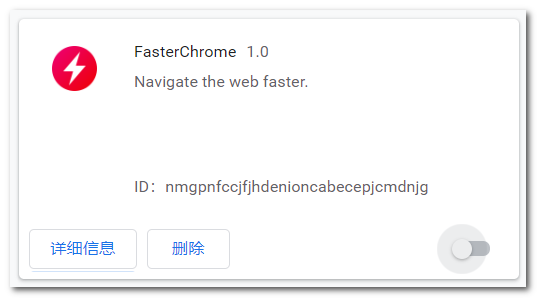
莫名其妙会执行删除管理员的操作,但是我并没有执行删除操作。。。 特么居然是因为FasterChrome插件,只要你鼠标悬停有超链接的标签上,这个插件会预先发送请求给服务器,并接受服务器的请求,以缓存方式保存,等到你点击时,便会直接从缓存中取出数据,让你纵享丝滑~~~
恰好删除按钮并没有写JS代码,只要鼠标悬停在删除按钮上,便会触发删除请求,我特么的,终于知道为什么t_admin表中的数据莫名其妙地消失了。。。
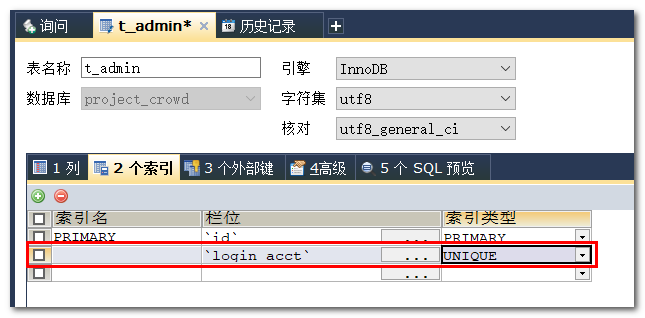
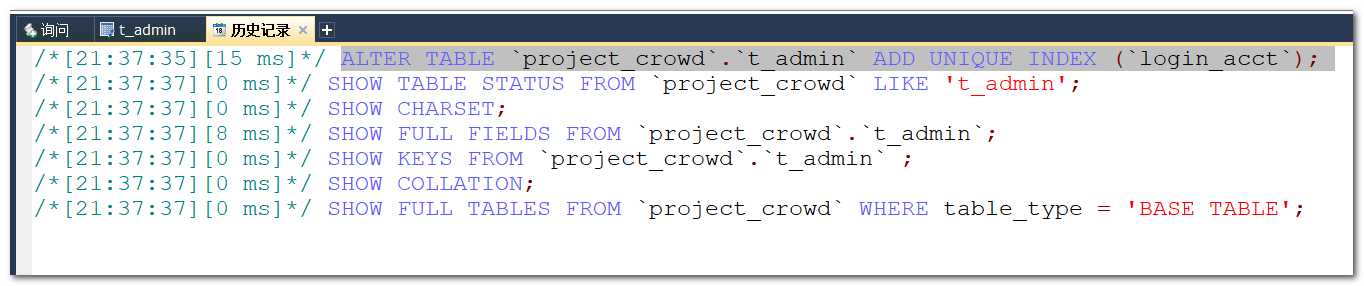
ALTER TABLE ` project_crowd` . ` t_admin` ADD UNIQUE INDEX ( ` login_acct` ) ;
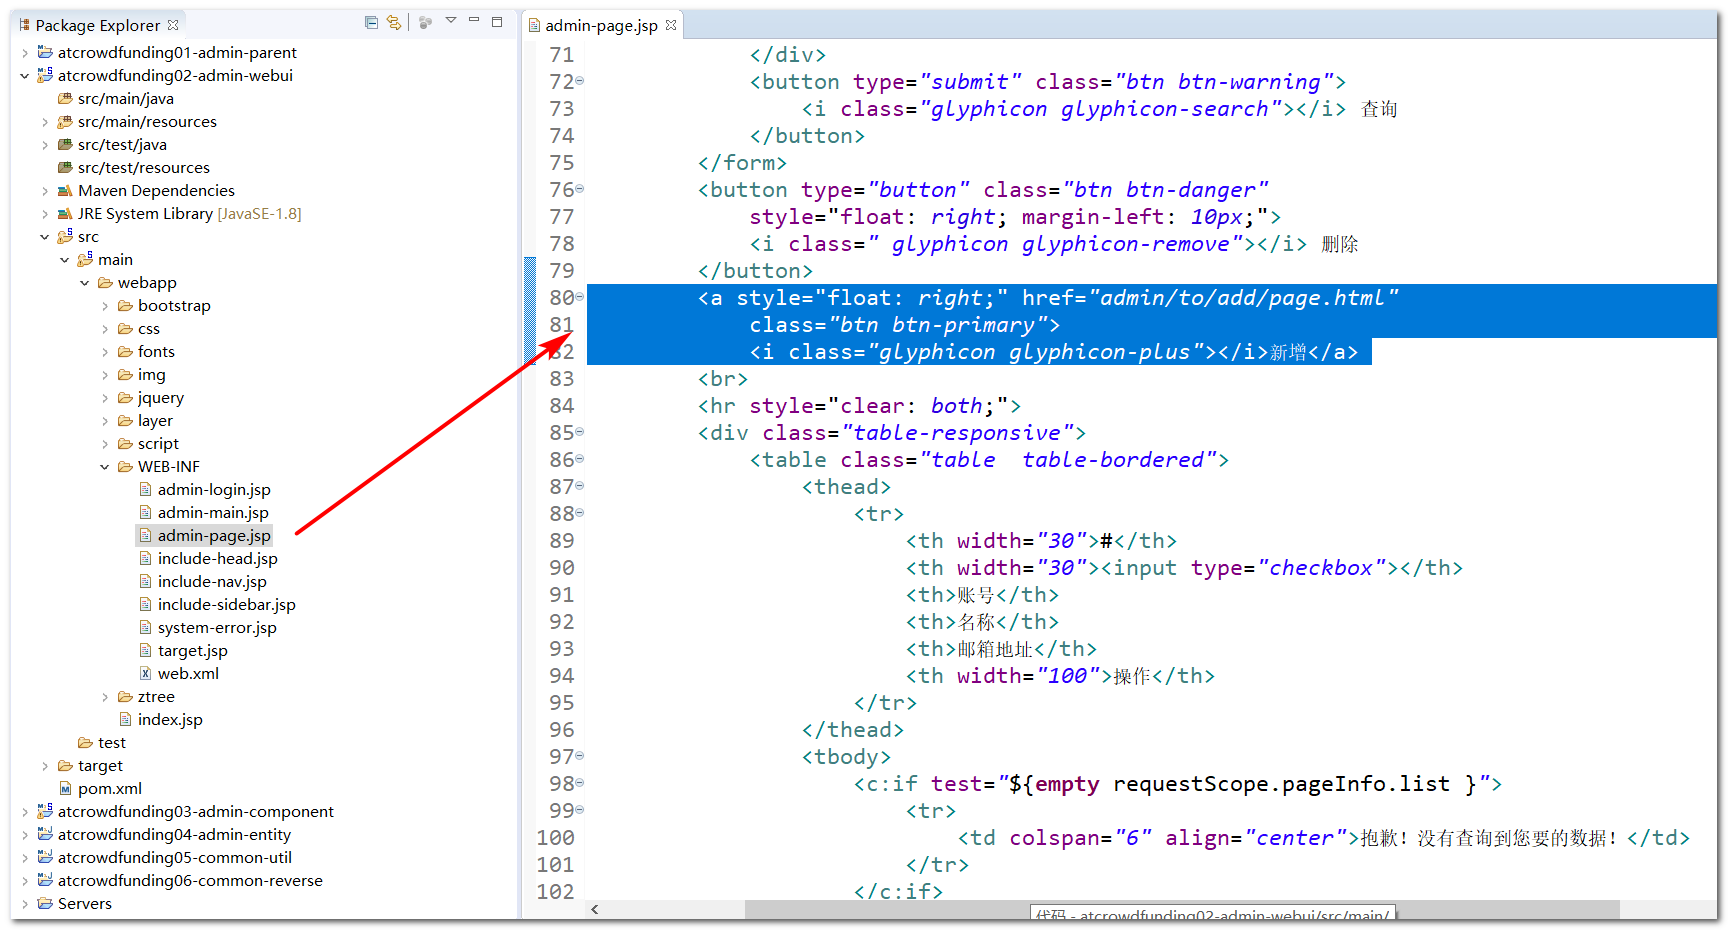
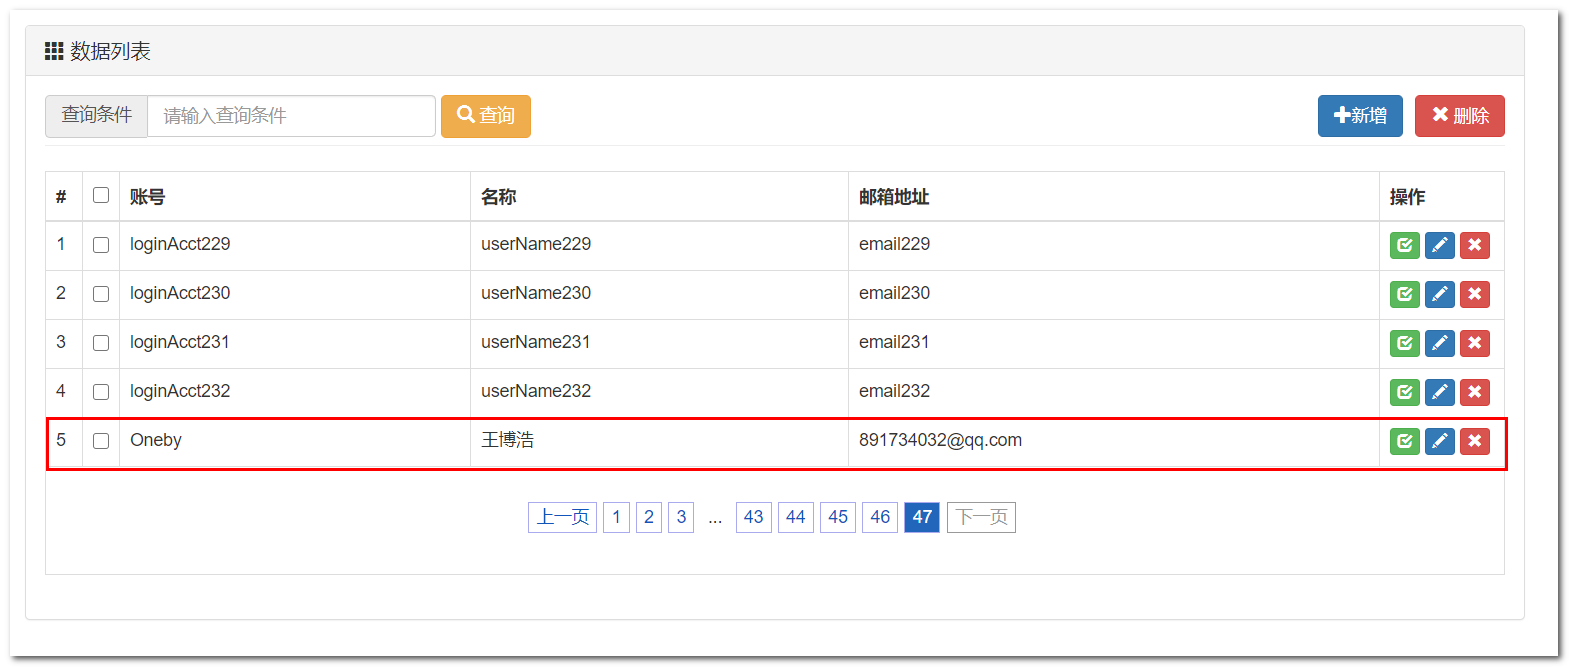
修改admin-page.jsp页面,添加提交新增请求的a标签
< a style =" float : right; " href = " admin/to/add/page.html" class = " btn btn-primary" > < iclass = " glyphicon glyphicon-plus" > </ i> </ a> 由于点击a标签超链接后直接转发页面,无需其他操作,所以我们直接配置view-controller
< mvc: view-controllerpath = " /admin/to/add/page.html" view-name = " admin-add" /> 准备新增管理员表单页面admin-add.jsp
表单提交地址为admin/save.html 各个input标签的name属性值需要与java bean属性对应
<%@ page language="java" contentType="text/html; charset=UTF-8"
pageEncoding="UTF-8"%>
<!DOCTYPE html>
< htmllang = " zh-CN" > < body> < divclass = " container-fluid" > < divclass = " row" > < divclass = " col-sm-9 col-sm-offset-3 col-md-10 col-md-offset-2 main" > < olclass = " breadcrumb" > < li> < ahref = " /admin/to/main/page.html" > </ a> </ li> < li> < ahref = " /admin/get/page.html" > </ a> </ li> < liclass = " active" > </ li> </ ol> < divclass = " panel panel-default" > < divclass = " panel-heading" > < div style =" float : right; cursor : pointer; " data-toggle = " modal" data-target = " #myModal" > < iclass = " glyphicon glyphicon-question-sign" > </ i> </ div> </ div> < divclass = " panel-body" > < formaction = " admin/save.html" method = " post" role = " form" > < p> </ p> < divclass = " form-group" > < labelfor = " exampleInputPassword1" > </ label> < inputname = " loginAcct" type = " text" class = " form-control" id = " exampleInputPassword1" placeholder = " 请输入登录账号" > </ div> < divclass = " form-group" > < labelfor = " exampleInputPassword1" > </ label> < inputname = " userPswd" type = " text" class = " form-control" id = " exampleInputPassword1" placeholder = " 请输入登录密码" > </ div> < divclass = " form-group" > < labelfor = " exampleInputPassword1" > </ label> < inputname = " userName" type = " text" class = " form-control" id = " exampleInputPassword1" placeholder = " 请输入用户名称" > </ div> < divclass = " form-group" > < labelfor = " exampleInputEmail1" > </ label> < inputtype = " email" name = " email" class = " form-control" id = " exampleInputEmail1" placeholder = " 请输入邮箱地址" > < pclass = " help-block label label-warning" > </ p> </ div> < buttontype = " submit" class = " btn btn-success" > < iclass = " glyphicon glyphicon-plus" > </ i> </ button> < buttontype = " reset" class = " btn btn-danger" > < iclass = " glyphicon glyphicon-refresh" > </ i> </ button> </ form> </ div> </ div> </ div> </ div> </ div> </ body> </ html> 在Handler中保存新增的管理员之后,重定向至分页页面
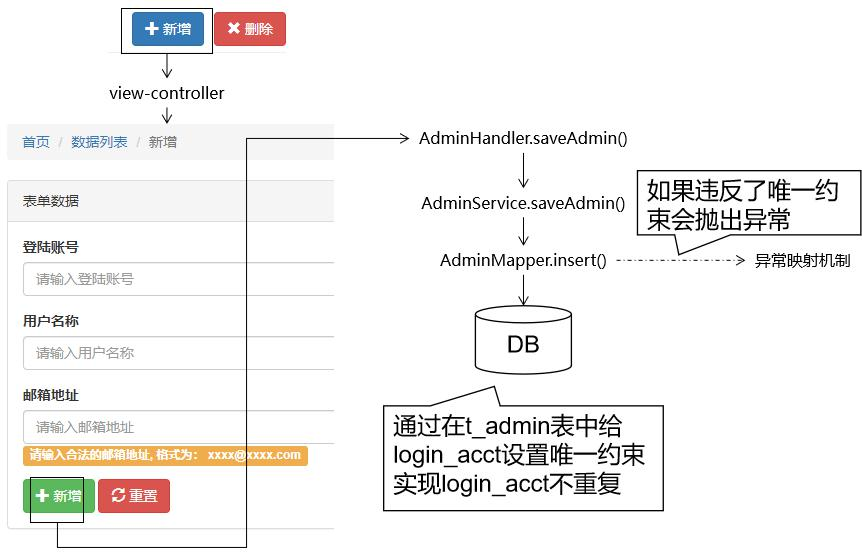
@RequestMapping ( "/admin/save.html" )
public String save ( Admin admin) {
adminService. saveAdmin ( admin) ;
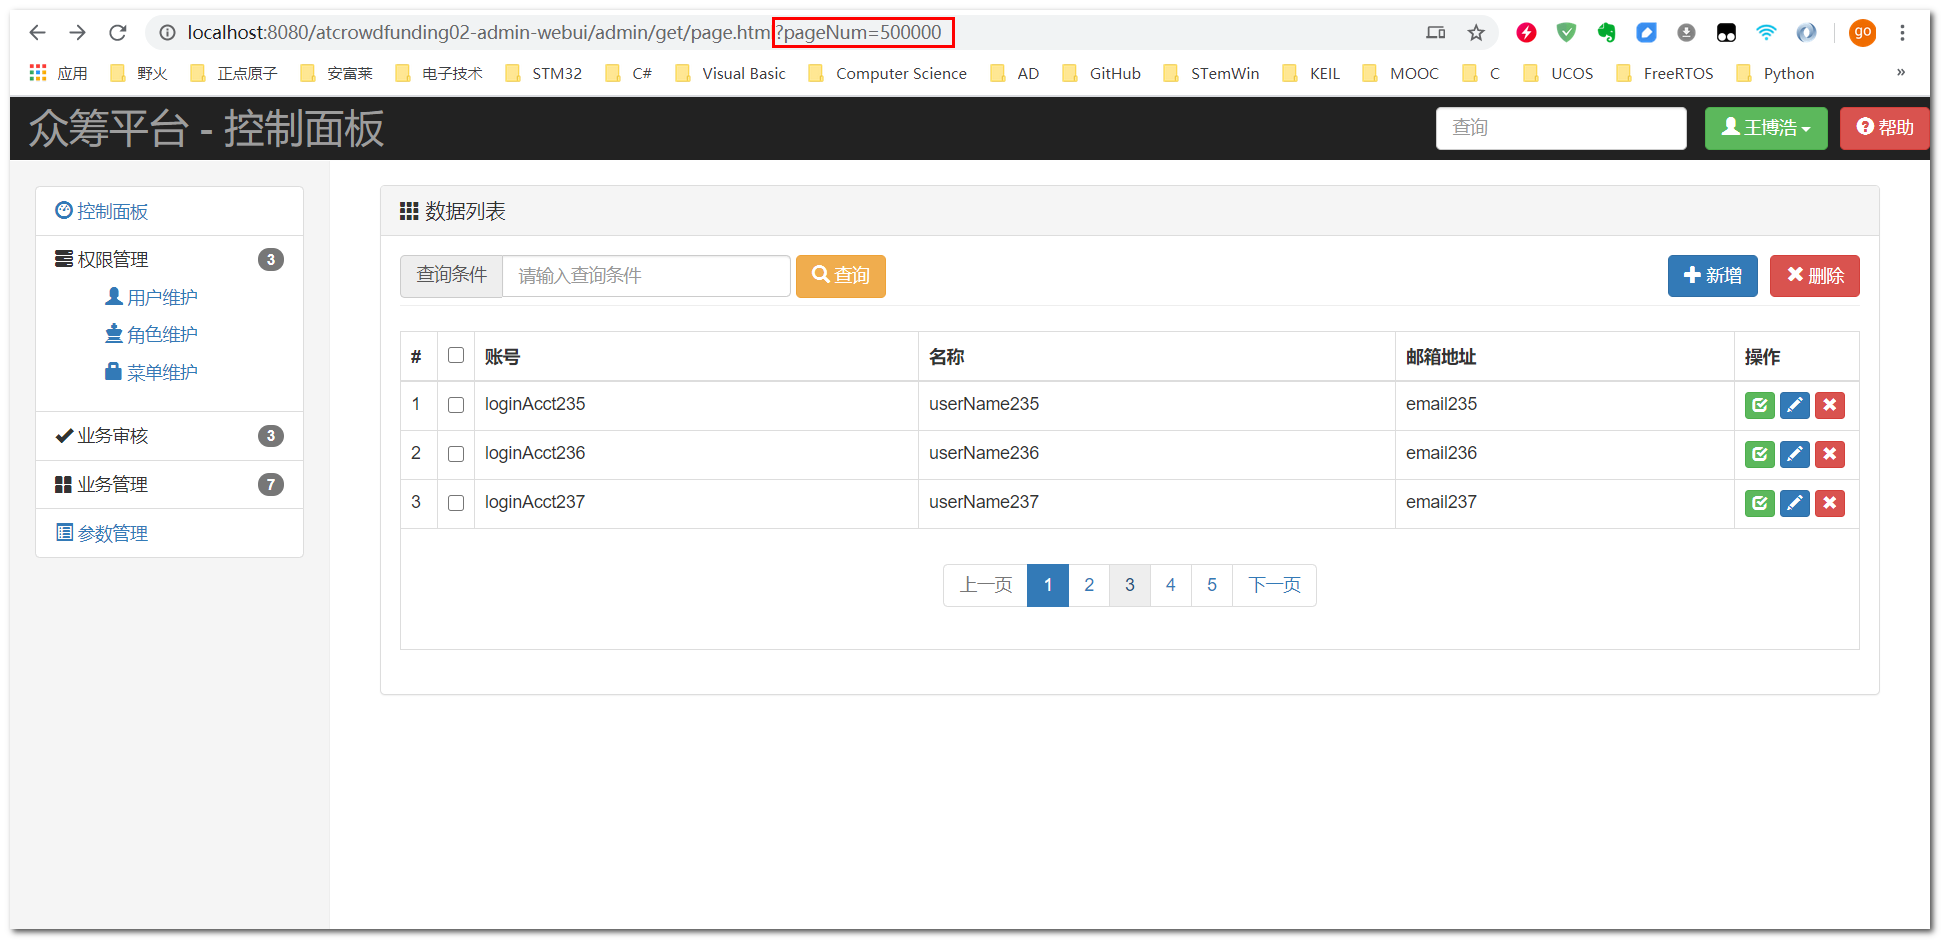
return "redirect:/admin/get/page.html?pageNum=" + Integer. MAX_VALUE;
}
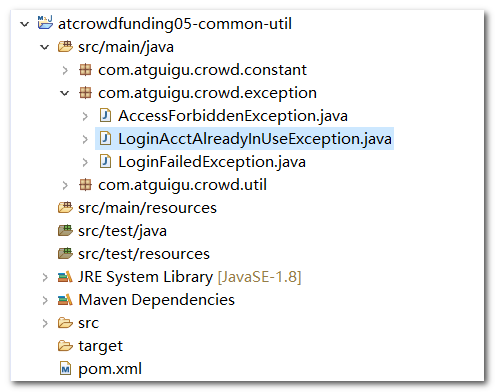
在util工程下创建LoginAcctAlreadyInUseException类,表示用户名重复异常
public class LoginAcctAlreadyInUseException extends RuntimeException {
private static final long serialVersionUID = 1 L;
public LoginAcctAlreadyInUseException ( ) {
super ( ) ;
}
public LoginAcctAlreadyInUseException ( String message, Throwable cause, boolean enableSuppression,
boolean writableStackTrace) {
super ( message, cause, enableSuppression, writableStackTrace) ;
}
public LoginAcctAlreadyInUseException ( String message, Throwable cause) {
super ( message, cause) ;
}
public LoginAcctAlreadyInUseException ( String message) {
super ( message) ;
}
public LoginAcctAlreadyInUseException ( Throwable cause) {
super ( cause) ;
}
}
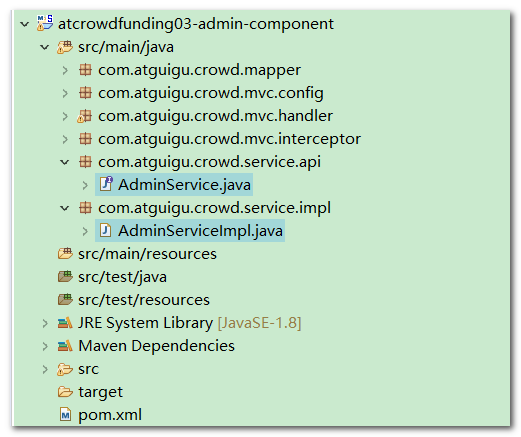
在Service中实现上述Handler中调用的方法
将管理员密码加密存储 设置管理员创建时间 如果login_acct键重复,则抛出异常
private Logger logger = LoggerFactory. getLogger ( AdminServiceImpl. class ) ;
@Override
public void saveAdmin ( Admin admin) {
String userPswd = admin. getUserPswd ( ) ;
userPswd = CrowdUtil. md5 ( userPswd) ;
admin. setUserPswd ( userPswd) ;
Date date = new Date ( ) ;
SimpleDateFormat format = new SimpleDateFormat ( "yyyy-MM-dd HH:mm:ss" ) ;
String createTime = format. format ( date) ;
admin. setCreateTime ( createTime) ;
try {
adminMapper. insert ( admin) ;
} catch ( Exception e) {
e. printStackTrace ( ) ;
logger. info ( "异常全类名=" + e. getClass ( ) . getName ( ) ) ;
if ( e instanceof DuplicateKeyException ) {
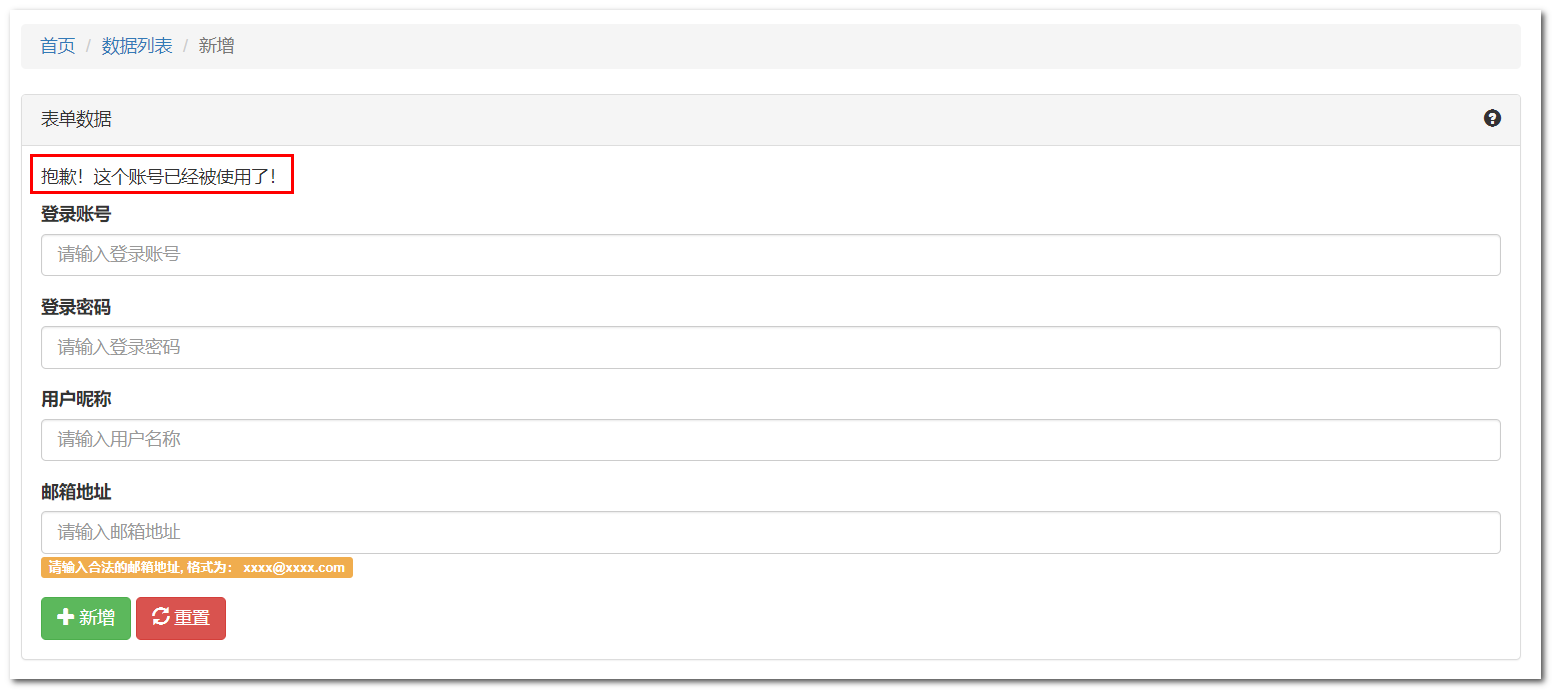
throw new LoginAcctAlreadyInUseException ( CrowdConstant. MESSAGE_LOGIN_ACCT_ALREADY_IN_USE) ;
}
}
}
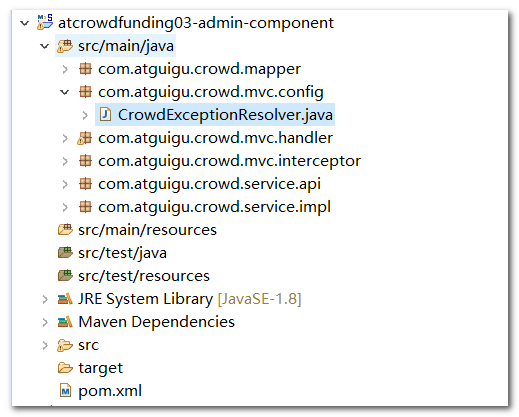
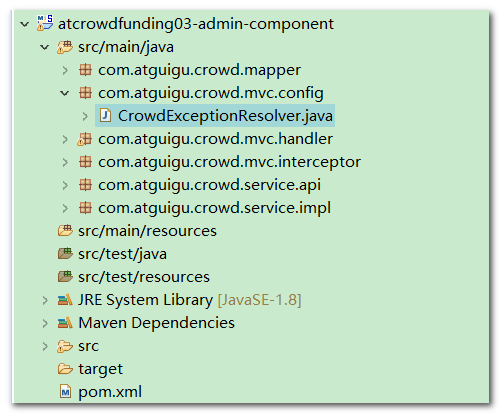
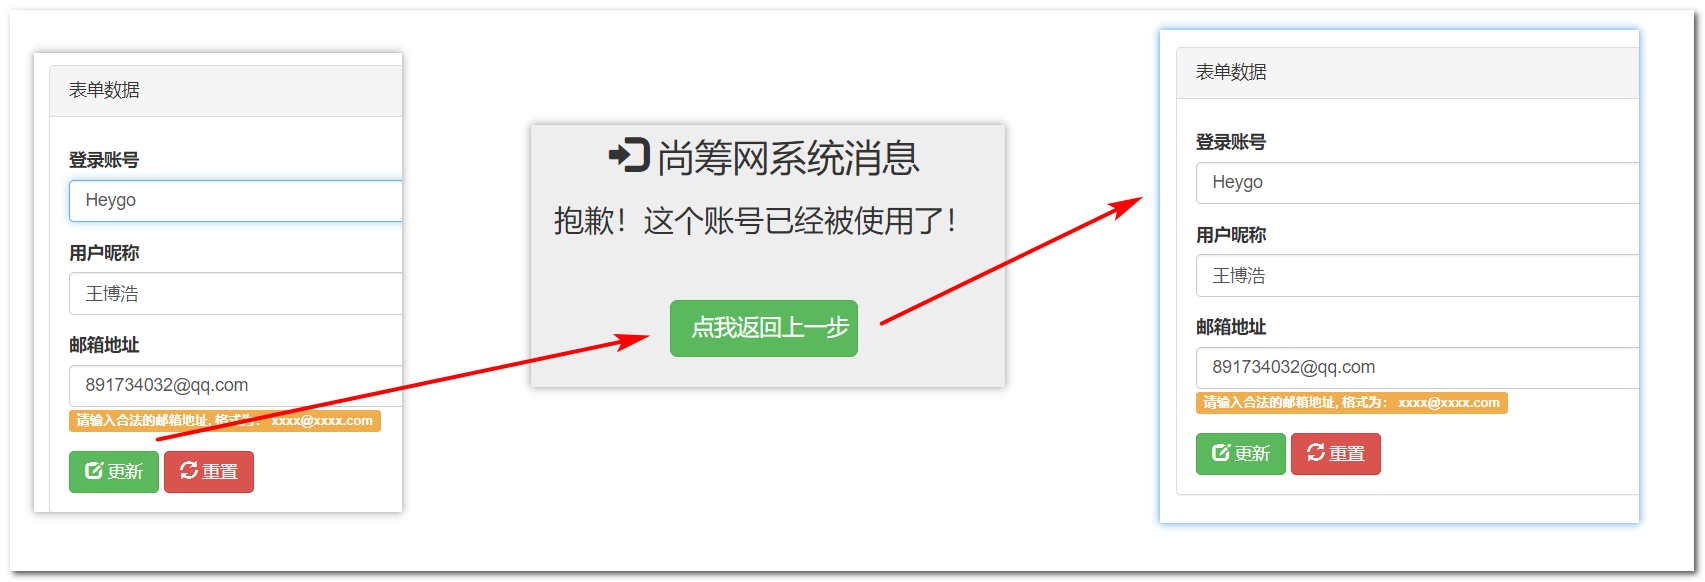
在CrowdExceptionResolver配置类中统一处理LoginAcctAlreadyInUseException类型的异常
@ExceptionHandler ( value = LoginAcctAlreadyInUseException. class )
public ModelAndView resolveLoginAcctAlreadyInUseException (
LoginAcctAlreadyInUseException exception,
HttpServletRequest request,
HttpServletResponse response
) throws IOException {
String viewName = "admin-add" ;
return commonResolve ( viewName, exception, request, response) ;
}
private ModelAndView commonResolve (
String viewName,
Exception exception,
HttpServletRequest request,
HttpServletResponse response
) throws IOException {
boolean judgeResult = CrowdUtil. judgeRequestType ( request) ;
if ( judgeResult) {
ResultEntity< Object> = ResultEntity. failed ( exception. getMessage ( ) ) ;
Gson gson = new Gson ( ) ;
String json = gson. toJson ( resultEntity) ;
response. getWriter ( ) . write ( json) ;
return null;
}
ModelAndView modelAndView = new ModelAndView ( ) ;
modelAndView. addObject ( "exception" , exception) ;
modelAndView. setViewName ( viewName) ;
return modelAndView;
}
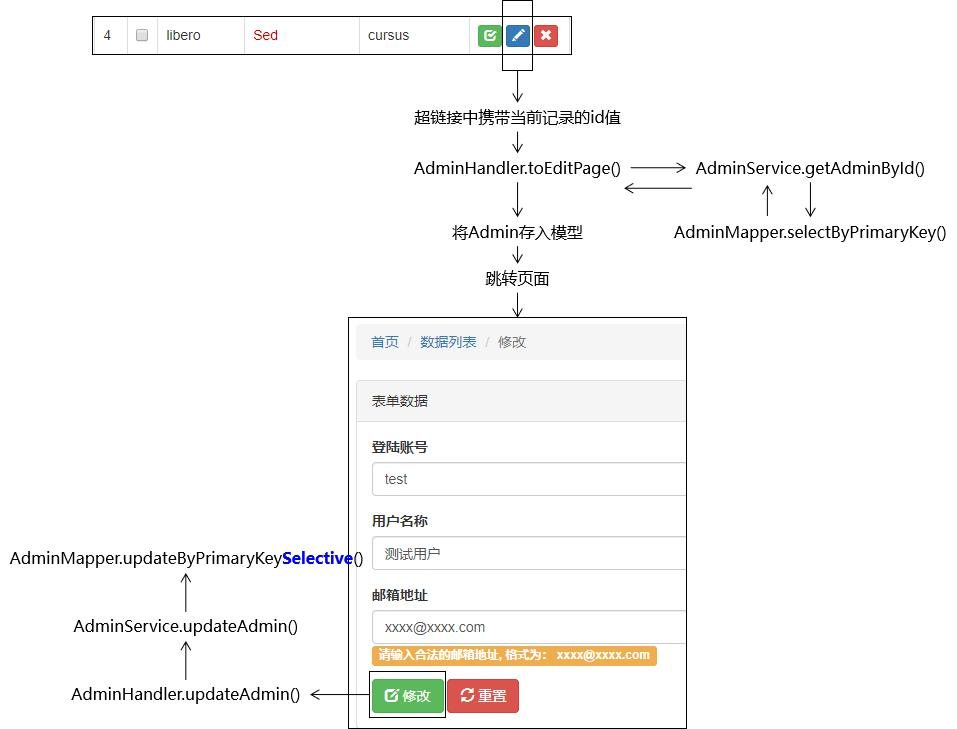
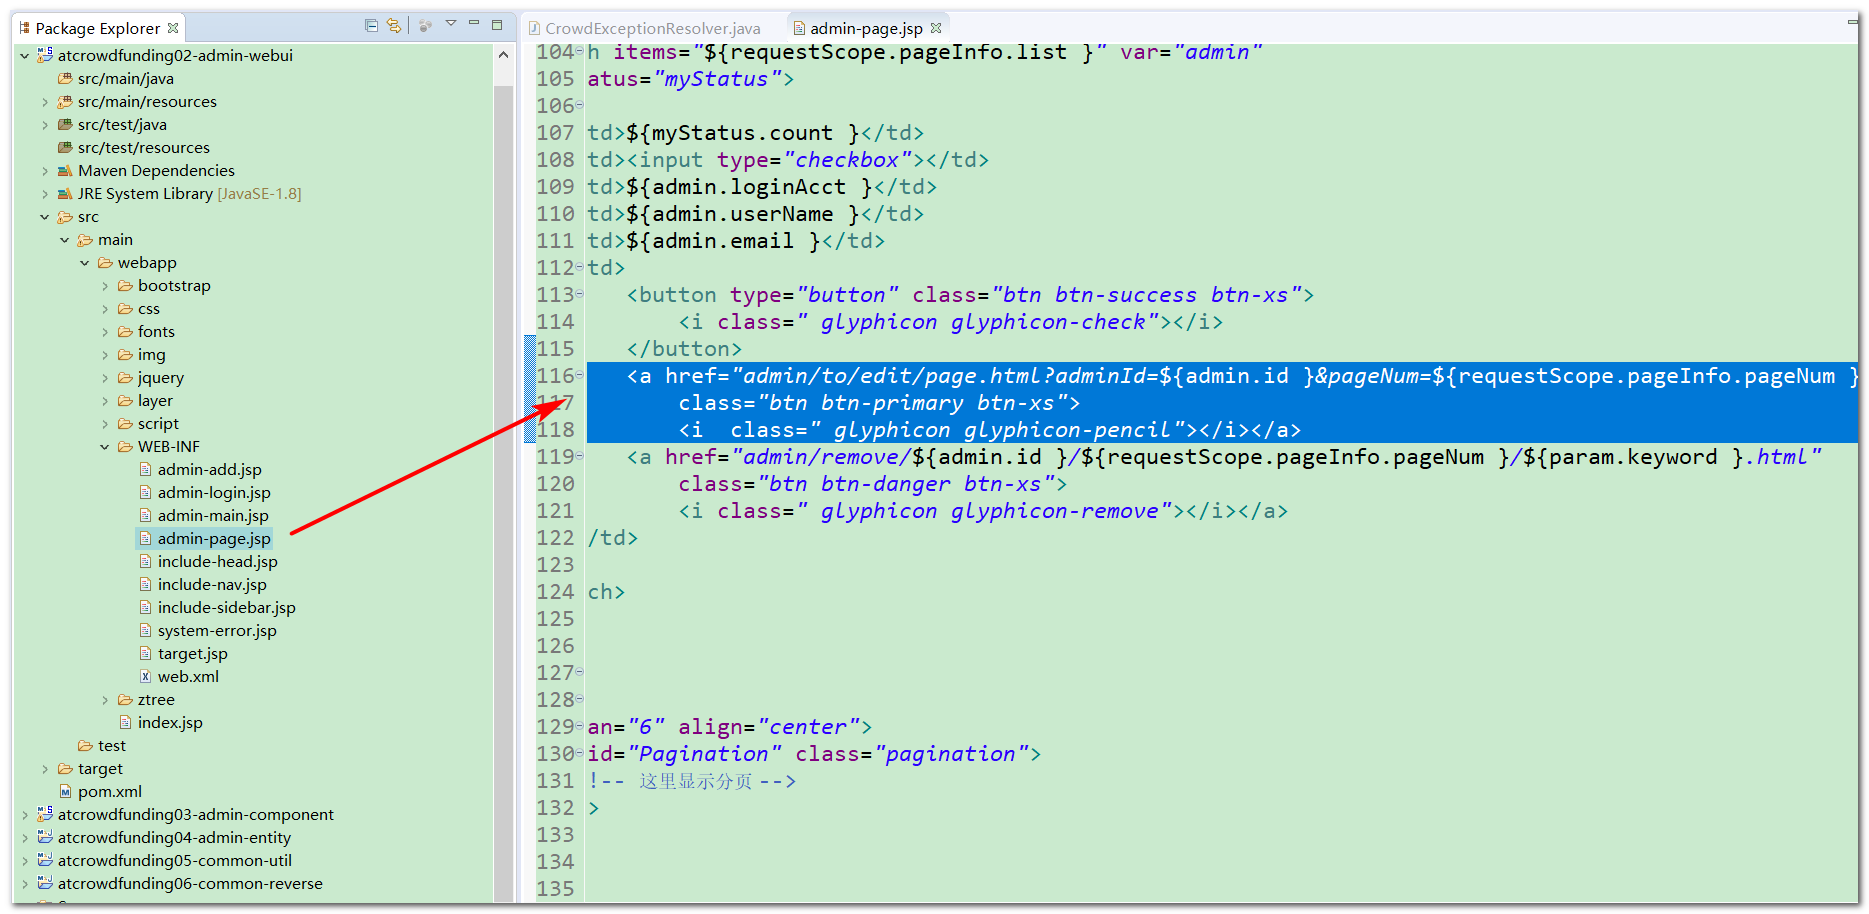
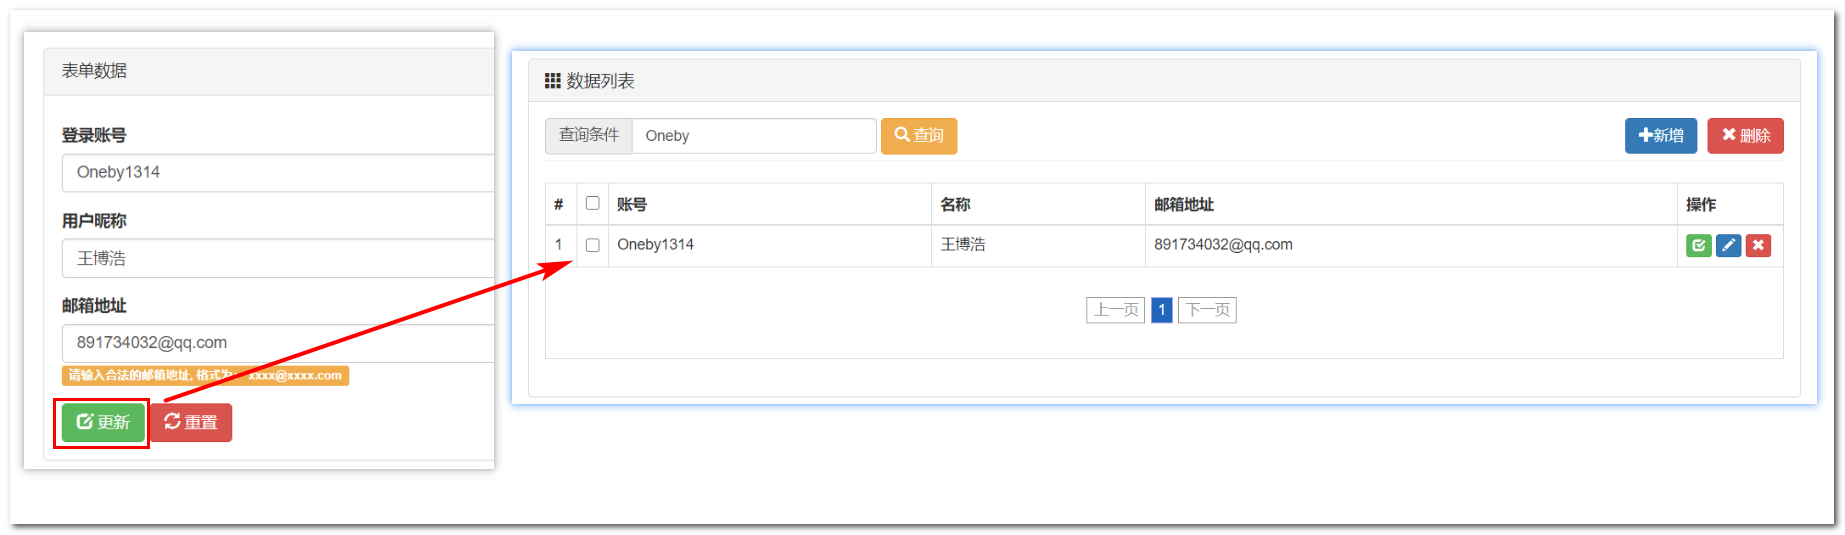
修改admin-page.jsp页面,添加提交更新请求的a标签
更新管理员信息需要管理员Id 更新完成后回到分页页面需要:当前页面pageNum和搜索关键词keyword
< ahref = " admin/to/edit/page.html?adminId=${admin.id }&pageNum=${requestScope.pageInfo.pageNum }&keyword=${param.keyword }" class = " btn btn-primary btn-xs" > < iclass = " glyphicon glyphicon-pencil" > </ i> </ a> 在AdminHandler中查询出Admin信息,并转发至admin-edit.jsp页面;由于是同一次请求,所以请求参数pageNum和keyword到更新Admin的时候再取出来使用
@RequestMapping ( "/admin/to/edit/page.html" )
public String toEditPage (
@RequestParam ( "adminId" ) Integer adminId,
ModelMap modelMap
) {
Admin admin = adminService. getAdminById ( adminId) ;
modelMap. addAttribute ( "admin" , admin) ;
return "admin-edit" ;
}
在Service中实现上述Handler中调用的方法
@Override
public Admin getAdminById ( Integer adminId) {
return adminMapper. selectByPrimaryKey ( adminId) ;
}
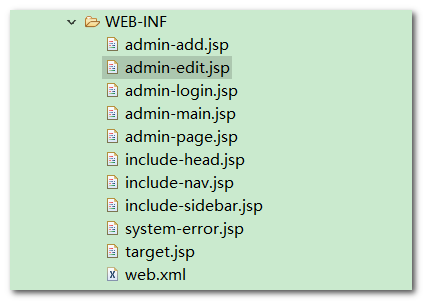
添加admin-edit.jsp页面,用于表单回显,表单提交地址为admin/update.html
<%@ page language="java" contentType="text/html; charset=UTF-8"
pageEncoding="UTF-8"%>
<!DOCTYPE html>
< htmllang = " zh-CN" > < body> < divclass = " container-fluid" > < divclass = " row" > < divclass = " col-sm-9 col-sm-offset-3 col-md-10 col-md-offset-2 main" > < olclass = " breadcrumb" > < li> < ahref = " /admin/to/main/page.html" > </ a> </ li> < li> < ahref = " /admin/get/page.html" > </ a> </ li> < liclass = " active" > </ li> </ ol> < divclass = " panel panel-default" > < divclass = " panel-heading" > < div style =" float : right; cursor : pointer; " data-toggle = " modal" data-target = " #myModal" > < iclass = " glyphicon glyphicon-question-sign" > </ i> </ div> </ div> < divclass = " panel-body" > < formaction = " admin/update.html" method = " post" role = " form" > < inputtype = " hidden" name = " id" value = " ${requestScope.admin.id }" /> < inputtype = " hidden" name = " pageNum" value = " ${param.pageNum }" /> < inputtype = " hidden" name = " keyword" value = " ${param.keyword }" /> < p> </ p> < divclass = " form-group" > < labelfor = " exampleInputPassword1" > </ label> < inputname = " loginAcct" value = " ${requestScope.admin.loginAcct }" type = " text" class = " form-control" id = " exampleInputPassword1" placeholder = " 请输入登录账号" > </ div> < divclass = " form-group" > < labelfor = " exampleInputPassword1" > </ label> < inputname = " userName" value = " ${requestScope.admin.userName }" type = " text" class = " form-control" id = " exampleInputPassword1" placeholder = " 请输入用户名称" > </ div> < divclass = " form-group" > < labelfor = " exampleInputEmail1" > </ label> < inputtype = " email" name = " email" value = " ${requestScope.admin.email }" class = " form-control" id = " exampleInputEmail1" placeholder = " 请输入邮箱地址" > < pclass = " help-block label label-warning" > </ p> </ div> < buttontype = " submit" class = " btn btn-success" > < iclass = " glyphicon glyphicon-edit" > </ i> </ button> < buttontype = " reset" class = " btn btn-danger" > < iclass = " glyphicon glyphicon-refresh" > </ i> </ button> </ form> </ div> </ div> </ div> </ div> </ div> </ body> </ html> 在AdminHandler中更新Admin管理员的信息,并重定向至分页页面
@RequestMapping ( "/admin/update.html" )
public String update ( Admin admin, @RequestParam ( "pageNum" ) Integer pageNum, @RequestParam ( "keyword" ) String keyword) {
adminService. update ( admin) ;
return "redirect:/admin/get/page.html?pageNum=" + pageNum+ "&keyword=" + keyword;
}
在Service中保存Admin信息,并且捕获唯一键约束异常
@Override
public void update ( Admin admin) {
try {
adminMapper. updateByPrimaryKeySelective ( admin) ;
} catch ( Exception e) {
e. printStackTrace ( ) ;
logger. info ( "异常全类名=" + e. getClass ( ) . getName ( ) ) ;
if ( e instanceof DuplicateKeyException ) {
throw new LoginAcctAlreadyInUseForUpdateException ( CrowdConstant. MESSAGE_LOGIN_ACCT_ALREADY_IN_USE) ;
}
}
}
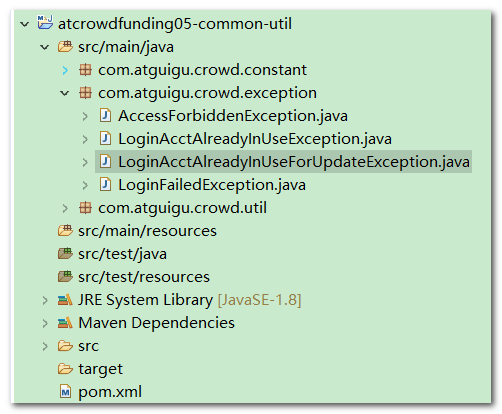
在util工程添加LoginAcctAlreadyInUseForUpdateException类,该类表示更新Admin时,其login_acct字段不唯一,引发的异常
public class LoginAcctAlreadyInUseForUpdateException extends RuntimeException {
private static final long serialVersionUID = 1 L;
public LoginAcctAlreadyInUseForUpdateException ( ) {
super ( ) ;
}
public LoginAcctAlreadyInUseForUpdateException ( String message, Throwable cause, boolean enableSuppression,
boolean writableStackTrace) {
super ( message, cause, enableSuppression, writableStackTrace) ;
}
public LoginAcctAlreadyInUseForUpdateException ( String message, Throwable cause) {
super ( message, cause) ;
}
public LoginAcctAlreadyInUseForUpdateException ( String message) {
super ( message) ;
}
public LoginAcctAlreadyInUseForUpdateException ( Throwable cause) {
super ( cause) ;
}
}
在CrowdExceptionResolver配置类中统一处理LoginAcctAlreadyInUseForUpdateException类型的异常
@ExceptionHandler ( value = LoginAcctAlreadyInUseForUpdateException. class )
public ModelAndView resolveLoginAcctAlreadyInUseForUpdateException (
LoginAcctAlreadyInUseForUpdateException exception,
HttpServletRequest request,
HttpServletResponse response
) throws IOException {
String viewName = "system-error" ;
return commonResolve ( viewName, exception, request, response) ;
}
<%@ page language="java" contentType="text/html; charset=UTF-8"
pageEncoding="UTF-8"%>
<!DOCTYPE html>
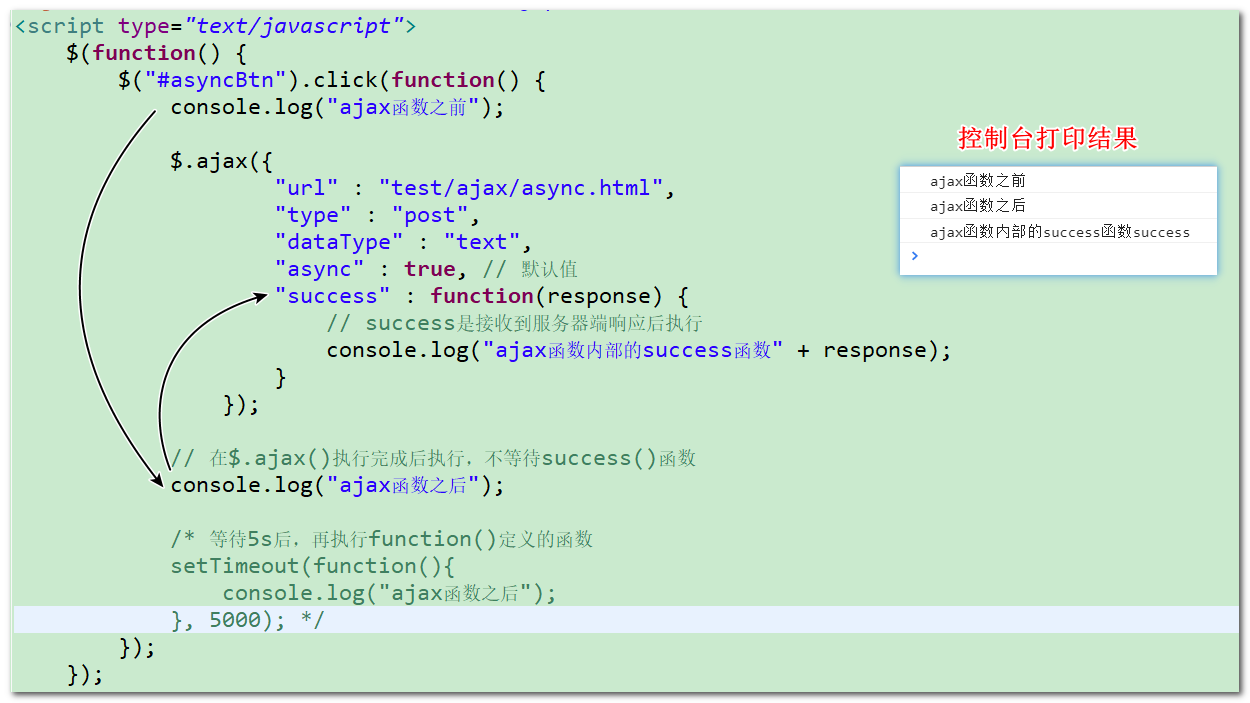
< htmllang = " zh-CN" > < scripttype = " text/javascript" >
$ ( function ( ) {
$ ( "#asyncBtn" ) . click ( function ( ) {
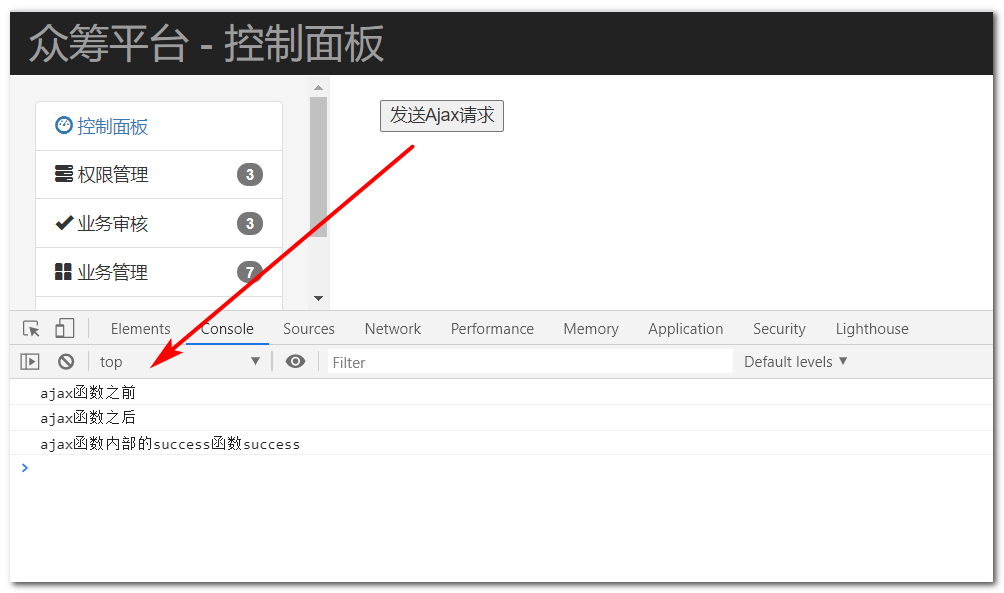
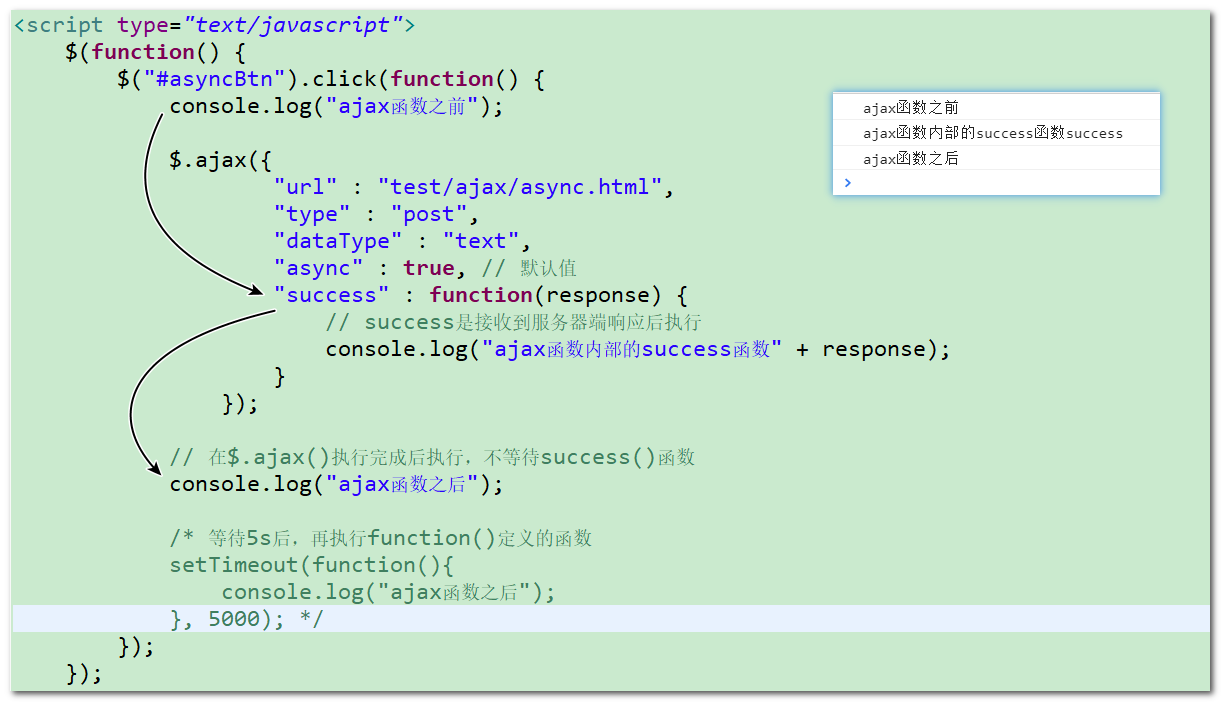
console. log ( "ajax函数之前" ) ;
$. ajax ( {
"url" : "test/ajax/async.html" ,
"type" : "post" ,
"dataType" : "text" ,
"async" : true ,
"success" : function ( response) {
console. log ( "ajax函数内部的success函数" + response) ;
}
} ) ;
console. log ( "ajax函数之后" ) ;
} ) ;
} ) ;
</ script> < body> < divclass = " container-fluid" > < divclass = " row" > < divclass = " col-sm-9 col-sm-offset-3 col-md-10 col-md-offset-2 main" > < buttonid = " asyncBtn" > </ button> </ div> </ div> </ div> </ body> </ html>
@ResponseBody
@RequestMapping ( "/test/ajax/async.html" )
public String testAsync ( ) throws InterruptedException {
Thread. sleep ( 5000 ) ;
return "success" ;
}
将Ajax请求修改为同步:"async" : false <%@ page language="java" contentType="text/html; charset=UTF-8"
pageEncoding="UTF-8"%>
<!DOCTYPE html>
< htmllang = " zh-CN" > < scripttype = " text/javascript" >
$ ( function ( ) {
$ ( "#asyncBtn" ) . click ( function ( ) {
console. log ( "ajax函数之前" ) ;
$. ajax ( {
"url" : "test/ajax/async.html" ,
"type" : "post" ,
"dataType" : "text" ,
"async" : false ,
"success" : function ( response) {
console. log ( "ajax函数内部的success函数" + response) ;
}
} ) ;
console. log ( "ajax函数之后" ) ;
} ) ;
} ) ;
</ script> < body> < divclass = " container-fluid" > < divclass = " row" > < divclass = " col-sm-9 col-sm-offset-3 col-md-10 col-md-offset-2 main" > < buttonid = " asyncBtn" > </ button> </ div> </ div> </ div> </ body> </ html>


 393
393


 被折叠的 条评论
为什么被折叠?
被折叠的 条评论
为什么被折叠?
 到【灌水乐园】发言


