


AIDL:Android Interface Definition Language,即Android接口定义语言
主要用于进程间的通信
首先是本地调用服务:
1.定义要暴露出来的接口方法:
public interface Iservice {
    public void callControlTemp();
    public void callControlPower();
}
2.完成普通服务的创建:
public class ServiceTest extends Service {

    @Override
    public IBinder onBind(Intent intent) {
        return new MyBinder();
    }

    public void controlTemp(){
        System.out.println("温控控制!!!");
    }

    public void controlPower(){
        System.out.println("电源控制!!!");
    }

    public class MyBinder extends IService{
        @Override
        public void callControlTemp() {
            controlTemp();
        }

        public void callControlPower(){
            controlPower();
        }
    }
}
3.完成本地Activity
public class MainActivity extends Activity {
private MyConn conn;
private Iservice binder;
@Override
protected void onCreate(Bundle savedInstanceState) {
super.onCreate(savedInstanceState);
setContentView(R.layout.activity_main);
Intent intent = new Intent(this, servicetest.class);
conn = new MyConn();
startService(intent);
bindService(intent, conn, BIND_AUTO_CREATE);
}
public class MyConn implements ServiceConnection{
@Override
public void onServiceConnected(ComponentName name, IBinder service) {
binder = (IService)service;
}
@Override
public void onServiceDisconnected(ComponentName name) {
}
}
public void clickPower(View v){
try {
binder.callControlPower();
} catch (RemoteException e) {
e.printStackTrace();
}
}
public void clickTemp(View v){
try {
binder.callControlTemp();
} catch (RemoteException e) {
e.printStackTrace();
}
}
@Override
protected void onDestroy() {
super.onDestroy();
if(conn != null){
unbindService(conn);
}
}
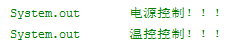
}输出结果,本地服务调用成功
=============================================================
接下来修改下代码,将本地服务改为远程服务端;
1.将要暴露的接口文件IService.java改为IService.aidl;
2.去掉IService.aidl中的所有修饰符(piublic);
3.修改服务的MyBinder继承自动生成的Stub类(注:此时MyBinder要实现的就是远程服务暴露的方法);
public class servicetest extends Service {

    @Override
    public IBinder onBind(Intent intent) {
        return new MyBinder();
    }

    public void controlTemp(){
        System.out.println("温控控制!!!");
    }

    public void controlPower(){
        System.out.println("电源控制!!!");
    }

    public class MyBinder extends Stub{
        @Override
        public void callControlTemp() {
            controlTemp();
        }

        @Override
        public void callControlPower(){
            controlPower();
        }
    }
}
4.修改AndroidMainfest.xml;
 <service android:name="com.example.servicetest.servicetest" >
            <intent-filter >
                <action android:name="com.zyw.service"/>
            </intent-filter>
 </service>
5.在远程客户端中开启服务;
然后完成本地调用客户端的实现:
1.新建一个包,包名为IService.aidl所在的包名,然后将IService.aidl复制到这个包中;
2.通过Stub类中的asInterface方法,将service返回至client的对象转换为IService.Stub;
public class MyConn implements ServiceConnection{

        @Override
        public void onServiceConnected(ComponentName name, IBinder service) {
            binder = Stub.asInterface(service);
        }

        @Override
        public void onServiceDisconnected(ComponentName name) {

        }
    }
3.完成本地Activity代码;
public class MainActivity extends Activity {
private MyConn conn;
private Iservice binder;
@Override
protected void onCreate(Bundle savedInstanceState) {
super.onCreate(savedInstanceState);
setContentView(R.layout.activity_main);
Intent intent = new Intent();
intent.setAction("com.zyw.service");
conn = new MyConn();
bindService(intent, conn, BIND_AUTO_CREATE);
}
public class MyConn implements ServiceConnection{
@Override
public void onServiceConnected(ComponentName name, IBinder service) {
binder = Stub.asInterface(service);
}
@Override
public void onServiceDisconnected(ComponentName name) {
}
}
public void clickPower(View v){
try {
binder.callControlPower();
} catch (RemoteException e) {
e.printStackTrace();
}
}
public void clickTemp(View v){
try {
binder.callControlTemp();
} catch (RemoteException e) {
e.printStackTrace();
}
}
@Override
protected void onDestroy() {
super.onDestroy();
if(conn != null){
unbindService(conn);
}
}
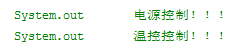
}本地调用远程服务结果:


 800
800

 被折叠的 条评论
为什么被折叠?
被折叠的 条评论
为什么被折叠?
 到【灌水乐园】发言


