


由浅入深的 D3.js 初级及进阶指南 之一 HelloWorld
任何教程的开端离不开 hello world ,我们也不能免俗. D3.js 拥有中非常强大的对 DOM 进行操作的能力.现在就简单的操作一下.
所需环境:
- ember-cli v3.16.1
- node v10.16.0
- d3.js v5
环境搭建详见 由浅入深的 D3.js (v5/v4) 初级及进阶指南 之零 背景介绍与环境安装
0. 前言
select 方法在 D3.js 中占据中重要的位置.任何 DOM 操作的起点.可以通过此方法,获取到想要操作的 DOM.
这也就是告诉我们,在框架中使用 D3.js 的时候,需要在组件元素或其他元素插入到文档中,大概就是 didInsert 这个声明周期之后,才能进行对 DOM 的操作.
1. 使用 D3.js 展示 Hello world 文本
1.1 创建 d3/hello-world 组件
ember g component d3/hello-world
原生 JavaScript 的话及可以直接在页面中添加 p 标签.
修改 handlerbars :
<p class="d3-hello" {{did-insert this.hello}}></p>
修改 component 逻辑文件:
import Component from '@glimmer/component';
import { action } from '@ember/object';
import {select} from 'd3-selection';
interface D3HelloWorldArgs {}
export default class D3HelloWorld extends Component<D3HelloWorldArgs> {
@action
hello() {
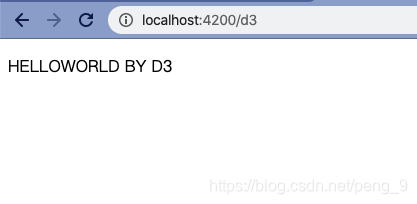
select(".d3-hello").text("HELLOWORLD BY D3")
}
}
在路由中使用此组件:
{{!-- d3 route file --}}
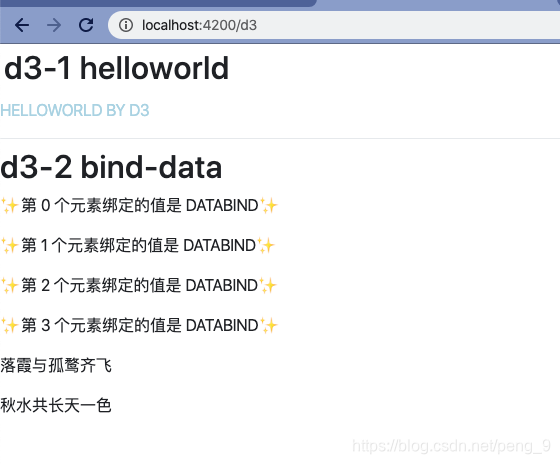
<h2>d3-1 helloworld</h2>
<D3::HelloWorld />
此时运行文件即可以看到:
同样的:
import Component from '@glimmer/component';
import { action } from '@ember/object';
import {select} from 'd3-selection';

interface D3HelloWorldArgs {}

export default class D3HelloWorld extends Component<D3HelloWorldArgs> {
    @action
    hello() {
        let p = select(".d3-hello").text("HELLOWORLD BY D3");

        // 修改此元素的样式
        p.attr("title","helloWorld").style("color","lightblue")
    }
}
这样就可以改变字体的 style 样式了,并为此 P 标签添加了 title 属性,虽然没有什么作用。
更多的关于 d3-selection 的 API 请查看链接。
2. 使用 .datum() / .data() 绑定数据
同样的创建 d3/bind-data 组件。
{{!-- d3/bind-data.hbs --}}
<p class="d3-bind" {{did-insert this.dataBind}}></p>
<p class="d3-bind" {{did-insert this.dataBind}}></p>
<p class="d3-bind" {{did-insert this.dataBind}}></p>
<p class="d3-bind" {{did-insert this.dataBind}}></p>

<p class="d3-bind2" {{did-insert this.dataBind2}}></p>
<p class="d3-bind2" {{did-insert this.dataBind2}}></p>
// d3/bind-data.ts
import Component from '@glimmer/component';
import { selectAll } from 'd3-selection';
import { action } from '@ember/object';

interface D3BindDataArgs { }

const STR = "DATABIND";
const ARR = ["落霞与孤鹜齐飞","秋水共长天一色"];
export default class D3BindData extends Component<D3BindDataArgs> {
    @action
    dataBind() {
        let p = selectAll('.d3-bind');
        p.datum(STR)
        p.text(function (d, i) {
            return `✨第 ${i} 个元素绑定的值是 ${d}✨`
        })
    }
    @action
    dataBind2() {
        let ps = selectAll(".d3-bind2");
        ps.data(ARR).text(function(d) {
            return d
        })
    }
}
同样的,在路由中使用此组件:
{{!-- d3 route file --}}
<h2>d3-1 helloworld</h2>
<D3::HelloWorld />
<div class="dropdown-divider"></div>
<h2>d3-2 bind-data</h2>
<D3::BindData />
运行程序可以看到:
3. 总结
在这篇文章中,对 D3.js 中 select 及其相关方法应该是有比较深刻的了解,如果没有,那么在以后的教程中我们也是会经常看到的.
更多关于 select 及其相关方法也可以查看此处 .
本系列其他文章:
- 环境搭建
- hello world (使用 D3.js 创建文本并绑定数据)


 1100
1100


 被折叠的 条评论
为什么被折叠?
被折叠的 条评论
为什么被折叠?
 到【灌水乐园】发言


