


目录
2. @RestControllerAdvice/@ControllerAdvice + @ExceptionHandler 实现自定义异常
3. 新建 UserController.class 测试 3 种不同异常的处理
一、 错误处理
1. 默认规则
1)默认情况下,SpringBoot 提供了 /error 处理所有错误的映射
2)对于机器客户端,它将生成 JSON 响应,其中包含错误,HTTP 状态和异常消息的详细信息;对于浏览器客户端,它将响应一个 "whitelabel" 错误视图,以 HTML 格式呈现相同的数据
3)要对其自定义,添加 View 解析为 Error
4)要完全替换默认行为,可以实现 ErrorController 并注册该类型的 Bean 定义,或添加 ErrorAttributes 类型组件以使用现有机制并替换其内容;ErrorAttributes 中定义了返回哪些错误项
2. 定制错误处理逻辑
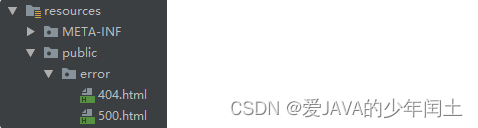
1)自定义错误页面 error/404.html,error/500.html 放到 /resources/public/error 文件夹下即可;也可以将这两个 html 命名为 4xx.html,5xx.html 则可处理对应 4xx、5xx 错误;当然还可以每个状态码放一个对应页面
2)通过 @ControllerAdvice/@RestControllerAdvice + @ExceptionHandler 处理异常
3)实现 HandlerExceptionResolver 处理异常
二、自定义异常处理
1. 实现 ErrorController
1. 新建 GlobalErrorController.class 实现 ErrorController 接口并实现如下逻辑
@RestController
public class GlobalErrorController implements ErrorController {
    // 错误请求路径
    private final String ERROR_PATH = "/error";

    @Resource
    private ErrorAttributes errorAttributes;

    @Override
    public String getErrorPath() {
        return ERROR_PATH;
    }

    /**
     * JSON格式错误信息
     */
    @RequestMapping(value = ERROR_PATH,  produces = {MediaType.APPLICATION_JSON_VALUE})
    public Map<String, Object> error(WebRequest webRequest) {
        ErrorAttributeOptions options = ErrorAttributeOptions.of(ErrorAttributeOptions.Include.MESSAGE);
        Map<String, Object> body = this.errorAttributes.getErrorAttributes(webRequest, options);
        return body;
    }
}
注意
1)ERROR_PATH = "/error" 这个路径其实就是 SpringBoot 错误处理机制中自动配置的路径;在 ErrorProperties.class 中可找到这个配置
2)如果在 application.properties 覆盖了默认错误路径,则上面代码中 ERROR_PATH 应设置为配置文件中的错误路径
# 全局错误映射路径
server.error.path = /error
3)这句代码:ErrorAttributeOptions.of(ErrorAttributeOptions.Include.MESSAGE);的意思是返回给前端的错误信息中包含哪些信息,这个 of() 方法中可以指定返回信息范围(可以指定多个),共有 4 个选项值:
- ErrorAttributeOptions.Include.EXCEPTION:Include the exception class name attribute
- ErrorAttributeOptions.Include.STACK_TRACE:Include the stack trace attribute
- ErrorAttributeOptions.Include.MESSAGE:Include the message attribute
- ErrorAttributeOptions.Include.BINDING_ERRORS:Include the binding errors attribute
不同值返回信息如下
a. ErrorAttributeOptions.Include.EXCEPTION
{
    "timestamp": "2022-08-07T13:53:40.607+00:00",
    "status": 500,
    "error": "Internal Server Error",
    "exception": "java.lang.RuntimeException",
    "message": "",
    "path": "/error123"
}
b. ErrorAttributeOptions.Include.STACK_TRACE,显示信息最多
{
    "timestamp": "2022-08-07T13:54:14.101+00:00",
    "status": 500,
    "error": "Internal Server Error",
    "trace": "java.lang.RuntimeException: Error\r\n\tat com.study ... ...
    "message": "",
    "path": "/error123"
}
c. ErrorAttributeOptions.Include.MESSAGE
{
    "timestamp": "2022-08-07T13:54:56.751+00:00",
    "status": 500,
    "error": "Internal Server Error",
    "message": "Error",
    "path": "/error123"
}
d. ErrorAttributeOptions.Include.BINDING_ERRORS
{
    "timestamp": "2022-08-07T13:53:03.791+00:00",
    "status": 500,
    "error": "Internal Server Error",
    "message": "",
    "path": "/error123"
}
2. @RestControllerAdvice/@ControllerAdvice + @ExceptionHandler 实现自定义异常
在一次请求调用过程中,如果程序出现异常,我们应对异常进行拦截,把异常中重要信息记录在日志便于排查错误,只提供简单的错误信息返回给前端;这个时候通过 @RestControllerAdvice/@ControllerAdvice + @ExceptionHandler 可轻松实现
1. 新建 GlobalException.class 继承 RuntimeException 并重写构造方法
@Data
public class GlobalException extends RuntimeException {
    // 错误编码
    private Integer errorCode;
    // 错误信息
    private String errorMsg;
    // 具体信息
    private String errorInfo;

    public GlobalException(Integer errorCode, String errorMsg, String errorInfo) {
        super(errorMsg);
        this.errorCode = errorCode;
        this.errorMsg = errorMsg;
        this.errorInfo = errorInfo;
    }

    public GlobalException(Integer errorCode, String errorMsg, Throwable cause) {
        super(errorMsg, cause);
        this.errorCode = errorCode;
        this.errorMsg = errorMsg;
        this.errorInfo = cause.getMessage();
    }
}
2. 新建 GlobalExceptionHandler.class 实现对系统错误的统一处理
@RestControllerAdvice
public class GlobalExceptionHandler {
    /**
     * 处理全局系统异常(非自定义异常)
     */
    @ExceptionHandler(Exception.class)
    public Map<String, Object> handleSystemException(Exception exception) {
        Map<String, Object> exceptionInfo = new HashMap<>();
        exceptionInfo.put("errorCode", 500);
        exceptionInfo.put("errorMsg", "系统故障");
        // 日志记录具体信息,不要返回给前端
        System.out.println(exception.getMessage());
        return exceptionInfo;
    }

    /**
     * 处理自定义异常
     */
    @ExceptionHandler(GlobalException.class)
    public Map<String, Object> handleGlobalException(GlobalException exception) {
        Map<String, Object> exceptionInfo = new HashMap<>();
        exceptionInfo.put("errorCode", exception.getErrorCode());
        exceptionInfo.put("errorMsg", exception.getErrorMsg());
        // 日志记录具体信息,不要返回给前端
        System.out.println(exception.getErrorInfo());
        return exceptionInfo;
    }

    /**
     * 实体类属性校验异常
     */
    @ExceptionHandler(MethodArgumentNotValidException.class)
    public Map<String, Object> MethodArgumentNotValidExceptionHandler(MethodArgumentNotValidException exception) {
        ObjectError objectError = exception.getBindingResult().getAllErrors().get(0);
        Map<String, Object> exceptionInfo = new HashMap<>();
        exceptionInfo.put("errorCode", 550);
        exceptionInfo.put("errorMsg", objectError.getDefaultMessage());
        return exceptionInfo;
    }
}
3. 新建 UserController.class 测试 3 种不同异常的处理
@RestController
public class UserController {
    /**
     * 测试全局异常
     */
    @GetMapping("/error1")
    public Integer error1() {
        int m = 10 / 0;
        return m;
    }

    /**
     * 测试自定义异常
     */
    @GetMapping("/error2")
    public Integer error2() {
        try {
            int m = 10 / 0;
            return m;
        } catch (Exception e) {
            throw new GlobalException(501, "系统错误", e);
        }
    }

    /**
     * 测试实体类字段校验异常
     */
    @PostMapping("/error3")
    public User error3(@RequestBody @Valid User user) {
        return user;
    }
}
4. 最终效果如下
1)全局异常测试(非自定义异常):http://localhost:8080/error1
{
    "errorCode": 500,
    "errorMsg": "系统故障"
}2)自定义异常测试:http://localhost:8080/error2
{
    "errorCode": 501,
    "errorMsg": "系统错误"
}3)实体类字段校验异常测试:http://localhost:8080/error3
{
    "errorCode": 550,
    "errorMsg": "年龄不能超过100岁"
}
补充
1. 参数校验所需依赖以及使用方式
1)实体类字段校验需要引入如下依赖
<dependency>
    <groupId>org.springframework.boot</groupId>
    <artifactId>spring-boot-starter-validation</artifactId>
</dependency>
2)实体类上添加注解
@Data
public class User {
    @NotBlank(message = "用户名不能为空")
    private String name;

    @NotNull(message = "年龄不能为空")
    @Min(value = 1, message = "年龄不能小于1岁")
    @Max(value = 100, message = "年龄不能超过100岁")
    private Integer age;
}
2. 追踪抛出错误的方法
上面的异常处理,虽然把返回给前端的异常提示信息和日志记录的异常信息进行了处理,但对于后端来说,日志仅仅打印了错误信息,并没有记录是哪个类哪个方法的抛出的异常,这不便于后端调试,所以可添加如下方法记录抛出错误的类和方法
1)添加根据异常查找出执行的类和方法
/**
 * 找出执行类和执行方法

 */
private String getExecutedMethod(Exception e) {
    StackTraceElement[] elements = e.getStackTrace();
    if(elements.length > 0) {
        // 异常链中第一个也就是最外层的信息, 当然就是 controller 这一层
        StackTraceElement target = elements[0];
        return String.format("%s#%s", target.getClassName(), target.getMethodName());
    }
    return "";
}
2)在异常处理器中做如下修改即可
/**
 * 处理全局系统异常(非自定义异常)
 */
@ExceptionHandler(Exception.class)
public Map<String, Object> handleSystemException(Exception exception) {
    Map<String, Object> exceptionInfo = new HashMap<>();
    exceptionInfo.put("errorCode", 500);
    exceptionInfo.put("errorMsg", "系统故障");
    // 日志记录具体信息,不要返回给前端
    String executedMethod = getExecutedMethod(exception);
    String exceptionMessage = String.format("执行方法: %s, 错误信息: %s", executedMethod, exception.getMessage());
    tem.out.println(exceptionMessage);
    return exceptionInfo;
}


 300
300


 被折叠的 条评论
为什么被折叠?
被折叠的 条评论
为什么被折叠?
 到【灌水乐园】发言


