


 本文介绍了一个使用Python实现的程序,该程序能够自动在Word文档的表格中批量插入图片,并通过GUI界面简化操作。程序利用python-docx库处理Word文档,通过tkinter创建图形界面,允许用户选择Word文件、图片文件夹、输出路径以及图片尺寸。程序还实现了将控制台输出重定向到GUI的多行文本框中,以便实时查看进度。
在工程Word文档的大量表格中自动插入图片的python程序
一、问题描述
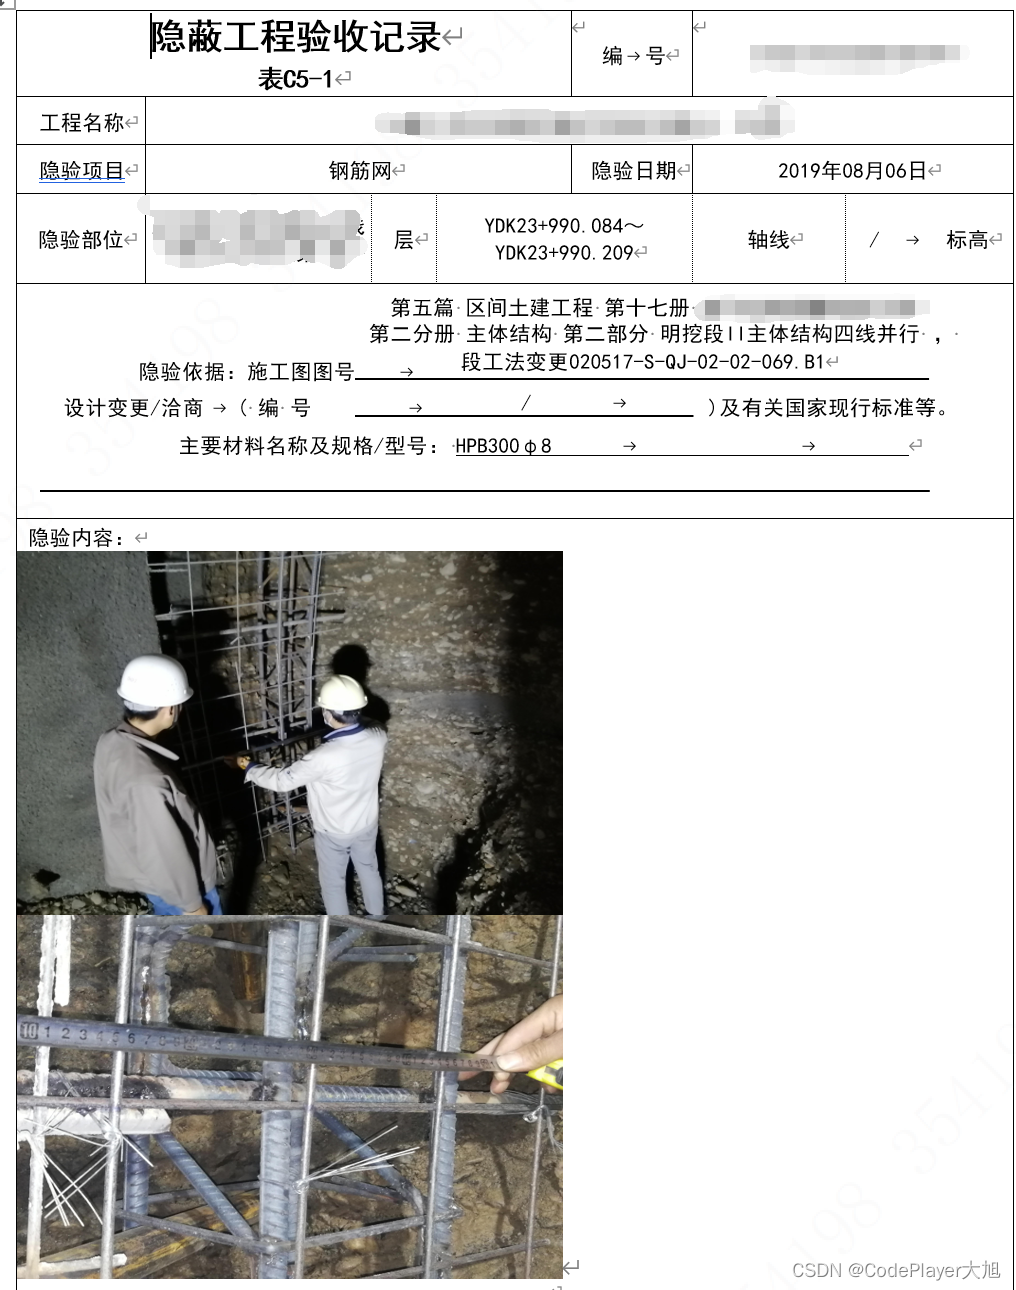
我的姐姐是一个工程技术公司的资料员,经常需要在word文档的表格中插入图片(就是那种类似修路的每100米插入几张照片这种简单重复的工作,其中每100米都有一个单独的表格,一项工程通常几十公里,手动插入图片,还要调整图片大小,工作量还是有的),有一次拜托我帮她完成这样工作,我就想到了写个程序来做这件事,不是一劳永逸的事吗?于是便开始了程序编写工作,语言选择方面,我选择了Python,毕竟“人生苦短,我用python”不是盖的。

在word的表格中插入图片代码
这部分代码主要应用了docx包,有个小坑就是,不要直接装docx。
pip install docx
如果直接装这个docx包,会有些小问题,因为这个包比较老(也有可能是我的pycharm比较新)。我是直接装的python-docx包,和docx包的用法一样,不过不会报错。
pip install python-docx
我一开始装的是docx,会报错,然后找到以下链接解决的:
链接: link
以下是在word的表格中插入图片的代码:
def insert_pictures_to_word(word_in_path,word_out_path,
	pictures_in_path,row,column,width,height):

    origin_word_directory=word_in_path
    result_directory=word_out_path
    origin_pictures_directory=pictures_in_path
    word_insert_row=int(row)-1
    word_insert_column=int(column)-1
    picture_width=int(width)
    picture_height=int(height)

    print(origin_word_directory)
    print(result_directory)
    print(origin_pictures_directory)
    print("word_insert_row: ",word_insert_row)
    print("word_insert_column: ",word_insert_column)
    print("picture_width: ",picture_width)
    print("picture_height: ",picture_height)


    # 获取输入目录下的所有word文件
    import os
    word_files_list=[]

    for files in os.walk(origin_word_directory,topdown=False):
        for file in files[2]:
            word_files_list.append(file)
    print("len(word_files_list) = ",len(word_files_list))

    # 获取输入图片目录下的所有图片名称
    picture_file_list=[]
    for files in os.walk(origin_pictures_directory,topdown=False):
        for file in files[2]:
            picture_file_list.append(file)
    print("len(picture_file_list) = ",len(picture_file_list))

    # 挨个向目录中的word文件表格中插入图片
    for origin_name in word_files_list:
        # 临时文件跳过
        if '~' == origin_name[0]:
            continue
        origin_doc=origin_word_directory+'/'+origin_name
        # 打开模板文件
        document = Document(origin_doc)
        print("打开文件 ",origin_doc," 成功")

        tables=document.tables
        print(len(tables)) # len(tables)表示word文档中表格的总个数

        import os
        files = os.listdir(origin_pictures_directory)  # 读入文件夹
        num_jpg = len(files)  # 统计文件夹中的文件个数
        print(num_jpg)  # 打印文件个数

        # 图片预处理
        from PIL import Image

        for i in range(len(tables)):
            tb = tables[i]  # 现在遍历到第i个表格
            # 获取表格的行
            tb_rows = tb.rows
            # 读取每一个表格第六行的内容
            row_data = []
            row_cells = tb_rows[5].cells
            run = tb.cell(word_insert_row, word_insert_column).paragraphs[1].add_run()

            # 产生文件夹内图片数量范围内的两个随机数
            var=1
            # rand_num1={'rand_num1':0}
            # rand_num2={'rand_num1':0}
            rand_num1=0
            rand_num2=0
            while var==1:
                rand_num1=np.random.randint(1,num_jpg+1)
                rand_num2=np.random.randint(1,num_jpg+1)
                if rand_num2!=rand_num1:
                    break
            # 利用生成的两个随机数重新生成两个随机图片的路径

            rand_path1=origin_pictures_directory+'/'+picture_file_list[rand_num1-1]
            rand_path2=origin_pictures_directory+'/'+picture_file_list[rand_num2-1]

            f1 = Image.open(rand_path1)  # 你的图片文件
            f1.save(rand_path1)  # 替换掉你的图片文件
            f1.close()

            f2 = Image.open(rand_path2)  # 你的图片文件
            f2.save(rand_path2)  # 替换掉你的图片文件
            f2.close()

            # 图片居中设置
            # paragraph = document.add_paragraph()
            # paragraph.alignment = WD_PARAGRAPH_ALIGNMENT.CENTER

            # 插入两张随机序号图片
            picture1 = run.add_picture(rand_path1)
            picture2 = run.add_picture(rand_path2)

            picture1.height = Cm(picture_height) # 设置图片高度
            picture1.width = Cm(picture_width) # 设置图片宽度

            picture2.height = Cm(picture_height) # 设置图片高度
            picture2.width = Cm(picture_width) # 设置图片宽度
            print("插入第 ",i," 张表成功!")

        print("插入图片到 ",origin_doc, " 成功")
        # 组织输出word的path
        result_file_name=result_directory+'/'+'result_'+origin_name
        document.save(result_file_name)
        print("###################################################################")
        print('\n')
    print("#######插入图片完成#######")
我在写代码过程中遇到的几个问题:
- tkinter的button控件中的command参数默认是函数名,不能带参数,找到了以下文章,解决了该问题:
链接: Python——如何向 Tkinter 按钮命令中传递参数
2.我想在UI的多行文本控件中展示整体插入图片的过程,就是将控制台标准输出重定向到tkinter的多行文本控件中,参考的是以下博客:
链接: python利用重定向知识将print输出到tkinter.Text多行文本控件上
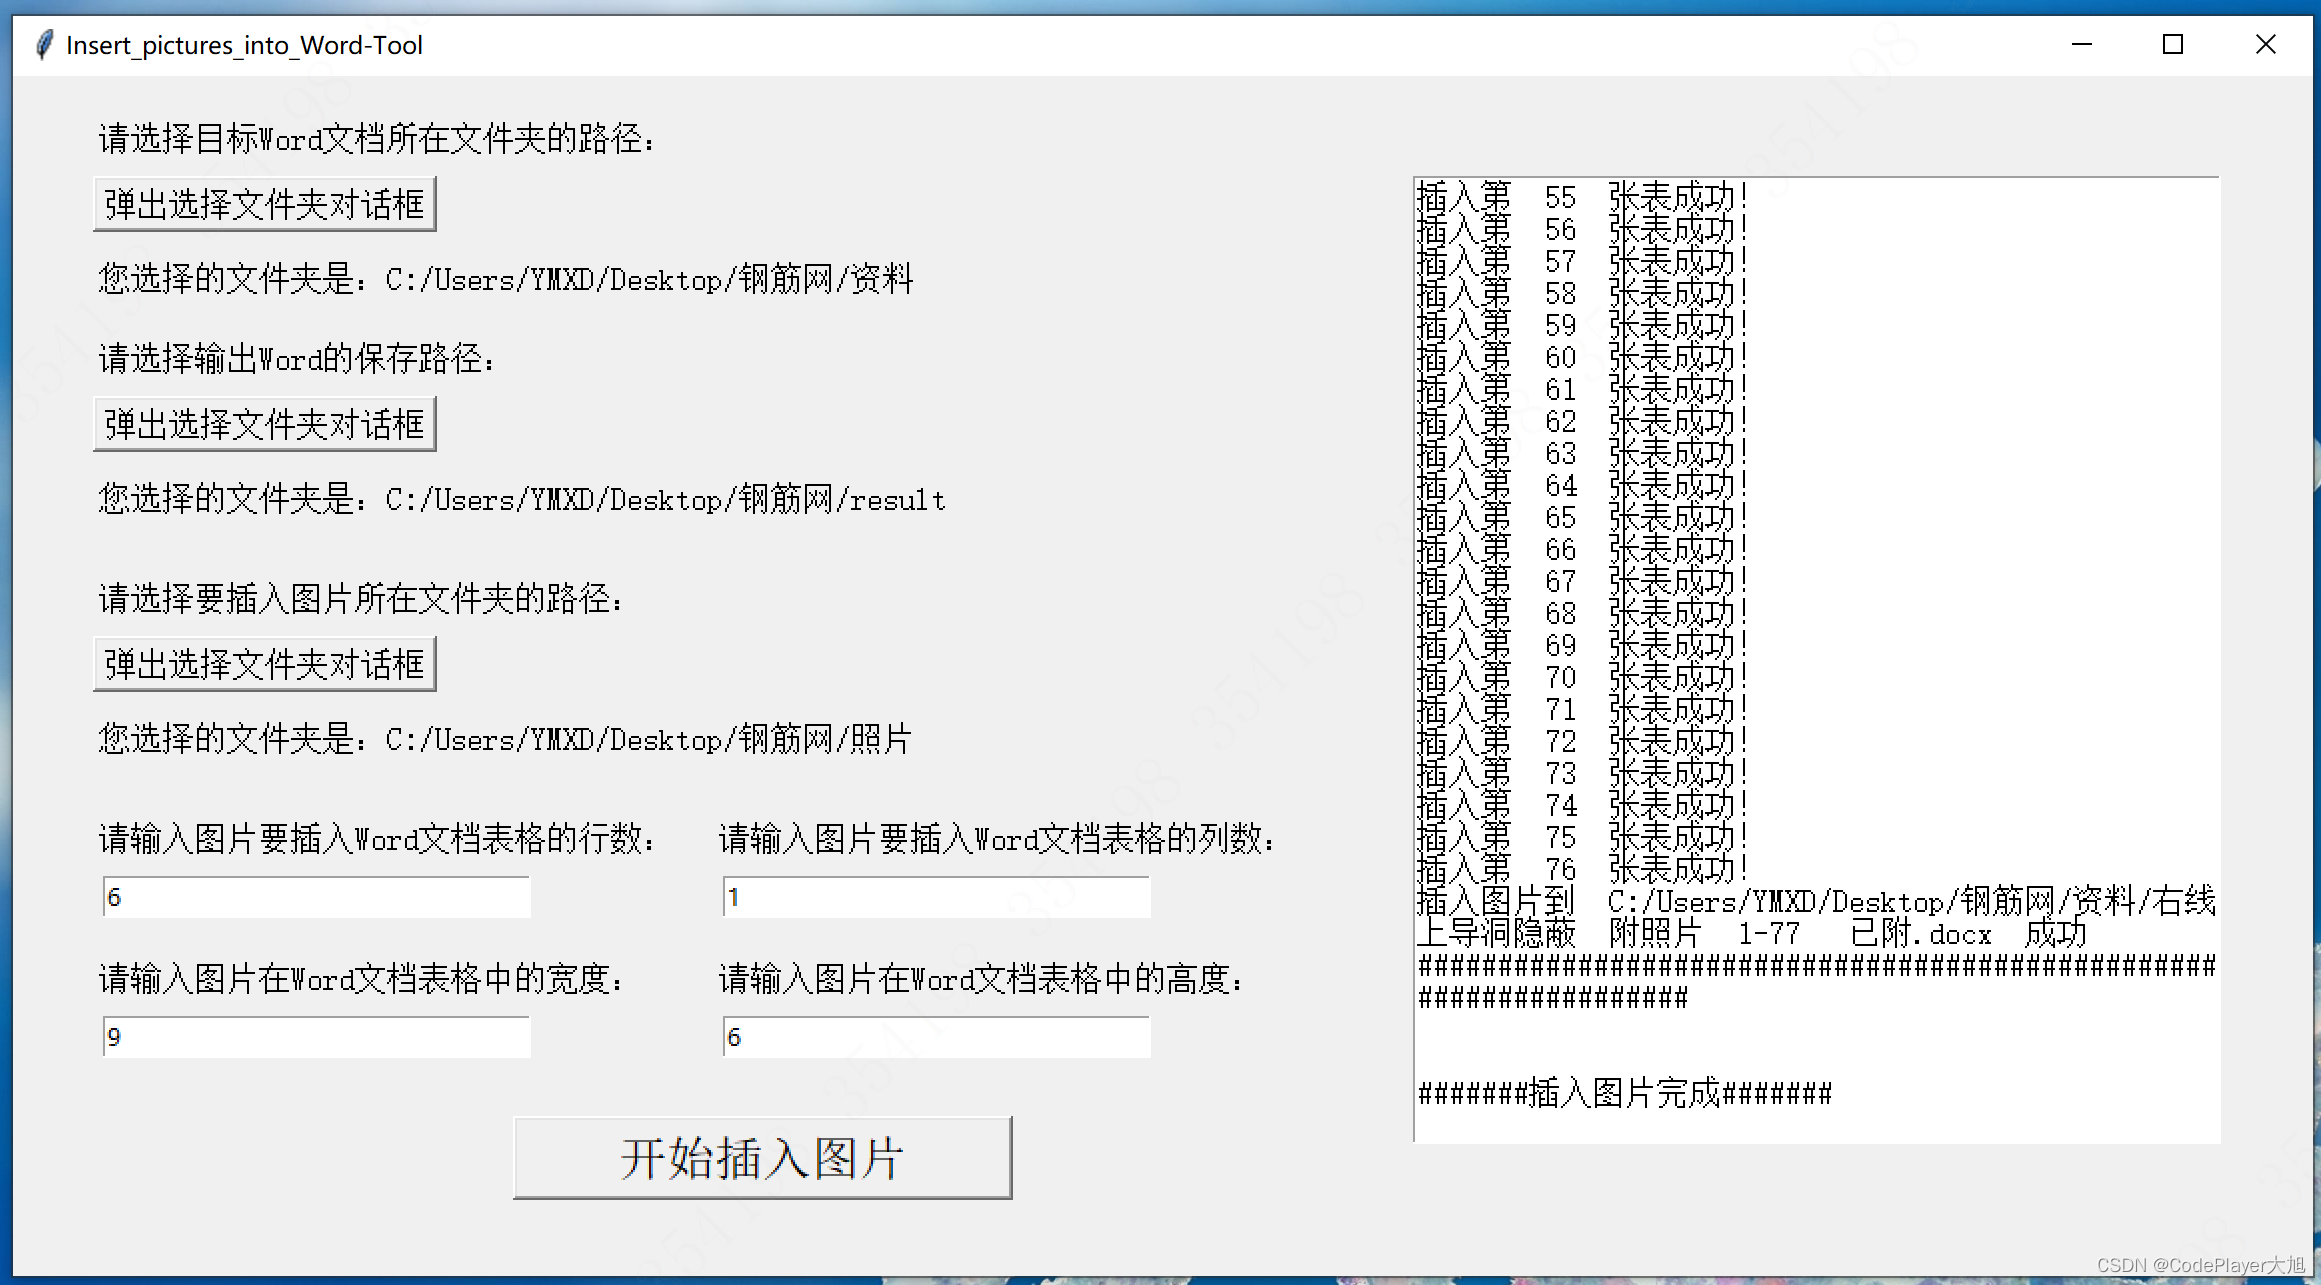
图形界面GUI设计
由于我姐基本没接触过编程,因此有必要做个图形界面,方便使用,这部分主要用的python的原生GUI包tkinter。图形界面的代码如下:
if __name__ == '__main__':
    # main()
    root = Tk() # 主界面
    root.geometry("1150x600+100+100")
    # 设置主界面窗体宽和高,设定窗口位置x=1000,y=1000,单位都是像素pixel

    root.wm_title('Insert_pictures_into_Word-Tool')  # 页面名称

    # anchor = 'w'  # 文本区域左对齐,可填'n','s','e',w',是英文中北,南,东,西的首字母
    # justify = 'left'  # 多行文本时行左对齐,可填'left','right','center'
    Label(root,text='请选择目标Word文档所在文件夹的路径:'
    ,font=("宋体",12),width=50,anchor = 'w',justify="left").place(x=40,y=20)

    word_in_path={'word_in_path':""}

    def choose_word_path():
        word_directory = tkinter.filedialog.askdirectory()
        if word_directory != '':
            word_in_path['word_in_path']=word_directory
            lb1.config(text="您选择的文件夹是:" + word_directory,font=("宋体", 12),
            			height = 0,width = 0)
            lb1.place(x=40,y=90)
        else:
            lb1.config(text="您没有选择任何文件夹!",font=("宋体", 12), height=0,
                      width=0)
            lb1.place(x=40, y=90)
    lb1 = Label(root, text='')
    lb1.pack()
    btn1 = Button(root, text="弹出选择文件夹对话框", command=choose_word_path,
    			 font=("宋体", 12),
                  height=0, width=0)

    btn1.pack()
    btn1.place(x=40, y=50)  # 设置按钮位置,该语句必须放在加载到窗体后才生效

    # 设置输出Word的保存路径
    Label(root, text='请选择输出Word的保存路径:'
    	,font = ("宋体", 12), width = 50, anchor = 'w',
    	justify = "left").place(x=40, y=130)

    word_out_path = {'word_out_path':""}

    def choose_save_path():
        filename2 = tkinter.filedialog.askdirectory()
        if filename2 != '':
            word_out_path['word_out_path']=filename2
            lb2.config(text="您选择的文件夹是:" + filename2,
            font=("宋体", 12), height=0, width=0)
            lb2.place(x=40, y=200)
        else:
            lb2.config(text="您没有选择任何文件夹!",font=("宋体", 12), height=0,
                      width=0)
            lb2.place(x=40, y=200)

    lb2 = Label(root, text='')
    lb2.pack()
    btn2 = Button(root, text="弹出选择文件夹对话框", command=choose_save_path,
    		font=("宋体", 12), height=0, width=0)
    btn2.place(x=40, y=160)  # 设置按钮位置,该语句必须放在加载到窗体后才生效

    #设置要插入图片所在文件夹的路径
    Label(root,text='请选择要插入图片所在文件夹的路径:',
               font=("宋体",12),width = 50, anchor = 'w',
               justify = "left").place(x=40, y=250)

    pictures_in_path ={'pictures_in_path':""}
    def choose_pictures_path():
        filename3 = tkinter.filedialog.askdirectory()
        if filename3 != '':
            pictures_in_path['pictures_in_path']=filename3
            lb3.config(text="您选择的文件夹是:" + filename3,
            			font=("宋体", 12), height=0,width=0)
            lb3.place(x=40, y=320)
        else:
            lb3.config(text="您没有选择任何图片文件夹!",font=("宋体", 12), height=0,
                      width=0)
            lb3.place(x=40, y=320)

    lb3 = Label(root, text='')
    lb3.pack()

    btn3 = Button(root, text="弹出选择文件夹对话框", command=choose_pictures_path,
    				font=("宋体", 12), height=0,width=0)
    btn3.place(x=40, y=280)  # 设置按钮位置,该语句必须放在加载到窗体后才生效

    Label(root,text='请输入图片要插入Word文档表格的行数:',
               font=("宋体",12),width = 50, anchor = 'w',
               		justify = "left").place(x=40, y=370)
    row=Entry(root,width=30)
    row.place(x=45,y=400)

    Label(root,text='请输入图片要插入Word文档表格的列数:',font=("宋体", 12),
    	 width=50, anchor='w', justify="left").place(x=350, y=370)
    column=Entry(root,width=30)
    column.place(x=355,y=400)

    Label(root,text='请输入图片在Word文档表格中的宽度:', font=("宋体", 12),
    		width=50, anchor='w', justify="left").place(x=40, y=440)
    width=Entry(root,width=30)
    width.place(x=45,y=470)

    Label(root,text='请输入图片在Word文档表格中的高度:',
               font=("宋体", 12), width=50, anchor='w',
               		justify="left").place(x=350, y=440)
    height=Entry(root,width=30)
    height.place(x=355,y=470)


    class myStdout():  # 重定向类,将标准输出重定向到多行文本控件
        def __init__(self):
            # 将其备份
            self.stdoutbak = sys.stdout
            self.stderrbak = sys.stderr
            # 重定向
            sys.stdout = self
            sys.stderr = self

        def write(self, info):
            # info信息即标准输出sys.stdout和sys.stderr接收到的输出信息
            t.insert('end', info)  # 在多行文本控件最后一行插入print信息
            t.update()  # 更新显示的文本,不加这句插入的信息无法显示
            t.see(tkinter.END)  # 始终显示最后一行,不加这句,当文本溢出控件最后一行时,不会自动显示最后一行

        def restoreStd(self):
            # 恢复标准输出
            sys.stdout = self.stdoutbak
            sys.stderr = self.stderrbak

    mystd=myStdout()  # 实例化重定向类
    t=tkinter.Text(root,font=("宋体", 12),width=50, height=30)  # 创建多行文本控件
    t.pack() # 布局在窗体上
    t.place(x=700, y=50)

    # 设置函数入口按钮
    btn =Button(root,text='开始插入图片',
    	command=lambda:insert_pictures_to_word(word_in_path['word_in_path'],
    			word_out_path['word_out_path'],
    			pictures_in_path['pictures_in_path'],
    			row.get(),column.get(),
     			width.get(), height.get()),
     			font=("宋体", 18), height = 0, width = 20)
    # 在默认的系统字体中,水平文本单位等于字符 0 的宽度,垂直文本单位等于 0 的高度。

    btn.pack()#加载到窗体
    btn.place(x=250,y=520)# 设置按钮位置,放在加载到窗体语句后才可以生效
    root.mainloop()
    mystd.restoreStd()  # 恢复标准输出
精力有限,就随便做了个稍微能看的界面,具体界面展示如下图:
程序打包
本来我想的是让我姐装个python和Anaconda,但是着实很费劲,而且最后也没装好,索性自己打个包。
程序打包我用的是pyinstaller,这里注意有一个坑:
平时我写代码用的都是默认python的base环境,没有想太多,直接就打包了,结果打个包花了好长时间,最后exe包出来有260M,我一想,不对劲啊,我这代码就几百行,引用了几个包,怎么会这么大,遂必应搜索了一波,发现是因为base环境包含了你在python上装的所有包,即使你的程序里没有使用其他包,在base环境下打包也会将你未使用的包装进你打的程序包里。一般都是自己建一个虚拟环境,只把你程序用到的几个包装上,然后在自建的虚拟环境下打包,这样你的程序包就没有多余的东西。在自建了虚拟环境后,打包就快了很多,而且包由260M,直接缩小到26M左右。下图为base环境和自建环境下打的包的大小对比截图。


 2621
2621

 被折叠的 条评论
为什么被折叠?
被折叠的 条评论
为什么被折叠?
 到【灌水乐园】发言


