


下载相关压缩包并上传

安装基础环境
yum -y install cmake make gcc-c++
yum -y install unzip
解压
先建一个目录
mkdir -p /usr/local/fastdfs
解压到新建目录
unzip libfastcommon-1.0.43.zip -d /usr/local/fastdfs/
#
cd /usr/local/fastdfs/libfastcommon-1.0.43/
# 编译
./make.sh
# 安装核心库
./make.sh install
# 创建软链接
ln -s /usr/lib64/libfastcommon.so /usr/local/lib/libfastcommon.so
ln -s /usr/local/lib64/libfdfsclient.so /usr/local/lib/libfdfsclient.so
ln -s /usr/local/lib64/libfdfsclient.so /usr/lib/libfdfsclient.so
# 解压dfs
tar zxvf fastdfs-6.06.tar.gz  -C /usr/local/fastdfs/
cd /usr/local/fastdfs/fastdfs-6.06/
# 修改配置文件
vim make.sh
# 修改结果
TARGET_PREFIX=$DESTDIR/usr/local
# 编译
./make.sh
# 安装
./make.sh install
安装后,FastDFS主程序所在的位置是:(修改前和修改后)
- /usr/local/bin 可执行文件所在位置。默认安装在/usr/bin 中。
- /etc/fdfs 配置文件所在位置。就是默认位置。
- /usr/local/lib 主程序代码所在位置。默认在/usr/bin中。
- /usr/local/include/fastdfs 包含的一些插件组所在位置。默认在/usr/include/fastdfs中。
cd /etc/init.d/
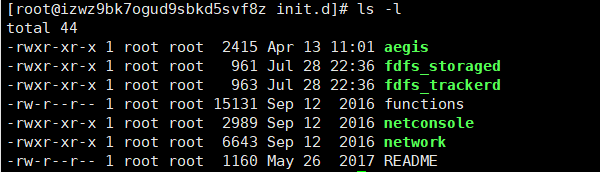
- fdfs_storaged 存储节点脚本
- fdfs_trackerd 跟踪器脚本
cd /etc/fdfs/

cd /usr/local/bin

配置tracker
cp tracker.conf.sample tracker.conf
vim tracker.conf
# the base path to store data and log files
base_path = /fastdfs/tracker
# 创建对应目录
mkdir -p /fastdfs/tracker
# 回到修改脚本
vim fdfs_trackerd
# 修改内容
PRG=/usr/local/bin/fdfs_trackerd
# 启动
./fdfs_trackerd start
# 查看状态
./fdfs_trackerd status
配置storage
cp storage.conf.sample storage.conf
# 修改内容
# the base path to store data and log files
# NOTE: the binlog files maybe are large, make sure
#       the base path has enough disk space,
#       eg. the disk free space should > 50GB
base_path = /fastdfs/storage/base
# 文件存储路径修改
store_path0 = /fastdfs/storage/store
# 单例,原来有两个追踪服务器的ip地址,现在不配集群,就删掉一个并写明自己的ip和端口
tracker_server = 192.168.209.121:22122
# 建配置文件中自定义的目录
mkdir -p /fastdfs/storage/base
mkdir -p /fastdfs/storage/store
# 修改启动脚本
vim /etc/init.d/fdfs_storaged
PRG=/usr/local/bin/fdfs_storaged
# 启动
/etc/init.d/fdfs_storaged start
# 查看状态
/etc/init.d/fdfs_storaged status
配置Client
用代码操作不用配置客户端
# 配置文件路径
/etc/fdfs
# 复制一份配置文件
cp client.conf.sample client.conf
# 修改内容
# 自定义目录
base_path = /fastdfs/client
# 修改为自己的ip
tracker_server = 119.23.211.243:22122
# 新建自己的自定义输出菜单
mkdir -p /fastdfs/client
nginx组件安装
可以让web服务器以http协议直接访问storage中的文件(也就是预览功能,不用下载)
# 解压
tar zxvf fastdfs-nginx-module-1.22.tar.gz  -C /usr/local/fastdfs/
# 进到源码目录去修改config配置文件
cd /usr/local/fastdfs/fastdfs-nginx-module-1.22/src
# 修改内容
CORE_INCS="$CORE_INCS /usr/local/include/fastdfs /usr/include/fastcommon/"
修改配置文件是为了之后安装nginx要把fastdfs-nginx-module加进去,nginx通过该模块去寻找fastdfs的安装目录
# 安装nginx所需的环境
yum install -y gcc gcc-c++ make automake autoconf libtool pcre pcre-develzlib zlib-devel openssl openssl-devel
# 解压ngixn
tar zxvf nginx-1.16.1.tar.gz  -C /usr/local/fastdfs/
# 进到该解压目录
cd /usr/local/fastdfs/nginx-1.16.1
# 创建自定义目录
mkdir -p /var/temp/nginx
# 修改配置(下面一堆命令直接在命令行输入,不用进配置文件,把注释去掉即可)
./configure \
# 配置安装路径
--prefix=/usr/local/nginx \
--pid-path=/var/run/nginx/nginx.pid \
--lock-path=/var/lock/nginx.lock \
--error-log-path=/var/log/nginx/error.log \
--http-log-path=/var/log/nginx/access.log \
--with-http_gzip_static_module \
--http-client-body-temp-path=/var/temp/nginx/client \
--http-proxy-temp-path=/var/temp/nginx/proxy \
--http-fastcgi-temp-path=/var/temp/nginx/fastcgi \
--http-uwsgi-temp-path=/var/temp/nginx/uwsgi \
--http-scgi-temp-path=/var/temp/nginx/scgi \
# 加载模块
--add-module=/usr/local/fastdfs/fastdfs-nginx-module-1.22/src
# 然后预编译
make
# 编译安装
make install
cd /usr/local/fastdfs/fastdfs-nginx-module-1.22/src
# 复制配置文件
cp mod_fastdfs.conf /etc/fdfs
# 修改内容
tracker_server=119.23.211.243:22122
url_have_group_name = true
store_path0=/fastdfs/storage/store
cp /usr/local/fastdfs/fastdfs-6.06/conf/http.conf /etc/fdfs/
cp /usr/local/fastdfs/fastdfs-6.06/conf/mime.types /etc/fdfs/
# 创建软链接
ln -s /usr/local/lib64/libfdfsclient.so /usr/lib64/libfdfsclient.so
ln -s /fastdfs/storage/store/data/  /fastdfs/storage/store/data/M00

# 配置文件路径
cd /usr/local/nginx/conf
# 修改内容
user  root; # 配置一个用户,让nginx以root用户访问文件系统

server {
    listen       8888;
    server_name  localhost;
	location ~/group[0-9]/M00{
            ngx_fastdfs_module;
    }
# 重启
/etc/init.d/fdfs_storaged restart
# nginx启动命令目录
/usr/local/nginx/sbin
# 启动nginx
./nginx

安装配置完毕
测试
# 保证当前目录下有一张 微信登录.png 图片
/usr/local/bin/fdfs_upload_file /etc/fdfs/client.conf 微信登录.png

# 访问地址:卷名 + 虚拟地址 + 文件名(前面已配置好虚拟地址映射到实际存储文件data目录下)
group1/M00/00/00/dxfT82ECKuGAX9Y9AAAf4RpzVjA359.png
# 查看文件系统目录是否上传了该图片
cd /fastdfs/storage/store/data/00/00/

# 去浏览器地址栏访问,能访问到就证明可以了
ip + port(8888)+ group1/M00/00/00/dxfT82ECKuGAX9Y9AAAf4RpzVjA359.png

现在证明安装配置没有问题


 4059
4059


 被折叠的 条评论
为什么被折叠?
被折叠的 条评论
为什么被折叠?
 到【灌水乐园】发言


