


前言
最近项目中需要用Tesnsorflow做个二元分类的预测(具体的业务场景就不提了),无奈大家之前都没做过。最终领导把这个任务安排给了我,本着公司需要什么,我就做什么的原则,承担了下来。
书归正传,本文主要介绍模型从开发到应用的过程,不涉足模型调优等与数据科学相关的问题(主要是不会啊)。文中用到的模型程序是基于tensorflow官方的svm示例修改而来。
一、模型流程
以下是模型从生成到使用的整体流程图

一.设计模型
该部分对应上图中,原始数据->训练数据的部分。
1.算法的选择
此处需要的是二元分类,因此我们采用SVM算法
2.数据的筛选
注意:此处不仅限于使用以下方法,以真正数据科学家的方法为准
1)根据业务进行初步的数据筛选
2)相关性分析
此处可以采用斯皮尔曼相关性(spearman)方法进行相关性分析。
X与Y之间的相关性:保留相关性系数高的X
X与X之间的相关性:如果两个X之间的相关性高,则只保留一个
3.数据的清洗
使用工具生成训练数据
二.训练模型
该部分对应上图中,训练数据->Tensorflow->模型的部分。
1. 编写程序
以下是训练模型及保存模型的Python代码
# -- coding: utf-8 --
import matplotlib.pyplot as plt
import numpy as np
import tensorflow as tf
import pandas as pd
import sklearn.model_selection as model_selection
graph = tf.get_default_graph()
df = pd.read_csv("/usr/local/tensorflow-demo/iris-dataset.csv",header=0)
data_size=df.shape[0]
df = df.values
df = np.array(df)
x_vals = np.array(df[:,:4])
y_vals = np.array(df[:,4])
X_train, X_test, Y_train, Y_test = model_selection.train_test_split(x_vals, y_vals, test_size=0.1)
batch_size = 100
x_data = tf.placeholder(shape=[None, 4], dtype=tf.float32,name = "x_data")
y_target = tf.placeholder(shape=[None, 1], dtype=tf.float32)
A = tf.Variable(tf.random_normal(shape=[4, 1]))
b = tf.Variable(tf.random_normal(shape=[1, 1]))
#y = Ax + b
model_output = tf.matmul(x_data, A) + b
#add
graph.add_to_collection(name="pred_svm", value=model_output)
# Declare vector L2 'norm' function squared
l2_norm = tf.reduce_sum(tf.square(A))
# Loss = max(0, 1-pred*actual) + alpha * L2_norm(A)^2
alpha = tf.constant([0.1])
classification_term = tf.reduce_sum(tf.maximum(0., 1. - model_output * y_target))
loss = classification_term + tf.multiply(alpha, l2_norm)
# Declare prediction function
prediction = tf.sign(model_output)
accuracy = tf.reduce_mean(tf.cast(tf.equal(prediction, y_target), tf.float32))
# Declare optimizer
my_opt = tf.train.GradientDescentOptimizer(0.001)
train_step = my_opt.minimize(loss)
#save
saver = tf.train.Saver()
sess = tf.Session()
init = tf.global_variables_initializer()
sess.run(init)
loss_vec = []
train_accuracy = []
test_accuracy = []
# Training loop
for i in range(data_size):
rand_index = np.random.choice(len(X_train), size=batch_size)
rand_x = X_train[rand_index]
rand_y = np.transpose([Y_train[rand_index]])
sess.run(train_step, feed_dict={x_data: rand_x, y_target: rand_y})
temp_loss = sess.run(loss, feed_dict={x_data: rand_x, y_target: rand_y})
loss_vec.append(temp_loss)
train_acc_temp = sess.run(accuracy, feed_dict={x_data: X_train,y_target: np.transpose([Y_train])})
train_accuracy.append(train_acc_temp)
test_acc_temp = sess.run(accuracy, feed_dict={x_data: X_test,y_target: np.transpose([Y_test])})
test_accuracy.append(test_acc_temp)
if (i + 1) % 100 == 0:
print('Step #{} A = {}, b = {}'.format(str(i + 1),str(sess.run(A)),str(sess.run(b))))
print('Train Loss = ' + str(temp_loss))
#print('Test Loss = ' + str(test_acc_temp))
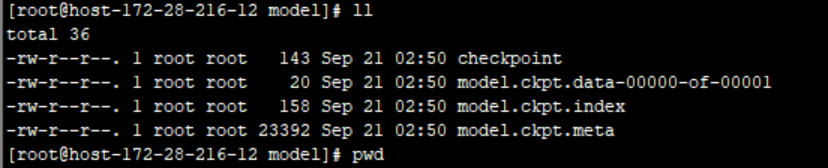
saver.save(sess, "/usr/local/tensorflow-demo/model/model.ckpt")2. 生成模型
三.使用模型
该部分对应上图中,Tensorflow->驱动程序。 驱动程序读写数据库不在本文范围内
1.使用模型
程序想要用模型进行预测,就要和模型进行通信,在这里使用Python的flask框架进行http通信。
话不多说上代码,以下是TensorFlow加载模型并提供对外http接口的Python代码
import matplotlib.pyplot as plt
import numpy as np
import tensorflow as tf
from flask import Flask,jsonify,render_template,request
import json

detection_graph = tf.Graph()
app=Flask(__name__)


@app.route('/api/predict',methods=['POST'])
def predict():
	data = request.get_data()
	data = json.loads(data.decode('utf-8'))
	print(data["input"])
	input_x = data["input"]
	input_x_arr = np.array(input_x)
	input_x_shape = input_x_arr.reshape(1,4)
	print(input_x_shape)
	with tf.Session(graph=detection_graph) as sess:
		sess.run(tf.global_variables_initializer())
		new_saver = tf.train.import_meta_graph('/usr/local/tensorflow-demo/model/model.ckpt.meta')
		new_saver.restore(sess, '/usr/local/tensorflow-demo/model/model.ckpt')
		x_data = detection_graph.get_tensor_by_name("x_data:0")
		pred_svm = tf.get_collection('pred_svm')
		x_vals_test = input_x_shape
		x_vals_test = x_vals_test.reshape(1,4)
		array = sess.run(pred_svm, feed_dict={x_data: x_vals_test})
		array = array[0][0]
		array = array[0]
		result = tf.sign(array)
		result = result.eval()
		result = str(result)
		print(result)
	return result


@app.route('/')
def main():
	return render_template('index.html')

if __name__=='__main__':
	app.run(host='0.0.0.0',port=6009)
我们可以通过访问http://ip:6009/api/predict的post方法进行参数封装和请求


 3221
3221


 被折叠的 条评论
为什么被折叠?
被折叠的 条评论
为什么被折叠?
 到【灌水乐园】发言


