


Spring全家桶-Spring Security之会话并发控制与集群解决
Spring Security是一个能够为基于Spring的企业应用系统提供声明式的安全访问控制解决方案的安全框架。它提供了一组可以在Spring应用上下文中配置的Bean,充分利用了Spring IoC(控制反转),DI(依赖注入)和AOP(面向切面编程)功能,为应用系统提供声明式的安全访问控制功能,减少了为企业系统安全控制编写大量重复代码的工作。
文章目录
前言
Spring Security为我们提供了多种session的处理策略。方便我们进行session的管理。Spring也为我们提供了Spring session的相关包。因为我们是在单机中,一般我们的服务部署为了达到高可用的情况一般都不止一台服务,这个时候我们的session该如何管理?在并发的情况下,Spring Security是如何控制session的呢?现在就来看看。
一、session并发控制?
session并发控制是说明单个用户允许在线的最大会话数。
二、创建项目spring-security-concurrency-control-cluster
1.引入pom
 <dependency>
     <groupId>org.springframework.boot</groupId>
     <artifactId>spring-boot-starter-security</artifactId>
 </dependency>

 <dependency>
     <groupId>org.springframework.boot</groupId>
     <artifactId>spring-boot-starter-web</artifactId>
 </dependency>
2.创建WebSecurityConfig进行相关设置
@EnableWebSecurity
public class WebSecurityConfig extends WebSecurityConfigurerAdapter {

    @Autowired
    private UserDetailsService userDetailsService;

    @Override
    protected void configure(AuthenticationManagerBuilder auth) throws Exception {
        auth.userDetailsService(userDetailsService).passwordEncoder(new BCryptPasswordEncoder());
    }

    @Override
    protected void configure(HttpSecurity http) throws Exception {
        http.authorizeRequests().antMatchers("/user/**").hasAnyRole("USER","ADMIN")
                .antMatchers("/books/**").hasAnyRole("ADMIN")
                .antMatchers("/").permitAll()
                .and()
                .formLogin()
                .loginPage("/login.html")
                .and()
                .csrf().disable()
                .sessionManagement()
                //用于设置单个用户允许同时在线的最大会话数,如果没有额外配置, 那么新登录的会话会踢掉旧的会话,
                .maximumSessions(1);

    }
}
上面的配置进行了session会话的管理配置,并且设置了maximumSessions,设置单个用户的最大会话数。
3.创建相应的UserDetailsService
@Bean
    public UserDetailsService userDetailsService(){
        InMemoryUserDetailsManager inMemoryUserDetailsManager = new InMemoryUserDetailsManager();
        inMemoryUserDetailsManager.createUser(User.withUsername("admin")
                .password(new BCryptPasswordEncoder().encode("123456")).roles("ADMIN").build());
        inMemoryUserDetailsManager.createUser(User.withUsername("user")
                .password(new BCryptPasswordEncoder().encode("123456")).roles("USER").build());
        return inMemoryUserDetailsManager;
    }
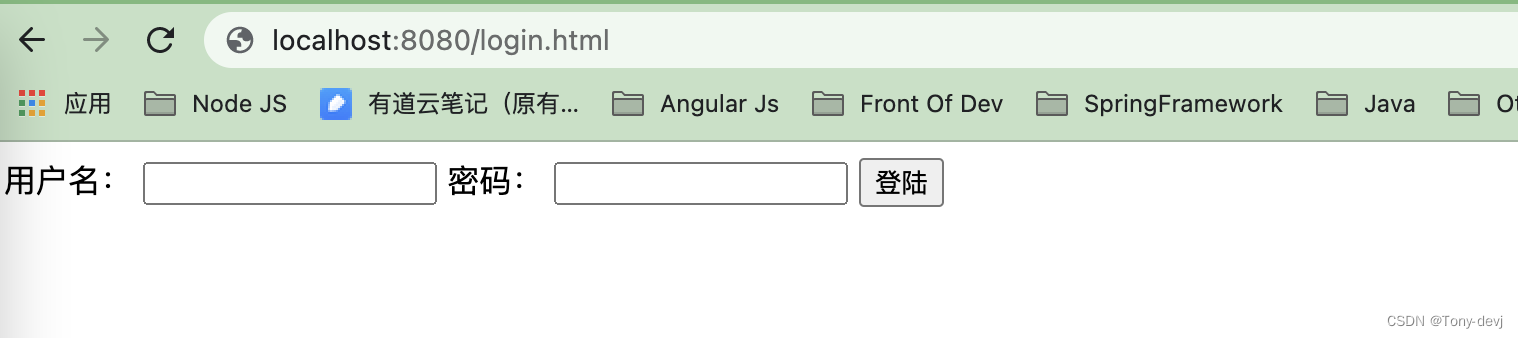
登陆页配置
在resources的目录下新增static目录,并创建login.html登陆页
<!DOCTYPE html>
<html lang="en">
<head>
    <meta charset="UTF-8">
    <title>Title</title>
</head>
<body>
<form  method="post">
    <label>用户名:</label>
    <label>
        <input type="text" name="username" />
    </label>
    <label>密码:</label>
    <label>
        <input type="password" name="password" />
    </label>
    <button type="submit" >登陆</button>
</form>
</body>
</html>
创建相应的controller
@RestController
public class UserController {

    @GetMapping("/user/index")
    public String index(){
        return "index";
    }

    @GetMapping("/user/list")
    public String list(){
        return "list";
    }
}
运行项目
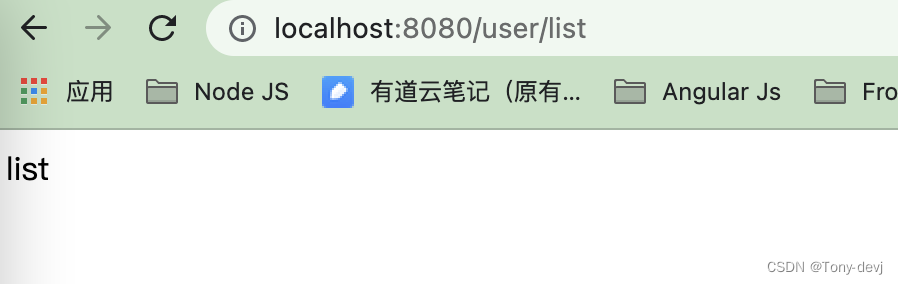
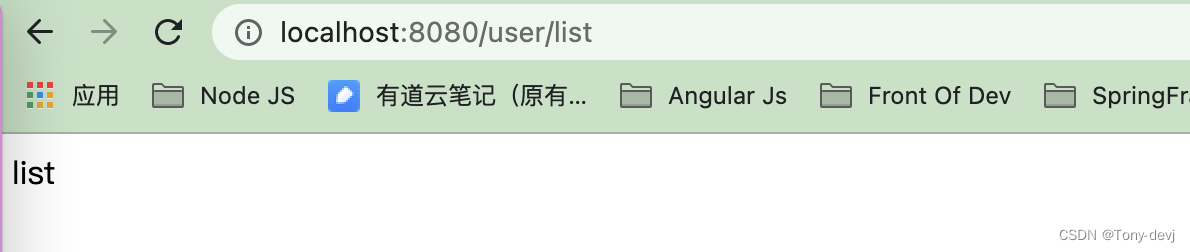
我们启动应用,并访问http://localhost:8080/user/list,将进入登陆页。
使用admin和123456进行登陆系统,可以进行登陆。返回list

因为我们上面设置了单个用户最大会话数为1,因此我们使用另外一个浏览器进行访问并登陆之后,再来刷新之前浏览器的界面的时候,将会返回如下内容:

提示:此会话已过期(可能是由于同一用户尝试进行多个并发登录)。
我们来看看具体的实现。
ConcurrencyControlConfigurer
public SessionManagementConfigurer<H>.ConcurrencyControlConfigurer maximumSessions(int maximumSessions) {
        this.maximumSessions = maximumSessions;
        return new SessionManagementConfigurer.ConcurrencyControlConfigurer();
    }
通过判断maximumSessions的属性值进行判断是否使用ConcurrencyControlConfigurer的配置。
isConcurrentSessionControlEnabled():
private boolean isConcurrentSessionControlEnabled() {
        return this.maximumSessions != null;
    }
通过检验isConcurrentSessionControlEnabled的值,进行创建相应的拦截器:
if (this.isConcurrentSessionControlEnabled()) {
            ConcurrentSessionFilter concurrentSessionFilter = this.createConcurrencyFilter(http);
            concurrentSessionFilter = (ConcurrentSessionFilter)this.postProcess(concurrentSessionFilter);
            http.addFilter(concurrentSessionFilter);
        }
session并发控制也是通过ConcurrentSessionFilter进行实现的(Spring Security Http中进行管理的时候是通过创建相关的过滤器处理,同时添加到Spring Security的过滤器链中).
我们来看看createConcurrencyFilter的实现:
private ConcurrentSessionFilter createConcurrencyFilter(H http) {
        SessionInformationExpiredStrategy expireStrategy = this.getExpiredSessionStrategy();
        SessionRegistry sessionRegistry = this.getSessionRegistry(http);
        ConcurrentSessionFilter concurrentSessionFilter = expireStrategy != null ? new ConcurrentSessionFilter(sessionRegistry, expireStrategy) : new ConcurrentSessionFilter(sessionRegistry);
        LogoutConfigurer<H> logoutConfigurer = (LogoutConfigurer)http.getConfigurer(LogoutConfigurer.class);
        if (logoutConfigurer != null) {
            List<LogoutHandler> logoutHandlers = logoutConfigurer.getLogoutHandlers();
            if (!CollectionUtils.isEmpty(logoutHandlers)) {
                concurrentSessionFilter.setLogoutHandlers(logoutHandlers);
            }
        }
        return concurrentSessionFilter;
    }
具体看看ConcurrentSessionFilter的doFilter方法
private void doFilter(HttpServletRequest request, HttpServletResponse response, FilterChain chain) throws IOException, ServletException {
        HttpSession session = request.getSession(false);
        if (session != null) {
            SessionInformation info = this.sessionRegistry.getSessionInformation(session.getId());
            if (info != null) {
                if (info.isExpired()) {
                    this.logger.debug(LogMessage.of(() -> {
                        return "Requested session ID " + request.getRequestedSessionId() + " has expired.";
                    }));
                    this.doLogout(request, response);
                    this.sessionInformationExpiredStrategy.onExpiredSessionDetected(new SessionInformationExpiredEvent(info, request, response));
                    return;
                }
				this.sessionRegistry.refreshLastRequest(info.getSessionId());
            }
        }

        chain.doFilter(request, response);
    }
onExpiredSessionDetected进行过期处理:
private static final class ResponseBodySessionInformationExpiredStrategy implements SessionInformationExpiredStrategy {
        private ResponseBodySessionInformationExpiredStrategy() {
        }

        public void onExpiredSessionDetected(SessionInformationExpiredEvent event) throws IOException {
            HttpServletResponse response = event.getResponse();
            response.getWriter().print("This session has been expired (possibly due to multiple concurrent logins being attempted as the same user).");
            response.flushBuffer();
        }
    }
下面我们来看看session的认证策略SessionAuthenticationStrategy:
private SessionAuthenticationStrategy getSessionAuthenticationStrategy(H http) {
        if (this.sessionAuthenticationStrategy != null) {
            return this.sessionAuthenticationStrategy;
        } else {
            List<SessionAuthenticationStrategy> delegateStrategies = this.sessionAuthenticationStrategies;
            SessionAuthenticationStrategy defaultSessionAuthenticationStrategy;
            if (this.providedSessionAuthenticationStrategy == null) {
                defaultSessionAuthenticationStrategy = (SessionAuthenticationStrategy)this.postProcess(this.sessionFixationAuthenticationStrategy);
            } else {
                defaultSessionAuthenticationStrategy = this.providedSessionAuthenticationStrategy;
            }
			//判断session并发控制策略
            if (this.isConcurrentSessionControlEnabled()) {
                SessionRegistry sessionRegistry = this.getSessionRegistry(http);
                ConcurrentSessionControlAuthenticationStrategy concurrentSessionControlStrategy = new ConcurrentSessionControlAuthenticationStrategy(sessionRegistry);
                concurrentSessionControlStrategy.setMaximumSessions(this.maximumSessions);
                concurrentSessionControlStrategy.setExceptionIfMaximumExceeded(this.maxSessionsPreventsLogin);
                concurrentSessionControlStrategy = (ConcurrentSessionControlAuthenticationStrategy)this.postProcess(concurrentSessionControlStrategy);
                RegisterSessionAuthenticationStrategy registerSessionStrategy = new RegisterSessionAuthenticationStrategy(sessionRegistry);
                registerSessionStrategy = (RegisterSessionAuthenticationStrategy)this.postProcess(registerSessionStrategy);
                delegateStrategies.addAll(Arrays.asList(concurrentSessionControlStrategy, defaultSessionAuthenticationStrategy, registerSessionStrategy));
            } else {
                delegateStrategies.add(defaultSessionAuthenticationStrategy);
            }

            this.sessionAuthenticationStrategy = (SessionAuthenticationStrategy)this.postProcess(new CompositeSessionAuthenticationStrategy(delegateStrategies));
            return this.sessionAuthenticationStrategy;
        }
    }
ConcurrentSessionControlAuthenticationStrategy:
 public void onAuthentication(Authentication authentication, HttpServletRequest request, HttpServletResponse response) {
        int allowedSessions = this.getMaximumSessionsForThisUser(authentication);
        if (allowedSessions != -1) {
            List<SessionInformation> sessions = this.sessionRegistry.getAllSessions(authentication.getPrincipal(), false);
            int sessionCount = sessions.size();
            if (sessionCount >= allowedSessions) {
            	//判断session的数和允许的session数进行比较
                if (sessionCount == allowedSessions) {
                    HttpSession session = request.getSession(false);
                    if (session != null) {
                        Iterator var8 = sessions.iterator();
                        while(var8.hasNext()) {
                            SessionInformation si = (SessionInformation)var8.next();
                            //如果会话不是新的会话则不做任何处理
                            if (si.getSessionId().equals(session.getId())) {
                                return;
                            }
                        }
                    }
                }
				//否则进行session策略判断
                this.allowableSessionsExceeded(sessions, allowedSessions, this.sessionRegistry);
            }
        }
    }

    protected void allowableSessionsExceeded(List<SessionInformation> sessions, int allowableSessions, SessionRegistry registry) throws SessionAuthenticationException {
    	//exceptionIfMaximumExceeded当用户达到最大会话数,是否阻止新会话的创建
        if (!this.exceptionIfMaximumExceeded && sessions != null) {
            sessions.sort(Comparator.comparing(SessionInformation::getLastRequest));
            int maximumSessionsExceededBy = sessions.size() - allowableSessions + 1;
            List<SessionInformation> sessionsToBeExpired = sessions.subList(0, maximumSessionsExceededBy);
            Iterator var6 = sessionsToBeExpired.iterator();

            while(var6.hasNext()) {
                SessionInformation session = (SessionInformation)var6.next();
                //当会话建立时,是之前的会话过期处理
                session.expireNow();
            }

        } else {
            throw new SessionAuthenticationException(this.messages.getMessage("ConcurrentSessionControlAuthenticationStrategy.exceededAllowed", new Object[]{allowableSessions}, "Maximum sessions of {0} for this principal exceeded"));
        }
    }
如果我们像创建新会话的时候不让其创建新会话,可以进行如下的配置
@Override
    protected void configure(HttpSecurity http) throws Exception {
        http.authorizeRequests().antMatchers("/user/**").hasAnyRole("USER","ADMIN")
                .antMatchers("/books/**").hasAnyRole("ADMIN")
                .antMatchers("/").permitAll()
                .and()
                .formLogin()
                .loginPage("/login.html")
                .and()
                .csrf().disable()
                .sessionManagement()
                //用于设置单个用户允许同时在线的最大会话数,如果没有额外配置, 那么新登录
                //的会话会踢掉旧的会话,
                .maximumSessions(1)
                .maxSessionsPreventsLogin(true);

    }
maxSessionsPreventsLogin进行以上的设置。
我们可以在运行看看:
当我们在chrome中登陆,可以正常登陆。
但是我们换了浏览器之后,在进行登陆,将登陆不上了。

上面确实进行了会话的个数处理,但是我们进行注销操作(调用/logout)接口的时候,我们再进行登陆,在chrome中页登陆不上了。怎么回事呢?难道要我们重启启动应用吗?在线上可不能这样处理。那改如何调整呢?
这里出现这个原因是因为Spring Security是通过监听session的销毁事件来触发会话信息的清理工作,我们再之前没有进行相应的处理,因此导致Spring Security无法正常清理过期的或者已经注销的会话session。
在Servlet中, 监听session相关事件的方法是实现HttpSessionListener接口, 并在系统中注册该监听器。 Spring Security在HttpSessionEventPublisher类中实现HttpSessionEventPublisher接口, 并转化成Spring的事件机制.
HttpSessionEventPublisher.class:
public class HttpSessionEventPublisher implements HttpSessionListener, HttpSessionIdListener {
    private static final String LOGGER_NAME = HttpSessionEventPublisher.class.getName();

    public HttpSessionEventPublisher() {
    }

    ApplicationContext getContext(ServletContext servletContext) {
        return SecurityWebApplicationContextUtils.findRequiredWebApplicationContext(servletContext);
    }
	//session创建
    public void sessionCreated(HttpSessionEvent event) {
        this.extracted(event.getSession(), new HttpSessionCreatedEvent(event.getSession()));
    }
	//session销毁
    public void sessionDestroyed(HttpSessionEvent event) {
        this.extracted(event.getSession(), new HttpSessionDestroyedEvent(event.getSession()));
    }
	//session改变
    public void sessionIdChanged(HttpSessionEvent event, String oldSessionId) {
        this.extracted(event.getSession(), new HttpSessionIdChangedEvent(event.getSession(), oldSessionId));
    }

    private void extracted(HttpSession session, ApplicationEvent e) {
        Log log = LogFactory.getLog(LOGGER_NAME);
        log.debug(LogMessage.format("Publishing event: %s", e));
        //发布事件
        this.getContext(session.getServletContext()).publishEvent(e);
    }
}
因此我们可以创建HttpSessionEventPublisherbean进行处理。
public class SessionConcurrencyControlClusterApplication {

    public static void main(String[] args) {
        SpringApplication.run(SessionConcurrencyControlClusterApplication.class,args);
    }

    @Bean
    public UserDetailsService userDetailsService(){
        InMemoryUserDetailsManager inMemoryUserDetailsManager = new InMemoryUserDetailsManager();
        inMemoryUserDetailsManager.createUser(User.withUsername("admin")
                .password(new BCryptPasswordEncoder().encode("123456")).roles("ADMIN").build());
        inMemoryUserDetailsManager.createUser(User.withUsername("user")
                .password(new BCryptPasswordEncoder().encode("123456")).roles("USER").build());
        return inMemoryUserDetailsManager;
    }

    @Bean
    public HttpSessionEventPublisher httpSessionEventPublisher(){
        return new HttpSessionEventPublisher();
    }

}
我们在进行启动系统看看。
先在chrome中登陆,是没有问题的。

我们在另外一个浏览器中登陆,将登陆不上。

但是当我们登出的时候,在进行登陆,是可以登陆上去的。
因此我们刚才配置的事件监听起到了一定的作用。
使用数据库管理用户的问题
当我们使用数据库管理用户的时候,会话并发控制没有起到作用。Spring Security为了实现会话并发控制, 采用会话信息表来管理用户的会话状态。session的控制处理看看session时怎么注册的。
SessionRegistryImpl.class:
//SessionRegistryImpl实现了ApplicationListener,所以可以监听Spring事件
public class SessionRegistryImpl implements SessionRegistry, ApplicationListener<AbstractSessionEvent> {
    //存放用户和其对应的所有的sessionId map
    private final ConcurrentMap<Object, Set<String>> principals;
    //存放sessionId以及对应的SessionInformation
    private final Map<String, SessionInformation> sessionIds;

    public SessionRegistryImpl() {
        this.principals = new ConcurrentHashMap();
        this.sessionIds = new ConcurrentHashMap();
    }

    public SessionRegistryImpl(ConcurrentMap<Object, Set<String>> principals, Map<String, SessionInformation> sessionIds) {
        this.principals = principals;
        this.sessionIds = sessionIds;
    }

    public List<Object> getAllPrincipals() {
        return new ArrayList(this.principals.keySet());
    }
	//获取所有的session
    public List<SessionInformation> getAllSessions(Object principal, boolean includeExpiredSessions) {
        Set<String> sessionsUsedByPrincipal = (Set)this.principals.get(principal);
        if (sessionsUsedByPrincipal == null) {
            return Collections.emptyList();
        } else {
            List<SessionInformation> list = new ArrayList(sessionsUsedByPrincipal.size());
            Iterator var5 = sessionsUsedByPrincipal.iterator();
            while(true) {
                SessionInformation sessionInformation;
                do {
                    do {
                        if (!var5.hasNext()) {
                            return list;
                        }

                        String sessionId = (String)var5.next();
                        sessionInformation = this.getSessionInformation(sessionId);
                    } while(sessionInformation == null);
                } while(!includeExpiredSessions && sessionInformation.isExpired());

                list.add(sessionInformation);
            }
        }
    }
	//通过sessionId获取SessionInformation
    public SessionInformation getSessionInformation(String sessionId) {
        return (SessionInformation)this.sessionIds.get(sessionId);
    }

    public void onApplicationEvent(AbstractSessionEvent event) {
        String oldSessionId;
        //	监听session销毁事件
        if (event instanceof SessionDestroyedEvent) {
            SessionDestroyedEvent sessionDestroyedEvent = (SessionDestroyedEvent)event;
            oldSessionId = sessionDestroyedEvent.getId();
            //
            this.removeSessionInformation(oldSessionId);
        } else if (event instanceof SessionIdChangedEvent) {
       		//sessionId改变事件
            SessionIdChangedEvent sessionIdChangedEvent = (SessionIdChangedEvent)event;
            oldSessionId = sessionIdChangedEvent.getOldSessionId();
            if (this.sessionIds.containsKey(oldSessionId)) {
                Object principal = ((SessionInformation)this.sessionIds.get(oldSessionId)).getPrincipal();
                this.removeSessionInformation(oldSessionId);
                this.registerNewSession(sessionIdChangedEvent.getNewSessionId(), principal);
            }
        }

    }
	//刷新最后的一个请求
    public void refreshLastRequest(String sessionId) {
        SessionInformation info = this.getSessionInformation(sessionId);
        if (info != null) {
            info.refreshLastRequest();
        }

    }
	//注册一个新的session
    public void registerNewSession(String sessionId, Object principal) {
        //如果sessionId不为空的时候,将移除对应的sessionId信息
        if (this.getSessionInformation(sessionId) != null) {
            this.removeSessionInformation(sessionId);
        }

        if (this.logger.isDebugEnabled()) {
            this.logger.debug(LogMessage.format("Registering session %s, for principal %s", sessionId, principal));
        }

        this.sessionIds.put(sessionId, new SessionInformation(principal, sessionId, new Date()));
        this.principals.compute(principal, (key, sessionsUsedByPrincipal) -> {
            if (sessionsUsedByPrincipal == null) {
                sessionsUsedByPrincipal = new CopyOnWriteArraySet();
            }
            ((Set)sessionsUsedByPrincipal).add(sessionId);
            this.logger.trace(LogMessage.format("Sessions used by '%s' : %s", principal, sessionsUsedByPrincipal));
            return (Set)sessionsUsedByPrincipal;
        });
    }
	//根据sessionId移除SessionInformation
    public void removeSessionInformation(String sessionId) {
        SessionInformation info = this.getSessionInformation(sessionId);
        if (info != null) {
            if (this.logger.isTraceEnabled()) {
                this.logger.debug("Removing session " + sessionId + " from set of registered sessions");
            }
			//移除sessionId对应的SessionInformation
            this.sessionIds.remove(sessionId);
            this.principals.computeIfPresent(info.getPrincipal(), (key, sessionsUsedByPrincipal) -> {
                this.logger.debug(LogMessage.format("Removing session %s from principal's set of registered sessions", sessionId));
                sessionsUsedByPrincipal.remove(sessionId);
                if (sessionsUsedByPrincipal.isEmpty()) {
                    this.logger.debug(LogMessage.format("Removing principal %s from registry", info.getPrincipal()));
                    sessionsUsedByPrincipal = null;
                }

                this.logger.trace(LogMessage.format("Sessions used by '%s' : %s", info.getPrincipal(), sessionsUsedByPrincipal));
                return sessionsUsedByPrincipal;
            });
        }
    }
}
Principals采用了以用户信息为key的设计。 在HashMap中, 以对象为key必须覆写hashCode和equals两个方法 , 但我们实现UserDetails时并没有这么做, 这导致同一个用户每次登录注销时计算得到的key都不相同, 所以每次登录都会向principals中添加一个用户, 而注销时却从来不能有效移除。 在这种情况下, 不仅达不到会话并发控制的效果, 还会引发内存泄露。
因此我们想达到相关的效果,我们在创建自定义的UserDetails的时候,需要实现hashCode和equals两个方法即可。
@Override
    public boolean equals(Object o) {
        return o instanceof User && this.username.equals(((User) o).getUsername());
    }

    @Override
    public int hashCode() {
        return this.username.hashCode();
    }
三.集群环境会话管理Spring Session
会话通常保存在服务器内存中,客户端访问时根据自己的sessionId在内存中查找,这种方法虽然简单快捷,但缺点也很明显。从容量上说,服务器内存有限,除了系统正常运行的消耗,留给session的空间不多,当访问量增大时,内存就会捉襟见肘。从稳定性上来说,session依赖于内存, 而内存并非持久性存储容器, 就算服务器本身是可靠的, 但当部署在上面的服务停止或重启时, 也会导致所有会话状态丢失。 我们如果将sessionId存储在内存中,重启服务就会丢失,这样对用户体验不是很友好。并且在高可用的情况下,我们一般是多机部署,而不是单台服务器。因此需要解决以上问题有如下几种方式:
Nginx ip_hash 策略:服务端使用 Nginx 代理,每个请求按访问 IP 的 hash 分配,这样来自同一 IP 固定访问一个后台服务器,避免了在服务器 A 创建 Session,第二次分发到服务器 B 的现象。Session 复制:任何一个服务器上的 Session 发生改变(增删改),该节点会把这个 Session 的所有内容序列化,然后广播给所有其它节点。共享 Session:服务端无状态话,将用户的 Session 等信息使用缓存中间件来统一管理,保障分发到每一个服务器的响应结果都一致。
在项目开发中,我们一般会推荐采用第三种方式,Spring为我们提供了session的相关工具包,就是使用Spring Session解决集群下session共享的问题。
Spring Session就是专门用于解决集群会话问题的, 它不仅为集群会话提供了非常完善的支持, 与Spring Security的整合也非常方便(谁叫都是Spring出品的呢)😄😄😄!
Spring Session提供了3种方式存储session的方式。- 分别对应3种注解:
- @EnableRedisHttpSession-存放在缓存redis
- @EnableMongoHttpSession-存放在Nosql的MongoDB
- @EnableJdbcHttpSession-存放数据库
- 分别对应3种注解:
1.项目依赖pom
<dependency>
     <groupId>org.springframework.session</groupId>
     <artifactId>spring-session-data-redis</artifactId>
 </dependency>

 <dependency>
     <groupId>org.springframework.boot</groupId>
     <artifactId>spring-boot-starter-data-redis</artifactId>
 </dependency>
2.使用redis存储session
一般我们在分布式场景下,管理session我们大部分使用的都是redis进行处理。也可以使用mongodb也是可以的,根据自己的喜好和公司的相关技术选型决定。
3.使用
- 修改配置文件application.yml:
server:
  port: 8080
spring:
  redis:
    port: 6379
    host: 127.0.0.1
    password: auth@123  #设置redis的认证密码 如没有设置redis的认证密码则不需配置
- 创建session管理配置
@EnableRedisHttpSession
public class SessionConfig {

}
添加即可。
将项目复制一份出来,并同时修改端口,不要和之前的项目一样(这样会端口冲突)。同时启动端口进行登陆验证访问操作,看看在redis中查看相应额数据即可。


 1633
1633


 被折叠的 条评论
为什么被折叠?
被折叠的 条评论
为什么被折叠?
 到【灌水乐园】发言


