


契源
最近家里人翻出了一些黑白老照片,想让我帮忙给老照片上色,于是我在gayhub上找到了DeOldify这个项目。
项目地址:https://github.com/jantic/DeOldify
作者在DeepAI上提供了Demo,可以直接上传照片体验。
https://deepai.org/machine-learning-model/colorizer
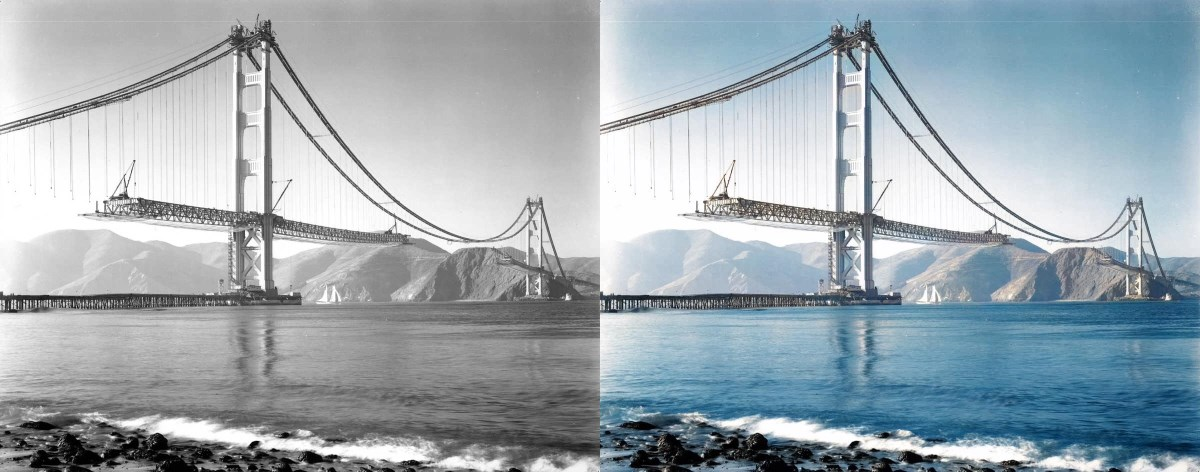
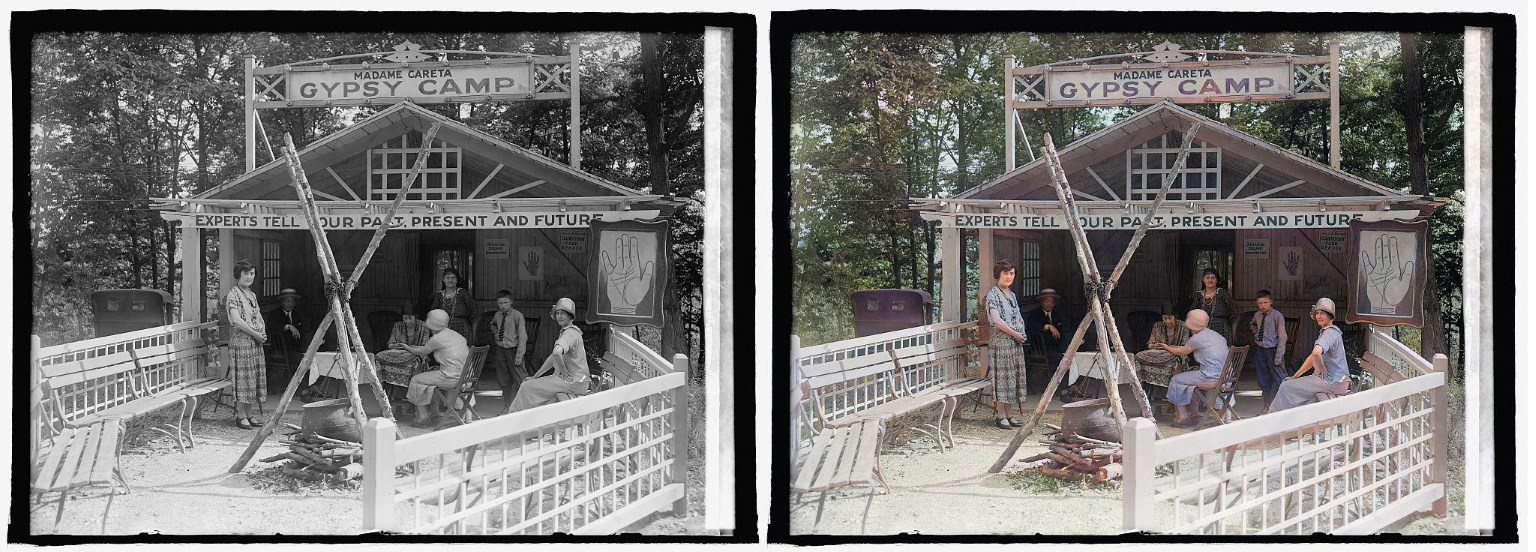
下面是作者提供的一些样例,先睹为快:
原理
这个项目我没找到对应的论文,我猜测是作者并没有发论文,因为在Readme中有个小标题Stuff That Should Probably Be In A Paper。
根据作者的自述,该项目底层还是用到著名的生成对抗网络(Gan),不过他采用了一种新型GAN训练方法,叫做NoGAN(这名字乍一看还以为他没用GAN)。
生成器(负责模型着色)他采用的是经典的”U-net“,同时它对生成器采用了预训练。U-net的主干网络同时也使用了到了ResNet,后面运行代码会联网自动下载ResNet模型参数文件。
下图为U-net结构,图源[1]:

实操
在开始上手前,首先了解作者提供的三个版本的预训练模型。
即Artistic、Stable、Video
原文描述如下:
Artistic - This model achieves the highest quality results in image coloration, in terms of interesting details and vibrance. The most notable drawback however is that it’s a bit of a pain to fiddle around with to get the best results (you have to adjust the rendering resolution or render_factor to achieve this). Additionally, the model does not do as well as stable in a few key common scenarios- nature scenes and portraits. The model uses a resnet34 backbone on a UNet with an emphasis on depth of layers on the decoder side. This model was trained with 5 critic pretrain/GAN cycle repeats via NoGAN, in addition to the initial generator/critic pretrain/GAN NoGAN training, at 192px. This adds up to a total of 32% of Imagenet data trained once (12.5 hours of direct GAN training).
Stable - This model achieves the best results with landscapes and portraits. Notably, it produces less “zombies”- where faces or limbs stay gray rather than being colored in properly. It generally has less weird miscolorations than artistic, but it’s also less colorful in general. This model uses a resnet101 backbone on a UNet with an emphasis on width of layers on the decoder side. This model was trained with 3 critic pretrain/GAN cycle repeats via NoGAN, in addition to the initial generator/critic pretrain/GAN NoGAN training, at 192px. This adds up to a total of 7% of Imagenet data trained once (3 hours of direct GAN training).
Video - This model is optimized for smooth, consistent and flicker-free video. This would definitely be the least colorful of the three models, but it’s honestly not too far off from “stable”. The model is the same as “stable” in terms of architecture, but differs in training. It’s trained for a mere 2.2% of Imagenet data once at 192px, using only the initial generator/critic pretrain/GAN NoGAN training (1 hour of direct GAN training).
简单理解,就是说Artistic模型比较倾向艺术型,上色会趋向丰富大胆一些,Stable模型比较稳定,上色通常比较写实,适合风景和肖像。这两个都是针对图像上色,对于视频上色需要使用第三个Vidio模型,它解决了视频上色的闪烁问题。
下面正式进入到代码实操环节,我的系统环境是Windows10,虽然作者使用的环境是Linux,并且说不支持windows环境,但我仍然在代码中找到了可供windows用户调用的接口。
首先克隆上面的代码仓库,新建一个models文件夹用来存放三个模型的预训练权重。
这个文件作者提供了网盘下载地址,也可以使用我提供的下载地址,下载得更快:
https://pan.baidu.com/s/1Wgib3b8o5F5W2dUnYrY_zw?pwd=8888

之后,在根目录下新建一个调用文件main.py:
import os
from deoldify.visualize import get_artistic_video_colorizer, get_stable_image_colorizer, get_artistic_image_colorizer
import warnings

warnings.filterwarnings("ignore")


def colorizer(input_path, output_dir):
    output_path = os.path.join(output_dir, os.path.basename(input_path))
    image_colorizer = get_stable_image_colorizer()  # stable稳定版
    # image_colorizer = get_artistic_image_colorizer()  # artistic 艺术版
    result = image_colorizer.get_transformed_image(input_path, render_factor=30, post_process=True, watermarked=True)

    if result is not None:
        result.save(output_path, quality=95)
        result.close()

if __name__ == '__main__':
    colorizer("./data/image/yanb_gray.jpg", "./data/result/")
作者提供的接口文件放在了visualize.py这个文件中,get_artistic_image_colorizer可以调用artistic模型,get_stable_image_colorizer()可以调用stable模型。
为了直观感受这个模型的上色效果,我下载了毕导的照片,先将其灰度化:
from PIL import Image

image_raw = Image.open("data/image/yanbi.jpg")
image_black_white = image_raw.convert('L')
image_black_white.save('data/image/yanbi_gray.jpg')
再输入到模型中进行上色,效果如下图所示:

结果非常Amazing啊!上色完之后,发现毕导的衣服颜色换了,因为模型无法根据灰度细节推理出原始色彩信息。艺术模型(Artistic)上的色明显比稳定模型(Stable)上得色彩更“妖艳”一些。最主要的是,毕导经过色彩重塑之后,皮肤变白了!
回归正题,下面我本来想再测试一下视频恢复效果,因为作者还提供了colorize_from_file_name这个接口可以用来给视频上色,但是我发现输入路径存在一些问题。根据仓库的issue[2],作者解释这可能是Linux和windows的路径不兼容导致的,只能以后有机会再试。
代码备份
另外,我发现这个仓库作者仍在维护更新,为了保证后续结果的稳定,我将目前的代码进行备份,同时不方便上gayhub的读者可以下载:
https://pan.baidu.com/s/1k4Dp8Sanz4FzbR6jtoTZ6g?pwd=8888
References
[1]https://www.likecs.com/show-205090690.html
[2]https://zhuanlan.zhihu.com/p/55050741
2022.9.15更
后记:视频上色
在Win10系统上无法成功给视频上色,在官方提供的Colab中,可以运行成功。
Colab地址:https://colab.research.google.com/github/jantic/DeOldify/blob/master/VideoColorizerColab.ipynb


 927
927

 被折叠的 条评论
为什么被折叠?
被折叠的 条评论
为什么被折叠?
 到【灌水乐园】发言


