


 本文介绍了如何在Vue应用中,通过动态路由和store管理,根据后端返回的菜单数据创建左侧菜单,避免直接访问未授权的路由,以及添加路由加载标记以优化用户体验。
之前在【Vue开发实例(六)实现左侧菜单导航】文中实现了菜单的导航,本篇是在那个基础上改造的。
动态路由实现左侧菜单导航
一、动态菜单创建
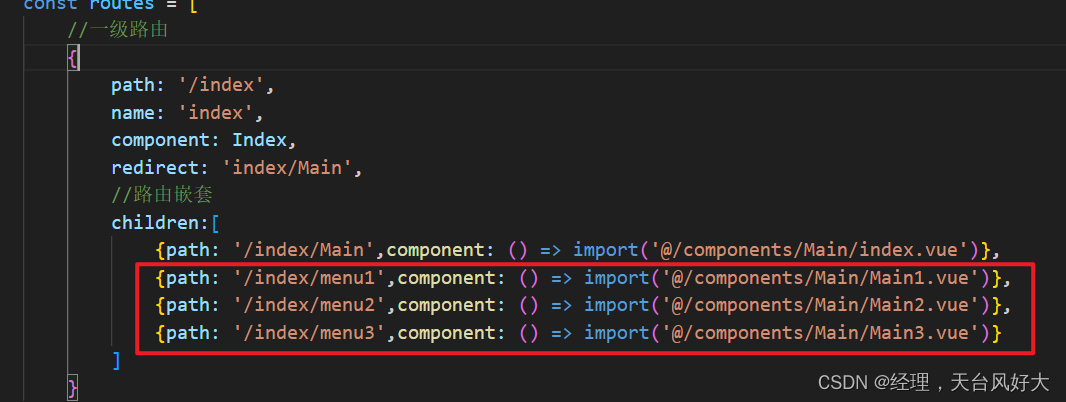
假如我定义了3条路由,分别是 ‘/index/menu1’,‘/index/menu2’,‘/index/menu3’
但当前登录的用户只有 ‘/index/menu1’,‘/index/menu2’ 两条路由的权限,如果按照【Vue开发实例(六)实现左侧菜单导航】的做法,可以直接在浏览器输入’/index/menu3’ 这条路由地址来访问,这显然是不对的,于是我们就需要动态路由。
在前文中,router/index.js下方的3条子路由,假设后端只返回menu1和menu2这2条,也就是这路由,我们只需动态创建2条即可。
- 原来的 menu_data 使用mockjs来返回,模拟后台查询菜单数据返回
- 在mockjs中定义对象的
/post/menuList路径get请求 - 返回参数中除了原来的
name、icon、path增加了component,用于定义跳转路径。
- 在mockjs中定义对象的
mock/index.js代码
Mock.mock('/post/menuList', 'get', function () {
  const menu_data = [
    {
      name: '一级菜单1',
      icon: 'el-icon-location',
      path: '/index/menu1',
      component: 'Main1'
    },
    {
      name: '一级菜单2',
      icon: 'el-icon-document',
      path: '/index/menu2',
      component: 'Main2'
    }
  ]
  return {
    menu_data
  }
});
- 修改store/index.js,全部参考代码如下

import Vue from 'vue'
import Vuex from 'vuex'
import moduleA from './module/moduleA.js';
import moduleB from './module/moduleB.js';

Vue.use(Vuex)

const state = {
  username: '牛牛',
  userState: 0,
  menu_data: []
}
const mutations = {
  setUser(state, name) {
    state.username = name
  },
  setUserState(state, data) {
    state.userState += data
  },
  setMenuData(state, data) {
    state.menu_data = data
  },
}
const getters = {
  getUserState(state) {
    let data;
    if (state.userState == 0) {
      data = '无效'
    } else {
      data = state.userState + '级'
    }
    return data;
  }
}
const modules = {
  a: moduleA,
  b: moduleB
}

export default new Vuex.Store({
  state,
  mutations,
  getters,
  modules
})
- 在
router/index.js里面使用方法 beforeEach 来获取数据,并提交到store
注意:
- 不要忘记引入axios和store的内容
import axios from "axios";
import store from "@/store/index.js";

import VueRouter from "vue-router"
import Index from "@/components/Index";
import axios from "axios";
import store from "@/store/index.js";

const routes = [
    //一级路由
    {
        path: '/index',
        name: 'index',
        component: Index,
        redirect: 'index/Main',
        //路由嵌套
        children:[
            {path: '/index/Main',component: () => import('@/components/Main/index.vue')},
            {path: '/index/menu1',component: () => import('@/components/Main/Main1.vue')},
            {path: '/index/menu2',component: () => import('@/components/Main/Main2.vue')},
            {path: '/index/menu3',component: () => import('@/components/Main/Main3.vue')}
        ]
    }
]
const router = new VueRouter({
    mode:'history',
    routes
})
router.beforeEach((to, from, next)=>{
    next();
    axios.get('/post/menuList').then(res=>{
         store.commit('setMenuData',res.data.menu_data)
    });
})
export  default router;
- 在
Aside.vue代码中,data里面的属性menu_data不能直接返回了,需通过computed来返回,并且返回的值是从store里面获取的
Aside.vue 参考代码如下
<template>
  <div style="height: 100%">
    <el-menu
      background-color="#545c64"
      text-color="#ffffff"
      active-text-color="#ffd04b"
      class="el-menu-vertical-demo"
      router
    >
      <el-menu-item
        :index="item.path"
        v-for="item in menu_data"
        :key="item.name"
      >
        <i :class="item.icon"></i>{{ item.name }}
      </el-menu-item>
    </el-menu>
  </div>
</template>

<script>
export default {
  name: "Aside",
  data() {
    return {};
  },
  computed: {
    menu_data: {
      get() {
        return this.$store.state.menu_data;
      },
    },
  },
};
</script>

<style scoped>
.el-icon-location,
.el-icon-document,
.el-icon-setting {
  display: inline-flex;
  align-items: center;
  justify-content: center;
}
</style>
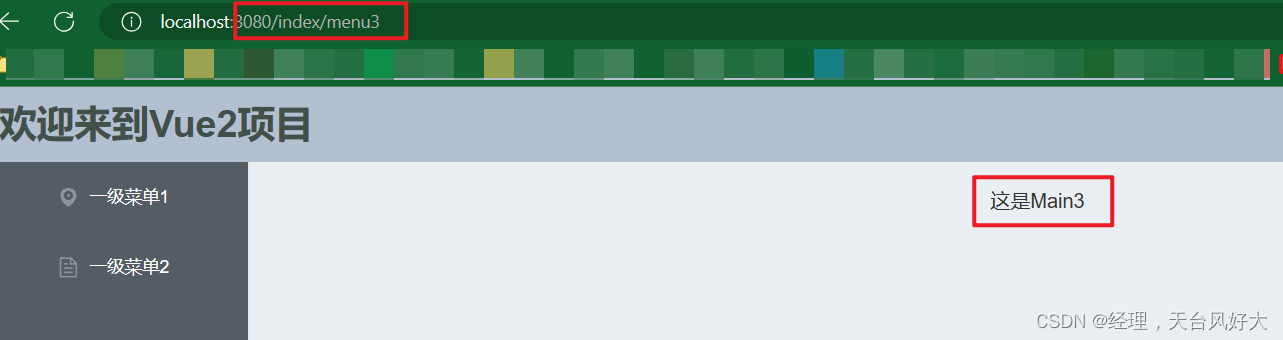
页面效果
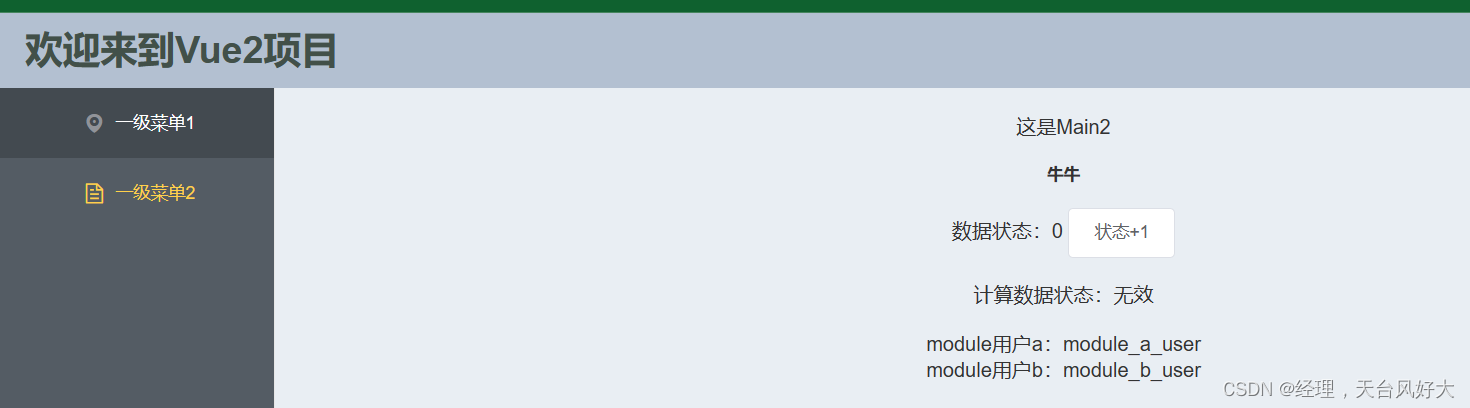
此时菜单确实只有2个菜单,点击菜单也能对应访问到路由menu1和menu2,但是当我们在地址栏输入 menu3的时候,也能访问,这显然是不对的,因为我们的路由是静态写死的,这里肯定是不合理的,所以需要动态来修改一下。
二、根据菜单数据来创建路由
目前的路由写法
const routes = [
    //一级路由
    {
        path: '/index',
        name: 'index',
        component: Index,
        redirect: 'index/Main',
        //路由嵌套
        children:[
            {path: '/index/Main',component: () => import('@/components/Main/index.vue')},
            {path: '/index/menu1',component: () => import('@/components/Main/Main1.vue')},
            {path: '/index/menu2',component: () => import('@/components/Main/Main2.vue')},
            {path: '/index/menu3',component: () => import('@/components/Main/Main3.vue')}
        ]
    }
]
针对上面的情况,我们可以考虑,通过菜单取到的数据,动态添加这个路由,而不是直接写死。
说干就干!!!
- 先将
router/index.js这3条路由代码删除
const routes = [
    //一级路由
    {
        path: '/index',
        name: 'index',
        component: Index,
        redirect: 'index/Main',
        //路由嵌套
        children:[
            {path: '/index/Main',component: () => import('@/components/Main/index.vue')},
        ]
    }
]
- 在
router/index.js中创建添加动态路由的方法 buildRouter
let oRouters = router.options.routes;
const buildRouter = () => {
    let data = store.state.menu_data;
    data.forEach(item => {
        let new_router = {
            path: item.path,
            component: () => import('../components/Main/' + item.component + '.vue')
        }
        oRouters[0].children.push(new_router);
    })
    router.addRoutes(oRouters)
}
- 在创建动态菜单的同时调用这个函数,修改
router/index.js
router.beforeEach((to, from, next)=>{
    next();
    axios.get('/post/menuList').then(res=>{
         store.commit('setMenuData',res.data.menu_data);

        //动态创建路由
        buildRouter();
    });
})
页面展示,点击访问 index/menu1 和 index/menu2正常
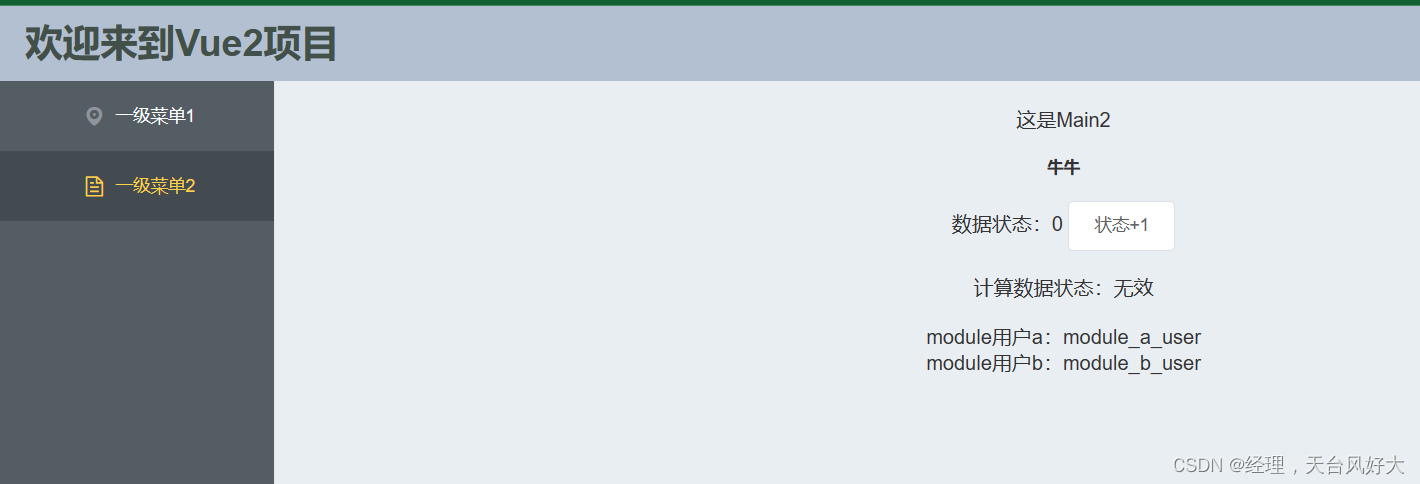
访问 index/menu3 就不会出现页面内容

全部参考代码
router/index.js
import VueRouter from "vue-router"
import Index from "@/components/Index";
import axios from "axios";
import store from "@/store/index.js";

const routes = [
    //一级路由
    {
        path: '/index',
        name: 'index',
        component: Index,
        redirect: 'index/Main',
        //路由嵌套
        children: [
            { path: '/index/Main', component: () => import('@/components/Main/index.vue') },
        ]
    }
]

const router = new VueRouter({
    mode: 'history',
    routes
})

let oRouters = router.options.routes;
const buildRouter = () => {
    let data = store.state.menu_data;
    data.forEach(item => {
        let new_router = {
            path: item.path,
            component: () => import('../components/Main/' + item.component + '.vue')
        }
        oRouters[0].children.push(new_router);
    })
    router.addRoutes(oRouters)
}

router.beforeEach((to, from, next) => {
    next();
    axios.get('/post/menuList').then(res => {
        store.commit('setMenuData', res.data.menu_data);

        //动态创建路由
        buildRouter();
    });
})

export default router;
三、添加路由已加载标记,省的每次点击菜单都要加载
- 修改
store/index.js,在store.js的state添加 属性isLoadRoute: false

- 在
router/index.js添加路由的router.beforeEach稍作修改
store和router的相关代码如下
store/index.js代码
import Vue from 'vue'
import Vuex from 'vuex'
import moduleA from './module/moduleA.js';
import moduleB from './module/moduleB.js';

Vue.use(Vuex)

const state = {
  username: '牛牛',
  userState: 0,
  menu_data: [],
  isLoadRoute: false,
}
const mutations = {
  setLoadRoute(state, data) {
    state.isLoadRoute = data
  },
  setUser(state, name) {
    state.username = name
  },
  setUserState(state, data) {
    state.userState += data
  },
  setMenuData(state, data) {
    state.menu_data = data
  },

}
const getters = {
  getUserState(state) {
    let data;
    if (state.userState == 0) {
      data = '无效'
    } else {
      data = state.userState + '级'
    }
    return data;
  }
}
const modules = {
  a: moduleA,
  b: moduleB
}

export default new Vuex.Store({
  state,
  mutations,
  getters,
  modules
})
router/index.js代码
import VueRouter from "vue-router"
import Index from "@/components/Index";
import axios from "axios";
import store from "@/store/index.js";
const routes = [
//一级路由
{
path: '/index',
name: 'index',
component: Index,
redirect: 'index/Main',
//路由嵌套
children: [
{ path: '/index/Main', component: () => import('@/components/Main/index.vue') },
]
}
]
const router = new VueRouter({
mode: 'history',
routes
})
let oRouters = router.options.routes;
const buildRouter = () => {
let data = store.state.menu_data;
data.forEach(item => {
let new_router = {
path: item.path,
component: () => import('../components/Main/' + item.component + '.vue')
}
oRouters[0].children.push(new_router);
})
router.addRoutes(oRouters)
}
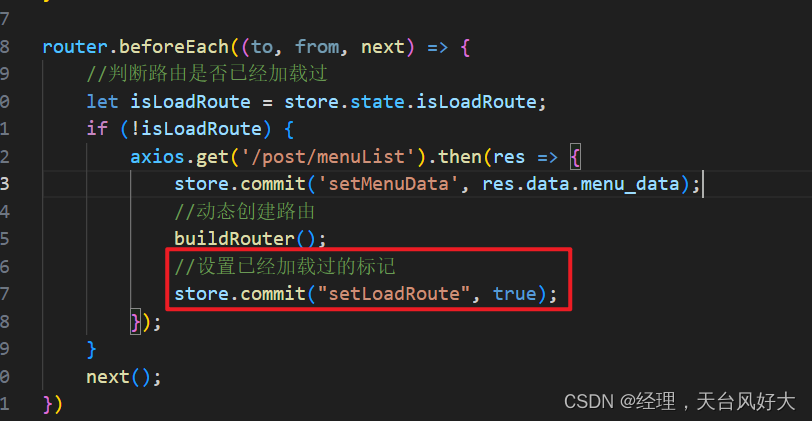
router.beforeEach((to, from, next) => {
//判断路由是否已经加载过
let isLoadRoute = store.state.isLoadRoute;
if (!isLoadRoute) {
axios.get('/post/menuList').then(res => {
store.commit('setMenuData', res.data.menu_data);
//动态创建路由
buildRouter();
//设置已经加载过的标记
store.commit("setLoadRoute", true);
});
}
next();
})
export default router;
此时点击菜单就不会重复加载了。


 4121
4121

 被折叠的 条评论
为什么被折叠?
被折叠的 条评论
为什么被折叠?
 到【灌水乐园】发言


