


 本文聚焦于Spring Cloud整合Seata解决分布式事务问题。先介绍Spring Cloud Alibaba与Spring Boot、Spring Cloud的版本对应关系,接着阐述整合Seata的环境配置,包括下载源码、创建日志表和事务相关表等,最后以用户下单扣减库存为例,模拟分布式事务问题并使用Seata解决。
seata官网:http://seata.io/zh-cn/
前言
在当下微服务架构比较火热时,新一代微服务解决方案Spring Cloud Alibaba提供的开源分布式事务解决框架Seata无疑成为了我们在解决分布式事务时的首要之选,前面两篇文章分别介绍了常见的分布式解决方案和成熟的框架以及关于Seata概念的入门介绍,没有过分布式事务处理的小伙伴可以先有个大致的入门了解:
- SpringCloud Alibaba微服务架构(十一)- 常见分布式事务解决方案及理论基础篇
- SpringCloud Alibaba微服务架构(十二)- 分布式事务解决框架之Seata概念入门篇
那么在本篇Spring Cloud整合Seata之前,你必须要了解一下Spring Cloud Alibaba与Spring Boot、Spring Cloud之间的版本对应关系。
版本选择: Spring Cloud Alibaba与Spring Boot、Spring Cloud版本对应关系
一、版本要求

坑点1: 如果项目中使用了druid数据库连接池,引入的是SpringBoot的Starter依赖druid-spring-boot-starter,那么需要把druid-spring-boot-starter依赖换成druid1.1.23,因为seata源码中引入的druid依赖跟druid-spring-boot-starter的自动装配类冲突了,冲突的情况下项目启动出现异常,异常如下:

二、整合Seata环境配置
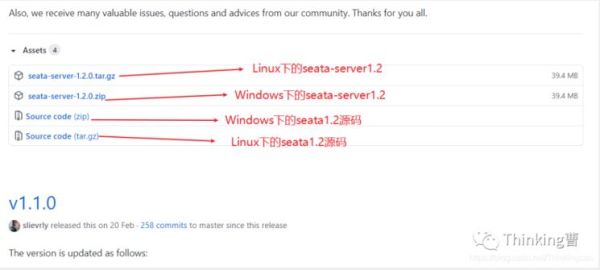
1. 下载seata-server-1.2.0和seata-1.2.0源码
seate-server下载: https://seata.io/zh-cn/blog/download.html,下载我们需要使用的seata1.2压缩包。
seata-1.2.0源码下载: https://github.com/seata/seata/releases
在这里插入图片描述
2. 创建undo_log日志表
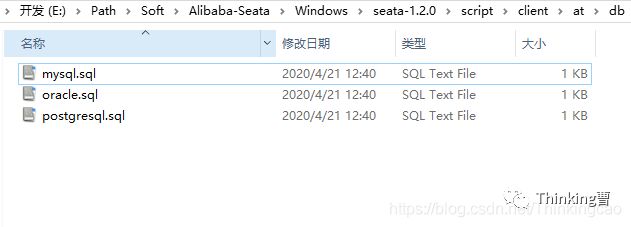
在seata1.2源码seata-1.2.0\script\client\at\db目录下有提供针对mysql、oracle、postgresql这三种数据库生成undo-log逆向日志回滚表的表创建脚本。
- 在你项目的参与全局事务的数据库中加入undo_log这张表。undo_log表脚本根据自身数据库类型来选择。
- for AT mode you must to init this sql for you business database. the seata server not need it.
CREATE TABLE IF NOT EXISTS `undo_log`
(
    `branch_id`     BIGINT(20)   NOT NULL COMMENT 'branch transaction id',
    `xid`           VARCHAR(100) NOT NULL COMMENT 'global transaction id',
    `context`       VARCHAR(128) NOT NULL COMMENT 'undo_log context,such as serialization',
    `rollback_info` LONGBLOB     NOT NULL COMMENT 'rollback info',
    `log_status`    INT(11)      NOT NULL COMMENT '0:normal status,1:defense status',
    `log_created`   DATETIME(6)  NOT NULL COMMENT 'create datetime',
    `log_modified`  DATETIME(6)  NOT NULL COMMENT 'modify datetime',
    UNIQUE KEY `ux_undo_log` (`xid`, `branch_id`)
) ENGINE = InnoDB
  AUTO_INCREMENT = 1
  DEFAULT CHARSET = utf8 COMMENT ='AT transaction mode undo table';
3.创建seata事务相关表
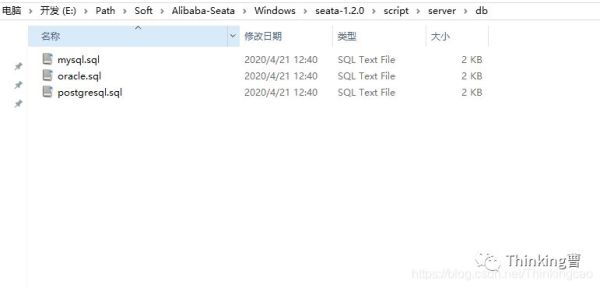
下载Seata1.2的源码后解压如上图,目前支持mysql、oracle、postgresql这三种数据库,上述三种脚本是针对Seata的Sever端在协调处理分布式事务时所需要的3张表,提供了不同数据库的global_table表、branch_table表、lock_table表创建脚本,根据自身数据库执行对应的sql脚本执行即可。
这里以mysql为例,在你的mysql数据库中创建名为seata的库,并执行以下sql,将会生成三张表:
-- -------------------------------- The script used when storeMode is 'db' --------------------------------
-- the table to store GlobalSession data
CREATE TABLE IF NOT EXISTS `global_table`
(
    `xid`                       VARCHAR(128) NOT NULL,
    `transaction_id`            BIGINT,
    `status`                    TINYINT      NOT NULL,
    `application_id`            VARCHAR(32),
    `transaction_service_group` VARCHAR(32),
    `transaction_name`          VARCHAR(128),
    `timeout`                   INT,
    `begin_time`                BIGINT,
    `application_data`          VARCHAR(2000),
    `gmt_create`                DATETIME,
    `gmt_modified`              DATETIME,
    PRIMARY KEY (`xid`),
    KEY `idx_gmt_modified_status` (`gmt_modified`, `status`),
    KEY `idx_transaction_id` (`transaction_id`)
) ENGINE = InnoDB
  DEFAULT CHARSET = utf8;

-- the table to store BranchSession data
CREATE TABLE IF NOT EXISTS `branch_table`
(
    `branch_id`         BIGINT       NOT NULL,
    `xid`               VARCHAR(128) NOT NULL,
    `transaction_id`    BIGINT,
    `resource_group_id` VARCHAR(32),
    `resource_id`       VARCHAR(256),
    `branch_type`       VARCHAR(8),
    `status`            TINYINT,
    `client_id`         VARCHAR(64),
    `application_data`  VARCHAR(2000),
    `gmt_create`        DATETIME(6),
    `gmt_modified`      DATETIME(6),
    PRIMARY KEY (`branch_id`),
    KEY `idx_xid` (`xid`)
) ENGINE = InnoDB
  DEFAULT CHARSET = utf8;

-- the table to store lock data
CREATE TABLE IF NOT EXISTS `lock_table`
(
    `row_key`        VARCHAR(128) NOT NULL,
    `xid`            VARCHAR(96),
    `transaction_id` BIGINT,
    `branch_id`      BIGINT       NOT NULL,
    `resource_id`    VARCHAR(256),
    `table_name`     VARCHAR(32),
    `pk`             VARCHAR(36),
    `gmt_create`     DATETIME,
    `gmt_modified`   DATETIME,
    PRIMARY KEY (`row_key`),
    KEY `idx_branch_id` (`branch_id`)
) ENGINE = InnoDB
  DEFAULT CHARSET = utf8;
4. 项目中引入seata依赖
4.1 如果微服务是SpringCloud
<!-- 分布式事务seata包 -->
<!--seata begin-->
<dependency>
   <groupId>com.alibaba.cloud</groupId>
   <artifactId>spring-cloud-starter-alibaba-seata</artifactId>
   <version>2.1.3.RELEASE</version>
   <exclusions>
     <exclusion>
        <groupId>io.seata</groupId>
        <artifactId>seata-spring-boot-starter</artifactId>
     </exclusion>
   </exclusions>
</dependency>
<dependency>
    <groupId>io.seata</groupId>
    <artifactId>seata-spring-boot-starter</artifactId>
    <version>1.2.0</version>
</dependency>
<!--seata end-->
4.2 如果微服务是Dubbo
<dependency>
    <groupId>io.seata</groupId>
    <artifactId>seata-spring-boot-starter</artifactId>
    <version>1.2.0</version>
</dependency>
5. 更改seata-server中的registry.conf
配置registry.conf注册中心为nacos,配置nacos相关属性参数。
##配置seata-server的注册中心,支持file 、nacos 、eureka、redis、zk、consul、etcd3、sofa
registry {
  # file 、nacos 、eureka、redis、zk、consul、etcd3、sofa
  type = "nacos"

  nacos {
    application = "seata-server"
    serverAddr = "127.0.0.1:8848"
    group = "SEATA_GROUP"
    namespace = "public"
    username = "nacos"
    cluster = "default"
    password = "nacos"
  }

  file {
    name = "file.conf"
  }
}

##配置seata-server的配置中心,支持file、nacos 、apollo、zk、consul、etcd3
config {
  # file、nacos 、apollo、zk、consul、etcd3
  type = "nacos"

  nacos {
    serverAddr = "127.0.0.1:8848"
    namespace = "public"
    group = "SEATA_GROUP"
    username = "nacos"
    password = "nacos"
  }

  file {
    name = "file.conf"
  }
}
6. 修改seata-server中的file.config
配置file.config的DB模式相关参数配置。
##配置seata-server的数据存储方式,支持本地文档和数据库。
## transaction log store, only used in seata-server
store {
  ## store mode: file、db、redis
  mode = "db"

  ## file store property
  file {
    ## store location dir
    dir = "sessionStore"
    # branch session size , if exceeded first try compress lockkey, still exceeded throws exceptions
    maxBranchSessionSize = 16384
    # globe session size , if exceeded throws exceptions
    maxGlobalSessionSize = 512
    # file buffer size , if exceeded allocate new buffer
    fileWriteBufferCacheSize = 16384
    # when recover batch read size
    sessionReloadReadSize = 100
    # async, sync
    flushDiskMode = async
  }

  ## database store property
  db {
    ## the implement of javax.sql.DataSource, such as DruidDataSource(druid)/BasicDataSource(dbcp)/HikariDataSource(hikari) etc.
    datasource = "druid"
    ## mysql/oracle/postgresql/h2/oceanbase etc.
    dbType = "mysql"
    driverClassName = "com.mysql.jdbc.Driver"
    url = "jdbc:mysql://127.0.0.1:3306/seata"
    user = "root"
    password = "root"
    minConn = 5
    maxConn = 30
    globalTable = "global_table"
    branchTable = "branch_table"
    lockTable = "lock_table"
    queryLimit = 100
    maxWait = 5000
  }

  ## redis store property
  redis {
    host = "127.0.0.1"
    port = "6379"
    password = ""
    database = "0"
    minConn = 1
    maxConn = 10
    queryLimit = 100
  }
}
7. 修改提交nacos脚本到nacos控制台
运行你下载的nacos,并参考:https://github.com/seata/seata/tree/develop/script/config-center 下的config.txt文件并修改:
service.vgroupMapping.my_test_tx_group=default
store.mode=db
store.db.datasource=druid
store.db.dbType=mysql
store.db.driverClassName=com.mysql.jdbc.Driver
store.db.url=jdbc:mysql://127.0.0.1:3306/seata?useUnicode=true
store.db.user=username
store.db.password=password
store.db.minConn=5
store.db.maxConn=30
store.db.globalTable=global_table
store.db.branchTable=branch_table
store.db.queryLimit=100
store.db.lockTable=lock_table
store.db.maxWait=5000
运行仓库:https://github.com/seata/seata/tree/develop/script/config-center/nacos 中提供的nacos脚本nacos-config.sh,将以上信息提交到nacos控制台,如果有需要修改参数,可直接通过登录nacos控制台修改。
操作如下图:

8. application.yml配置
从官方github仓库:https://github.com/seata/seata/tree/develop/script/client 拿到参考配置做修改,加到你项目的application.yml文件中。
#Seata分布式事务配置(AT模式)
seata:
  enabled: true
  application-id: ${spring.application.name}
  #客户端和服务端在同一个事务组
  tx-service-group: my_test_tx_group
  enable-auto-data-source-proxy: true
  service:
    vgroup-mapping:
      my_test_tx_group: default
  config:
    type: nacos
    nacos:
      namespace: "public"
      serverAddr: 127.0.0.1:8848
      group: SEATA_GROUP
      username: "nacos"
      password: "nacos"
  #服务注册到nacos
  registry:
    type: nacos
    nacos:
      application: seata-server
      server-addr: 127.0.0.1:8848
      group: SEATA_GROUP
      namespace: "public"
      username: "nacos"
      password: "nacos"
      cluster: default
9. 运行seata-server
启动运行seata-server,成功后,运行自己的服务提供者,服务参与者。在全局事务调用者(发起全局事务的服务)的接口上加入@GlobalTransactional注解
到此为止,整合SpringCloud整合seata1.2及seata1.2整合nacos的配置与注册中心全部整合完成了。
三、项目准备
如果你经过前面的步骤搭建Seata环境完成了,那么你可以尝试一下启动项目,控制台无异常则搭建成功。
那么下面准备以Seata官方文档上的一个经典例子为题,模拟用户下单,创建订单同时扣减库存数量这一过程中产生的分布式事务问题,然后使用Seata解决,正好使用以下Seata的特性。
1. 订单服务
- OrderController
/**
 * @desc:  订单服务
 * @author: cao_wencao
 * @date: 2020-09-22 23:27
 */
@RestController
@Slf4j
@RequestMapping("/order")
public class OrderController {

    @Autowired
    private OrderServiceImpl orderService;

    /**
     * 用户购买下单,模拟全局事务提交
     * @param pid
     * @return
     */
    @RequestMapping("/purchase/commit/{pid}")
    public Order orderCommit(@PathVariable("pid") Integer pid) {
        return orderService.createOrderCommit(pid);
    }

    /**
     * 用户购买下单,模拟全局事务回滚
     * @param pid
     * @return
     */
    @RequestMapping("/purchase/rollback/{pid}")
    public Order orderRollback(@PathVariable("pid") Integer pid) {
        return orderService.createOrderRollback(pid);
    }

} - OrderServiceImpl
/**
 * @desc:
 * @author: cao_wencao
 * @date: 2020-09-22 23:30
 */
@Service
@Slf4j
public class OrderServiceImpl {
    @Autowired
    private OrderDao orderDao;

    @Autowired
    private ProductService productService;

    //用户下单,模拟全局事务提交
    public Order createOrderCommit(Integer pid) {
        log.info("接收到{}号商品的下单请求,接下来调用商品微服务查询此商品信息", pid);

        //1 调用商品微服务,查询商品信息
        Product product = productService.findByPid(pid);
        log.info("查询到{}号商品的信息,内容是:{}", pid, JSON.toJSONString(product));

        //2 下单(创建订单)
        Order order = new Order();
        order.setUid(1);
        order.setUsername("测试用户");
        order.setPid(pid);
        order.setPname(product.getPname());
        order.setPprice(product.getPprice());
        order.setNumber(1);
        orderDao.save(order);
        log.info("创建订单成功,订单信息为{}", JSON.toJSONString(order));

        //3 扣库存m
        productService.reduceInventoryCommit(pid, order.getNumber());

        return order;
    }

    //用户下单,模拟全局事务回滚
    @GlobalTransactional//全局事务控制
    public Order createOrderRollback(Integer pid) {
        log.info("接收到{}号商品的下单请求,接下来调用商品微服务查询此商品信息", pid);

        //1 调用商品微服务,查询商品信息
        Product product = productService.findByPid(pid);
        log.info("查询到{}号商品的信息,内容是:{}", pid, JSON.toJSONString(product));

        //2 下单(创建订单)
        Order order = new Order();
        order.setUid(1);
        order.setUsername("测试用户");
        order.setPid(pid);
        order.setPname(product.getPname());
        order.setPprice(product.getPprice());
        order.setNumber(1);
        orderDao.save(order);
        log.info("创建订单成功,订单信息为{}", JSON.toJSONString(order));

        //3 扣库存m
        productService.reduceInventoryRollback(pid, order.getNumber());

        return order;
    }

} - 商品服务的Feign类ProductService
/**
 * @desc:
 * @author: cao_wencao
 * @date: 2020-09-22 23:43
 */
@FeignClient(value = "product-service",configuration = FeignRequestInterceptor.class)
public interface ProductService {
    //@FeignClient的value +  @RequestMapping的value值  其实就是完成的请求地址  "http://product-service/product/" + pid
    //指定请求的URI部分
    @RequestMapping("/product/product/{pid}")
    Product findByPid(@PathVariable Integer pid);

    //扣减库存,模拟全局事务提交
    //参数一: 商品标识
    //参数二:扣减数量
    @RequestMapping("/product/reduceInventory/commit")
    void reduceInventoryCommit(@RequestParam("pid") Integer pid,
                               @RequestParam("number") Integer number);

    //扣减库存,模拟全局事务回滚
    //参数一: 商品标识
    //参数二:扣减数量
    @RequestMapping("/product/reduceInventory/rollback")
    void reduceInventoryRollback(@RequestParam("pid") Integer pid,
                         @RequestParam("number") Integer number);

}
2. 商品服务
- ProductController
/**
 * @desc:
 * @author: cao_wencao
 * @date: 2020-09-22 23:16
 */
@RestController
@Slf4j
@RequestMapping("/product")
public class ProductController {

    @Autowired
    private ProductService productService;

    /**
     * 扣减库存,正常->模拟全局事务提交
     * @param pid
     * @param number
     */
    @RequestMapping("/reduceInventory/commit")
    public void reduceInventoryCommit(Integer pid, Integer number) {
        String token = ServletUtils.getRequest().getHeader("token");
        log.info("从head请求头透传过来的值为token:"+ token);
        productService.reduceInventoryCommit(pid, number);
    }

    /**
     * 扣减库存,异常->模拟全局事务回滚
     * @param pid
     * @param number
     */
    @RequestMapping("/reduceInventory/rollback")
    public void reduceInventoryRollback(Integer pid, Integer number) {
        productService.reduceInventoryRollback(pid, number);
    }

    //商品信息查询
    @RequestMapping("/product/{pid}")
    public Product product(@PathVariable("pid") Integer pid) {
        log.info("接下来要进行{}号商品信息的查询", pid);
        Product product = productService.findByPid(pid);
        log.info("商品信息查询成功,内容为{}", JSON.toJSONString(product));
        return product;
    }
} - ProductService接口类
/**
 * @desc:  商品接口
 * @author: cao_wencao
 * @date: 2020-09-22 23:18
 */
public interface ProductService {
    //根据pid查询商品信息
    Product findByPid(Integer pid);

    //扣减库存,正常->模拟全局事务提交
    void reduceInventoryCommit(Integer pid, Integer number);

    //扣减库存,异常->模拟全局事务回滚
    void reduceInventoryRollback(Integer pid, Integer number);
} - ProductServiceImpl 接口实现类
/**
 * @desc:  商品服务实现类
 * @author: cao_wencao
 * @date: 2020-09-22 23:20
 */
@Service
public class ProductServiceImpl implements ProductService {

    @Autowired
    private ProductDao productDao;

    @Override
    public Product findByPid(Integer pid) {
        return productDao.findById(pid).get();
    }

    /**
     * 扣减库存,正常->模拟全局事务提交
     * @param pid
     * @param number
     */
    @Override
    public void reduceInventoryCommit(Integer pid, Integer number) {
        //查询
        Product product = productDao.findById(pid).get();
        //省略校验

        //内存中扣减
        product.setStock(product.getStock() - number);

        //保存扣减库存
        productDao.save(product);
    }

    /**
     * 扣减库存,异常->模拟全局事务回滚
     * @param pid
     * @param number
     */
    @Transactional(rollbackFor = Exception.class)  //服务提供方本地事务注解
    @Override
    public void reduceInventoryRollback(Integer pid, Integer number) {
        //查询
        Product product = productDao.findById(pid).get();
        //省略校验

        //内存中扣减
        product.setStock(product.getStock() - number);

        //模拟异常
        int i = 1 / 0;

        //保存扣减库存
        productDao.save(product);
    }
} 


 7457
7457

 被折叠的 条评论
为什么被折叠?
被折叠的 条评论
为什么被折叠?
 到【灌水乐园】发言


