


文章目录
全屏和调整大小
/**
 * Sizes
 */
const sizes = {
    width: window.innerWidth,
    height: window.innerHeight
}
// 调整窗口大小时触发了一个函数
window.addEventListener('resize', () =>
{
    // Update sizes
    sizes.width = window.innerWidth
    sizes.height = window.innerHeight

    // Update camera
    camera.aspect = sizes.width / sizes.height
    camera.updateProjectionMatrix() // 当您更改相机属性aspect时,需要调用它

    // Update renderer
    renderer.setSize(sizes.width, sizes.height)
    renderer.setPixelRatio(Math.min(window.devicePixelRatio, 2))
})
处理像素比
可能会在边缘看到一种模糊的渲染和形状像楼梯的伪影(称为锯齿),那是因为一个像素比大于 1。
要获取您可以使用的屏幕像素比 window.devicePixelRatio ,并更新渲染器的像素比,您只需调用 renderer.setPixelRatio(…)
renderer.setPixelRatio(Math.min(window.devicePixelRatio, 2)) // 将像素比限制为 2
处理全屏
除了监听双击事件 window.addEventListener(‘dblclick’, fn)
需要三件事:
- 一种知道它是否已经全屏的方法
- 进入全屏模式的方法
- 一种退出全屏模式的方法
可以使用document.fullscreenElement、 canvas.requestFullscreen和 document.exitFullscreen:
window.addEventListener('dblclick', () =>
{
    if(!document.fullscreenElement)
    {
        canvas.requestFullscreen()  // go fullscreen
    }
    else
    {
        document.exitFullscreen()  // leave fullscreen
    }
})
兼容性:
window.addEventListener('dblclick', () =>
{
    const fullscreenElement = document.fullscreenElement || document.webkitFullscreenElement

    if(!fullscreenElement)
    {
        if(canvas.requestFullscreen)
        {
            canvas.requestFullscreen()
        }
        else if(canvas.webkitRequestFullscreen)
        {
            canvas.webkitRequestFullscreen()
        }
    }
    else
    {
        if(document.exitFullscreen)
        {
            document.exitFullscreen()
        }
        else if(document.webkitExitFullscreen)
        {
            document.webkitExitFullscreen()
        }
    }
})
几何
什么是几何
在 Three.js 中,几何由点(3D 空间中的点坐标)和面(连接这些顶点以创建表面的三角形)组成。
使用几何来创建网格,但您也可以使用几何来形成粒子。每个点(点的单数)将对应一个粒子
不同的内置几何形状
所有内置几何都继承自Geometry,
这个类有很多内置的方法,比如 translate(…), rotateX(…), normalize()等等
- 箱形几何BoxGeometry 创建一个盒子。
- 平面几何PlaneGeometry 创建一个矩形平面。
- 圆几何CircleGeometry 创建光盘或光盘的一部分(如饼图)。
- 圆锥几何ConeGeometry 创建一个圆锥体或圆锥体的一部分。您可以打开或关闭圆锥体的底部。
- CylinderGeometry创建一个圆柱体。您可以打开或关闭圆柱体的末端,并且可以更改每个末端的半径。
- 环形几何RingGeometry 3创建扁平环或扁平圆的一部分。
- 圆环几何TorusGeometry 创建一个具有一定厚度(如甜甜圈)或部分环的环。
- 圆环结几何TorusKnotGeometry 创建某种结几何。
- 十二面体几何DodecahedronGeometry 创建一个 12 面的球体。您可以为更圆的球体添加细节。
- 八面体几何OctahedronGeometry 创建一个 8 面球体。您可以为更圆的球体添加细节。
- 四面体几何TetrahedronGeometry 创建一个 4 面球体(如果不增加细节,它不会是一个球体)。您可以为更圆的球体添加细节。
- 二十面体几何IcosahedronGeometry 创建一个由大小大致相同的三角形组成的球体。
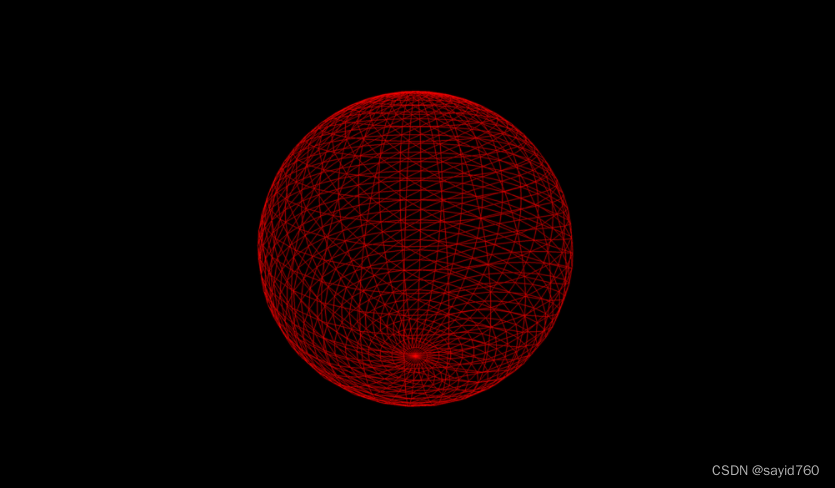
- 球体几何SphereGeometry 创建最流行的球体类型,其中面看起来像四边形(四边形只是两个三角形的组合)。
- 形状几何ShapeGeometry 根据路径创建形状。
- 管几何TubeGeometry 沿路径创建管。
- 挤压几何ExtrudeGeometry 基于路径创建拉伸。您可以添加和控制斜角。
- 车床几何LatheGeometry 创建一个花瓶或花瓶的一部分(更像是一场革命)。
- 文本几何TextGeometry 创建 3D 文本。您必须提供字体 json 格式的字体。
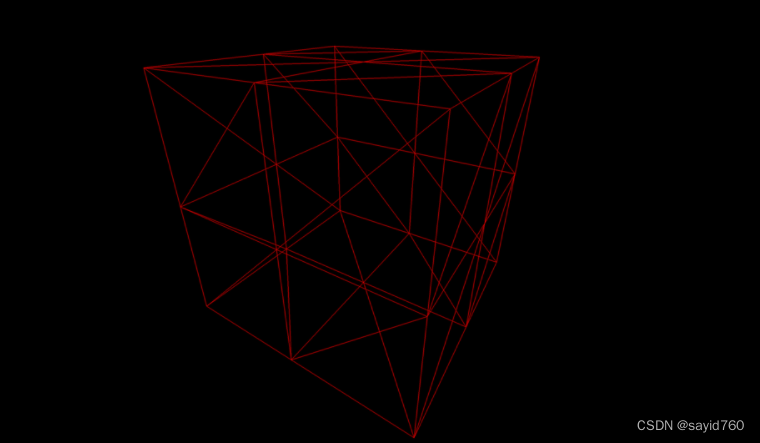
盒子示例
盒子几何BoxGeometry有6个参数:
- width: x 轴上的大小
- height: y 轴上的大小
- depth: z 轴上的大小
- widthSegmentsx :轴上有多少细分
- heightSegmentsy :轴上有多少细分
- depthSegmentsz :轴上有多少细分
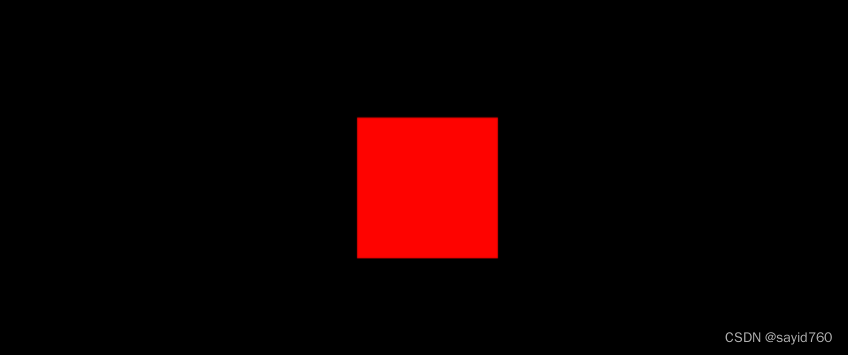
const geometry = new THREE.BoxGeometry(1, 1, 1, 2, 2, 2)
// 添加 wireframe: true 到材料,线框将显示分隔每个三角形的线
const material = new THREE.MeshBasicMaterial({ color: 0xff0000, wireframe: true })
const geometry = new THREE.SphereGeometry(1, 32, 32)
创建自己的几何图形
如果几何图形非常复杂或具有精确的形状,最好在 3D 软件中创建它,但如果几何图形不太复杂,我们可以通过开始自己构建一个空的几何
const geometry = new THREE.Geometry()
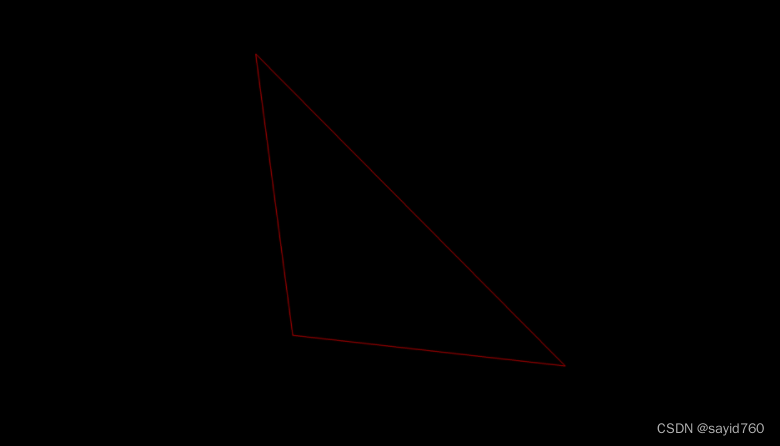
可以使用Face创建面
// Create an empty geometry
const geometry = new THREE.Geometry()

// Create 3 vertices
const vertice1 = new THREE.Vector3(0, 0, 0)
geometry.vertices.push(vertice1)

const vertice2 = new THREE.Vector3(0, 1, 0)
geometry.vertices.push(vertice2)

const vertice3 = new THREE.Vector3(1, 0, 0)
geometry.vertices.push(vertice3)

// Create a face from those 3 vertices
geometry.faces.push(new THREE.Face3(0, 1, 2)
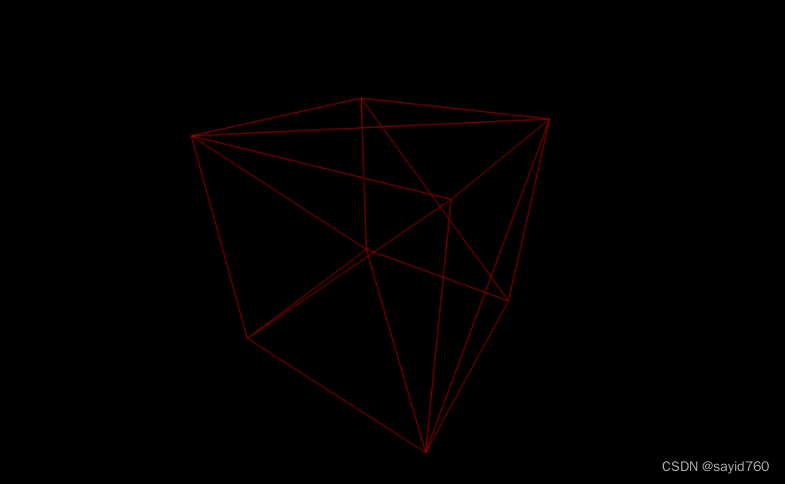
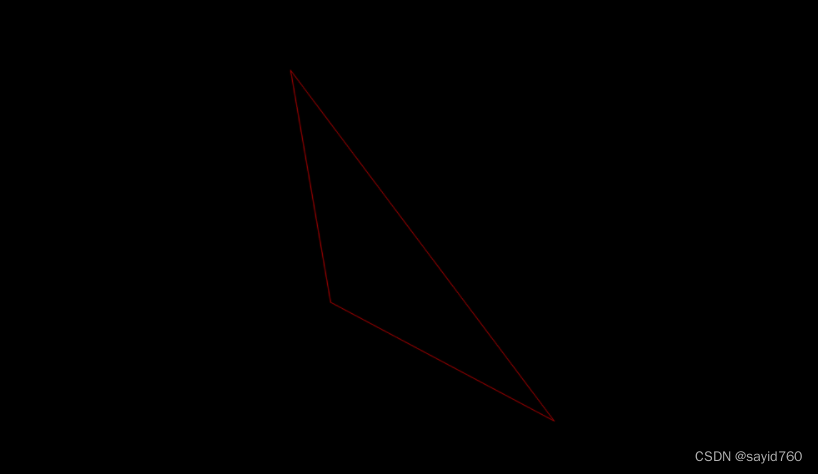
创建一堆随机三角形:
// Create an empty geometry
const geometry = new THREE.Geometry()

// Loop to create 50 triangles
for(let i = 0; i < 50; i++)
{
    // Loop to create 3 vertices
    for(let j = 0; j < 3; j++)
    {
        geometry.vertices.push(new THREE.Vector3(
            (Math.random() - 0.5) * 4, // x
            (Math.random() - 0.5) * 4, // y
            (Math.random() - 0.5) * 4  // z
        ))
    }

    // Create the triangle
    const verticesIndex = i * 3
    geometry.faces.push(new THREE.Face3(
        verticesIndex,
        verticesIndex + 1,
        verticesIndex + 2
    ))
}
缓冲区几何形状
缓冲区几何体类似于几何体,但它们更高效和优化。缺点是它们对开发人员不太友好。更新缓冲区几何图形或从头开始创建一个将更具挑战性,但会提高性能。
const geometry = new THREE.BoxBufferGeometry(1, 1, 1)
创建自己的缓冲区几何
要创建自己的缓冲区几何图形,请先实例化一个空的BufferGeometry。我们将像之前一样创建一个简单的三角形:
要将点添加到BufferGeometry,您必须从Float32Array开始。
Float32Array是原生 JavaScript 类型数组。您只能在其中存储浮点数,并且该数组的长度是固定的。
const positionsArray = new Float32Array(9)

// First vertice
positionsArray[0] = 0
positionsArray[1] = 0
positionsArray[2] = 0

// Second vertice
positionsArray[3] = 0
positionsArray[4] = 1
positionsArray[5] = 0

// Third vertice
positionsArray[6] = 1
positionsArray[7] = 0
positionsArray[8] = 0
或者
const positionsArray = new Float32Array([
    0, 0, 0, // First vertex
    0, 1, 0, // Second vertex
    1, 0, 0  // Third vertex
])
如您所见,点的坐标是线性指定的。该数组是一维数组,您可以在其中指定第一个点的和,然后 x是 y第二 个点的和 ,依此类推
// Create an empty BufferGeometry
const geometry = new THREE.BufferGeometry()

// Create a Float32Array containing the vertices position (3 by 3)
const positionsArray = new Float32Array([
    0, 0, 0, // First vertex
    0, 1, 0, // Second vertex
    1, 0, 0  // Third vertex
])

// Create the attribute and name it 'position'
// positionsArray类型化数组,3对应于多少值构成一个顶点属性。
// 正如我们之前看到的,要读取这个数组,我们必须 3×3,因为顶点位置由 3 个值(x和 y ) 组成z:
const positionsAttribute = new THREE.BufferAttribute(positionsArray, 3)
// 选择 'position' 这个名称是因为 Three.js 内部着色器会寻找该值来定位顶点
geometry.setAttribute('position', positionsAttribute)
创建一堆随机三角形:
// Create an empty BufferGeometry
const geometry = new THREE.BufferGeometry()

// Create 50 triangles (450 values)
const count = 50
const positionsArray = new Float32Array(count * 3 * 3)
for(let i = 0; i < count * 3 * 3; i++)
{
    positionsArray[i] = (Math.random() - 0.5) * 4
}

// Create the attribute and name it 'position'
const positionsAttribute = new THREE.BufferAttribute(positionsArray, 3)
geometry.setAttribute('position', positionsAttribute)
调试界面
虽然可以使用 HTML / CSS / JS 创建自己的调试 UI,但已经有多个库:
如何实现 Dat.GUI
npm install --save dat.gui
import './style.css'
import * as THREE from 'three'
import { OrbitControls } from 'three/examples/jsm/controls/OrbitControls.js'
import gsap from 'gsap'
import * as dat from 'dat.gui'

/**
 * Debug
 */
const gui = new dat.GUI() // 屏幕右上角出现一个空面板

可以向该面板添加不同类型的元素:
- 范围 — 用于具有最小值和最大值的数字
- 颜色 — 用于各种格式的颜色
- 文本 — 用于简单文本
- 复选框 ——用于布尔值(true 或 false)
- Select — 用于从值列表中进行选择
- 按钮 ——触发功能
- 文件夹 ——如果您有太多元素,可以组织您的面板
添加元素
gui.add(mesh.position, 'y')

gui.add(mesh.position, 'y').min(- 3).max(3).step(0.01)
// Dat.GUI 将自动检测您想要调整的属性类型并使用相应的元素。一个很好的例子是 Object3Dvisible的属性。这是一个布尔值,如果 ,将隐藏对象:false
gui.add(mesh, 'visible')

// Dat.GUI 选择了一个复选框,因为该 visible 属性是一个布尔值。可以 wireframe 对材料的属性做同样的事情:
gui.add(material, 'wireframe')
颜色
处理颜色有点困难。
首先,需要使用 addColor(…) 而不是 add(…). 这是因为 Dat.GUI 无法仅通过属性类型知道您是否要调整文本、数字或颜色。
其次,必须在其属性中创建一个带有颜色的中间对象,并在您的材质中使用该属性。这是由于 Three.js 材料没有像 #ff0000.
// parameter 在代码开始部分之后 创建一个 变量import :
const parameters = {
    color: 0xff0000
}

// 在面板中看到一个颜色选择器
gui.addColor(parameters, 'color')
    .onChange(() =>
    {
        material.color.set(parameters.color)
    })
// 目前, 0xff0000 颜色在两个地方指定:在 parameters 对象中和在 material,虽然这没什么大不了的,但如果我们想改变颜色,我们必须在这两个地方做
const material = new THREE.MeshBasicMaterial({ color: parameters.color })
功能
要触发一个函数,比如颜色值,我们必须将该函数添加到一个对象中
const parameters = {
    color: 0xff0000,
    spin: () =>  // 单击spin按钮会导致立方体进行360度旋转
    {
        gsap.to(mesh.rotation, { duration: 1, y: mesh.rotation.y + Math.PI * 2 })
    }
}
gui.add(parameters, 'spin')
提示
- 隐藏
按 H 隐藏面板。
如果您希望面板从一开始就隐藏,请 gui.hide() 在实例化后调用 - 关
您可以通过单击其底部来关闭面板。
如果您希望面板默认关闭,您可以在实例化 Dat.GUI 时发送一个对象并将其传递 closed: true 到其属性中:
const gui = new dat.GUI({ closed: true })
- 宽度
您可以通过拖放左边框来更改面板的宽度(尽管请注意,它并不总是有效)。
如果要更改面板的默认宽度,请添加 width: … 属性:
const gui = new dat.GUI({ width: 400 })
更多Dat.GUI 的信息:
Github 仓库:https://github.com/dataarts/dat.gui
API 文档:https://github.com/dataarts/dat.gui/blob/HEAD/API.md
一个简单但完整的例子:https://jsfiddle.net/ikatyang/182ztwao/ 4
纹理
什么是纹理?
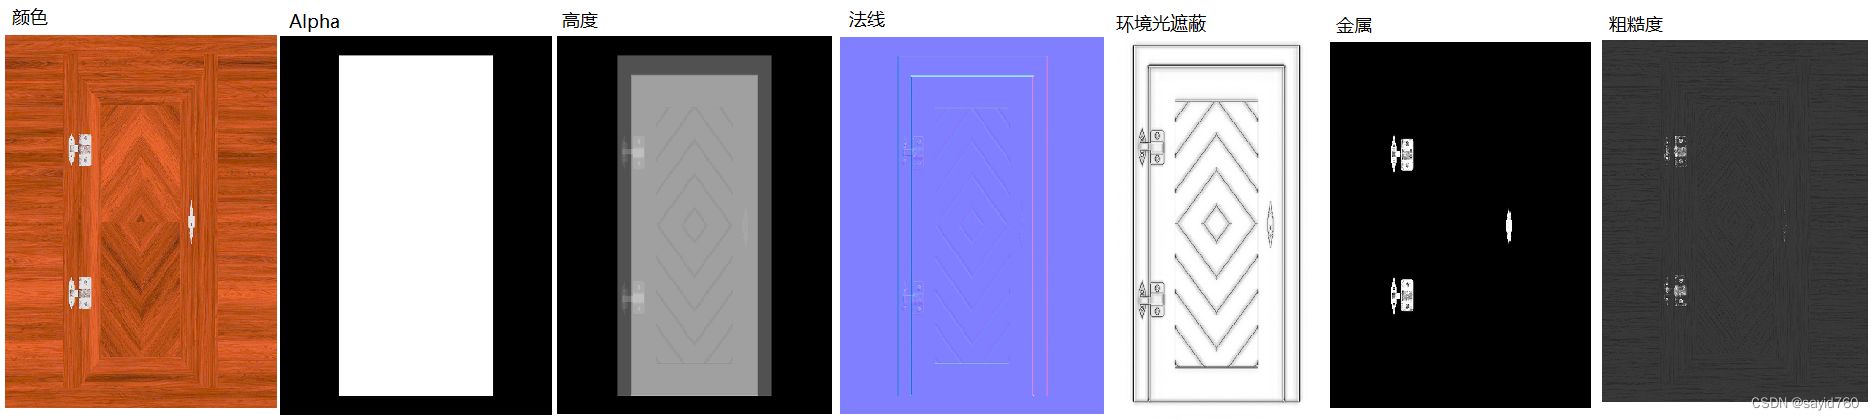
纹理是覆盖几何图形表面的图像
- 颜色 (或反照率)
反照率纹理是最简单的一种。它只会获取纹理的像素并将它们应用于几何体。 - Alpha
Alpha纹理是灰度图像,其中白色可见,黑色不可见 - 高度
高度纹理是一个灰度图像,它将移动顶点以创建一些浮雕。如果你想看到它,你需要添加细分 - 法线
法线纹理将添加小细节。它不会移动顶点,但会诱使光线认为脸部的方向不同。法线纹理对于添加具有良好性能的细节非常有用,因为您不需要细分几何体。 - 环境光遮蔽
环境光遮蔽纹理是一个灰度图像,会在表面的缝隙中伪造阴影。虽然它在物理上并不准确,但它肯定有助于创造对比。 - 金属
金属度纹理是一个灰度图像,它将指定哪个部分是金属(白色)和非金属(黑色)。这些信息将有助于产生反思。 - 粗糙度
粗糙度是带有金属度的灰度图像,它将指定哪个部分是粗糙的(白色),哪个部分是光滑的(黑色)。这些信息将有助于消散光。地毯很崎岖,你看不到它上面的光反射,而水面很光滑,你可以看到它上面反射的光。在这里,木头是均匀的,因为上面有一层透明的涂层。
如何加载纹理
- 获取图片的 URL
import imageSource from './image.png'
// 或 const imageSource = '/image.png'
console.log(imageSource)
- 加载图像
- 使用原生js
const image = new Image()
image.onload = () =>
{
    console.log('image loaded')
}
image.src = '/textures/door/color.jpg'

// 在函数外部创建纹理,然后通过将纹理 needsUpdate 属性 设置为加载图像后更新它true:
const image = new Image()
const texture = new THREE.Texture(image)
image.addEventListener('load', () =>
{
    texture.needsUpdate = true
})
image.src = '/textures/door/color.jpg'
const material = new THREE.MeshBasicMaterial({ map: texture })
- 使用纹理加载器
使用TextureLoader实例化一个变量,并使用其 .load(…) 方法创建纹理:
const textureLoader = new THREE.TextureLoader()
const texture = textureLoader.load('/textures/door/color.jpg')
三个参数:
load 图片加载成功时
progress 当加载正在进行时
error 如果出了问题
const textureLoader = new THREE.TextureLoader()
const texture = textureLoader.load(
    '/textures/door/color.jpg',
    () =>
    {
        console.log('loading finished')
    },
    () =>
    {
        console.log('loading progressing')
    },
    () =>
    {
        console.log('loading error')
    }
)
- 使用加载管理器
如果您有多个要加载的图像并希望在所有图像加载时收到通知等事件相互交互,您可以使用LoadingManager
创建LoadingManager的实例类并将其传递给TextureLoader:
const loadingManager = new THREE.LoadingManager()
const textureLoader = new THREE.TextureLoader(loadingManager)
onStart您可以通过用您自己的函数、 onLoad、 onProgress和 替换以下属性来监听各种事件 onError:
const loadingManager = new THREE.LoadingManager()
loadingManager.onStart = () =>
{
    console.log('loading started')
}
loadingManager.onLoaded = () =>
{
    console.log('loading finished')
}
loadingManager.onProgress = () =>
{
    console.log('loading progressing')
}
loadingManager.onError = () =>
{
    console.log('loading error')
}

const textureLoader = new THREE.TextureLoader(loadingManager)
可以开始加载您需要的所有图像:
// ...

const colorTexture = textureLoader.load('/textures/door/color.jpg')
const alphaTexture = textureLoader.load('/textures/door/alpha.jpg')
const heightTexture = textureLoader.load('/textures/door/height.jpg')
const normalTexture = textureLoader.load('/textures/door/normal.jpg')
const ambientOcclusionTexture = textureLoader.load('/textures/door/ambientOcclusion.jpg')
const metalnessTexture = textureLoader.load('/textures/door/metalness.jpg')
const roughnessTexture = textureLoader.load('/textures/door/roughness.jpg')
不要忘记也改变它 material
const material = new THREE.MeshBasicMaterial({ map: colorTexture })
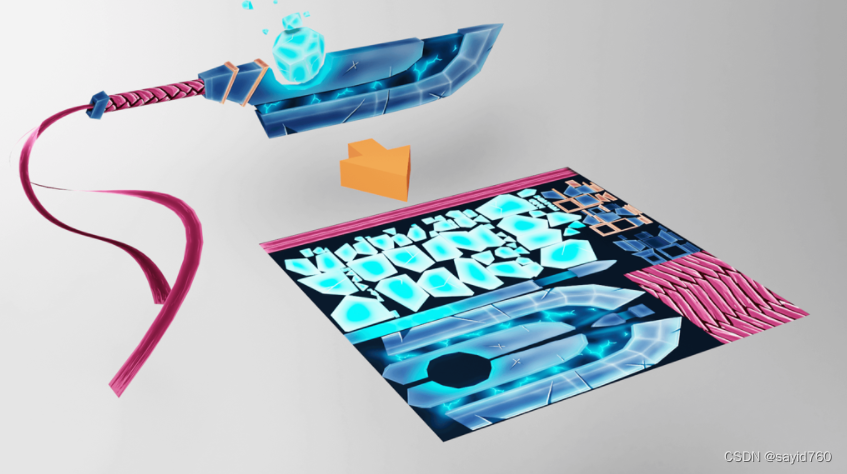
UV展开
所谓的 UV 展开。您可以想象这就像打开折纸或糖果包装以使其平整。每个顶点在平面(通常是正方形)上都有一个二维坐标
const geometry = new THREE.BoxBufferGeometry(1, 1, 1)

// Or
const geometry = new THREE.SphereBufferGeometry(1, 32, 32)

// Or
const geometry = new THREE.ConeBufferGeometry(1, 1, 32)

// Or
const geometry = new THREE.TorusBufferGeometry(1, 0.35, 32, 100)
如果它是缓冲区几何体,您实际上可以在属性中看到这些 UV 2D 坐标 :
console.log(geometry.attributes.uv)
当您使用图元时,这些 UV 坐标由 Three.js 生成。如果您创建自己的几何体并希望对其应用纹理,则必须指定 UV 坐标。
如果您使用 3D 软件制作几何图形,您还必须进行 UV 展开。
变换纹理
重复
可以使用 Vector2 repeat 属性重复纹理, 表示它具有 x 和 y 属性。
const colorTexture = textureLoader.load('/textures/door/color.jpg')
colorTexture.repeat.x = 2
colorTexture.repeat.y = 3

// 必须使用常量更新wrapS and wrapT 属性,wrapS为X轴,wrapT为Y轴
colorTexture.wrapS = THREE.RepeatWrapping
colorTexture.wrapT = THREE.RepeatWrapping

// 可以改变方向
colorTexture.wrapS = THREE.MirroredRepeatWrapping
colorTexture.wrapT = THREE.MirroredRepeatWrapping
抵消
可以使用 offset 也是Vector2的属性来偏移纹理x和y轴属性。更改这些只会偏移 UV 坐标:
colorTexture.offset.x = 0.5
colorTexture.offset.y = 0.5
回转
可以使用属性旋转纹理,该 rotation 属性是一个简单的数字,对应于弧度的角度:
colorTexture.rotation = Math.PI * 0.25
如果删除 offset and repeat 属性,您会看到旋转发生在立方体面的左下角
也就是说,实际上是 0, 0 UV 坐标。如果要更改该旋转的枢轴,可以使用 center 也是Vector2的属性来完成
// 纹理现在将在其中心旋转
colorTexture.rotation = Math.PI * 0.25
colorTexture.center.x = 0.5
colorTexture.center.y = 0.5
过滤和 Mipmap
如果您在该面几乎被隐藏时查看立方体的顶面,您会看到非常模糊的纹理,这是由于过滤和mipmapping
Mipmapping(或带有空格的“mip 映射”)是一种技术,它包括一次又一次地创建一半较小版本的纹理,直到获得 1x1 纹理。所有这些纹理变化都发送到 GPU,GPU 将选择最合适的纹理版本。
Three.js 和 GPU 已经处理了所有这些,您只需设置要使用的过滤算法即可。有两种类型的过滤器算法:缩小过滤器和放大过滤器。
缩小过滤器
当纹理的像素小于渲染的像素时,会发生缩小过滤器。换句话说,纹理对于表面来说太大了,它覆盖了。
minFilter 您可以使用该属性更改纹理的缩小过滤器 。
有 6 个可能的值:
THREE.NearestFilter
THREE.LinearFilter
THREE.NearestMipmapNearestFilter
THREE.NearestMipmapLinearFilter
THREE.LinearMipmapNearestFilter
THREE.LinearMipmapLinearFilter
默认值为 THREE.LinearMipmapLinearFilter. 如果您对纹理的外观不满意,您应该尝试其他过滤器。
colorTexture.minFilter = THREE.NearestFilter
如果您使用的是像素比高于 1 的设备,则不会有太大差异。如果没有,请将相机放置在几乎隐藏这张脸的位置,您应该会获得更多细节和奇怪的伪影。
如果您使用文件夹中的 checkerboard-1024x1024.png 纹理进行 测试/static/textures/ ,您会更清楚地看到这些伪影:
const colorTexture = textureLoader.load('/textures/checkerboard-1024x1024.png')
放大滤镜
放大过滤器的工作方式与缩小过滤器类似,但是当纹理的像素大于渲染的像素时。换句话说,纹理对于它所覆盖的表面来说太小了。
您可以使用 checkerboard-8x8.png 同样位于 static/textures/ 文件夹中的纹理查看结果:
const colorTexture = textureLoader.load('/textures/checkerboard-8x8.png')
纹理变得模糊,因为它是一个非常大的表面上的非常小的纹理
可以使用该 magFilter 属性更改纹理的放大过滤器。
只有两个可能的值:
- THREE.NearestFilter
- THREE.LinearFilter
默认值为 THREE.LinearFilter.
如果您测试 THREE.NearestFilter,您会看到基本图像被保留,并且您得到一个像素化纹理:
colorTexture.magFilter = THREE.NearestFilter
THREE.NearestFilter 它比其他过滤器更便宜,使用它时你应该获得更好的性能,这将稍微减轻 GPU 的负担。
仅使用 minFilter 属性的 mipmap。如果您使用的是 THREE.NearestFilter,则不需要 mipmap,您可以使用以下命令停用它们 colorTexture.generateMipmaps = false:
colorTexture.generateMipmaps = false
colorTexture.minFilter = THREE.NearestFilter
纹理格式和优化
在准备纹理时,必须牢记 3 个关键要素:
- 重量
- 尺寸(或分辨率)
- 数据
重量
不要忘记访问您网站的用户必须下载这些纹理。您可以使用我们在网络上使用的大多数图像类型,例如 .jpg (有损压缩但通常更轻)或 .png (无损压缩但通常更重)。
尝试应用通常的方法来获得可接受的图像,但尽可能轻。您可以使用TinyPNG等压缩网站 1(也适用于 jpg)或任何软件。
规模
无论图像的权重如何,您使用的纹理的每个像素都必须存储在 GPU 上。和你的硬盘一样,GPU 也有存储限制。更糟糕的是,自动生成的 mipmapping 增加了必须存储的像素数量。
尽量减小图像的大小。
如果你还记得我们说过的关于 mipmapping 的话,Three.js 会重复生成一个小半个版本的纹理,直到它得到一个 1x1 的纹理。因此,您的纹理宽度和高度必须是 2 的幂。这是强制的,以便 Three.js 可以将纹理的大小除以 2。
一些例子: 512x512, 1024x1024 或 512x2048
512, 1024 并且 2048 可以除以 2 直到达到 1。
如果您使用的纹理的宽度或高度与 2 的幂值不同,Three.js 将尝试将其拉伸到最接近的 2 的幂数,这可能会产生视觉上很差的结果,并且您还会收到警告在控制台中。
数据
我们还没有测试它,因为我们还有其他东西要先看,但是纹理支持透明度。您可能知道,jpg 文件没有 alpha 通道,因此您可能更喜欢使用 png。
或者您可以使用 alpha 映射,我们将在以后的课程中看到。
如果您使用的是普通纹理(紫色纹理),您可能希望获得每个像素的红色、绿色和蓝色通道的准确值,否则最终可能会出现视觉故障。为此,您需要使用 png,因为它的无损压缩会保留这些值。


 2万+
2万+


 被折叠的 条评论
为什么被折叠?
被折叠的 条评论
为什么被折叠?
 到【灌水乐园】发言


