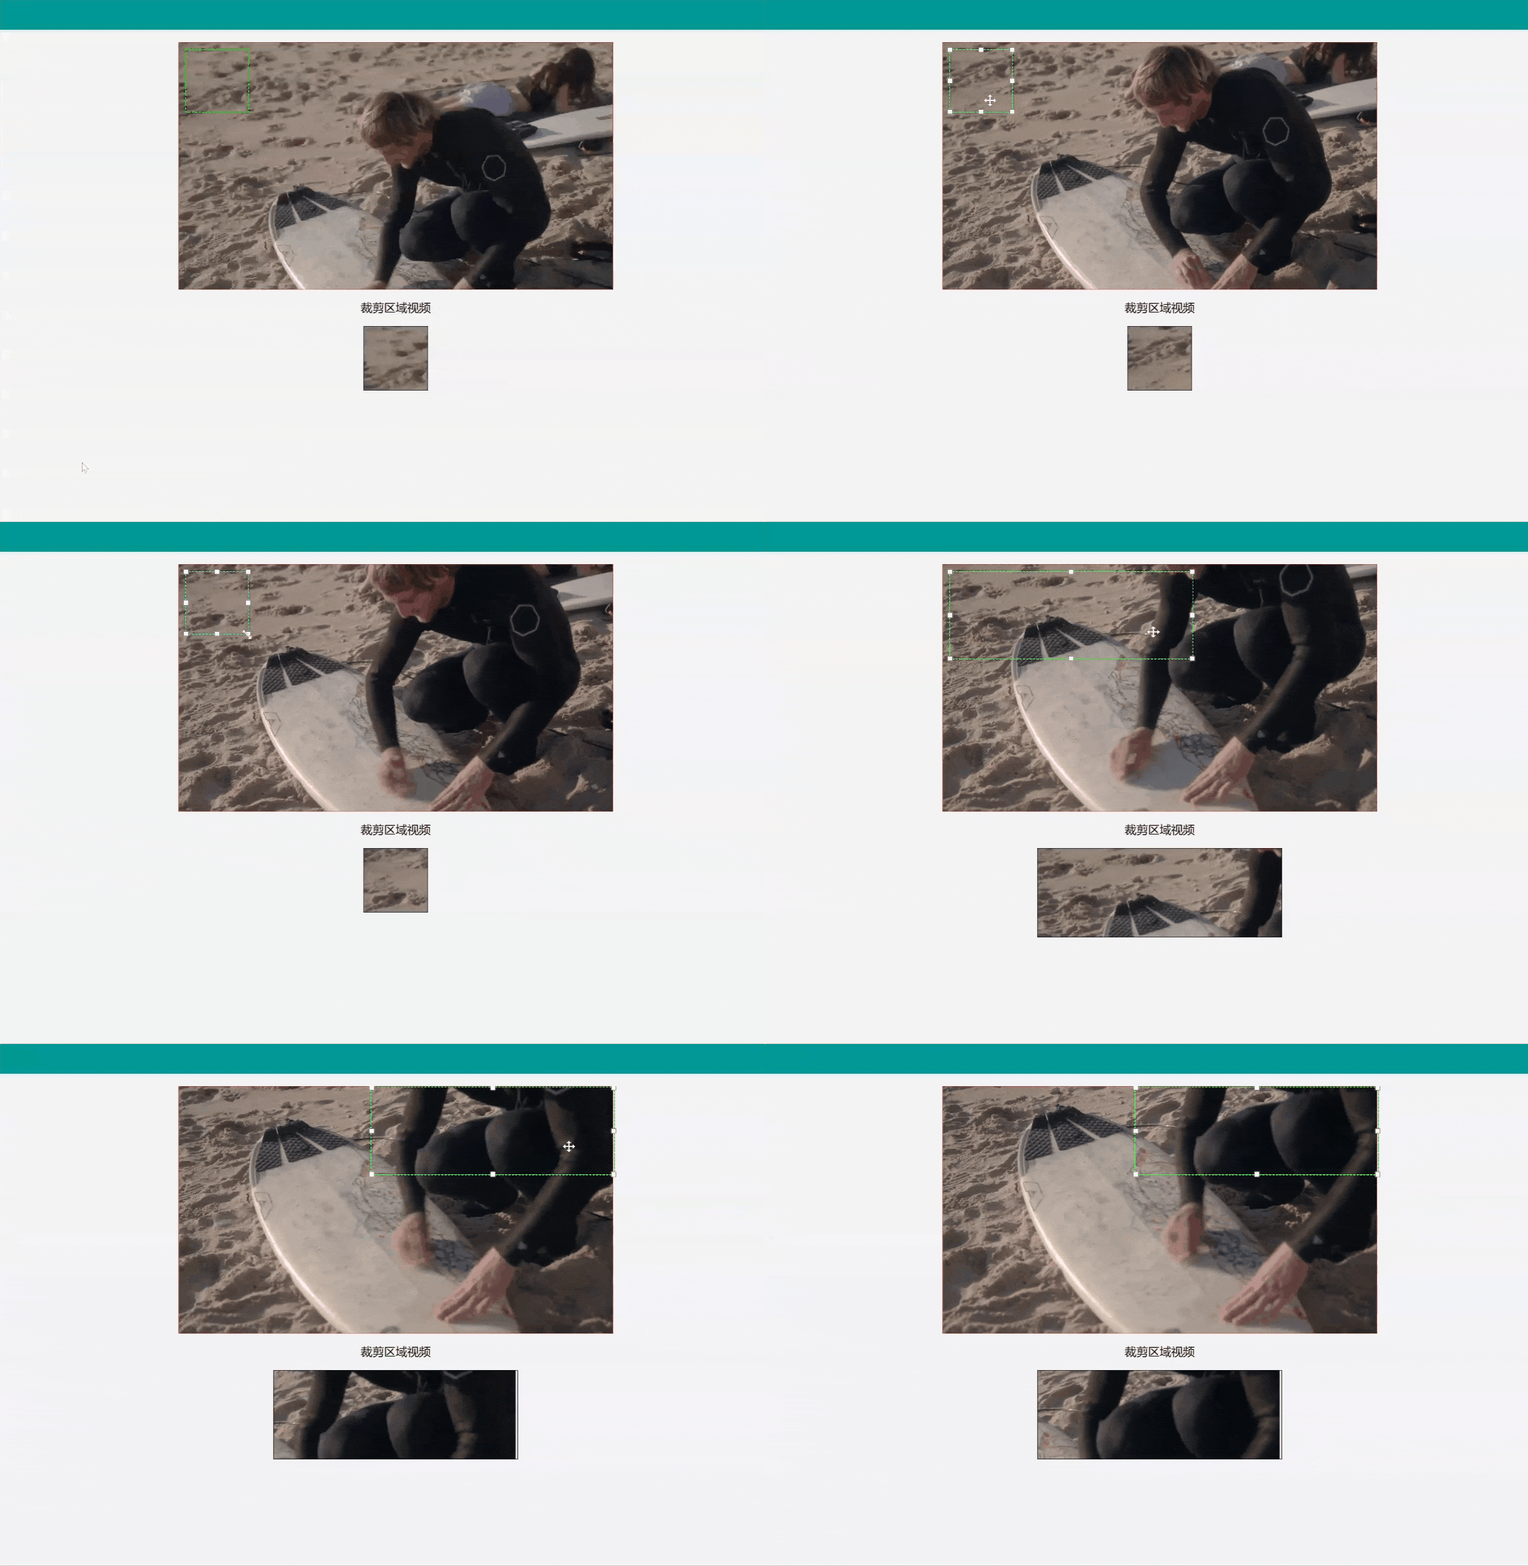
在现代网页应用中,视频处理和裁剪功能变得越来越常见,尤其是在图像编辑和媒体管理工具中。本篇文章将带领你实现一个基于 Vue.js 的简单实时视频裁剪功能。
功能介绍: 今天客户在TRTC功能里面提出新需求,只想要展示选中范围内画面发布到房间中,结合TRTC有一个自定义分享视频源里面也支持分享canvas画面,故有本次功能实现,在本文章中,我将带你一步步实现一个在Vue.js中自动裁剪视频区域并显示在Canvas中的功能。这个功能允许你使用拖拽和调整大小的虚线框选择视频的一部分,并且实时显示该部分视频的内容。这种实时的更新效果是通过使用 requestAnimationFrame 方法递归调用绘制函数来实现的。
实现步骤:
1. 安装所需插件
在这个项目中,我们将使用 vue-drag-resize 插件来实现可拖拽和调整大小的裁剪框。安装该插件:
npm i -s vue-drag-resize
在main.js里面注册组件:
import Vue from 'vue'
import VueDragResize from 'vue-drag-resize'

Vue.component('vue-drag-resize', VueDragResize)
2. 代码实现:
2.1 模板部分
<template>
  <div class="father">
    <!-- 底部视频和裁剪框 -->
    <div class="image-container">
      <video
        ref="backgroundVideo"
        src="@/assets/videos/sample.mp4"
        autoplay
        loop
        muted
        class="background-video"
      ></video>
      <VueDragResize
        ref="cropBox"
        :w="100"
        :h="100"
        :x="10"
        :y="10"
        :parent-limitation="true"
        :is-resizable="true"
        :is-draggable="true"
        :snap-to-grid="[10, 10]"
        class="crop-box"
      ></VueDragResize>
    </div>

    <!-- 显示裁剪后的内容 -->
    <div class="cropped-image-container">
      <h3>裁剪区域视频</h3>
      <canvas ref="croppedCanvas"></canvas>
    </div>
  </div>
</template>
分析:
<video>标签: 用于加载和显示视频。这里设置了autoplay自动播放、loop循环播放,以及muted静音属性。<VueDragResize>组件: 这是一个第三方组件,用于创建一个可以拖动和调整大小的裁剪框。它的属性w和h分别代表初始宽度和高度,x和y指定裁剪框的初始位置。<canvas>标签: 用于显示裁剪后的视频帧。
2.2 脚本部分
<script>
import VueDragResize from "vue-drag-resize";

export default {
  name: "Crop",
  data() {
    return {
      wid: 100, // 初始裁剪框宽度
    };
  },
  components: {
    VueDragResize,
  },
  methods: {
    cropVideoFrame() {
      const cropBox = this.$refs.cropBox.$el.getBoundingClientRect();
      const video = this.$refs.backgroundVideo;
      const canvas = this.$refs.croppedCanvas;
      const ctx = canvas.getContext("2d");

      const scaleX = video.videoWidth / video.clientWidth;
      const scaleY = video.videoHeight / video.clientHeight;

      canvas.width = cropBox.width;
      canvas.height = cropBox.height;

      ctx.drawImage(
        video,
        (cropBox.left - video.getBoundingClientRect().left) * scaleX,
        (cropBox.top - video.getBoundingClientRect().top) * scaleY,
        cropBox.width * scaleX,
        cropBox.height * scaleY,
        0,
        0,
        cropBox.width,
        cropBox.height
      );

      // 递归调用,实现每一帧都更新
      requestAnimationFrame(this.cropVideoFrame);
    },
  },
  mounted() {
    // 在组件挂载后开始裁剪视频
    this.cropVideoFrame();
  },
};
</script>
分析:
VueDragResize组件的引入: 从vue-drag-resize库中引入VueDragResize组件,用于创建裁剪框。cropVideoFrame方法: 该方法实现了视频帧的裁剪功能。通过getBoundingClientRect获取裁剪框和视频的位置和尺寸,并使用drawImage方法将选定的视频区域绘制到canvas上。- 递归更新: 通过
requestAnimationFrame递归调用cropVideoFrame方法,以确保canvas中的内容随着视频的播放实时更新。 - 生命周期钩子
mounted: 在组件挂载后,立即开始执行裁剪功能。
2.3 样式部分
<style scoped>
.father {
  height: 400px;
  width: 700px;
  border: 1px solid red;
  position: relative;
  margin: 0 auto;
}

.image-container {
  position: relative;
  width: 100%;
  height: 100%;
}

.background-video {
  width: 100%;
  height: 100%;
  object-fit: cover;
}

.crop-box {
  border: 2px dashed #00ff00;
  position: absolute;
  cursor: move;
}

.cropped-image-container {
  margin-top: 20px;
  text-align: center;
}

canvas {
  border: 1px solid #000;
}
</style>
分析:
- 布局样式: 主要用于控制父容器、视频、裁剪框和
canvas的布局和大小。 - 裁剪框样式: 使用绿色虚线框表示裁剪区域,并设置了拖动手柄的样式。
3. 代码运行流程
- 加载视频: 组件加载时,视频会自动播放并循环。
- 显示裁剪框: 用户可以通过拖动和调整
VueDragResize组件所生成的裁剪框来选择视频的某一部分。 - 实时裁剪并显示: 一旦裁剪框的位置或大小发生变化,
cropVideoFrame方法会立即捕获变化并更新canvas上的内容,使用户看到裁剪后的视频帧。
4. 完整代码
<template>
  <div class="father">
    <!-- 底部视频和裁剪框 -->
    <div class="image-container">
      <video
        ref="backgroundVideo"
        src="@/assets/videos/sample.mp4"
        autoplay
        loop
        muted
        class="background-video"
      ></video>
      <VueDragResize
        ref="cropBox"
        :w="100"
        :h="100"
        :x="10"
        :y="10"
        :parent-limitation="true"
        :is-resizable="true"
        :is-draggable="true"
        :snap-to-grid="[10, 10]"
        class="crop-box"
      ></VueDragResize>
    </div>

    <!-- 显示裁剪后的内容 -->
    <div class="cropped-image-container">
      <h3>裁剪区域视频</h3>
      <canvas ref="croppedCanvas"></canvas>
    </div>
  </div>
</template>
<script>
import VueDragResize from "vue-drag-resize";

export default {
  name: "Crop",
  data() {
    return {
      wid: 100, // 初始裁剪框宽度
    };
  },
  components: {
    VueDragResize,
  },
  methods: {
    cropVideoFrame() {
      const cropBox = this.$refs.cropBox.$el.getBoundingClientRect();
      const video = this.$refs.backgroundVideo;
      const canvas = this.$refs.croppedCanvas;
      const ctx = canvas.getContext("2d");

      const scaleX = video.videoWidth / video.clientWidth;
      const scaleY = video.videoHeight / video.clientHeight;

      canvas.width = cropBox.width;
      canvas.height = cropBox.height;

      ctx.drawImage(
        video,
        (cropBox.left - video.getBoundingClientRect().left) * scaleX,
        (cropBox.top - video.getBoundingClientRect().top) * scaleY,
        cropBox.width * scaleX,
        cropBox.height * scaleY,
        0,
        0,
        cropBox.width,
        cropBox.height
      );

      // 递归调用,实现每一帧都更新
      requestAnimationFrame(this.cropVideoFrame);
    },
  },
  mounted() {
    // 在组件挂载后开始裁剪视频
    this.cropVideoFrame();
  },
};
</script>
<style scoped>
.father {
  height: 400px;
  width: 700px;
  border: 1px solid red;
  position: relative;
  margin: 0 auto;
}

.image-container {
  position: relative;
  width: 100%;
  height: 100%;
}

.background-video {
  width: 100%;
  height: 100%;
  object-fit: cover;
}

.crop-box {
  border: 2px dashed #00ff00;
  position: absolute;
  cursor: move;
}

.cropped-image-container {
  margin-top: 20px;
  text-align: center;
}

canvas {
  border: 1px solid #000;
}
</style>
最终效果展示:

感谢一键三连,祝愿各位程序员,永无bug


 1648
1648

 被折叠的 条评论
为什么被折叠?


