一、基本内容介绍
1.使用UICollectionView首先要创建UICollectionView对象,其中需要一个UICollectionViewLayout为UICollectionView的cell布局。
UICollectionView *collectionView = [[UICollectionView alloc] initWithFrame:rect collectionViewLayout:[[UICollectionViewLayout
 alloc] init]];
一般的,我们可以自定义UICollectionViewLayout来自定义布局。
简单的来说UICollectionView就像UITableViewCell一样。只是他的布局更加自由化。
同样的它像UITableViewCell一样要实现数据源和代理。下面就是它基本的数据源和代理方法。
- (NSInteger)collectionView:(UICollectionView *)collectionView numberOfItemsInSection:(NSInteger)section;
- (UICollectionViewCell *)collectionView:(UICollectionView *)collectionView cellForItemAtIndexPath:(NSIndexPath *)indexPath;
两个方法分别表示返回的UICollectionViewCell的个数和每个UICollectionViewCell的显示内容。
2.UICollectionView的展示还需要一类UIcollectionViewFlowLayout,有了它UICollectionViewCell的流水布局就可以进行调试了。它的基本方法也是等会我们做例子要用到的:
- (void)prepareLayout
一些初始化工作在这里面进行。
//用来设置collectionView停止滚动那一刻的位置
- (CGPoint)targetContentOffsetForProposedContentOffset:(CGPoint)proposedContentOffset withScrollingVelocity:(CGPoint)velocity
下面两个方法一般是连在一起用
/**
 *  只要显示的边界发生改变就重新布局:qwe
 内部会重新调用prepareLayout和layoutAttributesForElementsInRect方法获得所有cell的布局属性
 */
 //该方法返回的是一个bool值,当返回yes时,只要显示边界发送改变就会重新调用layoutAttributesForElementsInRect
- (BOOL)shouldInvalidateLayoutForBoundsChange:(CGRect)newBounds

- (NSArray *)layoutAttributesForElementsInRect:(CGRect)rect
二、例子
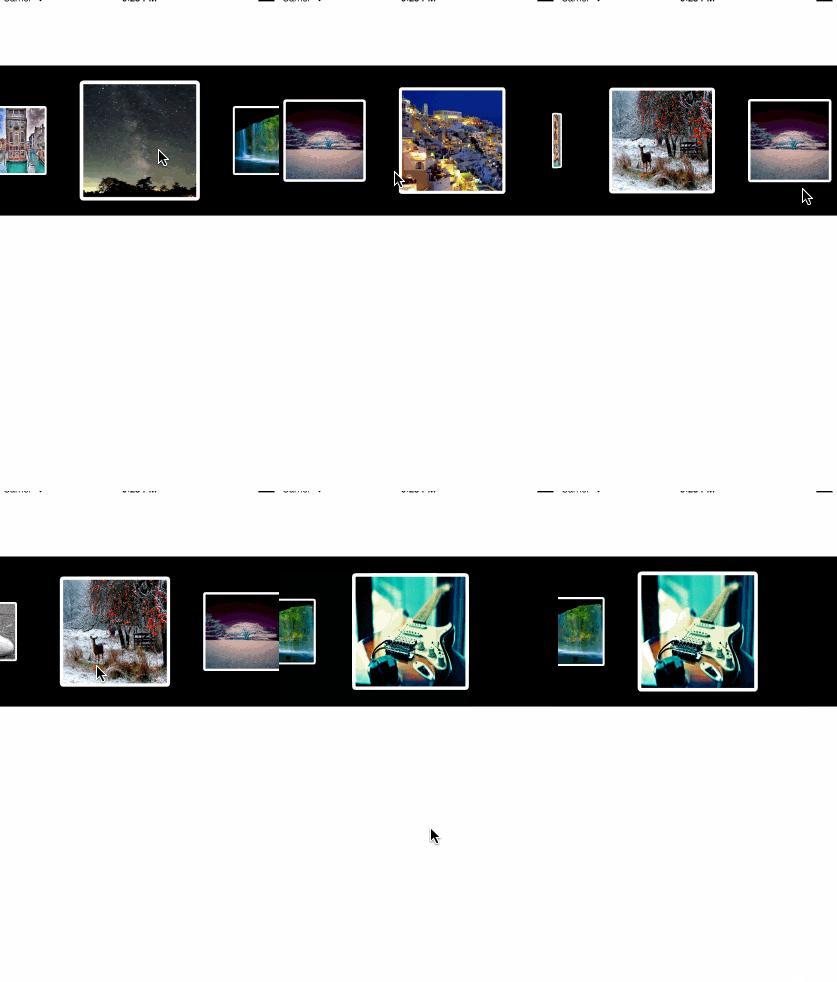
下面来做一个左右滑动的例子。效果图如下:

思路大致如下
1.基本设置
- (void)viewDidLoad {
    [super viewDidLoad];

    //设置宽度
    CGFloat w = self.view.frame.size.width;

    CGRect rect = CGRectMake(0, 100, w, 200);
    //开始布局 其中Linelayout 是自定义UICollectionViewLayout下面将要介绍
    UICollectionView *collectionView = [[UICollectionView alloc] initWithFrame:rect collectionViewLayout:[[LineLayout alloc] init]];
    //设置数据源和代理
        collectionView.dataSource = self;
    collectionView.delegate = self;
    //给我们自己定义的cell注册,这里我用了一个xib来设置图片的外观 也可以自己用代码来写只是注册方法变为 regisClass,同时自定义的cell我在这不再多说。
    [collectionView registerNib:[UINib nibWithNibName:@"ImageCell" bundle:nil] forCellWithReuseIdentifier:ID];
    //在view controller的view上添加UIcollectionView。
    [self.view addSubview:collectionView];
    //设置一个全局属性保存我们设置的UICollectionView。
    self.collectionView = collectionView;
2.实现必要的数据源和代理方法
这里的lmages是一个可变数组,图片我已经放进去了。现在只要关注数据源和代理就行了。
//返回cell的个数
- (NSInteger)collectionView:(UICollectionView *)collectionView numberOfItemsInSection:(NSInteger)section
{
    return self.images.count;
}

- (UICollectionViewCell *)collectionView:(UICollectionView *)collectionView cellForItemAtIndexPath:(NSIndexPath *)indexPath
{
//ImageCell是自定义cell
    ImageCell *cell = [collectionView dequeueReusableCellWithReuseIdentifier:ID forIndexPath:indexPath];
    cell.image = self.images[indexPath.item];
    return cell;
}
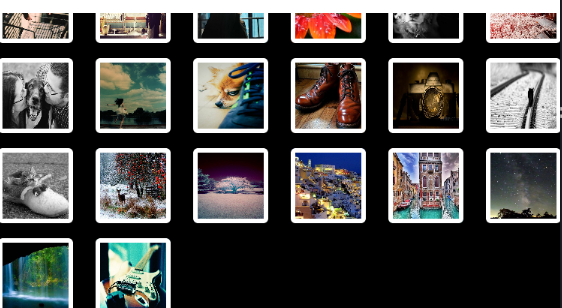
如果现用系统默认布局的话也就是UICollectionViewLayout布局,显示内容如下:

现在我们自定义一个UICollectionViewLayout就叫做LineLayout ,然后就在这里做些文章。
首先初始化尺寸
//初始化工作在这里面进行
- (void)prepareLayout
{
    [super prepareLayout];

    // 每个cell的尺寸
    self.itemSize = CGSizeMake(ItemWH, ItemWH);
    CGFloat inset = (self.collectionView.frame.size.width - ItemWH) * 0.5;
    self.sectionInset = UIEdgeInsetsMake(0, inset, 0, inset);
    // 设置水平滚动
    self.scrollDirection = UICollectionViewScrollDirectionHorizontal;
    self.minimumLineSpacing = ItemWH * 0.7;

    // 每一个cell(item)都有自己的UICollectionViewLayoutAttributes
    // 每一个indexPath都有自己的UICollectionViewLayoutAttributes
}
下面的两个方法一般是同时使用
/**
 *  只要显示的边界发生改变就重新布局:qwe
 内部会重新调用prepareLayout和layoutAttributesForElementsInRect方法获得所有cell的布局属性
 */
- (BOOL)shouldInvalidateLayoutForBoundsChange:(CGRect)newBounds
{

    return YES;
}
这个方法返回YES表示能实时监听
- (NSArray *)layoutAttributesForElementsInRect:(CGRect)rect- (NSArray *)layoutAttributesForElementsInRect:(CGRect)rect
{
// 0.计算可见的矩形框
CGRect visiableRect;
visiableRect.size = self.collectionView.frame.size;
visiableRect.origin = self.collectionView.contentOffset;
// 1.取得默认的cell的UICollectionViewLayoutAttributes
NSArray *array = [super layoutAttributesForElementsInRect:rect];
// 计算屏幕最中间的x
CGFloat centerX = self.collectionView.contentOffset.x + self.collectionView.frame.size.width * 0.5;
// 2.遍历所有的布局属性
for (UICollectionViewLayoutAttributes *attrs in array) {
// 如果不在屏幕上,直接跳过
if (!CGRectIntersectsRect(visiableRect, attrs.frame)) continue;
// 每一个item的中点x
CGFloat itemCenterX = attrs.center.x;
// 差距越小, 缩放比例越大
// 根据跟屏幕最中间的距离计算缩放比例
CGFloat scale = 1 + HMScaleFactor * (1 - (ABS(itemCenterX - centerX) / HMActiveDistance));
attrs.transform = CGAffineTransformMakeScale(scale, scale);
}
return array;
}
在这个方法中来设置滚动停止那一刻的效果
/**
 *  用来设置collectionView停止滚动那一刻的位置
 *
 *  @param proposedContentOffset 原本collectionView停止滚动那一刻的位置
 *  @param velocity              滚动速度
 */
- (CGPoint)targetContentOffsetForProposedContentOffset:(CGPoint)proposedContentOffset withScrollingVelocity:(CGPoint)velocity
{
    // 1.计算出scrollView最后会停留的范围
    CGRect lastRect;
    lastRect.origin = proposedContentOffset;
    lastRect.size = self.collectionView.frame.size;

    // 计算屏幕最中间的x
    CGFloat centerX = proposedContentOffset.x + self.collectionView.frame.size.width * 0.5;
   // NSLog(@"------%f",self.collectionView.frame.size.width);

    // 2.取出这个范围内的所有属性
    NSArray *array = [self layoutAttributesForElementsInRect:lastRect];

    // 3.遍历所有属性
    CGFloat adjustOffsetX = MAXFLOAT;
    for (UICollectionViewLayoutAttributes *attrs in array) {
        NSLog(@"%f",attrs.center.x);

        if (ABS(attrs.center.x - centerX) < ABS(adjustOffsetX)) {

            adjustOffsetX = attrs.center.x - centerX;
           //z NSLog(@"----%f",adjustOffsetX);

        }
    }

    return CGPointMake(proposedContentOffset.x + adjustOffsetX, proposedContentOffset.y);
}
代码中涉及了一些对效果做出的算法计算,在这里就不详细说明。主要还是以次例子掌握方法的应用。


 4034
4034


 被折叠的 条评论
为什么被折叠?


