Dialog
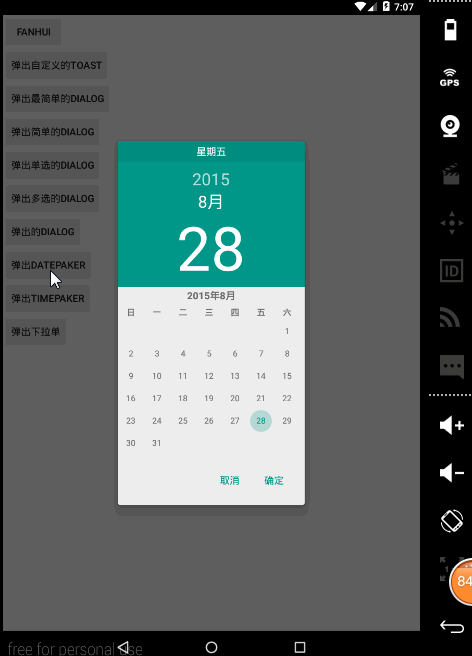
DatePickerDialog
mCalendar=Calendar.getInstance();
            DatePickerDialog datedialog=new DatePickerDialog(MainActivity.this, new OnDateSetListener() {

                @Override
                public void onDateSet(DatePicker view, int year, int monthOfYear, int dayOfMonth) {
                    mCalendar.set(year, monthOfYear,dayOfMonth);
                    SimpleDateFormat format=new SimpleDateFormat("yyyy年MM月dd日");
                    Toast.makeText(getApplicationContext(), "这个事"+format.format(mCalendar.getTime()), Toast.LENGTH_SHORT).show();

                }
            }, mCalendar.get(Calendar.YEAR),  mCalendar.get(Calendar.MONTH),  mCalendar.get(Calendar.DAY_OF_MONTH));
            datedialog.show();
运行图
TimePickerDialog
private Calendar mCalendar;
mCalendar=Calendar.getInstance();
            TimePickerDialog timedialog=new TimePickerDialog(MainActivity.this,new TimePickerDialog.OnTimeSetListener() {

                @Override
                public void onTimeSet(TimePicker view, int hourOfDay, int minute) {
                    mCalendar.set(Calendar.HOUR, hourOfDay);
                    mCalendar.set(Calendar.MINUTE, minute);
                    SimpleDateFormat formattime=new SimpleDateFormat("yyyy年MM月dd日HH----mm");
                    Toast.makeText(getApplicationContext(), formattime.format(mCalendar.getTime()),Toast.LENGTH_SHORT).show();

                }
            },mCalendar.get(Calendar.HOUR),mCalendar.get(Calendar.MINUTE),true);
            timedialog.show();
结果图
private PopupWindow popwindow;
popwindow=new PopupWindow(MainActivity.this);
View popView=getLayoutInflater().inflate(R.layout.my_pop, null);
popwindow.setWidth(ViewGroup.LayoutParams.MATCH_PARENT);
popwindow.setHeight(ViewGroup.LayoutParams.WRAP_CONTENT);
popwindow.setContentView(popView);
popwindow.setFocusable(false);
popwindow.setOutsideTouchable(true);
popwindow.showAsDropDown(button10);
@Override
public boolean onKeyDown(int keyCode, KeyEvent event) {
if(keyCode==KeyEvent.KEYCODE_BACK){
if(popwindow!=null&&popwindow.isShowing()){
popwindow.dismiss();
return true;
}
}
return super.onKeyDown(keyCode, event);
}
布局文件
<?xml version="1.0" encoding="utf-8"?>
<LinearLayout xmlns:android="http://schemas.android.com/apk/res/android"
    android:layout_width="match_parent"
    android:layout_height="match_parent"
    android:orientation="vertical" >
    <TextView
        android:layout_width="wrap_content"
        android:layout_height="wrap_content"
        android:text="第一个"/>
    <TextView
        android:layout_width="wrap_content"
        android:layout_height="wrap_content"
        android:text="第二个"/>
    <TextView
        android:layout_width="wrap_content"
        android:layout_height="wrap_content"
        android:text="第三个"/>


</LinearLayout>
运行图
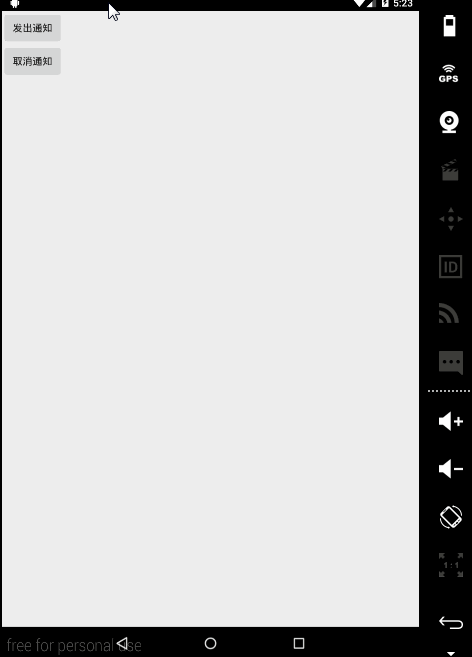
Notification主代码
package com.example.mynotification;
import android.app.Activity;
import android.app.Notification;
import android.app.NotificationManager;
import android.app.PendingIntent;
import android.content.Context;
import android.content.Intent;
import android.os.Bundle;
import android.view.Menu;
import android.view.MenuItem;
import android.view.View;
import android.view.View.OnClickListener;
import android.widget.Button;
public class MainActivity extends Activity implements OnClickListener {
private Button mButton1;
private Button mButton2;
private NotificationManager mNotification;
@Override
protected void onCreate(Bundle savedInstanceState) {
super.onCreate(savedInstanceState);
setContentView(R.layout.activity_main);
mNotification = (NotificationManager) getSystemService(Context.NOTIFICATION_SERVICE);
mButton1=(Button) findViewById(R.id.notify1);
mButton2=(Button) findViewById(R.id.notify2);
mButton1.setOnClickListener(this);
mButton2.setOnClickListener(this);
}
@Override
public void onClick(View v) {
switch(v.getId()){
case R.id.notify1:
Notification notification=new Notification();
notification.icon=R.drawable.ic_launcher;
notification.tickerText="我是一个消息";
notification.flags=Notification.FLAG_AUTO_CANCEL;
Intent intent=new Intent(getApplicationContext(),MainActivity.class);
PendingIntent penintent=PendingIntent.getActivity(getApplicationContext(), 1, intent, PendingIntent.FLAG_ONE_SHOT);
notification.setLatestEventInfo(getApplicationContext(), "我是标题", "我是内容", penintent);
notification.when=System.currentTimeMillis();
mNotification.notify(1,notification);
break;
case R.id.notify2:
mNotification.cancel(1);
break;
}
}
}
最新版本
Intent intent=new Intent(getApplicationContext(),MainActivity.class);
PendingIntent penintent=PendingIntent.getActivity(getApplicationContext(), 1, intent, PendingIntent.FLAG_ONE_SHOT);
Notification notification=new Notification.Builder(MainActivity.this).setContentText("我是文本")
.setSmallIcon(R.drawable.ic_launcher).setTicker("我是一个消息")
.setContentTitle("我是标题").setContentInfo("我是info").setContentIntent(penintent)
.setAutoCancel(true).setWhen(System.currentTimeMillis()).build();
mNotification.notify(2,notification);
运行图
自定义的Notification
Intent intent=new Intent(getApplicationContext(),MainActivity.class);
RemoteViews remoteView=new RemoteViews(getPackageName(),R.layout.notificatiochun);
PendingIntent penintent=PendingIntent.getActivity(getApplicationContext(), 1, intent, PendingIntent.FLAG_ONE_SHOT);
Notification notification=new Notification.Builder(MainActivity.this).setContentText("我是文本")
.setSmallIcon(R.drawable.ic_launcher).setTicker("我是一个消息")
.setContentTitle("我是标题").setContentInfo("我是info").setContentIntent(penintent)
.setAutoCancel(true).setWhen(System.currentTimeMillis()).setContent(remoteView).build();
mNotification.notify(2,notification);


 1031
1031

 被折叠的 条评论
为什么被折叠?
被折叠的 条评论
为什么被折叠?
 到【灌水乐园】发言


