


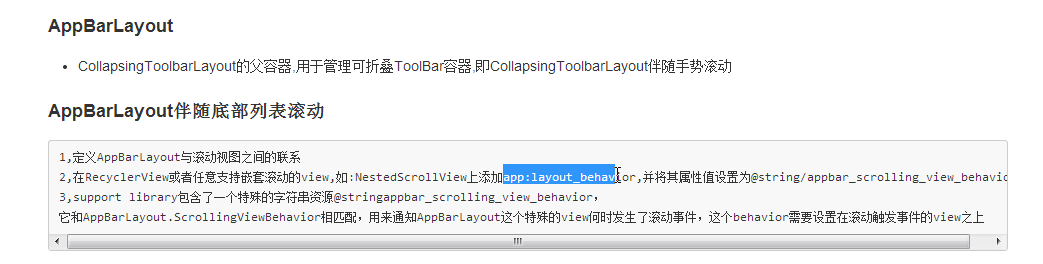
ToolBar配合CoordinatorLayout实现拉伸折叠效果
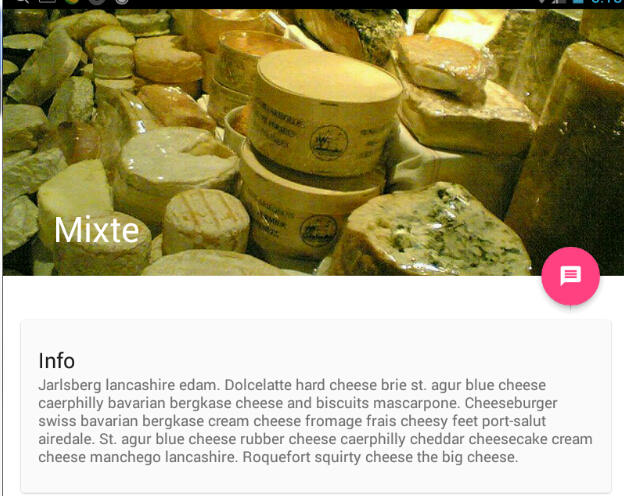
首先看下ToolBar拉伸的效果图,如图所示
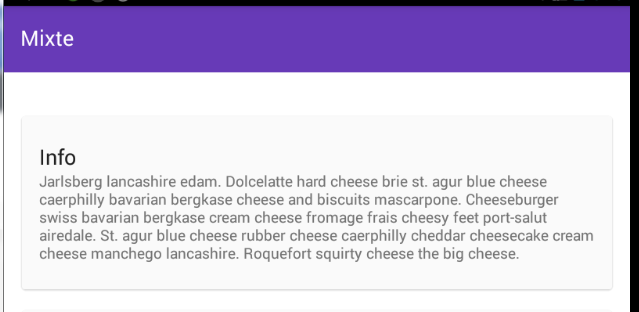
1.ToolBar未拉伸之前
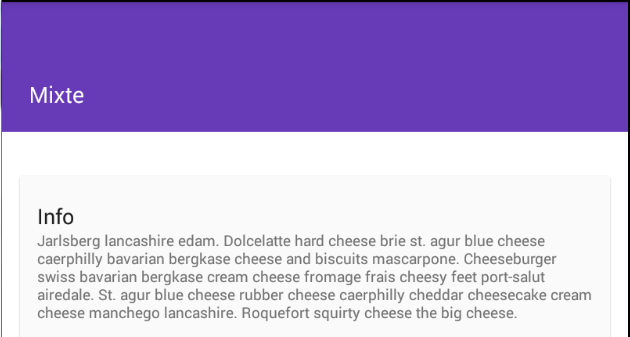
2.ToolBar拉伸中
3.拉伸完成
首先看下实现上面特效所需要的布局代码
//最外层布局CoordinatorLayout 是实现拉伸布局的 关键,由它管理布局的拉伸,布局的显示
<android.support.design.widget.CoordinatorLayout xmlns:android="http://schemas.android.com/apk/res/android"
    xmlns:tools="http://schemas.android.com/tools"
    xmlns:app="http://schemas.android.com/apk/res-auto"
    android:layout_width="match_parent"
    android:layout_height="match_parent"
    tools:context="com.example.administrator.view.CoordinateActivity">
    //用于管理可折叠ToolBar容器
    <android.support.design.widget.AppBarLayout
        android:layout_width="match_parent"
        android:layout_height="350dp">
        <!-- 展示的布局标题距离左边14dp-->
        //可折叠的ToolBar容器
      <android.support.design.widget.CollapsingToolbarLayout
            android:layout_width="match_parent"
            android:layout_height="350dp"
            android:id="@+id/collapsing"
            app:expandedTitleMarginStart="14dp"
            app:layout_scrollFlags="scroll|exitUntilCollapsed"
            app:contentScrim="#00ff00">

        <ImageView
            android:layout_width="match_parent"
            android:layout_height="wrap_content"
            android:background="@drawable/skin3"/>

            <android.support.v7.widget.Toolbar
                app:layout_collapseMode="parallax"
                android:layout_width="match_parent"
                android:layout_height="?attr/actionBarSize">

            </android.support.v7.widget.Toolbar>


        </android.support.design.widget.CollapsingToolbarLayout>

    </android.support.design.widget.AppBarLayout>

    <android.support.v7.widget.RecyclerView
        android:id="@+id/myRecyclerView"
        android:layout_width="match_parent"
        android:layout_height="match_parent"
        app:layout_behavior="@string/appbar_scrolling_view_behavior">

        </android.support.v7.widget.RecyclerView>


</android.support.design.widget.CoordinatorLayout>
控件属性说明
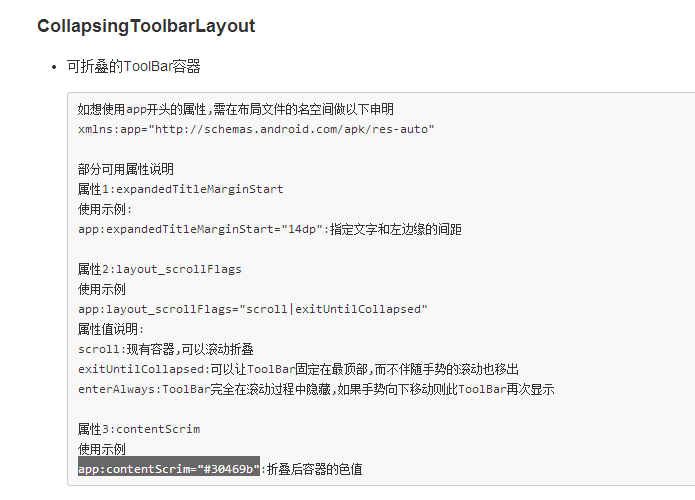
一、CollapsingToolbarLayout
二、AppBarLayout
三、Toolbar
代码实现

public class CheeseListFragment extends Fragment {

    @Nullable
    @Override
    public View onCreateView(LayoutInflater inflater, ViewGroup container, Bundle savedInstanceState) {
        RecyclerView rv = (RecyclerView) inflater.inflate(
                R.layout.fragment_cheese_list, container, false);
        setupRecyclerView(rv);
        return rv;
    }

    private void setupRecyclerView(RecyclerView recyclerView) {
        recyclerView.setLayoutManager(new LinearLayoutManager(recyclerView.getContext()));
        recyclerView.setAdapter(new SimpleStringRecyclerViewAdapter(getActivity(),
                getRandomSublist(Cheeses.sCheeseStrings, 30)));
    }

    private List<String> getRandomSublist(String[] array, int amount) {
        ArrayList<String> list = new ArrayList<>(amount);
        Random random = new Random();
        //RecyclerView中的数据,大家可以随便添加
        while (list.size() < amount) {
            list.add(array[random.nextInt(array.length)]);
        }
        return list;
    }
    //RecyclerView的适配器,实现都很简单,大家可以自己实现
    public static class SimpleStringRecyclerViewAdapter
            extends RecyclerView.Adapter<SimpleStringRecyclerViewAdapter.ViewHolder> {

        private final TypedValue mTypedValue = new TypedValue();
        private int mBackground;
        private List<String> mValues;

        public static class ViewHolder extends RecyclerView.ViewHolder {
            public String mBoundString;

            public final View mView;
            public final ImageView mImageView;
            public final TextView mTextView;

            public ViewHolder(View view) {
                super(view);
                mView = view;
                mImageView = (ImageView) view.findViewById(R.id.avatar);
                mTextView = (TextView) view.findViewById(android.R.id.text1);
            }

            @Override
            public String toString() {
                return super.toString() + " '" + mTextView.getText();
            }
        }

        public String getValueAt(int position) {
            return mValues.get(position);
        }

        public SimpleStringRecyclerViewAdapter(Context context, List<String> items) {
            context.getTheme().resolveAttribute(R.attr.selectableItemBackground, mTypedValue, true);
            mBackground = mTypedValue.resourceId;
            mValues = items;
        }

        @Override
        public ViewHolder onCreateViewHolder(ViewGroup parent, int viewType) {
            View view = LayoutInflater.from(parent.getContext())
                    .inflate(R.layout.list_item, parent, false);
            view.setBackgroundResource(mBackground);
            return new ViewHolder(view);
        }

        @Override
        public void onBindViewHolder(final ViewHolder holder, int position) {
            holder.mBoundString = mValues.get(position);
            holder.mTextView.setText(mValues.get(position));

            holder.mView.setOnClickListener(new View.OnClickListener() {
                @Override
                public void onClick(View v) {
                    Context context = v.getContext();
                    Intent intent = new Intent(context, CheeseDetailActivity.class);
                    intent.putExtra(CheeseDetailActivity.EXTRA_NAME, holder.mBoundString);

                    context.startActivity(intent);
                }
            });
            //Glide图片加载库,相对于Picasso图片加载库来说,更快,同时与Activity,Fragment生命周期进行了绑定
            Glide.with(holder.mImageView.getContext())
                    .load(Cheeses.getRandomCheeseDrawable())
                    .fitCenter()
                    .into(holder.mImageView);
        }

        @Override
        public int getItemCount() {
            return mValues.size();
        }
    }
}
通过上面的代码,我们就可以实现一个ToolBar折叠布局,实现的效果,相对来很漂亮,美观,与IOS中的空间效果很相似,同时使用ToolBar折叠效果,用户使用起来可以增加更多的乐趣,同时能够节省更多的手机空间给用户显示数据。


 1243
1243


 被折叠的 条评论
为什么被折叠?
被折叠的 条评论
为什么被折叠?
 到【灌水乐园】发言


