


ListView的使用中,可选择继承ListActivity,也可选择不继承。
继承ListActivity的实例:
http://blog.csdn.net/jincf2011/article/details/6605867
http://xys289187120.blog.51cto.com/3361352/657171/
不继承ListActivity的实例:
分三步:
1.在activity_main.xml文件中声明listview
<ListView
        android:id="@+id/listview"
        android:layout_width="fill_parent"
        android:layout_height="wrap_content"
        android:layout_weight="1"
        android:drawSelectorOnTop="false"
        android:background="#fff"
        />
2.自定义item样式
在layout目录下新建list_tem.xml文件
内容可参考:
<?xml version="1.0" encoding="utf-8"?>
<LinearLayout xmlns:android="http://schemas.android.com/apk/res/android"
    android:layout_width="match_parent"
    android:layout_height="41dp"
    android:orientation="horizontal"
    android:background="#fff">
    <LinearLayout
        android:layout_width="fill_parent"
        android:layout_height="fill_parent"
        android:orientation="vertical"
        android:layout_weight="1"
        >
        <TextView
            android:id="@+id/list_item_textview_name"
            android:layout_width="fill_parent"
            android:layout_height="40dp"
            android:text="蒋XX"
            android:gravity="center"
            />
        <!--  一条横线-->
        <View
            android:layout_width="match_parent"
            android:layout_height="1dip"
            android:background="#cccccc"
            android:layout_gravity="center_horizontal"
        />
    </LinearLayout>
    <!--  竖线-->
    <View
        android:layout_width="1dip"
        android:layout_height="match_parent"
        android:background="#cccccc"
        android:layout_gravity="center_horizontal"
    />

    <LinearLayout
        android:layout_width="fill_parent"
        android:layout_height="fill_parent"
        android:orientation="vertical"
        android:layout_weight="1"
        >
        <TextView
            android:id="@+id/list_item_textview_state"
            android:layout_width="fill_parent"
            android:layout_height="40dp"
            android:text="正在设计中"
            android:gravity="center"
            />
        <!--  一条横线-->
        <View
            android:layout_width="match_parent"
            android:layout_height="1dip"
            android:background="#cccccc"
            android:layout_gravity="center_horizontal"
        />
    </LinearLayout>
    <!--  一条竖线-->
    <View
        android:layout_width="1dip"
        android:layout_height="match_parent"
        android:background="#cccccc"
        android:layout_gravity="center_horizontal"
    />

    <LinearLayout
        android:layout_width="fill_parent"
        android:layout_height="fill_parent"
        android:orientation="vertical"
        android:layout_weight="0.8"
        >
        <TextView
            android:id="@+id/list_item_textview_date"
            android:layout_width="fill_parent"
            android:layout_height="40dp"
            android:text="2015/6/27"
            android:gravity="center"
            />
        <!--  一条横线-->
        <View
            android:layout_width="match_parent"
            android:layout_height="1dip"
            android:background="#cccccc"
            android:layout_gravity="center_horizontal"
        />
    </LinearLayout>

</LinearLayout>
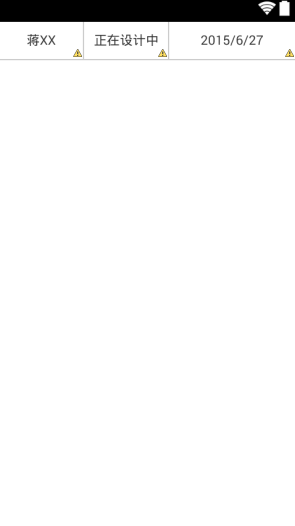
视图:
3.在代码中实现listview
此处只提供一个处理ListView的方法,以及需要的数据。
    //数据域
    private SimpleAdapter listItemAdapter;//SimpleAdapter作为ListView的适配器
    private ListView mListView;//ListView
    private ArrayList<HashMap<String, Object>> listItems;//存放ListView Items资源

    //此方法处理ListView
    private void processListView(){
        mListView=(ListView)findViewById(R.id.listview);
        listItems = new ArrayList<HashMap<String, Object>>();
        for(int i=0;i<12;i++){
           HashMap<String, Object> map = new HashMap<String, Object>();
           map.put("ItemName", "name: "+i);
           map.put("ItemState", "正在进行中");
           map.put("ItemDate", "2015.5."+i);
           listItems.add(map);
        }
        listItemAdapter=new SimpleAdapter(this, listItems, R.layout.list_item,
                new String[]{"ItemName","ItemState","ItemDate"},new int[]{R.id.list_item_textview_name,R.id.list_item_textview_state,R.id.list_item_textview_date});
        mListView.setDividerHeight(0);//设置边界线不可见
        mListView.setAdapter(listItemAdapter);
        mListView.setOnItemClickListener(new OnItemClickListener() {//为item设置点击事件
            @Override
            public void onItemClick(AdapterView<?> parent, View view, int position,
            long id) {
            // 获取点击的Item视图中一个textview的值
            TextView textView=(TextView)view.findViewById(R.id.list_item_textview_name);
            String strName=textView.getText().toString().trim();
            }
        });
} 


 376
376

 被折叠的 条评论
为什么被折叠?
被折叠的 条评论
为什么被折叠?
 到【灌水乐园】发言


