


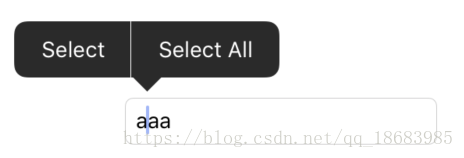
首先,下面这个控件咱们应该在UITextField、UITextView、UIWebView、WKWebView等控件上看到过.
这个控件叫UIMenuController.看着这个名字大家第一想法是不是UIViewController.其实,这个控件和UIViewController并没有什么关系.
NS_CLASS_AVAILABLE_IOS(3_0) __TVOS_PROHIBITED @interface UIMenuController : NSObject
1.创建
根据定义可以看出来UIMenuController是继承NSObject的.而且,在UIMenuController里头看不到init方法,只能看到一个单例.
#if UIKIT_DEFINE_AS_PROPERTIES
@property(class, nonatomic, readonly) UIMenuController *sharedMenuController;
#else
+ (UIMenuController *)sharedMenuController;
#endif
那么就意味着UIMenuController不能使用通常的alloc init的方法来创建,只能使用单例来创建.
UIMenuController *menuController = [UIMenuController sharedMenuController];
2.属性
@property(nonatomic,getter=isMenuVisible) BOOL menuVisible;	    // default is NO
@property(nonatomic) UIMenuControllerArrowDirection arrowDirection NS_AVAILABLE_IOS(3_2); // default is UIMenuControllerArrowDefault
@property(nullable, nonatomic,copy) NSArray<UIMenuItem *> *menuItems NS_AVAILABLE_IOS(3_2); // default is nil. these are in addition to the standard
@property(nonatomic,readonly) CGRect menuFrame;
- 首先.menuVisible这个属性是UIMenuController这个对象是否显示,而且,default is NO说明,刚创建的时候这个控件是不显示的.
- UIMenuControllerArrowDirection这个枚举定义了一下几种
typedef NS_ENUM(NSInteger, UIMenuControllerArrowDirection) {
    UIMenuControllerArrowDefault, // up or down based on screen location
    UIMenuControllerArrowUp NS_ENUM_AVAILABLE_IOS(3_2),
    UIMenuControllerArrowDown NS_ENUM_AVAILABLE_IOS(3_2),
    UIMenuControllerArrowLeft NS_ENUM_AVAILABLE_IOS(3_2),
    UIMenuControllerArrowRight NS_ENUM_AVAILABLE_IOS(3_2),
} __TVOS_PROHIBITED;
是控件小尖尖指向的方向(控件呼出方向与这个相反).默认值是Default(可能在上方也可能在下方),下面会讲解怎么用.
- menuFrame这个属性是UIMenuController呼出框的frame.高度包括了这个小尖尖.(XR打印出来高度是45).
- NSArray<UIMenuItem *> *menuItems.这个数组里面放的是UIMenuItem类型的对象.也就是上面的一些按钮.
NS_CLASS_AVAILABLE_IOS(3_2) __TVOS_PROHIBITED @interface UIMenuItem : NSObject

- (instancetype)initWithTitle:(NSString *)title action:(SEL)action NS_DESIGNATED_INITIALIZER;

@property(nonatomic,copy) NSString *title;
@property(nonatomic)      SEL       action;

@end
创建方法也很简单.标签名,方法名SEL就OK.
3.对象方法
- (void)setMenuVisible:(BOOL)menuVisible animated:(BOOL)animated;
- (void)setTargetRect:(CGRect)targetRect inView:(UIView *)targetView;
- (void)update;
- (void)setMenuVisible:(BOOL)menuVisible animated:(BOOL)animated;
这个方法可以让UIMenuController显示,是否带动画.- (void)setTargetRect:(CGRect)targetRect inView:(UIView *)targetView;
这个就可以用到上面的arrowDirection属性,因为默认是UIMenuControllerArrowDefault, // up or down based on screen location,上面或者是下面,TargetRect设置x,y即可,w,h传入0就行,就是小尖尖的位置.如果我们都想把小尖尖放到边缘处,那么显示在上面或者是显示在下面的时候y的值肯定是不同的.那么我们要首先调用- (void)setMenuVisible:(BOOL)menuVisible animated:(BOOL)animated;让UIMenuController显示.然后判断一下位置.然后- (void)setTargetRect:(CGRect)targetRect inView:(UIView *)targetView;.- (void)update;
当menuItems等属性手动改变的时候需要调用这个方法
4.UIMenuController的通知
UIKIT_EXTERN NSNotificationName const UIMenuControllerWillShowMenuNotification __TVOS_PROHIBITED;
UIKIT_EXTERN NSNotificationName const UIMenuControllerDidShowMenuNotification __TVOS_PROHIBITED;
UIKIT_EXTERN NSNotificationName const UIMenuControllerWillHideMenuNotification __TVOS_PROHIBITED;
UIKIT_EXTERN NSNotificationName const UIMenuControllerDidHideMenuNotification __TVOS_PROHIBITED;
UIKIT_EXTERN NSNotificationName const UIMenuControllerMenuFrameDidChangeNotification __TVOS_PROHIBITED;
1. UIMenuControllerWillShowMenuNotification //UIMenuController将要显示
2. UIMenuControllerDidShowMenuNotification //UIMenuController已经显示
3. UIMenuControllerWillHideMenuNotification //UIMenuController将要隐藏
4. UIMenuControllerDidHideMenuNotification //UIMenuController已经隐藏
5. UIMenuControllerMenuFrameDidChangeNotification //UIMenuController的menuFrame已经改变
5.使用注意点
- 上面说了UITextField、UITextView、UIWebView、WKWebView这些控件是带这个UIMenuController的.如果我们用Button来点击弹出这个控件会发现并没有弹出.那么这是怎么回事呢.
- 需要调用
- (BOOL)becomeFirstResponder这个方法,只有成为了第一响应者才能弹出UIMenuController. - 为什么调用了
- (BOOL)becomeFirstResponder还是不能弹出.
打印一下- (BOOL)becomeFirstResponder的返回值.如果是NO说明这个控件不能成为第一响应者.比如UIButton.我们需要子类化一个,然后重写- (BOOL)canBecomeFirstResponder并且返回YES.
- 需要调用
- (BOOL)canBecomeFirstResponder {
	return YES;
}
好了,现在可以正常显示了.
- 默认的UIMenuItem.(UIResponderStandardEditActions)
- cut:
- copy:
- paste:
- delete:
- select:
- selectAll:
- toggleBoldface:
- toggleItalics:
- toggleUnderline:
- makeTextWritingDirectionLeftToRight:
- makeTextWritingDirectionRightToLeft:
- increaseSize:
- decreaseSize:
如果自定义的想要使用某些可以直接在.m里面重写这些方法就行.如果禁止使用全部,可以在.m里面重写- (BOOL)canPerformAction:(SEL)action withSender:(id)sender
- (BOOL)canPerformAction:(SEL)action withSender:(id)sender {
	return NO;
}
如果想禁用某些可以这样写
- (BOOL)canPerformAction:(SEL)action withSender:(id)sender {
    if (action == @selector(cut:)) {
        return NO;
    } else if (action == @selector(copy:)) {
        return NO;
    } else if (action == @selector(select:)) {
        return NO;
    } else if (action == @selector(selectAll:)) {
        return NO;
    } else if (action == @selector(paste:)) {
        return NO;
    } else if (action == @selector(delete:)) {
        return NO;
    } else if (action == @selector(_promptForReplace:)) {//这个是私有的方法r
        return NO;
    } else if (action == @selector(_transliterateChinese:)) {//繁简转换.私有方法
        return NO;
    } else if (action == @selector(_insertDrawing:)) {//繁简转换.私有方法
        return NO;
    } else if (action == @selector(_showTextStyleOptions:)) {//私有方法
		return NO;
    }
    return NO;
}
因为有一些私有方法,所以我建议大家直接返回NO,然后全体自定义.
推荐的使用方式:
- (IBAction)buttonAddClick:(UIButton *)sender {
     UIMenuController *mController = [UIMenuController sharedMenuController];
     if (mController.isMenuVisible) {//1.是否已经存在,已经存在就隐藏
          [mController setMenuVisible:NO animated:YES];
     } else {
          if ([sender becomeFirstResponder]) {//2.成为第一响应者,呼出UIMenuController
               UIMenuItem *firstItem = [[UIMenuItem alloc] initWithTitle:@"确定" action:@selector(confirmClick)];
               UIMenuItem *secondItem = [[UIMenuItem alloc] initWithTitle:@"取消" action:@selector(cancelClick)];
               [mController setMenuItems:@[firstItem ,secondItem]];
               mController.arrowDirection = UIPopoverArrowDirectionDown;
               //3.先给一个targetRect,以免第一次点击不显示
               [mController setTargetRect:CGRectMake(sender.center.x, sender.center.y , 0, 0) inView:self.view];
               [mController setMenuVisible:YES animated:YES];
               NSLog(@"%ld",mController.arrowDirection);
               switch (mController.arrowDirection) {//4.通过当前显示的方向来更改targetRect(重置小尖尖的位置).也可以在上面指定arrowDirection.
                    case UIMenuControllerArrowUp:{
                         [mController setTargetRect:CGRectMake(sender.center.x, sender.center.y + sender.bounds.size.height / 2, 0, 0) inView:self.view];
                    }
                         break;
                    case UIMenuControllerArrowDown:{
                         [mController setTargetRect:CGRectMake(sender.center.x, sender.center.y - sender.bounds.size.height / 2, 0, 0) inView:self.view];
                    }
                         break;
                    case UIMenuControllerArrowLeft:{
                         [mController setTargetRect:CGRectMake(sender.center.x - sender.bounds.size.width / 2, sender.center.y , 0, 0) inView:self.view];
                    }
                         break;
                    case UIMenuControllerArrowRight:{
                         [mController setTargetRect:CGRectMake(sender.center.x + sender.bounds.size.width / 2, sender.center.y , 0, 0) inView:self.view];
                    }
                         break;
                    default:
                         break;
               }
          }
     }
}


 169
169

 被折叠的 条评论
为什么被折叠?
被折叠的 条评论
为什么被折叠?
 到【灌水乐园】发言


