


如果没有了解SmartRefreshLayout基本使用, 请先看 SmartRefreshLayout基本使用 或者 https://blog.csdn.net/qq_19688207/article/details/115666841?spm=1001.2014.3001.5501
因为自定义Header和Foote方式基本一样, 所以这里介绍Header就可以了

一. 官方文档介绍
github文档
我们看到官方文档实现方式:
① 自定义一个View, 实现RefreshHeader接口.
② 重写RefreshHeader里面所有方法
发现问题:
① 有部分方法我们根本就用不到, 但是还是要重写去实现.
② 重写用不到的方法的时候, 部分方法有返回值, 我们还得关注返回值是什么意思.
二. 解决办法
- 先去看看SmartRefreshLayout框架内部有没有解决方案.
- 如果没有, 自己写一个基类BaseHeader实现RefreshHeader接口, 重写接口方法, 然后自定义HeaderView继承BaseHeader, 需要什么方法就重写什么方法.
因为部分方法需要子类必须实现, 所以BaseHeader定义成抽象类
//通用的, 任意项目都可以用
public class abstract BaseHeader implements RefreshHeader{
      //重写RefreshHeader里面的方法
      ...
}
//具体项目Header
public class HeaderView extends BaseHeader{
        //需要什么方法就重写什么方法
}
SmartRefreshLayout内部解决方案:
因为框架本身就集成有默认的Header, 所以我们先看系统的ClassicsHeader是怎么实现的.
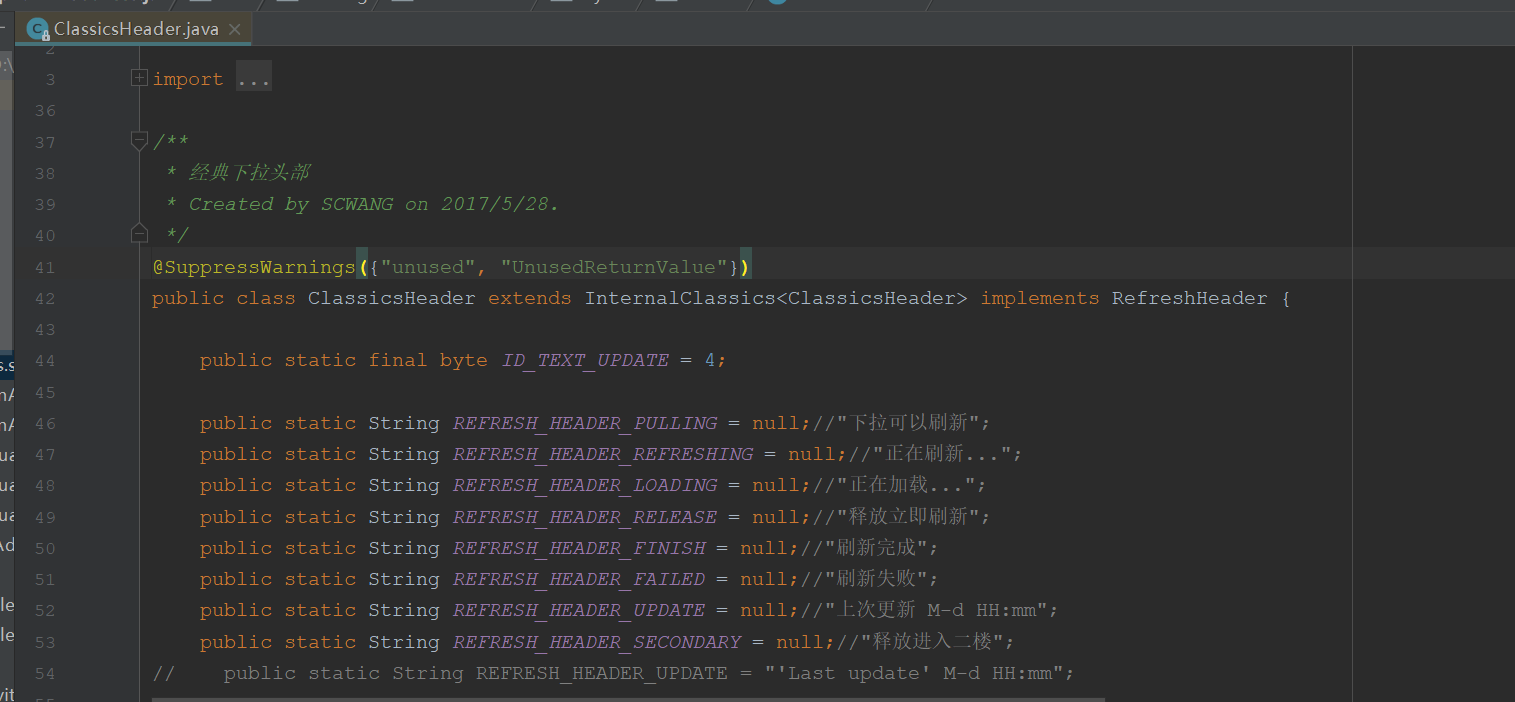
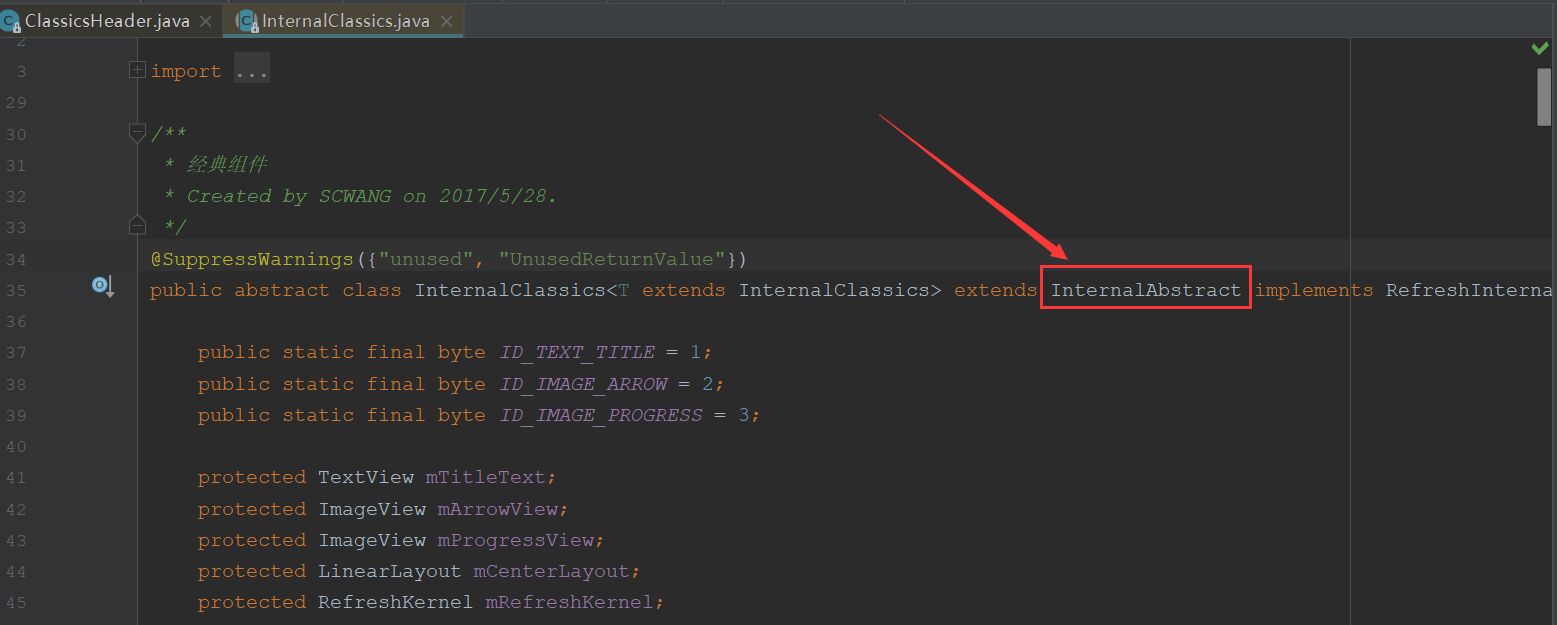
我们看到ClassicsHeader实现了RefreshHeader接口, 但是继承的却不是基本布局, 而是一个自定义的布局InternalClassics<ClassicsHeader>.
InternalAbstract.png
得出继承关系:
class ClassicsHeader extends InternalClassics implements RefreshHeader
class InternalClassics extends InternalAbstract implements RefreshInternal
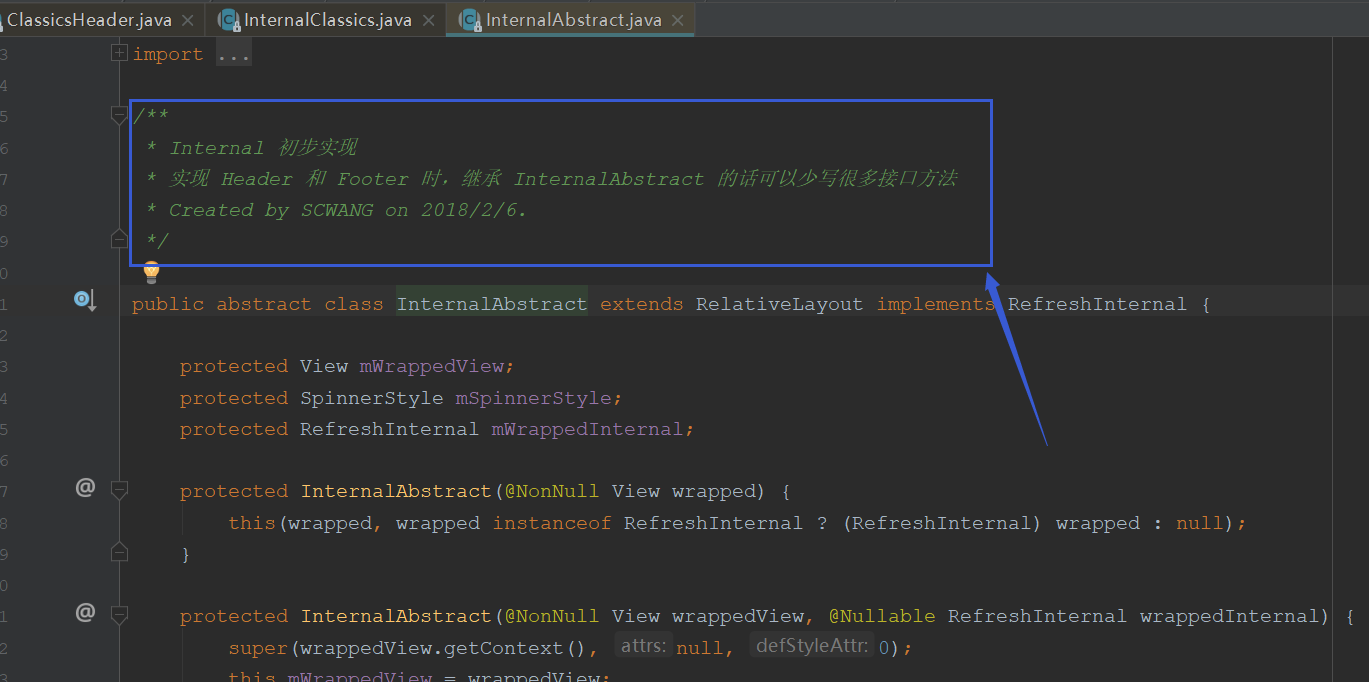
class InternalAbstract extends RelativeLayout implements RefreshInternal
interface RefreshHeader extends RefreshInternal
我们看到InternalAbstract 注释里写着: 实现 Header 和 Footer 时,继承 InternalAbstract 的话可以少写很多接口方法
于是可以这样写
public class MyHeaderView extends InternalAbstract{

    protected MyHeaderView(@NonNull View wrapped) {
        super(wrapped);
    }

    protected MyHeaderView(@NonNull View wrappedView, @Nullable RefreshInternal wrappedInternal) {
        super(wrappedView, wrappedInternal);
    }

    protected MyHeaderView(Context context, AttributeSet attrs, int defStyleAttr) {
        super(context, attrs, defStyleAttr);
    }
}
但是还有2个问题要解决:
- 自定义View布局如何添加进去?
- 下拉过程和释放刷新等状态如何监听?
解决方法:
1: 我们看到InternalAbstract 的父类其实就是RelativeLayout, 所以在初始化的时候直接addView(headerView)就可以了
- 参考文档 结合ClassicsHeader源码
最基础的写法, 只需重写onFinish和onStateChanged即可. 当然其它方法看具体需求
于是得到以下写法
import com.scwang.smartrefresh.layout.api.RefreshLayout;
import com.scwang.smartrefresh.layout.constant.RefreshState;
import com.scwang.smartrefresh.layout.internal.InternalAbstract;

/**
 * 自定义HeaderView
 */
public class MyHeaderView extends InternalAbstract{

    public static String REFRESH_HEADER_PULLING = "下拉可以刷新";//"下拉可以刷新";
    public static String REFRESH_HEADER_LOADING = "正在加载...";//"正在加载...";
    public static String REFRESH_HEADER_RELEASE = "释放立即刷新";
    public static String REFRESH_HEADER_FINISH = "刷新成功";//"刷新完成";
    public static String REFRESH_HEADER_FAILED = "刷新失败";//"刷新失败";

    private TextView mTitleText;

    public MyHeaderView(Context context) {
        this(context, null);
    }

    public MyHeaderView(Context context, AttributeSet attrs) {
        this(context, attrs, 0);
    }

    public MyHeaderView(Context context, AttributeSet attrs, int defStyleAttr) {
        super(context, attrs, defStyleAttr);

        View view = LayoutInflater.from(context).inflate(R.layout.miyuan_refresh_head, this);
        mTitleText = view.findViewById(R.id.txt);

    }

    @Override
    public int onFinish(@NonNull RefreshLayout layout, boolean success) {
        if (success) {
            mTitleText.setText(REFRESH_HEADER_FINISH);
        } else {
            mTitleText.setText(REFRESH_HEADER_FAILED);
        }
        super.onFinish(layout, success);
        return 500; //延迟500毫秒之后再弹回
    }

    @Override
    public void onStateChanged(@NonNull RefreshLayout refreshLayout, @NonNull RefreshState oldState, @NonNull RefreshState newState) {
        switch (newState) {
            case PullDownToRefresh: //下拉过程
                mTitleText.setText(REFRESH_HEADER_PULLING);
                break;
            case ReleaseToRefresh: //松开刷新
                mTitleText.setText(REFRESH_HEADER_RELEASE);
                break;
            case Refreshing: //loading中
                mTitleText.setText(REFRESH_HEADER_LOADING);
                break;
        }
    }
}
如果想查看newState更多状态码, 可以去看看RefreshState(枚举)的源码
总结 自定义Header步骤:
- 自定义View 继承 InternalAbstract.
- 初始化时, 添加自定义布局到Header
- 重写onStateChanged和onFinish监听手势滑动, 根据不同的状态改变布局UI.
优化
上面的MyHeaderView基本是可以用了,但是还有会出现2个问题
- 我们一个项目中, 基本上会有多页面都会用到同一个MyHeaderView, 那我们每次都需要在xml中这么写.
<com.scwang.smartrefresh.layout.SmartRefreshLayout
    android:id="@+id/refreshLayout"
    android:layout_width="match_parent"
    android:layout_height="match_parent">
    <com.liys.smartrefreshlayout.MyHeaderView
        android:layout_width="match_parent"
        android:layout_height="wrap_content"/>

    <!-- 我的布局 -->
    <ImageView
        android:layout_width="match_parent"
        android:layout_height="match_parent"
        android:background="@drawable/a"/>
</com.scwang.smartrefresh.layout.SmartRefreshLayout>
很明显, 这么写会很捞, 重复代码太多.
- 多个页面我想换成另一个自定义HeaderView, 怎么办呢? 每个布局去改或者修改MyHeaderView源码. 显然这样也不好.
解决思路:
我们可以写多一层, 把SmartRefreshLayout和MyHeaderView封装起来, 为了降低耦合性, 我们可以把MyHeaderView封装成一个属性, 默认给它一个MyHeaderView, 也就是整个项目需要的HeaderView, 部分页面需要独立的HeaderView可以自定义添加进去. 封装完成我们可以直接这么写
<com.liys.smartrefreshlayout.MySmartRefreshLayout
    android:id="@+id/refreshLayout"
    android:layout_width="match_parent"
    android:layout_height="match_parent">
    <!--app:headView = "..."-->

    <!-- 我的布局 -->
    <ImageView
        android:layout_width="match_parent"
        android:layout_height="match_parent"
        android:background="@drawable/a"/>
</com.liys.smartrefreshlayout.MySmartRefreshLayout>
这里只提供思路, 这个具体怎么封装就得看个人了.
例如: 简单封装, 这里只是单纯把MyHeaderView添加进去而已.
public class MySmartRefreshLayout extends SmartRefreshLayout{

    MyHeaderView  mHeaderView;

    public MySmartRefreshLayout (Context context) {
        this(context, null);
    }

    public MySmartRefreshLayout (Context context, AttributeSet attrs) {
        this(context, attrs, 0);
    }

    public MySmartRefreshLayout (Context context, AttributeSet attrs, int defStyleAttr) {
        super(context, attrs, defStyleAttr);

        ViewGroup.LayoutParams layoutParams = new ViewGroup.LayoutParams(ViewGroup.LayoutParams.MATCH_PARENT,ViewGroup.LayoutParams.WRAP_CONTENT);
        mHeaderView= new MyHeaderView(context);
        mHeaderView.setLayoutParams(layoutParams);
        addView(headRefresh, 0);
    }
}
Header和Footer属性:
<?xml version="1.0" encoding="utf-8"?>
<com.scwang.smartrefresh.layout.SmartRefreshLayout
    xmlns:android="http://schemas.android.com/apk/res/android"
    xmlns:app="http://schemas.android.com/apk/res-auto"
    xmlns:tools="http://schemas.android.com/tools"
    android:id="@+id/refreshLayout"
    android:layout_width="match_parent"
    android:layout_height="match_parent"
    tools:context=".MainActivity">

    <com.scwang.smartrefresh.layout.header.ClassicsHeader
        android:id="@+id/header"
        android:layout_width="match_parent"
        android:layout_height="wrap_content"
        app:srlTextPulling="下拉可以刷新"
        app:srlTextRefreshing="正在刷新..."
        app:srlTextLoading="正在加载..."
        app:srlTextRelease="释放立即刷新"
        app:srlTextFinish="刷新完成"
        app:srlTextFailed="刷新失败"
        app:srlTextUpdate="上次更新 M-d HH:mm"
        app:srlTextSecondary="释放进入二楼"/>

    <ListView
        android:id="@+id/listView"
        android:layout_width="match_parent"
        android:layout_height="match_parent"/>

    <com.scwang.smartrefresh.layout.footer.ClassicsFooter
        android:id="@+id/footer"
        android:layout_width="match_parent"
        android:layout_height="wrap_content"
        app:srlTextPulling="上拉加载更多"
        app:srlTextRelease="释放立即加载"
        app:srlTextLoading="正在加载..."
        app:srlTextRefreshing="正在刷新..."
        app:srlTextFinish="加载完成"
        app:srlTextFailed="加载失败"
        app:srlTextNothing="没有更多数据了"/>

</com.scwang.smartrefresh.layout.SmartRefreshLayout>


 1万+
1万+


 被折叠的 条评论
为什么被折叠?
被折叠的 条评论
为什么被折叠?
 到【灌水乐园】发言


