


SpringBoot教程(三十) | SpringBoot集成Shiro权限框架
一、 什么是Shiro
shiro是apache的一个开源框架,是一个权限管理的框架,实现 用户认证、用户授权。
spring中有spring security (原名Acegi),是一个权限框架,它和spring依赖过于紧密,没有shiro使用简单。
shiro不依赖于spring,shiro不仅可以实现 web应用的权限管理,还可以实现c/s系统,分布式系统权限管理,shiro属于轻量框架,越来越多企业项目开始使用shiro。
使用shiro实现系统的权限管理,有效提高开发效率,从而降低开发成本。
二、Shiro 组件
核心组件
主要有三大组件 为 Subject、SecurityManager、 Realms
| 组件名称 | 概念 | 作用 |
|---|---|---|
| Subject | 主体 | 可以是用户也可以是程序,主体要访问系统,系统需要对主体进行认证、授权 |
| SecurityManager | 安全管理器 | 主体进行认证和授权都是通过securityManager进行。 它管理着所有 Subject;可以看出它是 Shiro 的核心,它负责与后边介绍的其他组件进行交互,如果学习过 SpringMVC,你可以把它看成 DispatcherServlet 前端控制。 |
| Realm | 域,领域,相当于数据源 | 开发者可自定义的模块,根据项目的需求,验证和授权的逻辑在 Realm 中实现 |
其他组件
| 组件名称 | 概念 | 作用 |
|---|---|---|
| Authenticator | 认证器 | 主体进行认证最终通过authenticator进行的。 |
| Authorizer | 授权器 | 主体进行授权最终通过authorizer进行的。 |
| SessionManager | web应用中一般是用web容器对session进行管理, 所以shiro也提供一套session管理的方式。 | |
| SessionDao | 通过SessionDao管理session数据,针对个性化的session数据存储需要使用sessionDao。 | |
| Cache Manager | 缓存管理器 | 主要对session和授权数据进行缓存。 比如将授权数据通过cacheManager进行缓存管理,和ehcache整合对缓存数据进行管理。 |
| DefaultWebSecurityManager | 安全管理器 | 开发者自定义的 Realm 需要注入到 DefaultWebSecurityManager 进行管理才能生效。 |
| ShiroFilterFactoryBean | 过滤器工厂 | 负责创建并配置过滤链(filter chain)。这些过滤器可以应用于HTTP请求以实现访问控制。 |
三、流程说明
shiro的运行流程

Shiro把用户的数据封装成标识token,token一般封装着用户名,密码等信息;- 使用
Subject主体获取到封装着用户的数据的标识token; Subject把标识token交给SecurityManager,在SecurityManager安全中心,SecurityManager把标识token委托给认证器Authenticator进行身份证。认证器的作用是一般用来指定如何验证,它规定本次认证用到那些Realm- 认证器
Authenticator将传入的标识token,与数据源Realm对比,验证token是否合法
四、SpringBoot 集成 Shiro 的 两种方式
一种是shiro 官网的 shiro-spring
一种是springboot 的 starter 集成的 shiro-spring-boot-web-starter
五、shiro-spring 方式
1. 添加 Shiro 相关 maven
        <!--shiro-->
        <dependency>
            <groupId>org.apache.shiro</groupId>
            <artifactId>shiro-spring</artifactId>
            <version>1.12.0</version>
        </dependency>
<!--        <dependency>-->
<!--            <groupId>org.apache.shiro</groupId>-->
<!--            <artifactId>shiro-core</artifactId>-->
<!--            <version>1.12.0</version>-->
<!--        </dependency>-->
<!--        <dependency>-->
<!--            <groupId>org.apache.shiro</groupId>-->
<!--            <artifactId>shiro-web</artifactId>-->
<!--            <version>1.12.0</version>-->
<!--        </dependency>-->
2. 添加 其他 maven
       <!-- lombok -->
        <dependency>
            <groupId>org.projectlombok</groupId>
            <artifactId>lombok</artifactId>
            <!--provided 意味着打包的时候可以不用包进去-->
            <scope>provided</scope>
        </dependency>

        <!-- MySQL JDBC驱动 -->
        <dependency>
            <groupId>com.mysql</groupId>
            <artifactId>mysql-connector-j</artifactId>
        </dependency>

        <!--mybatis-plus 这个版本需要指定了,因为场景启动器里面没有 -->
        <dependency>
            <groupId>com.baomidou</groupId>
            <artifactId>mybatis-plus-boot-starter</artifactId>
            <version>3.5.7</version>
        </dependency>

        <!-- MyBatis-Plus代码生成器(逆向工程)-->
        <dependency>
            <groupId>com.baomidou</groupId>
            <artifactId>mybatis-plus-generator</artifactId>
            <version>3.5.7</version>
        </dependency>

        <!-- MyBatis-Plus代码生成器所需引擎
           模板引擎来生成代码文件 -->
        <dependency>
            <groupId>org.freemarker</groupId>
            <artifactId>freemarker</artifactId>
        </dependency>

       <!-- Thymeleaf 用于访问html文件 -->
        <dependency>
            <groupId>org.springframework.boot</groupId>
            <artifactId>spring-boot-starter-thymeleaf</artifactId>
        </dependency>

        <!--在Thymeleaf中使用shiro标签-->
        <dependency>
            <groupId>com.github.theborakompanioni</groupId>
            <artifactId>thymeleaf-extras-shiro</artifactId>
            <version>2.0.0</version>
        </dependency>
3. 设计数据库表
用户表、角色表、权限表、用户角色权限、角色权限表
-- ----------------------------
-- Table structure for tb_user
-- ----------------------------
DROP TABLE IF EXISTS `tb_user`;
CREATE TABLE `tb_user`  (
  `id` int NOT NULL AUTO_INCREMENT,
  `username` varchar(255) CHARACTER SET utf8mb3 COLLATE utf8mb3_bin NULL DEFAULT NULL,
  `password` varchar(255) CHARACTER SET utf8mb3 COLLATE utf8mb3_bin NULL DEFAULT NULL,
  `create_time` datetime NULL DEFAULT NULL,
  `status` int NULL DEFAULT NULL COMMENT '状态',
  PRIMARY KEY (`id`) USING BTREE
) ENGINE = InnoDB AUTO_INCREMENT = 3 CHARACTER SET = utf8mb3 COLLATE = utf8mb3_bin ROW_FORMAT = COMPACT;

-- ----------------------------
-- Records of tb_user
-- ----------------------------
INSERT INTO `tb_user` VALUES (1, '超级小明', '12345', NULL, NULL);
INSERT INTO `tb_user` VALUES (2, '王子', '12345', NULL, NULL);

-- ----------------------------
-- Table structure for tb_role
-- ----------------------------
DROP TABLE IF EXISTS `tb_role`;
CREATE TABLE `tb_role`  (
  `id` int NOT NULL AUTO_INCREMENT,
  `name` varchar(255) CHARACTER SET utf8mb3 COLLATE utf8mb3_bin NULL DEFAULT NULL COMMENT '角色名称',
  `description` varchar(255) CHARACTER SET utf8mb3 COLLATE utf8mb3_bin NULL DEFAULT NULL COMMENT '描述',
  PRIMARY KEY (`id`) USING BTREE
) ENGINE = InnoDB AUTO_INCREMENT = 3 CHARACTER SET = utf8mb3 COLLATE = utf8mb3_bin ROW_FORMAT = COMPACT;

-- ----------------------------
-- Records of tb_role
-- ----------------------------
INSERT INTO `tb_role` VALUES (1, '超级管理员', NULL);
INSERT INTO `tb_role` VALUES (2, '产品管理员', NULL);
INSERT INTO `tb_role` VALUES (3, '订单管理员', NULL);

-- ----------------------------
-- Table structure for tb_permission
-- ----------------------------
DROP TABLE IF EXISTS `tb_permission`;
CREATE TABLE `tb_permission`  (
  `id` int NOT NULL AUTO_INCREMENT,
  `url` varchar(255) CHARACTER SET utf8mb3 COLLATE utf8mb3_bin NULL DEFAULT NULL,
  `name` varchar(255) CHARACTER SET utf8mb3 COLLATE utf8mb3_bin NULL DEFAULT NULL,
  PRIMARY KEY (`id`) USING BTREE
) ENGINE = InnoDB AUTO_INCREMENT = 4 CHARACTER SET = utf8mb3 COLLATE = utf8mb3_bin ROW_FORMAT = COMPACT;

-- ----------------------------
-- Records of tb_permission
-- ----------------------------
INSERT INTO `tb_permission` VALUES (1, '查询', 'user:queryAll');
INSERT INTO `tb_permission` VALUES (2, '增加', 'user:add');
INSERT INTO `tb_permission` VALUES (3, '删除', 'user:delete');


-- ----------------------------
-- Table structure for tb_user_role
-- ----------------------------
DROP TABLE IF EXISTS `tb_user_role`;
CREATE TABLE `tb_user_role`  (
  `role_id` int NOT NULL COMMENT '角色id',
  `user_id` int NOT NULL COMMENT '用户id'
) ENGINE = InnoDB CHARACTER SET = utf8mb3 COLLATE = utf8mb3_bin ROW_FORMAT = COMPACT;

-- ----------------------------
-- Records of tb_user_role
-- ----------------------------
INSERT INTO `tb_user_role` VALUES (1, 1);
INSERT INTO `tb_user_role` VALUES (2, 2);


-- ----------------------------
-- Table structure for tb_role_permission
-- ----------------------------
DROP TABLE IF EXISTS `tb_role_permission`;
CREATE TABLE `tb_role_permission`  (
  `role_id` int NOT NULL COMMENT '角色id',
  `permission_id` int NOT NULL COMMENT '权限id'
) ENGINE = InnoDB CHARACTER SET = utf8mb3 COLLATE = utf8mb3_bin ROW_FORMAT = COMPACT;

-- ----------------------------
-- Records of tb_role_permission
-- ----------------------------
INSERT INTO `tb_role_permission` VALUES (1, 1);
INSERT INTO `tb_role_permission` VALUES (1, 2);
INSERT INTO `tb_role_permission` VALUES (1, 3);
INSERT INTO `tb_role_permission` VALUES (2, 1);
INSERT INTO `tb_role_permission` VALUES (3, 1);
4. 使用mybatisplus逆向工程生成代码
具体操作我这边就不具体说了
5. 添加 自定义Realm 类
自定义Realm实现类
要求:
1.自定义Realm时,通常会继承AuthorizingRealm类,因为它同时提供了认证和授权的功能
2.重写 认证方法 doGetAuthenticationInfo() 和 授权方法doGetAuthorizationInfo() ,分别用于实现自定义的认证逻辑和授权逻辑。
细节:查询资料,得知shiro在subject.login(token)方法时不会执行doGetAuthorizationInfo方法,只有在访问到有权限验证的接口时会调用查看权限
package com.example.springbootshiro.realm;

import com.example.springbootshiro.entity.Permission;
import com.example.springbootshiro.entity.Role;
import com.example.springbootshiro.entity.User;
import com.example.springbootshiro.mapper.RolePermissionMapper;
import com.example.springbootshiro.mapper.UserMapper;
import com.example.springbootshiro.mapper.UserRoleMapper;
import org.apache.shiro.SecurityUtils;
import org.apache.shiro.authc.*;
import org.apache.shiro.authz.AuthorizationException;
import org.apache.shiro.authz.AuthorizationInfo;
import org.apache.shiro.authz.SimpleAuthorizationInfo;
import org.apache.shiro.realm.AuthorizingRealm;
import org.apache.shiro.subject.PrincipalCollection;
import org.springframework.beans.factory.annotation.Autowired;
import org.springframework.stereotype.Service;

import java.util.HashSet;
import java.util.List;
import java.util.Set;

/**
 * @ClassName MyShiroRealm
 *
 */
@Service
public class MyShiroRealm  extends AuthorizingRealm {
    @Autowired
    private UserMapper userMapper;
    @Autowired
    private UserRoleMapper userRoleMapper;
    @Autowired
    private RolePermissionMapper rolePermissionMapper;


    /**
     * 认证方法:登录认证
     * @param token
     * @return
     * @throws AuthenticationException
     */
    @Override
    protected AuthenticationInfo doGetAuthenticationInfo(AuthenticationToken token) throws AuthenticationException {

        //获取用户输入的用户名密码
        String username= (String) token.getPrincipal();
        String password=new String((char[])token.getCredentials());

        System.out.println("用户输入--->username:"+username+"-->password:"+password);

        //在数据库中查询
        User userInfo=userMapper.selectByName(username);
        if (userInfo == null) {
            throw new UnknownAccountException("用户名或密码错误!");
        }
        if (!password.equals(userInfo.getPassword())) {
            throw new IncorrectCredentialsException("用户名或密码错误!");
        }
        SimpleAuthenticationInfo authenticationInfo = new SimpleAuthenticationInfo(
                userInfo, // 用户名
                userInfo.getPassword(), // 密码
                getName() // realm name
        );
        return authenticationInfo;
    }

    /**
     * 授权方法:获取用户角色和权限
     * @param principal
     * @return
     */
    @Override
    protected AuthorizationInfo doGetAuthorizationInfo(PrincipalCollection principal) {
        if(principal == null){
            throw new AuthorizationException("principals should not be null");
        }
        User userInfo= (User) SecurityUtils.getSubject().getPrincipal();
        System.out.println("用户-->"+userInfo.getUsername()+"获取权限中");
        SimpleAuthorizationInfo simpleAuthorizationInfo = new SimpleAuthorizationInfo();

        //用户获取角色集
        List<Role> roleList=userRoleMapper.findByUserName(userInfo.getUsername());
        Set<String> roleSet=new HashSet<>();
        for (Role r:roleList){
            Integer roleId=r.getId();//获取角色id
            simpleAuthorizationInfo.addRole(r.getName());//添加角色名字
            List<Permission> permissionList=rolePermissionMapper.findByRoleId(roleId);
            for (Permission p:permissionList){
                //添加权限
                simpleAuthorizationInfo.addStringPermission(p.getName());
            }
        }

        System.out.println("角色为-> " + simpleAuthorizationInfo.getRoles());
        System.out.println("权限为-> " + simpleAuthorizationInfo.getStringPermissions());
        return simpleAuthorizationInfo;
    }


}
扩展:授权类方法 对应的 注解
授权类(SimpleAuthorizationInfo) 方法对应的 注解
角色相关的方法及注解
addRole(String roleName): 添加一个角色到授权信息中。addRoles(Collection<String> roleNames): 批量添加多个角色到授权信息中。
相匹配注解:
@RequiresRoles(value = {"admin", "user"}, logical = Logical.AND): 表示方法调用者必须同时拥有"admin"和"user"两个角色。logical属性决定了多个角色或权限之间的逻辑关系(如AND、OR)。
权限相关的方法及注解
addStringPermission(String permissionString): 添加一个权限字符串到授权信息中。addStringPermissions(Collection<String> permissions): 批量添加多个权限字符串到授权信息中。
相匹配注解:
@RequiresPermissions(value = {"user:create", "user:update"}, logical = Logical.OR): 表示方法调用者至少需要拥有"user:create"或"user:update"中的一个权限。
其他类别的注解
@RequiresAuthentication: 表示方法调用者必须已经通过身份验证。
@RequiresUser: 表示方法调用者必须是一个已识别的用户,但不一定是特定的角色或拥有特定的权限。
6. 添加 ShiroConfig 配置类
package com.example.springbootshiro.config;

import com.example.springbootshiro.realm.MyShiroRealm;
import org.apache.shiro.authc.credential.HashedCredentialsMatcher;
import org.apache.shiro.cache.CacheManager;
import org.apache.shiro.cache.MemoryConstrainedCacheManager;
import org.apache.shiro.mgt.RememberMeManager;
import org.apache.shiro.realm.AuthorizingRealm;
import org.apache.shiro.realm.Realm;
import org.apache.shiro.spring.security.interceptor.AuthorizationAttributeSourceAdvisor;
import org.apache.shiro.spring.web.ShiroFilterFactoryBean;
import org.apache.shiro.web.mgt.CookieRememberMeManager;
import org.apache.shiro.web.mgt.DefaultWebSecurityManager;
import org.apache.shiro.web.servlet.Cookie;
import org.apache.shiro.web.servlet.SimpleCookie;
import org.apache.shiro.web.session.mgt.DefaultWebSessionManager;
import org.springframework.aop.framework.autoproxy.DefaultAdvisorAutoProxyCreator;
import org.springframework.context.annotation.Bean;
import org.springframework.context.annotation.Configuration;

import java.util.LinkedHashMap;

/**
 * @ClassName ShiroConfig
 *
 */
@Configuration
public class ShiroConfig {

    /**
     * ShiroFilter是整个Shiro的入口点,用于拦截需要安全控制的请求进行处理
     * 是shiro的大管家,相当于mybatis里的SqlSessionFactoryBean
     * @param securityManager
     * @return
     */
    @Bean
    public ShiroFilterFactoryBean shiroFilterFactoryBean(org.apache.shiro.mgt.SecurityManager securityManager) {
        ShiroFilterFactoryBean shiroFilterFactoryBean = new ShiroFilterFactoryBean();
        //配置 登录页面URL
        shiroFilterFactoryBean.setLoginUrl("/login");
        //配置 登录成功后的页面URL
        shiroFilterFactoryBean.setSuccessUrl("/index");
        //配置 访问没有权限的时 触发的页面URL
        shiroFilterFactoryBean.setUnauthorizedUrl("/403");
        //页面权限控制(配置 Shiro 的过滤器链)
        shiroFilterFactoryBean.setFilterChainDefinitionMap(ShiroFilterMapFactory.shiroFilterMap());
        //设置 Shiro 的安全管理器
        shiroFilterFactoryBean.setSecurityManager(securityManager);
        return shiroFilterFactoryBean;
    }

    /**
     * web应用管理配置
     * @param shiroRealm
     * @param cacheManager
     * @param manager
     * @return
     */
    @Bean
    public DefaultWebSecurityManager securityManager(Realm shiroRealm, CacheManager cacheManager, RememberMeManager manager) {
        DefaultWebSecurityManager securityManager = new DefaultWebSecurityManager();
        //设置缓存管理器
        securityManager.setCacheManager(cacheManager);
        //设置记住我管理器,用于处理用户的“记住我”功能。也就是记住Cookie
        securityManager.setRememberMeManager(manager);
        //设置单个 Realm,用于用户认证和授权。
        securityManager.setRealm(shiroRealm);
        //设置会话管理器,用于管理用户的会话。
        securityManager.setSessionManager(sessionManager());
        return securityManager;
    }

    /**
     * 处理 Web 会话
     * Session Manager:会话管理
     * 即用户登录后就是一次会话,在没有退出之前,它的所有信息都在会话中;
     * 会话可以是普通JavaSE环境的,也可以是如Web环境的;
     * @return
     */
    @Bean
    public DefaultWebSessionManager sessionManager() {
        DefaultWebSessionManager defaultWebSessionManager=new DefaultWebSessionManager();
        // 设置session过期时间3600s
        Long timeout=60L*1000*60;//毫秒级别
        //设置全局会话超时时间
        defaultWebSessionManager.setGlobalSessionTimeout(timeout);
        // 启用会话验证调度器,定期检查会话的有效性
        defaultWebSessionManager.setSessionValidationSchedulerEnabled(true);
        // 禁用URL会话ID重写 ,去掉shiro登录时url里的JSESSIONID
        defaultWebSessionManager.setSessionIdUrlRewritingEnabled(false);
        return defaultWebSessionManager;
    }

    /**
     * 加密算法
     * @return
     */
    @Bean
    public HashedCredentialsMatcher hashedCredentialsMatcher() {
        HashedCredentialsMatcher hashedCredentialsMatcher = new HashedCredentialsMatcher();
        hashedCredentialsMatcher.setHashAlgorithmName("MD5");//采用MD5 进行加密
        hashedCredentialsMatcher.setHashIterations(1);//加密次数
        return hashedCredentialsMatcher;
    }

    /**
     * 记住我的配置
     * @return
     */
    @Bean
    public RememberMeManager rememberMeManager() {
        Cookie cookie = new SimpleCookie("rememberMe");
        cookie.setHttpOnly(true);//通过js脚本将无法读取到cookie信息
        cookie.setMaxAge(60 * 60 * 24);//cookie保存一天
        CookieRememberMeManager manager=new CookieRememberMeManager();
        manager.setCookie(cookie);
        return manager;
    }
    /**
     * 缓存配置
     * @return
     */
    @Bean
    public CacheManager cacheManager() {
        MemoryConstrainedCacheManager cacheManager=new MemoryConstrainedCacheManager();//使用内存缓存
        return cacheManager;
    }

    /**
     * 配置realm,用于认证和授权
     * @param hashedCredentialsMatcher
     * @return
     */
    @Bean
    public AuthorizingRealm shiroRealm(HashedCredentialsMatcher hashedCredentialsMatcher) {
        MyShiroRealm shiroRealm = new MyShiroRealm();
        //校验密码用到的算法
//        shiroRealm.setCredentialsMatcher(hashedCredentialsMatcher);
        return shiroRealm;
    }

    /**
     * 启用shiro方言,这样能在页面上使用shiro标签
     * @return
     */
//    @Bean
//    public ShiroDialect shiroDialect() {
//        return new ShiroDialect();
//    }

    /**
     * 开启shiro注解支持(例如:@RequiresRoles、@RequiresPermissions 等)
     * AuthorizationAttributeSourceAdvisor 和 DefaultAdvisorAutoProxyCreator 的共同作用下注解才能起效
     */
    @Bean
    public AuthorizationAttributeSourceAdvisor getAuthorizationAttributeSourceAdvisor(org.apache.shiro.mgt.SecurityManager securityManager) {
        AuthorizationAttributeSourceAdvisor advisor = new AuthorizationAttributeSourceAdvisor();
        advisor.setSecurityManager(securityManager);
        return advisor;
    }

    /**
     *  AOP 相关的自动代理创建器
     * 这个才能解决权限注解不生效问题
     */
    @Bean
    public DefaultAdvisorAutoProxyCreator advisorAutoProxyCreator(){
        DefaultAdvisorAutoProxyCreator advisorAutoProxyCreator = new DefaultAdvisorAutoProxyCreator();
        advisorAutoProxyCreator.setProxyTargetClass(true);
        return advisorAutoProxyCreator;
    }

}
ShiroFilterMapFactory
抽出来的工具类 用于路径映射和拦截
可参考:Shiro拦截机制表, 里面有配置说明
package com.example.springbootshiro.config;

import java.util.LinkedHashMap;

/**
 * @ClassName ShiroFilterMapFactory
 */
public class ShiroFilterMapFactory {

    public static LinkedHashMap<String, String> shiroFilterMap() {
        //设置路径映射,注意这里要用LinkedHashMap 保证有序
        LinkedHashMap<String, String> filterChainDefinitionMap = new LinkedHashMap<>();
        //对所有用户认证
        filterChainDefinitionMap.put("/static/**", "anon");
        filterChainDefinitionMap.put("/login", "anon");
        //退出拦截器,退出成功后重定向的到URL为“/”
        filterChainDefinitionMap.put("/logout", "logout");
        //对所有页面进行认证
        filterChainDefinitionMap.put("/**", "authc");
        return filterChainDefinitionMap;
    }
}
扩展:Shiro过滤机制表
| 过滤名称 | 类 | 描述 |
|---|---|---|
| anon | org.apache.shiro.web.filter.authc.AnonymousFilter | 匿名拦截器,即不需要登录即可访问;一般用于静态资源过滤;示例/static/**=anon |
| authc | org.apache.shiro.web.filter.authc.FormAuthenticationFilter | 基于表单的拦截器;如/**=authc,如果没有登录会跳到相应的登录页面登录 |
| authcBasic | org.apache.shiro.web.filter.authc.BasicHttpAuthenticationFilter | Basic HTTP身份验证拦截器 |
| logout | org.apache.shiro.web.filter.authc.LogoutFilter | 退出拦截器,主要属性:redirectUrl:退出成功后重定向的地址(/),示例/logout=logout |
| noSessionCreation | org.apache.shiro.web.filter.session.NoSessionCreationFilter | 不创建会话拦截器,调用subject.getSession(false)不会有什么问题,但是如果subject.getSession(true)将抛出DisabledSessionException异常 |
| perms | org.apache.shiro.web.filter.authz.PermissionsAuthorizationFilter | 权限授权拦截器,验证用户是否拥有所有权限;属性和roles一样;示例/user/**=perms[“user:create”] |
| port | org.apache.shiro.web.filter.authz.PortFilter | 端口拦截器,主要属性port(80):可以通过的端口;示例/test= port[80],如果用户访问该页面是非80,将自动将请求端口改为80并重定向到该80端口,其他路径/参数等都一样 |
| rest | org.apache.shiro.web.filter.authz.HttpMethodPermissionFilter | rest风格拦截器,自动根据请求方法构建权限字符串;示例/users=rest[user],会自动拼出user:read,user:create,user:update,user:delete权限字符串进行权限匹配(所有都得匹配,isPermittedAll) |
| roles | org.apache.shiro.web.filter.authz.RolesAuthorizationFilter | 角色授权拦截器,验证用户是否拥有所有角色;示例/admin/**=roles[admin] |
| ssl | org.apache.shiro.web.filter.authz.SslFilter | SSL拦截器,只有请求协议是https才能通过;否则自动跳转会https端口443;其他和port拦截器一样; |
| user | org.apache.shiro.web.filter.authc.UserFilter | 用户拦截器,用户已经身份验证/记住我登录的都可;示例/**=user |
7. 开始测试—后端
1. 创建一个LoginController 类
用来处理登录访问请求
package com.example.springbootshiro.controller;

import com.example.springbootshiro.entity.User;
import com.example.springbootshiro.result.ResponseResult;
import org.apache.shiro.SecurityUtils;
import org.apache.shiro.authc.IncorrectCredentialsException;
import org.apache.shiro.authc.UnknownAccountException;
import org.apache.shiro.authc.UsernamePasswordToken;
import org.apache.shiro.subject.Subject;
import org.springframework.stereotype.Controller;
import org.springframework.ui.Model;
import org.springframework.web.bind.annotation.GetMapping;
import org.springframework.web.bind.annotation.PostMapping;
import org.springframework.web.bind.annotation.ResponseBody;

/**
 * @ClassName LoginController
 */
@Controller
public class LoginController {

    @GetMapping("/login")
    public  String login(){
        return "login";
    }

    @GetMapping("/")
    public String home(){
        return "redirect:/index";
    }

    @GetMapping("/index")
    public String index(Model model){
        User user= (User) SecurityUtils.getSubject().getPrincipal();
        model.addAttribute("user",user);
        return "index";
    }

    @PostMapping("login")
    @ResponseBody
    public ResponseResult login(User user, Boolean rememberMe){
        System.out.println("user = " + user);
        UsernamePasswordToken token = new UsernamePasswordToken(user.getUsername(), user.getPassword());
        //获取Subject 对象
        Subject subject= SecurityUtils.getSubject();
        try {
            if (rememberMe){
                //是否记住我
                token.setRememberMe(true);
            }
            subject.login(token);
            return ResponseResult.success("/index");
        } catch (UnknownAccountException e) {
            return ResponseResult.fail(e.getMessage());
        } catch (IncorrectCredentialsException e) {
            return ResponseResult.fail(e.getMessage());
        }
    }
    @GetMapping("/403")
    public String forbid(){
        return "403";
    }
}
2. 创建一个UserController 类
用于处理User类的访问请求,并使用Shiro权限注解控制权限:
package com.example.springbootshiro.controller;

import org.apache.shiro.authz.annotation.RequiresPermissions;
import org.springframework.web.bind.annotation.GetMapping;
import org.springframework.web.bind.annotation.RequestMapping;
import org.springframework.web.bind.annotation.RestController;

/**
 * @ClassName UserController
 */
@RestController
@RequestMapping("/user")
public class UserController {

    @RequiresPermissions("user:queryAll")
    @GetMapping("/queryAll")
    public String queryAll(){

        //只演示框架...功能不实现
        return "查询列表";
    }

    @RequiresPermissions("user:add")
    @GetMapping("/add")
    public String userAdd(){
        return "添加用户";
    }

    @RequiresPermissions("user:delete")
    @GetMapping("/delete")
    public String userDelete(){
        return "删除用户";
    }
}
8. 开始测试—前端
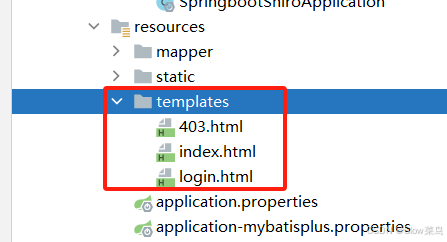
1. 编写login.html页面
<!DOCTYPE html>
<html lang="en">
<head>
    <meta charset="UTF-8">
    <title>Login Form</title>
    <!-- 确保jQuery库被加载 -->
    <script src="https://code.jquery.com/jquery-3.3.1.min.js"></script>

</head>
<body>
<form id="loginForm">
    <input type="text" id="username" name="username" class="text" />
    <input type="password" id="password" name="password" class="password" />
    <!-- 添加一个复选框来表示布尔值选项 -->
    <input type="checkbox" id="rememberMe" name="rememberMe" value="true" />
    <label for="rememberMe">记住我</label>
</form>
<div class="signin">
    <input id="loginBut" type="button" value="Login" />
</div>

<script type="text/javascript">
    // jQuery插件定义
    $.fn.serializeObject = function () {
        var o = {};
        var a = this.serializeArray();
        $.each(a, function () {
            if (o[this.name]) {
                if (!o[this.name].push) {
                    o[this.name] = [o[this.name]];
                }
                o[this.name].push(this.value);
            } else {
                o[this.name] = this.value || '';
            }
        });
        return o;
    };

    $(function() {
        $("#loginBut").click(function() {
            var arr = $('#loginForm').serializeObject();
            // 检查rememberMe复选框是否被选中
            if (!$('#rememberMe').is(':checked')) {
                // 如果未选中,则显式添加rememberMe: false到arr中
                arr.rememberMe = false;
            }
            $.ajax({
                url: '/login',
                type: 'post',
                data: arr,
                dataType: "json",
                success: function(data) {
                    console.log("data",data,location)
                    if (data.code == 200) {
                        //debugger;
                        console.log("data",data)
                        location.href = data.message;
                    } else {
                        alert(data.message);
                    }
                },
                error: function(jqXHR, textStatus, errorThrown) {
                    // 使用jqXHR.responseText或jqXHR.responseJSON来获取错误信息
                    if (jqXHR.responseJSON) {
                        alert(jqXHR.responseJSON.msg || 'Unknown error');
                    } else {
                        alert('Error: ' + textStatus);
                    }
                }
            });
        });
    });
</script>
</body>
</html>
2. 编写index.html页面
<!DOCTYPE html>
<html lang="en" xmlns:th="http://www.thymeleaf.org">
<head>
    <meta charset="UTF-8">
    <title>首页</title>
</head>
<body>
<h1>我是templates 下面的 index</h1>
<h1>番茄欢迎您!</h1>
<!-- 使用 th:text 和 th:if 一起检查 user 是否为 null -->
<span th:text="${user != null ? user.username : '未登录'}">登录用户:未登录</span>
<a th:href="@{/logout}">注销</a>


<h2>权限测试</h2>
<a th:href="@{/user/queryAll}">获取用户全部信息</a>
<a th:href="@{/user/add}">添加用户</a>
<a th:href="@{/user/delete}">删除用户</a>
</body>
</html>
3. 编写403页面
<!DOCTYPE html>
<html lang="en">
<head>
    <meta charset="UTF-8">
    <title>403</title>
</head>
<body>
<h1>403权限不够</h1>
<a href="/index">首页</a>
</body>
</html>
10、测试遇到的问题
启动项目:访问http://localhost:8080/,它会自动拦截,页面重定向到 http://localhost:8080/login ,登录成功跳转到http://localhost:8080/index
问题:
登录测试用户的时候,访问没有权限的链接请求时,后台抛出Caused by:org.apache.shiro.authz.AuthorizationException: Not authorized to invoke method 异常后,
以为会因为我们在ShiroConfig配置类中配置了shiroFilterFactoryBean.setUnauthorizedUrl(“/403”); 从而跳到我们写的403页面,
结果却并没有触发。
原因如下:
只有perms,roles,ssl,rest,port才是属于AuthorizationFilter,
而anon,authcBasic,auchc,user是AuthenticationFilter,
所以unauthorizedUrl设置后页面不跳转。
解决方案:
方案1:在ShiroFilterMapFactory.shiroFilterMap() 我们配置的 页面权限控制中 换掉 anon
方案2:要么配置全局拦截器 (推荐这种比较好)
@RestControllerAdvice
public class GlobalException {

    @ExceptionHandler(value = AuthorizationException.class)
    public String handleAuthorizationException() {
        return "全局处理器的 403";

    }
六、shiro-spring-boot-web-starter方式
1. 添加 maven 依赖
    <!--增加Shiro的配置-->
        <dependency>
            <groupId>org.apache.shiro</groupId>
            <artifactId>shiro-spring-boot-web-starter</artifactId>
            <version>1.4.0</version>
        </dependency>
        <!--Thymeleaf模板引擎-->
        <dependency>
            <groupId>org.springframework.boot</groupId>
            <artifactId>spring-boot-starter-thymeleaf</artifactId>
        </dependency>
        <!--在Thymeleaf中使用shiro标签-->
        <dependency>
            <groupId>com.github.theborakompanioni</groupId>
            <artifactId>thymeleaf-extras-shiro</artifactId>
            <version>2.0.0</version>
        </dependency>
2. 添加Shiro的配置
和 “SpringBoot集成Shiro权限框架(shiro-spring 方式)”相比。
去掉ShiroConfig配置类中关于ShiroFilterFactoryBean的初始化配置,移到了application.properties文件中。
properties 格式:
#开启Shiro配置,默认为true
shiro.enabled=true
#开启ShiroWeb配置,默认为true
shiro.web.enabled=true
#登录地址
shiro.loginUrl=/login
#登录成功地址
shiro.successUrl=/index
#未获授权默认跳转地址
shiro.unauthorizedUrl=/unauthorized
#是否允许将sessionId放到Url地址拦中。默认为true。默认为true
shiro.sessionManager.sessionIdUrlRewritingEnabled=true
#是否允许将sessionId放到cookie中,默认为true
shiro.sessionManager.sessionIdCookieEnabled=true
3. 添加 ShiroConfig 配置类
和 “SpringBoot集成Shiro权限框架(shiro-spring 方式)”相比。
去掉ShiroConfig配置类中关于ShiroFilterFactoryBean的实例化方法,改为ShiroFilterChainDefinition。
@Bean
public ShiroFilterChainDefinition shiroFilterChainDefinition(){
   DefaultShiroFilterChainDefinition definition = new DefaultShiroFilterChainDefinition();
   //页面权限控制
   definition.addPathDefinitions(ShiroFilterMapFactory.shiroFilterMap());
   return definition;
}
其他的配置和操作与 “SpringBoot集成Shiro权限框架(shiro-spring 方式)” 一样,不再赘述。
参考文章
【1】SpringBoot&Shiro实现权限管理
【2】Spring Boot整合Shiro,两种方式实战总结(含源码)
【3】Springboot集成Shiro(前后端分离)
【4】SpringBoot2.0 整合 Shiro 框架,实现用户权限管理
【5】springboot整合shiro入门,实现认证和授权功能(非常详细)
【6】SpringBoot整合Shiro+Jwt实现登录认证和授权
【7】(十二)整合 Shiro 框架,实现用户权限管理-爱代码爱编程
【8】超详细 Spring Boot 整合 Shiro 教程!


 572
572

 被折叠的 条评论
为什么被折叠?
被折叠的 条评论
为什么被折叠?
 到【灌水乐园】发言


