


本文大纲:
- android中view的加载绘制流程
- 自定义view中的基础概念
- 父View和子View的联系
1.android中view的加载绘制流程
1.1 andriod视图结构:

说明:
上图给出了android一个Activity中的视图结构,从外向内依次是 phoneWindow-->DecorView-->ActionBar+ContentLayout. 其中ContentLayout是一个FrameLayout,它的id是content, 我们自己设置的布局就是contentLayout的子View, 下面把它叫做contentView, 调用setContentView() 其实就是将自己的布局添加到contentLayout中去.
1.2 视图加载流程:
绘制流程从源码说起,入口就是 进入Activity之后的setContentView() (源码为android API28)
* 如果我们继承AppCompatActivty(现在很多都是这样):
入口:
AppCompatActivity#setContentView
@Override
public void setContentView(@LayoutRes int layoutResID) {
    getDelegate().setContentView(layoutResID);
}
AppCompatActivity#getDelegate
@NonNull
public AppCompatDelegate getDelegate() {
    if (mDelegate == null) {
        mDelegate = AppCompatDelegate.create(this, this);
    }
    return mDelegate;
}
AppCompatDelegate.create
public static AppCompatDelegate create(Activity activity, AppCompatCallback callback) {
    return new AppCompatDelegateImpl(activity, activity.getWindow(), callback);
}
AppCompatDelegateImpl#setContentView
@Override
public void setContentView(View v) {
    ensureSubDecor();
    ViewGroup contentParent = (ViewGroup) mSubDecor.findViewById(android.R.id.content);
    contentParent.removeAllViews();
    contentParent.addView(v);
    mOriginalWindowCallback.onContentChanged();
}
顺藤摸瓜,找到了线索,contentParent就是上面说到的contentLayout, 我们自己的布局就是v, 其中的逻辑清晰可见。'
* 如果我们直接继承Activity:
入口
Activity#setContentView
public void setContentView(@LayoutRes int layoutResID) {
    getWindow().setContentView(layoutResID);
    initWindowDecorActionBar();
}
Activity#getWindow
public Window getWindow() {
    return mWindow;
}
在 Activity#attach 中找到了mWindow的赋值
final void attach(Context context, ActivityThread aThread,
        Instrumentation instr, IBinder token, int ident,
        Application application, Intent intent, ActivityInfo info,
        CharSequence title, Activity parent, String id,
        NonConfigurationInstances lastNonConfigurationInstances,
        Configuration config, String referrer, IVoiceInteractor voiceInteractor,
        Window window, ActivityConfigCallback activityConfigCallback) {
.....
    mWindow = new PhoneWindow(this, window, activityConfigCallback);
......
}
PhoneWindow#setContentView
@Override
    public void setContentView(View view, ViewGroup.LayoutParams params) {
        // Note: FEATURE_CONTENT_TRANSITIONS may be set in the process of installing the window
        // decor, when theme attributes and the like are crystalized. Do not check the feature
        // before this happens.
        if (mContentParent == null) {
            // ①创建 decorView
            installDecor();
        } else if (!hasFeature(FEATURE_CONTENT_TRANSITIONS)) {
            mContentParent.removeAllViews();
        }

        if (hasFeature(FEATURE_CONTENT_TRANSITIONS)) {
            view.setLayoutParams(params);
            final Scene newScene = new Scene(mContentParent, view);
            transitionTo(newScene);
        } else {
            // ②添加我们自己的view
            mContentParent.addView(view, params);
        }
        mContentParent.requestApplyInsets();
        final Callback cb = getCallback();
        if (cb != null && !isDestroyed()) {
            cb.onContentChanged();
        }
        mContentParentExplicitlySet = true;
    }
我们也找到了相似的逻辑,①处 如果decorView还没有被创建,则创建一个,其中包括decorView的创建和其中的toolbar, contentLayout的创建逻辑。 ②处mContentParent就是之前说到的contentLayout, 它在installDecor() 中会调用 'mContentParent = generateLayout(mDecor);’ 被创建,接下来就是将我们自己的view添加到mContentParent中去。
2. 自定义view中的基础概念
2.1.自定义View的基本方法:
每个View都要依次经历方法:
- 测量:onMeasure()决定View的大小;
- 布局:onLayout()决定View在ViewGroup中的位置;
- 绘制:onDraw()决定绘制这个View。
2.2.自定义View的分类:
- 单一视图,无子view:View
此时一般需要重写onMeasure() 和 onDraw()
- 视图组,包含子view:ViewGroup
此时一般需要重写onMeasure() 和 onLayout()
注意绘制的顺序,都是从父布局自上而下绘制的,只有叶子节点才会只绘制自身,父节点不止绘制自身,还要绘制子view

2.3.Android坐标系
对于整个屏幕而言:
- 屏幕左上角为坐标原点
- 向右为X增大方向
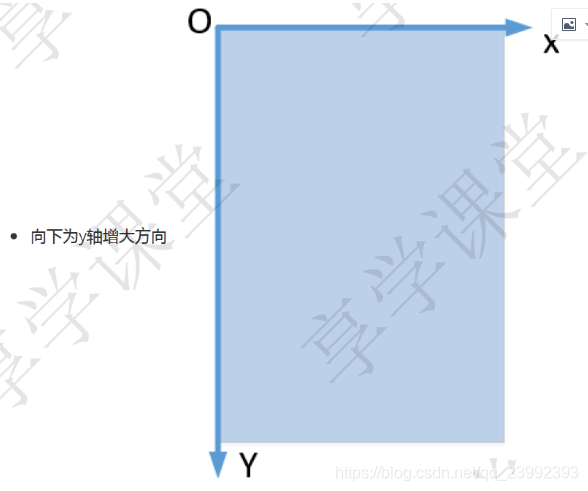
对于View的坐标位置,一般是相对于父布局而言的:
- 父容器的左上角为view的坐标原点
- 向右为X增大方向

//View中获取位置的方法
getTop(); //获取子View左上角距父View顶部的距离
getLeft(); //获取子View左上角距父View左侧的距离
getBottom(); //获取子View右下角距父View顶部的距离
getRight(); //获取子View右下角距父View左侧的距离
与MotionEvent中 get()和getRaw()的区别
//get() :触摸点相对于其所在组件坐标系的坐标
event.getX();
event.getY();
//getRaw() :触摸点相对于屏幕默认坐标系的坐标
event.getRawX();
event.getRawY();
2.4.宽高的获取
getWidth && getHeight 在onLayout() 之后才能获取值
public final int getHeight() {
    return mBottom - mTop;
}
public final int getWidth() {
    return mRight - mLeft;
}
getMeasuredHeight && getMeasuredWidth 在onMeasure之后可以获取值
public final int getMeasuredHeight() {
    return mMeasuredHeight & MEASURED_SIZE_MASK;
}
public final int getMeasuredWidth() {
    return mMeasuredWidth & MEASURED_SIZE_MASK;
}
2.5.View的测量规格 MeasureSpec
MeasureSpec定义:
首先MeasureSpec是一个int值,包含测量模式mode(占2位)和 测量大小size(占30位)两种信息。
![]()
mode有三种:
- UNSECIFIED 父控件不对你有任何限制,你想要多大给你多大,想上天就上天。这种情况一般用于系统内部,表示一种测量状态。(这个模式主要用于系统内部多次Measure的情形,并不是真的说你想要多大最后就真有多大)
- EXACTLY 父控件已经知道你所需的精确大小,你的最终大小应该就是这么大。
- AT_MOST 你的大小不能大于父控件给你指定的size,但具体是多少,得看你自己的实现
MeasureSpec的意义:
可以看到在重写 onMeasure(int widthMeasureSpec, int heightMeasureSpec) 会带有MeasureSpec类型的参数,这个参数就是从父布局传进来的。
MeasureSpec是父布局用来对子view的控制的参数,子view通过父布局传进来的MeasureSpec参数结合自己的内容大小最终来确定自己的大小。后面会详细解释。
3. 父View和子View的联系
要真正理解自定义view, 必须要知道父布局和子view是怎么产生联系的。这样才能知道整颗View树是怎样绘制的。
3.1 先从onMeasure说起(父布局和子布局的代码只代表逻辑):
父布局#onMeasure:
public void onMeasure(int parentWidthMeasureSpec, int parentHeightMeasureSpec){
        // 1. 测量子布局(可能有多个,这里假设只有一个子布局)
        // 1.1 计算子布局的测量规格   ①
        int childWidthMeasureSpec = getChildMeasureSpec(parentWidthMeasureSpec,
        mPaddingLeft + mPaddingRight, lp.width);
        int childHeightMeasureSpec = getChildMeasureSpec(parentHeightMeasureSpec,
        mPaddingTop + mPaddingBottom, lp.height);
        // 1.2 测量子布局
        child.measure(childWidthMeasureSpec, childHeightMeasureSpec);
        // 2. 测量自己
        // 2.1 解析父布局的测量规格
        int widthSpecMode = MeasureSpec.getMode(parentWidthMeasureSpec);
        int widthSpecSize = MeasureSpec.getSize(parentWidthMeasureSpec);
        int heightSpecMode = MeasureSpec.getMode(parentHeightMeasureSpec);
        int heightSpecSize = MeasureSpec.getSize(parentHeightMeasureSpec);
        // 2.2 根据父布局的测量规格结合自己的内容设置最终大小
        int resultWidth;
        int resultHeight;
        int contentWidth=child.getMeasuredWidth();  // 假设这是我内容的宽
        int contentHeight=child.getMeasureHeight(); // 假设这是我内容的高
        switch(widthSpecMode){
            case MeasureSpec.EXACTLY:
                resultWidth=widthSpecSize;
                break;
            case MeasureSpec.AT_MOST:
            case MeasureSpec.UNSPECIFIED:
                resultWidth=Math.min(widthSpecSize,contentWidth);
                break;
        }
        switch(heightSpecMode){
            case MeasureSpec.EXACTLY:
                resultHeight=heightSpecSize;
                break;
            case MeasureSpec.AT_MOST:
            case MeasureSpec.UNSPECIFIED:
                resultHeight=Math.min(heightSpecSize,contentHeight);
                break;
        }
        // 3 最后别忘了设置 自己的大小 只有设置了此方法 长和宽才有效
        setMeasuredDimension(resultWidth,resultHeight);
}
子布局#onMeasure(假设它没有子布局):
public void onMeasure(int parentWidthMeasureSpec, int parentHeightMeasureSpec){
        // 2. 测量自己
        // 2.1 解析父布局的测量规格  ②
        int widthSpecMode = MeasureSpec.getMode(parentWidthMeasureSpec);
        int widthSpecSize = MeasureSpec.getSize(parentWidthMeasureSpec);
        int heightSpecMode = MeasureSpec.getMode(parentHeightMeasureSpec);
        int heightSpecSize = MeasureSpec.getSize(parentHeightMeasureSpec);
        // 2.2 根据父布局的测量规格结合自己的内容设置最终大小
        int resultWidth;
        int resultHeight;
        int contentWidth=child.getMeasuredWidth();  // 假设这是我内容的宽
        int contentHeight=child.getMeasureHeight(); // 假设这是我内容的高
        switch(widthSpecMode){
            case MeasureSpec.EXACTLY:
                resultWidth=widthSpecSize;
                break;
            case MeasureSpec.AT_MOST:
            case MeasureSpec.UNSPECIFIED:
                resultWidth=Math.min(widthSpecSize,contentWidth);
                break;
        }
        switch(heightSpecMode){
            case MeasureSpec.EXACTLY:
                resultHeight=heightSpecSize;
                break;
            case MeasureSpec.AT_MOST:
            case MeasureSpec.UNSPECIFIED:
                resultHeight=Math.min(heightSpecSize,contentHeight);
                break;
        }
        // 3 最后别忘了设置 自己的大小 只有设置了此方法 长和宽才有效
        setMeasuredDimension(resultWidth,resultHeight);
}
分析一下父布局和子view的联系:
①处父布局计算的MeasureSpec, 并将它作用到②处子布局中,子布局根据他来决定自身大小。
①处计算MeasureSpec的逻辑:
ViewGroup#getChildMeasureSpec
public static int getChildMeasureSpec(int spec, int padding, int childDimension) {
    int specMode = MeasureSpec.getMode(spec);
    int specSize = MeasureSpec.getSize(spec);

    int size = Math.max(0, specSize - padding);

    int resultSize = 0;
    int resultMode = 0;

    switch (specMode) {
    // Parent has imposed an exact size on us
    case MeasureSpec.EXACTLY:
        if (childDimension >= 0) {
            resultSize = childDimension;
            resultMode = MeasureSpec.EXACTLY;
        } else if (childDimension == LayoutParams.MATCH_PARENT) {
            // Child wants to be our size. So be it.
            resultSize = size;
            resultMode = MeasureSpec.EXACTLY;
        } else if (childDimension == LayoutParams.WRAP_CONTENT) {
            // Child wants to determine its own size. It can't be
            // bigger than us.
            resultSize = size;
            resultMode = MeasureSpec.AT_MOST;
        }
        break;

    // Parent has imposed a maximum size on us
    case MeasureSpec.AT_MOST:
        if (childDimension >= 0) {
            // Child wants a specific size... so be it
            resultSize = childDimension;
            resultMode = MeasureSpec.EXACTLY;
        } else if (childDimension == LayoutParams.MATCH_PARENT) {
            // Child wants to be our size, but our size is not fixed.
            // Constrain child to not be bigger than us.
            resultSize = size;
            resultMode = MeasureSpec.AT_MOST;
        } else if (childDimension == LayoutParams.WRAP_CONTENT) {
            // Child wants to determine its own size. It can't be
            // bigger than us.
            resultSize = size;
            resultMode = MeasureSpec.AT_MOST;
        }
        break;

    // Parent asked to see how big we want to be
    case MeasureSpec.UNSPECIFIED:
        if (childDimension >= 0) {
            // Child wants a specific size... let him have it
            resultSize = childDimension;
            resultMode = MeasureSpec.EXACTLY;
        } else if (childDimension == LayoutParams.MATCH_PARENT) {
            // Child wants to be our size... find out how big it should
            // be
            resultSize = View.sUseZeroUnspecifiedMeasureSpec ? 0 : size;
            resultMode = MeasureSpec.UNSPECIFIED;
        } else if (childDimension == LayoutParams.WRAP_CONTENT) {
            // Child wants to determine its own size.... find out how
            // big it should be
            resultSize = View.sUseZeroUnspecifiedMeasureSpec ? 0 : size;
            resultMode = MeasureSpec.UNSPECIFIED;
        }
        break;
    }
    //noinspection ResourceType
    return MeasureSpec.makeMeasureSpec(resultSize, resultMode);
}- 父布局在计算MeasureSpec的时候已经考虑到了子view的LayoutParam属性,包括 具体的值,match_parent,wrap_content,所以子view在拿到父布局传递的MeasureSpec的时候不用在考虑LayoutParams属性,只需要考虑自身内容的大小。
- 最终计算的mode对应关系:

总结:
-
- 子控件如果设置了确定值,如 width="20dp" ,则它的大小就固定为20dp, 模式为EXACTLY
- 子控件如果设置match_parent, 那么他的模式跟随父亲给的模式。当父亲给的模式为AT_MOST时,它的最终大小不能超过父亲给的大小;当父亲给的模式是EXACTLY时,它的最终大小是父亲给的大小。
- 子控件如果设置了wrap_content,那么它的模式为AT_MOST,它的最终大小不能超过父亲给的大小。
3.2 再说onLayout()
onLayout就简单了。
onLayout作用是用来摆放子view的,如果没有子view,那么一般不需要重写。所以这个一般是父布局自己做的事情,子view无需关心
父布局#onLayout:
protected void onLayout(boolean changed, int l, int t, int r, int b) {
    // l,t,r,b 是自己距离自己的父布局的上下左右的距离,如果只考虑内部的布局,可以不使用

    // 1.确定子view的坐标
    int top;
    int left;
    int right;
    int bottom;
    // 计算上下左右的坐标(相对于自己的内部)
   //...
   //2. 摆放子布局
   child.layout(left, top, right, bottom);
}
总结:
- onLayout关键就是确定子view上下左右的坐标
3.3 onDraw()
onDraw() 是用来绘制自身的,一般父布局不需要绘制自身,所以这个一般是子view(没有父布局)的事情。
子view#onDraw()
protected void onDraw(Canvas canvas) {
    // 坐标系相对于view自身
    // 使用画笔 画布 形状
}
总结:
- onDraw()方法可以玩出很多样式,直接继承View一般都要重写onDraw(),这方面需要学习画笔画布方面的知识。
注意:
作为父布局ViewGroup默认是不会调用onDraw()方法的,除非两种情况:
-
- 父布局设置了背景颜色
- 父布局设置了setWillNotDraw(false)


 607
607


 被折叠的 条评论
为什么被折叠?
被折叠的 条评论
为什么被折叠?
 到【灌水乐园】发言


