之前介绍了布局和容器,它们都用于摆放一个或多个子组件,而实际应用中,受限于手机、Pad、电脑的屏幕大小,一个布局不可能摆放无限个组件,我们往往采取滚动的方式,来使得一部分组件展示在屏幕上,一部分组件处于缓存中,像这种方式的布局,我们叫作可滚动布局
文章目录
一、滚动布局
Flutter中可滚动布局基本都来自Sliver模型,原理和安卓传统UI的ListView、RecyclerView类似,滚动布局里面的每个子组件的样式往往是相同的,由于组件占用内存较大,所以在内存上我们可以缓存有限个组件,滚动布局时仅仅刷新组件的数据,来达到滚动布局存放无限个子组件的目标
1.SingleChildScrollView
SingleChildScrollView比较特殊,是基于Box模型的可滚动布局,只接受一个子组件,由于没有复用机制,我们一般用于如长文本这种有限滚动距离的情况,构造如下:
  const SingleChildScrollView({
    super.key,
    this.scrollDirection = Axis.vertical,// 可滚动方向
    this.reverse = false, // 反向
    this.padding,// 内间距
    this.primary,// 是否顶层
    this.physics,// 滚动的摩擦力等
    this.controller,// 控制器,可用于控制滚动到指定位置
    this.child,
    this.dragStartBehavior = DragStartBehavior.start,
    this.clipBehavior = Clip.hardEdge,
    this.restorationId,
    this.keyboardDismissBehavior = ScrollViewKeyboardDismissBehavior.manual,// 键盘消失方式
  })
简单使用:
Container(
    width: 200,
    height: 300,
    color: Colors.amber,
    child: SingleChildScrollView(
      child: Text("hi,flutter " * 100),
    )
);
效果:

2.ListView
ListView是很常用的滚动布局,构造如下:
  ListView({
    super.key,
    super.scrollDirection,
    super.reverse,
    super.controller,
    super.primary,
    super.physics,
    super.shrinkWrap,// 是否根据子组件的总长度来设置ListView的长度 默认false
    super.padding,
    this.itemExtent,// 固定item的宽高,垂直滚动时为高,水平时为宽。固定后性能好
    this.prototypeItem,// 和itemExtent类似,只不过测量依据是一个组件
    bool addAutomaticKeepAlives = true,
    bool addRepaintBoundaries = true,
    bool addSemanticIndexes = true,
    super.cacheExtent,// 预渲染区域长度
    List<Widget> children = const <Widget>[],
    int? semanticChildCount,
    super.dragStartBehavior,
    super.keyboardDismissBehavior,
    super.restorationId,
    super.clipBehavior,
  })
简单使用:
Iterable<int> generateInts() sync* {
  for (var i = 0; i < 100; i++) {
    yield i;
  }
}

Container(
    width: 200,
    height: 50,
    color: Colors.amber,
    child: ListView(
      children: generateInts().map((e) => Text("hi,flutter $e")).toList(),
    )
);
效果:

2.1 ListView.builder
命名式构造**ListView.builder**,通过itemCount参数来表示内部一共有多少元素,通过itemBuilder参数来构造子组件,类似安卓RecyclerView的ItemType,我们可以方便的通过逻辑处理构造出不同类型的组件:
Container(
    width: 200,
    height: 300,
    child: ListView.builder(
      itemBuilder: (context, index) {
        if (index % 2 == 0) {
          return Container(
            color: Colors.amber,
            child: Text("偶数:$index"),
          );
        } else {
          return Container(
            color: Colors.black12,
            child: Text("奇数:$index"),
          );
        }
      },
      itemCount: 100,
    )
);
效果:

2.2 ListView.separated
**ListView.separated比ListView.builder**多出一个参数separatorBuilder,表示每个元素之间的一个分割组件
Container(
    width: 200,
    height: 300,
    child: ListView.separated(
      itemBuilder: (context, index) {
        if (index % 2 == 0) {
          return Container(
            color: Colors.amber,
            child: Text("偶数:$index"),
          );
        } else {
          return Container(
            color: Colors.black12,
            child: Text("奇数:$index"),
          );
        }
      },
      itemCount: 100,
      separatorBuilder: (context, index) {
        return Divider(
          height: 3,
          color: Colors.black,
        );
      },
    )
);
效果:

3.ScrollController
滚动组件都有一个controller参数,类型为**ScrollController**,用来控制滚动,构造如下:
  ScrollController({
    double initialScrollOffset = 0.0,// 初始滚动偏移
    this.keepScrollOffset = true,// 是否保存滚动位置
    this.debugLabel,
  })
下面通过一个按钮来控制滚动,需要用到状态:
class _MyScroll extends State<MyScroll> {
ScrollController _controller = ScrollController();
double _offset = 0;
void initState() {
_controller.addListener(() {
print(_controller.offset); // 打印滚动偏移
});
}
void dispose() {
_controller.dispose();
}
Widget build(BuildContext context) {
return Container(
width: 200,
height: 300,
child: Stack(
children: [
ListView.separated(
controller: _controller,
itemBuilder: (context, index) {
if (index % 2 == 0) {
return Container(
color: Colors.amber,
child: Text("偶数:$index"),
);
} else {
return Container(
color: Colors.black12,
child: Text("奇数:$index"),
);
}
},
itemCount: 100,
separatorBuilder: (context, index) {
return Divider(
height: 3,
color: Colors.black,
);
},
),
Positioned(
child: FloatingActionButton(
onPressed: () {
_offset += 200;
_controller.animateTo(_offset,
duration: Duration(milliseconds: 200),
curve: Curves.linear);
},
),
right: 0,
bottom: 0,
),
],
),
);
}
}
效果:

3.1 ScrollPosition
ScrollController是支持一对多的,当一个ScrollController绑定多个滚动布局时,如果相对某个可滚动布局单独操作,可以使用ScrollController的positions参数,该参数为一组ScrollPosition,一个ScrollPosition对应一个滚动布局
_controller.positions.elementAt(0).animateTo(to, duration: duration, curve: curve);
4.NotificationListener
使用NotificationListener是另一种监听滚动事件的方式,ScrollController只能够监听滚动的位置,但NotificationListener还可以获取ViewPort(滚动布局中,用于渲染当前视口中需要显示的Sliver)的一些信息,通过ViewPort信息我们可以知道可滚动的最大距离等信息,值得注意的是NotificationListener可以处于滚动布局到View树根中任意位置,构造比较简单:
  const NotificationListener({
    super.key,
    required super.child,
    this.onNotification,
  })
下面通过NotificationListener计算进度,并显示在FAB上:
class _MyScroll extends State<MyScroll> {
ScrollController _controller = ScrollController();
double _offset = 0;
int _progress = 0;
void initState() {
_controller.addListener(() {
print(_controller.offset); // 打印滚动偏移
_offset = _controller.offset;
});
}
void dispose() {
_controller.dispose();
}
Widget build(BuildContext context) {
return Container(
width: 200,
height: 300,
child: NotificationListener(
onNotification: (ScrollNotification notification) {
double progress = notification.metrics.pixels /
notification.metrics.maxScrollExtent;
//重新构建
setState(() {
_progress = (progress * 100).toInt();
});
return false;
},
child: Stack(
children: [
ListView.separated(
controller: _controller,
itemBuilder: (context, index) {
if (index % 2 == 0) {
return Container(
color: Colors.amber,
child: Text("偶数:$index"),
);
} else {
return Container(
color: Colors.black12,
child: Text("奇数:$index"),
);
}
},
itemCount: 100,
separatorBuilder: (context, index) {
return Divider(
height: 3,
color: Colors.black,
);
},
),
Positioned(
child: FloatingActionButton(
child: Text("$_progress%"),
onPressed: () {
_offset += 200;
_controller.animateTo(_offset,
duration: Duration(milliseconds: 200),
curve: Curves.linear);
},
),
right: 0,
bottom: 0,
),
],
),
),
);
}
}

5.GridView
ListView一行只能摆放一个子组件,GridView可以指定一行摆放多个子组件,比较特殊的参数为gridDelegate,需要我们传入一个SliverGridDelegate对象,SliverGridDelegate是抽象类,实现类有SliverGridDelegateWithFixedCrossAxisCount和SliverGridDelegateWithMaxCrossAxisExtent
5.1 SliverGridDelegateWithFixedCrossAxisCount
SliverGridDelegateWithFixedCrossAxisCount就是固定个数摆放,构造如下:
  const SliverGridDelegateWithFixedCrossAxisCount({
    required this.crossAxisCount,// 横轴摆放子组件个数
    this.mainAxisSpacing = 0.0,// 主轴方向(可滚动方向)的间距
    this.crossAxisSpacing = 0.0,// 横轴方向子元素的间距
    this.childAspectRatio = 1.0,// 子元素在横轴长度和主轴长度的比例
    this.mainAxisExtent,
  })
简单使用:
Container(
  width: 200,
  height: 300,
  child: GridView(
    gridDelegate: const SliverGridDelegateWithFixedCrossAxisCount(
        crossAxisCount: 3, crossAxisSpacing: 20, mainAxisSpacing: 30),
    children: [
      Container(
        padding: const EdgeInsets.all(8),
        color: Colors.green[100],
        child: const Text('1'),
      ),
      Container(
        padding: const EdgeInsets.all(8),
        color: Colors.green[200],
        child: const Text('2'),
      ),
      Container(
        padding: const EdgeInsets.all(8),
        color: Colors.green[300],
        child: const Text('3'),
      ),
      Container(
        padding: const EdgeInsets.all(8),
        color: Colors.green[400],
        child: const Text('4'),
      ),
      Container(
        padding: const EdgeInsets.all(8),
        color: Colors.green[500],
        child: const Text('5'),
      ),
      Container(
        padding: const EdgeInsets.all(8),
        color: Colors.green[600],
        child: const Text('6'),
      ),
    ],
  ),
);
效果:

5.2 SliverGridDelegateWithMaxCrossAxisExtent
SliverGridDelegateWithMaxCrossAxisExtent只是将固定数量改为固定最大宽度,内部会自动进行计算,得出每个item的固定宽度,每个item宽度依然是相同的
Container(
  width: 200,
  height: 300,
  child: GridView(
    gridDelegate: const SliverGridDelegateWithMaxCrossAxisExtent(
        maxCrossAxisExtent: 120, crossAxisSpacing: 20, mainAxisSpacing: 30),
    children: [
      Container(
        padding: const EdgeInsets.all(8),
        color: Colors.green[100],
        child: const Text('1'),
      ),
      Container(
        padding: const EdgeInsets.all(8),
        color: Colors.green[200],
        child: const Text('2'),
      ),
      Container(
        padding: const EdgeInsets.all(8),
        color: Colors.green[300],
        child: const Text('3'),
      ),
      Container(
        padding: const EdgeInsets.all(8),
        color: Colors.green[400],
        child: const Text('4'),
      ),
      Container(
        padding: const EdgeInsets.all(8),
        color: Colors.green[500],
        child: const Text('5'),
      ),
      Container(
        padding: const EdgeInsets.all(8),
        color: Colors.green[600],
        child: const Text('6'),
      ),
    ],
  ),
);
效果:

5.3 GridView.builder
和ListView一样,GridView的命名式构造builder,参数itemBuilder允许用户自己根据数据来构建不同的组件:
Container(
  width: 200,
  height: 300,
  child: GridView.builder(
    gridDelegate: const SliverGridDelegateWithMaxCrossAxisExtent(
        maxCrossAxisExtent: 120, crossAxisSpacing: 20, mainAxisSpacing: 30),
    itemBuilder: (BuildContext context, int index) {
      return Container(
        padding: const EdgeInsets.all(8),
        color: index % 2 == 0 ? Colors.green[100] : Colors.amber[100],
        child: Text('$index'),
      );
    },
    itemCount: 100,
  ),
);
效果:

6.PageView
具有页面切换效果的组件,你可以横向切换页面,也可以竖向切换,常常用在首页。构造如下:
  PageView({
    super.key,
    this.scrollDirection = Axis.horizontal,
    this.reverse = false,
    PageController? controller,// 控制page切换的控制器
    this.physics,
    this.pageSnapping = true,// 每次滑动是否强制切换整个页面
    this.onPageChanged,// 页面变化的回调
    List<Widget> children = const <Widget>[],
    this.dragStartBehavior = DragStartBehavior.start,
    this.allowImplicitScrolling = false,
    this.restorationId,
    this.clipBehavior = Clip.hardEdge,
    this.scrollBehavior,
    this.padEnds = true,
  })
使用上很简单,传入一个组件列表即可:
PageView(
  children: [
    Center(
      child: Text("1"),
    ),
    Center(
      child: Text("2"),
    ),
    Center(
      child: Text("3"),
    ),
  ],
);
效果:
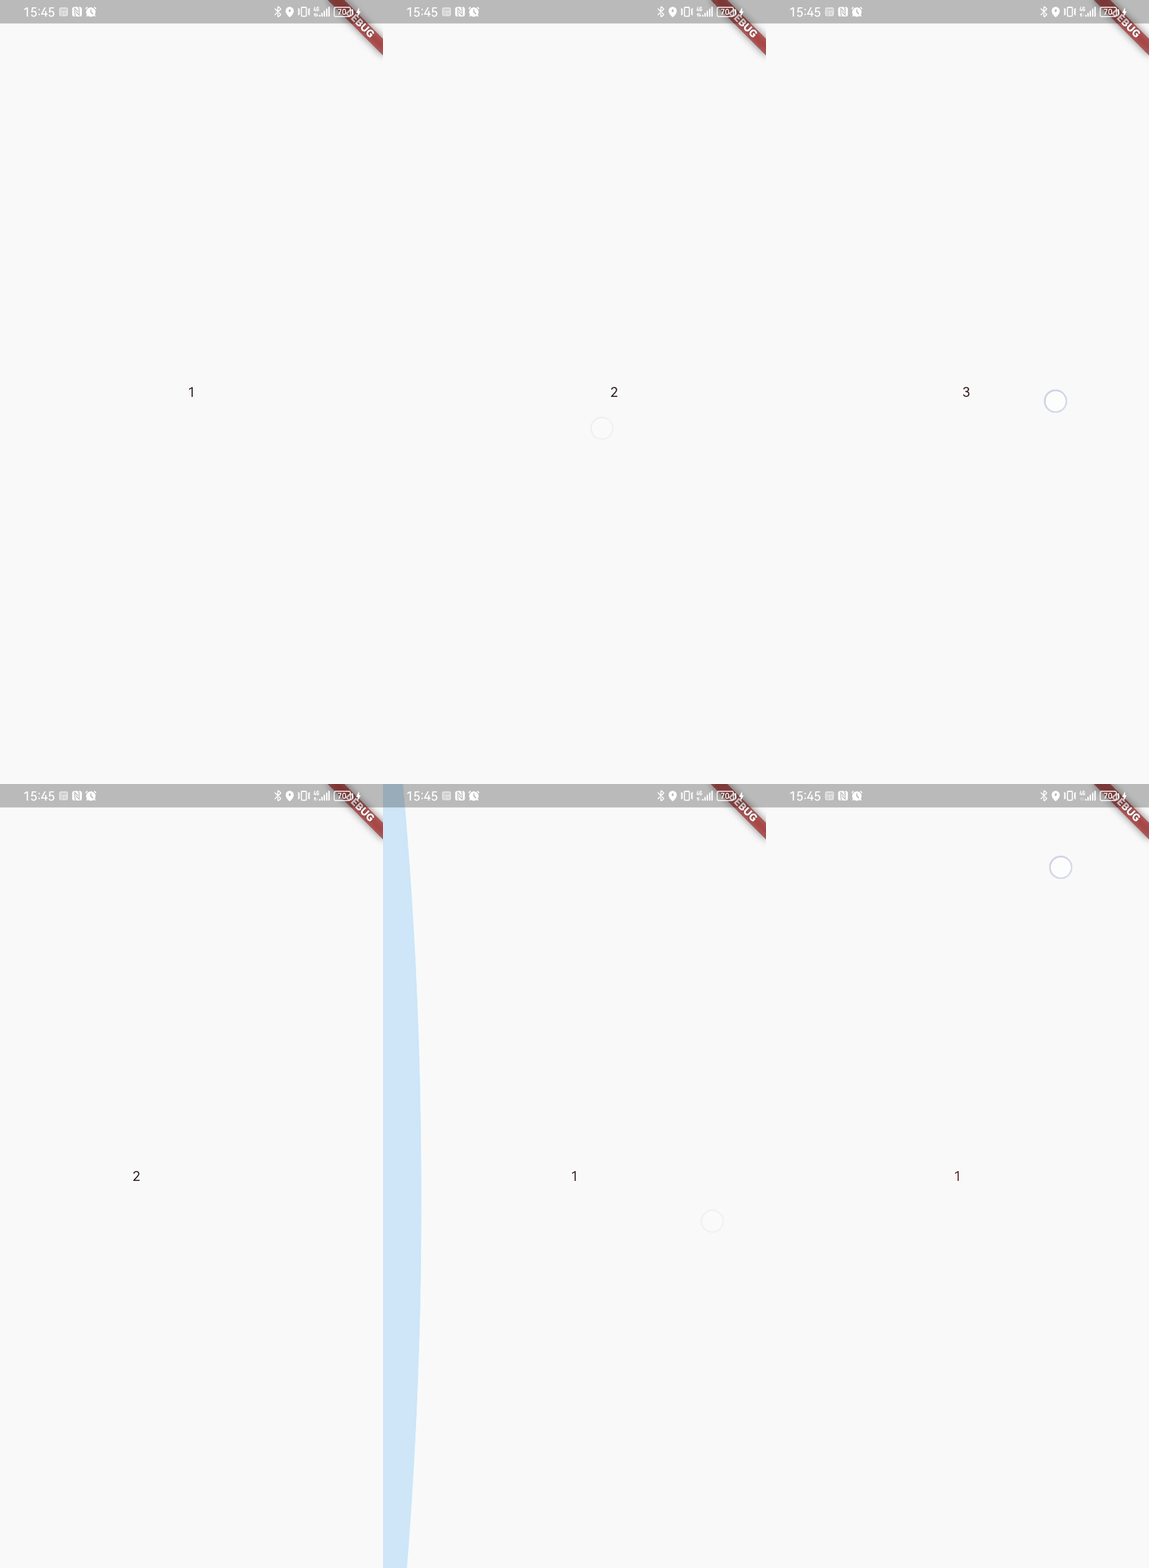
PageView默认每次切换都会重新build子组件,如果需要缓存页面,可以查看:可滚动组件子项缓存
7.TabBarView
TabBarView封装了PageView,来达到与TabBar的联动效果,TabBarView构造如下:
  const TabBarView({
    super.key,
    required this.children,
    this.controller,// TabController 控制页面切换与TabBar设置相同的TabController达到联动效果
    this.physics,
    this.dragStartBehavior = DragStartBehavior.start,
    this.viewportFraction = 1.0,
    this.clipBehavior = Clip.hardEdge,
  })
TabBar构造如下:
  const TabBar({
    super.key,
    required this.tabs,// tab组件集合
    this.controller,// TabController 与TabBarView设置相同达到联动效果
    this.isScrollable = false,
    this.padding,
    this.indicatorColor,// 指示器颜色
    this.automaticIndicatorColorAdjustment = true,
    this.indicatorWeight = 2.0,// 指示器高度
    this.indicatorPadding = EdgeInsets.zero,// 指示器padding
    this.indicator,// 指示器 Decoration类型
    this.indicatorSize, // 指示器长度,tab长度|label长度
    this.dividerColor,// 分隔符颜色
    this.labelColor,// label的文本颜色
    this.labelStyle,// label的TextStyle
    this.labelPadding,// label的padding
    this.unselectedLabelColor,
    this.unselectedLabelStyle,
    this.dragStartBehavior = DragStartBehavior.start,
    this.overlayColor,// 焦点、悬停、水波纹颜色
    this.mouseCursor,// 鼠标光标
    this.enableFeedback,// 提供声学和/或触觉反馈
    this.onTap,// 点击了tab的回调
    this.physics,// 滚动的物理效果,摩擦力等
    this.splashFactory,// 水波纹效果
    this.splashBorderRadius,// 水波纹Radius
  })
Tab是Flutter为TabBar提供的一个选项组件,构造如下:
  const Tab({
    super.key,
    this.text,// 文本
    this.icon,// 图标
    this.iconMargin = const EdgeInsets.only(bottom: 10.0),
    this.height,// 高度
    this.child,// 自定义子组件
  })
TabController构造如下:
TabController({ int initialIndex = 0, Duration? animationDuration, required this.length, required TickerProvider vsync})
TabController必传两个参数,length代表page的总数,tabs与page的数量要相等,vsync是动画执行过程的TickerProvider上下文,可以在定义TabController时使用模板类SingleTickerProviderStateMixin
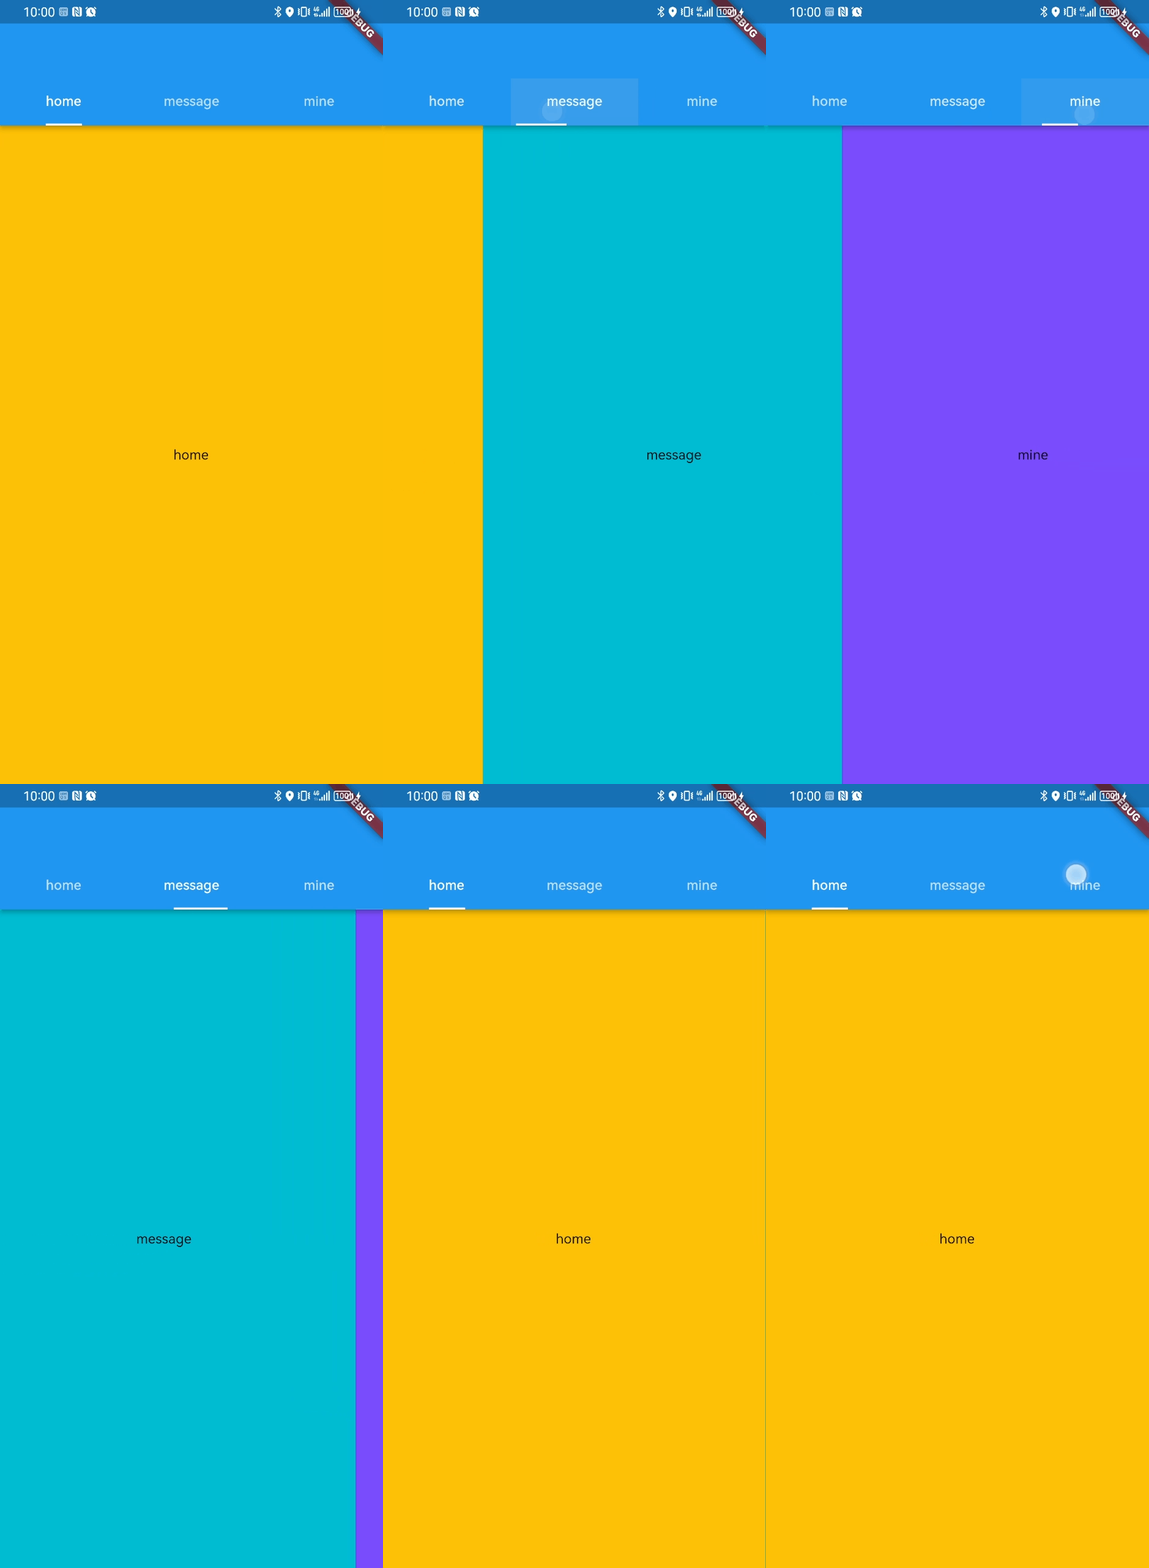
结合上面三种组件使用:
class _MyScroll extends State<MyScroll> with SingleTickerProviderStateMixin {
late TabController _tabController;
void initState() {
// length表示page的总数
_tabController = TabController(length: 3, vsync: this);
}
void dispose() {
// 释放资源
_tabController.dispose();
}
Widget build(BuildContext context) {
return Scaffold(
appBar: AppBar(
bottom: TabBar(
controller: _tabController,
indicatorSize: TabBarIndicatorSize.label,
tabs: const [
Tab(text: "home"),
Tab(text: "message"),
Tab(text: "mine"),
],
),
),
body: TabBarView(
controller: _tabController,
children: [
Container(
alignment: Alignment.center,
color: Colors.amber,
child: const Text("home"),
),
Container(
alignment: Alignment.center,
color: Colors.cyan,
child: const Text("message"),
),
Container(
alignment: Alignment.center,
color: Colors.deepPurpleAccent,
child: const Text("mine"),
),
],
),
);
}
}
效果:
二、自定义Sliver
上面我们使用了Flutter内置的Sliver模型布局,针对大量数据达到复用组件,以提高性能,覆盖了大多数应用场景
实际上Sliver模型布局在Flutter中分成三个角色:
-
Sliver:复用机制的核心,按需进行构建和布局 -
ViewPort:滚动布局中,用于渲染当前视口中需要显示的Sliver -
Scrollable:监听到用户滑动行为后,根据最新的滑动偏移构建Viewport
上面的滚动布局这三大角色都是1:1:1的,但对于一些特殊的需要组合滚动布局的情况,Flutter也提供了CustomScrollView组件,创建一个公共的 Scrollable 和 Viewport ,然后它的 slivers 参数接受一个 Sliver 数组,来达到组合多个滚动布局的效果
Sliver所有的组件可以查看官方文档:Sliver相关组件
通过选择不同的Sliver组件,我们也可以很方便的打造官方提供的常用滚动布局,下面是我们使用过的相关的Sliver:
| Sliver名称 | 功能 | 对应的可滚动组件 |
|---|---|---|
| SliverList | 列表 | ListView |
| SliverFixedExtentList | 高度固定的列表 | ListView,指定itemExtent时 |
| SliverAnimatedList | 添加/删除列表项可以执行动画 | AnimatedList |
| SliverGrid | 网格 | GridView |
| SliverPrototypeExtentList | 根据原型生成高度固定的列表 | ListView,指定prototypeItem 时 |
| SliverFillViewport | 包含多个子组件,每个都可以填满屏幕 | PageView |
也有专门针对Sliver的容器:
| Sliver名称 | 对应 Box |
|---|---|
| SliverPadding | Padding |
| SliverVisibility、SliverOpacity | Visibility、Opacity |
| SliverFadeTransition | FadeTransition |
| SliverLayoutBuilder | LayoutBuilder |
其他Sliver:
| Sliver名称 | 说明 |
|---|---|
| SliverAppBar | 对应 AppBar,主要是为了在 CustomScrollView 中使用。 |
| SliverToBoxAdapter | 一个适配器,可以将 Box 适配为 Sliver。 |
| SliverPersistentHeader | 滑动到顶部时可以固定住。 |
1.CustomScrollView
CustomScrollView构造的参数也都是介绍过的:
  const CustomScrollView({
    super.key,
    super.scrollDirection,
    super.reverse,
    super.controller,
    super.primary,
    super.physics,
    super.scrollBehavior,
    super.shrinkWrap,
    super.center,// slivers中用key选定一个中心组件作为中心轴,其他子组件的滚动方向和摆放以中心轴为准进行正方向还是反方向
    super.anchor,// 锚点,效果为初始化时离中心轴的反向滚动距离,距离=整体高度*锚点值。不设置center的情况下,就是一个顶部留白
    super.cacheExtent,
    this.slivers = const <Widget>[],
    super.semanticChildCount,
    super.dragStartBehavior,
    super.keyboardDismissBehavior,
    super.restorationId,
    super.clipBehavior,
  })
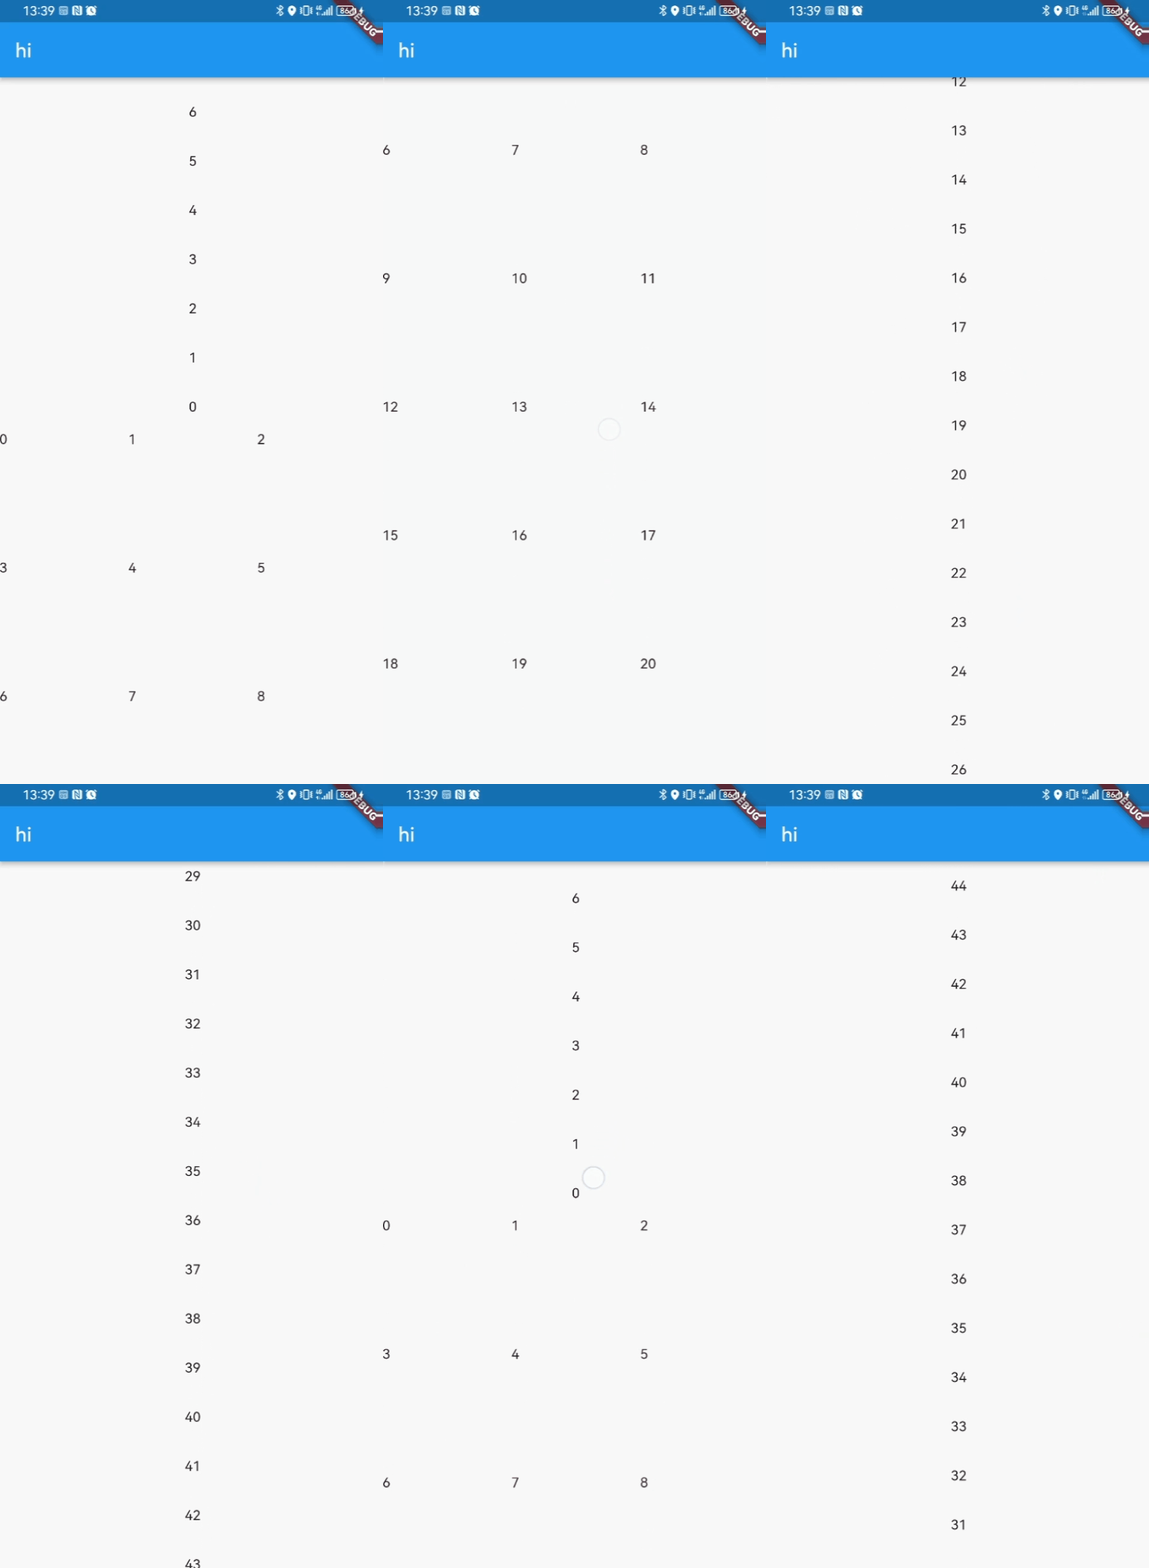
下面我们使用CustomScrollView将一个SliverList和SliverGrid进行组合:
class _MyScroll extends State<MyScroll> with SingleTickerProviderStateMixin {
GlobalKey _centerKey = GlobalKey();
Widget build(BuildContext context) {
return CustomScrollView(
anchor: 0.5,// 初始距离中心轴半个整体组件的高度
center: _centerKey,// 以SliverGrid为中心轴
slivers: [
SliverList(
delegate: SliverChildBuilderDelegate(
(BuildContext context, int index) {
return Container(
height: 50,
alignment: Alignment.center,
child: Text("$index"),
);
},
childCount: 50,
),
),
SliverGrid(
key: _centerKey,
delegate: SliverChildBuilderDelegate(
(BuildContext context, int index) {
return Text("$index");
},
childCount: 50,
),
gridDelegate:
SliverGridDelegateWithFixedCrossAxisCount(crossAxisCount: 3),
),
SliverList(
delegate: SliverChildBuilderDelegate(
(BuildContext context, int index) {
return Container(
height: 50,
alignment: Alignment.center,
child: Text("$index"),
);
},
childCount: 50,
),
),
],
);
}
}
效果:
1.1 SliverAppBar
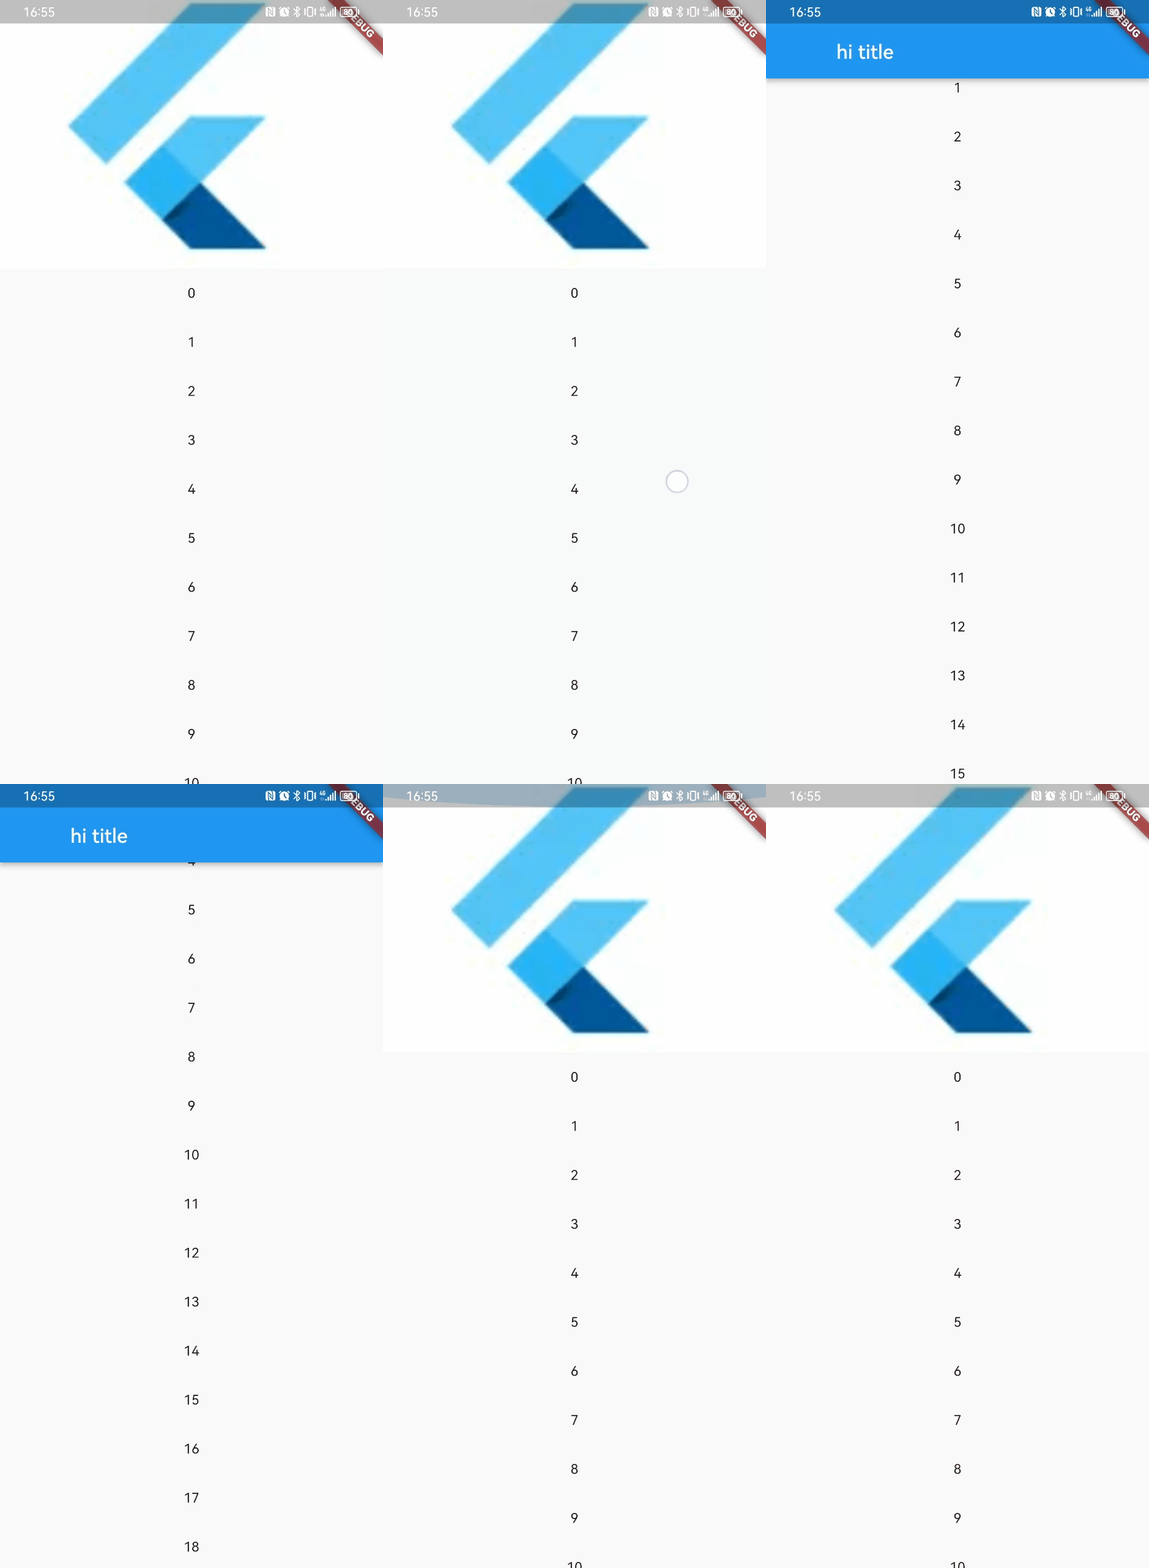
可滚动的AppBar,参数和AppBar基本一致,随着滚动偏移量分别不同操作,如进行缩放到固定位置和扩展变高,在安卓中为AppBarLayout结合CollapsingToolbarLayout使用的效果,构造如下:
const SliverAppBar({
super.key,
this.leading,// title左侧子组件
this.automaticallyImplyLeading = true,//如果leading为null,是否自动实现默认的leading按钮
this.title,
this.actions,// 导航栏右侧菜单
this.flexibleSpace,// 弹性空间,配合滚动,达到展开和固定的切换
this.bottom, // 导航栏底部菜单,通常为Tab按钮组
this.elevation,// 导航栏阴影
...
this.expandedHeight,// 展开高度
this.floating = false,// 用户向SliverAppBar滚动时,SliverAppBar是否应立即变为可见
this.pinned = false,// 滚动到SliverAppBar视图是否应在继续滚动时保持可见。
this.snap = false,// 如果[snap]和[foating]为true,向SliverAppBar滚动时SliverAppBar具有浮动效果
this.stretch = false,// SliverAppBar是否应该拉伸以填充滚动区域。
this.stretchTriggerOffset = 100.0,
this.onStretchTrigger,
this.shape,
this.toolbarHeight = kToolbarHeight,
this.leadingWidth,
(
'This property is obsolete and is false by default. '
'This feature was deprecated after v2.4.0-0.0.pre.',
)
this.backwardsCompatibility,
this.toolbarTextStyle,
this.titleTextStyle,
this.systemOverlayStyle,
})
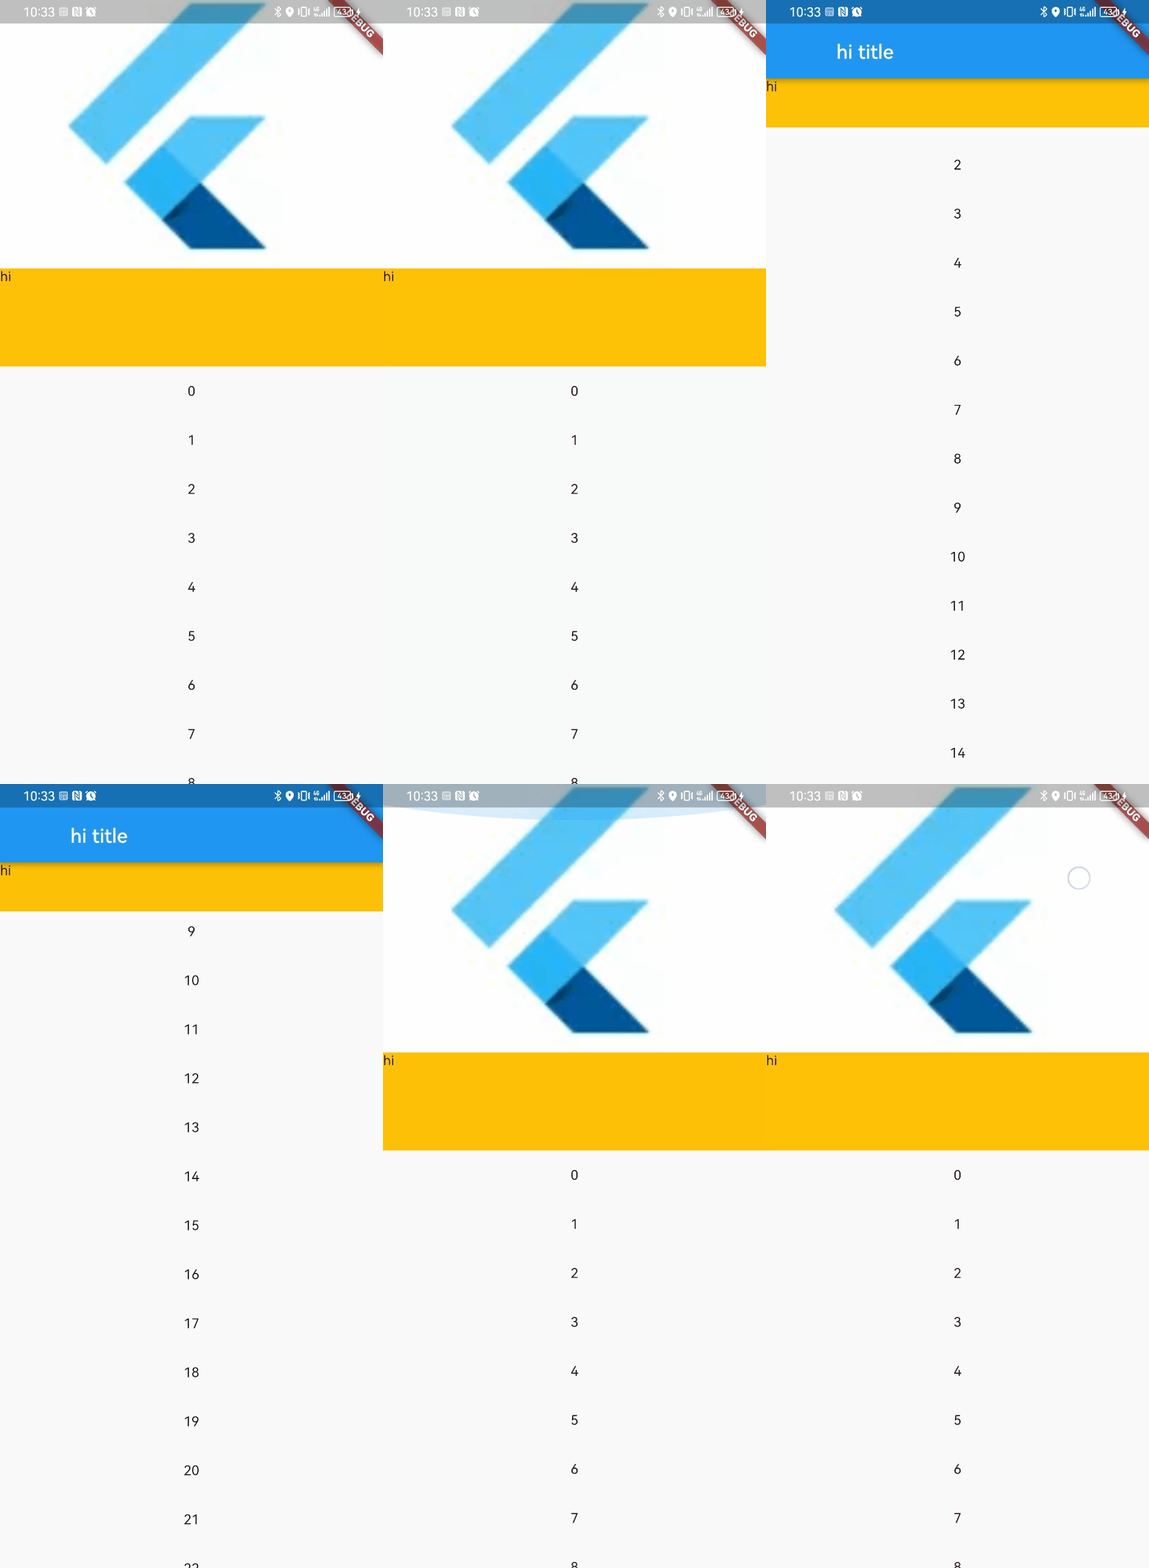
简单使用:
Material(
  child: CustomScrollView(
    slivers: [
      SliverAppBar(
        expandedHeight: 250.0,
        flexibleSpace: FlexibleSpaceBar(
          title: const Text('hi title'),
          background: Image.asset(
            "./drawable/img.png",
            fit: BoxFit.cover,
          ),
        ),
        // floating: true,
        pinned: true,
        // snap: true,
        // stretch: true,
      ),
      SliverList(
        delegate: SliverChildBuilderDelegate(
          (BuildContext context, int index) {
            return Container(
              height: 50,
              alignment: Alignment.center,
              child: Text("$index"),
            );
          },
          childCount: 50,
        ),
      ),
    ],
  ),
);
效果:
1.2 SliverPersistentHeader
SliverPersistentHeader可以达到粘性标题的效果,构造如下:
  const SliverPersistentHeader({
    super.key,
    required this.delegate,
    this.pinned = false,// 滚动到Header组件视图时是否固定显示
    this.floating = false,// 用户反向滚动时,是否应立即变为可见
  })
delegate参数为SliverPersistentHeaderDelegate类型,SliverPersistentHeaderDelegate是一个抽象类,需要自己实现:
class MySliverPersistentHeaderDelegate extends SliverPersistentHeaderDelegate {
// header 最大高度;pined为 true 时,当 header 刚刚固定到顶部时高度为最大高度。
double get maxExtent;
// header 的最小高度;
double get minExtent;
// 构建组件
Widget build(
BuildContext context, double shrinkOffset, bool overlapsContent) {
throw UnimplementedError();
}
// 重新构建的条件
bool shouldRebuild(covariant SliverPersistentHeaderDelegate oldDelegate) {
throw UnimplementedError();
}
}
我们简单封装后:
class MySliverPersistentHeaderDelegate extends SliverPersistentHeaderDelegate {
double maxHeight;
double minHeight;
Widget Function(
BuildContext context, double shrinkOffset, bool overlapsContent)
layoutBuild;
// header 最大高度;pined为 true 时,当 header 刚刚固定到顶部时高度为最大高度。
double get maxExtent => maxHeight;
// header 的最小高度;
double get minExtent => minHeight;
MySliverPersistentHeaderDelegate(
{required this.maxHeight, this.minHeight = 0, required this.layoutBuild});
// 构建组件
Widget build(
BuildContext context, double shrinkOffset, bool overlapsContent) =>
layoutBuild(context, shrinkOffset, overlapsContent);
// 重新构建的条件
bool shouldRebuild(covariant SliverPersistentHeaderDelegate oldDelegate) {
return oldDelegate.maxExtent != maxExtent ||
oldDelegate.minExtent != minExtent;
}
}
在CustiomScrollView中使用SliverPersistentHeader:
Material(
  child: CustomScrollView(
    slivers: [
      SliverAppBar(
        expandedHeight: 250.0,
        flexibleSpace: FlexibleSpaceBar(
          title: const Text('hi title'),
          background: Image.asset(
            "./drawable/img.png",
            fit: BoxFit.cover,
          ),
        ),
        pinned: true,
      ),
      // SliverPersistentHeader
      SliverPersistentHeader(
        pinned: true,
        delegate: MySliverPersistentHeaderDelegate(
          maxHeight: 100,
          minHeight: 50,
          layoutBuild: (BuildContext context, double shrinkOffset,
              bool overlapsContent) {
            return Container(
              height: 100,
              child: Text("hi"),
              color: Colors.amber,
            );
          },
        ),
      ),
      SliverList(
        delegate: SliverChildBuilderDelegate(
          (BuildContext context, int index) {
            return Container(
              height: 50,
              alignment: Alignment.center,
              child: Text("$index"),
            );
          },
          childCount: 50,
        ),
      ),
    ],
  ),
);
效果:
1.3 SliverToBoxAdapter
CustomScrollView下的Sliver集合,必须是Sliver组件,不能够使用Box模型,如果想要使用,可以通过SliverToBoxAdapter,它将Box模型适配为Sliver模型
Material(
  child: CustomScrollView(
    slivers: [
      SliverToBoxAdapter(
        child: Container(
          height: 300,
          child: PageView(
            children: [
              Container(
                alignment: Alignment.center,
                child: Text("1"),
              ),
              Container(
                alignment: Alignment.center,
                child: Text("2"),
              ),
            ],
          ),
        ),
      ),
      SliverList(
        delegate: SliverChildBuilderDelegate(
          (BuildContext context, int index) {
            return Container(
              height: 50,
              alignment: Alignment.center,
              child: Text("$index"),
            );
          },
          childCount: 50,
        ),
      ),
    ],
  ),
);
效果:
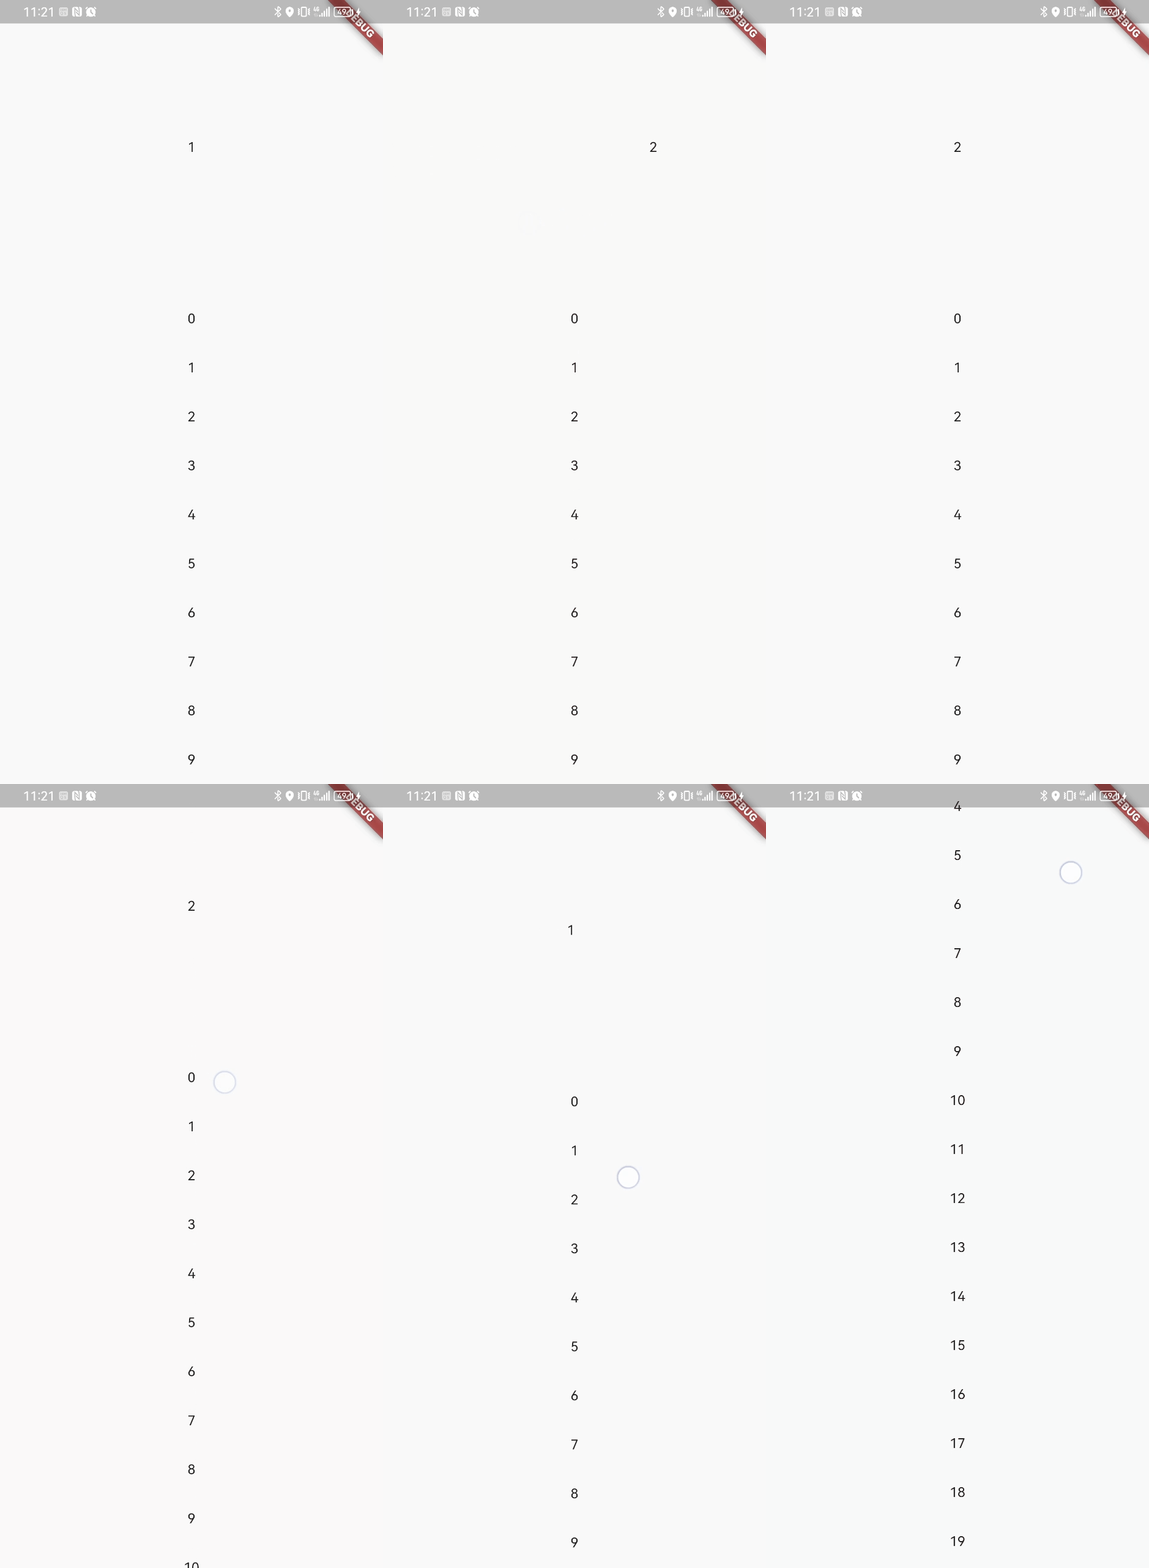
SliverToBoxAdapter不能解决滑动冲突问题,由于CustomScrollView组件,创建一个公共的 Scrollable 和 Viewport ,而SliverToBoxAdapter下PageView为一个单独的Scrollable ,Flutter中滚动事件优先分配给子组件,当两个Scrollable 存在并方向相同时,就会产生冲突
2.NestedScrollView
NestedScrollView也是一个CustomScrollView,NestedScrollView 与CustomScrollView不同的是,它做了内部协调,将滚动区域分为head和body,参数headerSliverBuilder接收一个函数,返回组件集合代表滚动区域的头部
Scaffold(
  body: NestedScrollView(
      headerSliverBuilder: (BuildContext context, bool innerBoxIsScrolled) {
        return [
          SliverAppBar(title: Text("hi")),
          SliverList(
            delegate: SliverChildBuilderDelegate(
              (BuildContext context, int index) {
                return Container(
                  height: 50,
                  alignment: Alignment.center,
                  child: Text("$index"),
                );
              },
              childCount: 5,
            ),
          ),
        ];
      },
      body: ListView.builder(
        itemBuilder: (BuildContext context, int index) {
          return Container(
            alignment: Alignment.center,
            height: 60,
            child: Text("$index"),
          );
        },
        itemCount: 100,
      )),
);
效果:
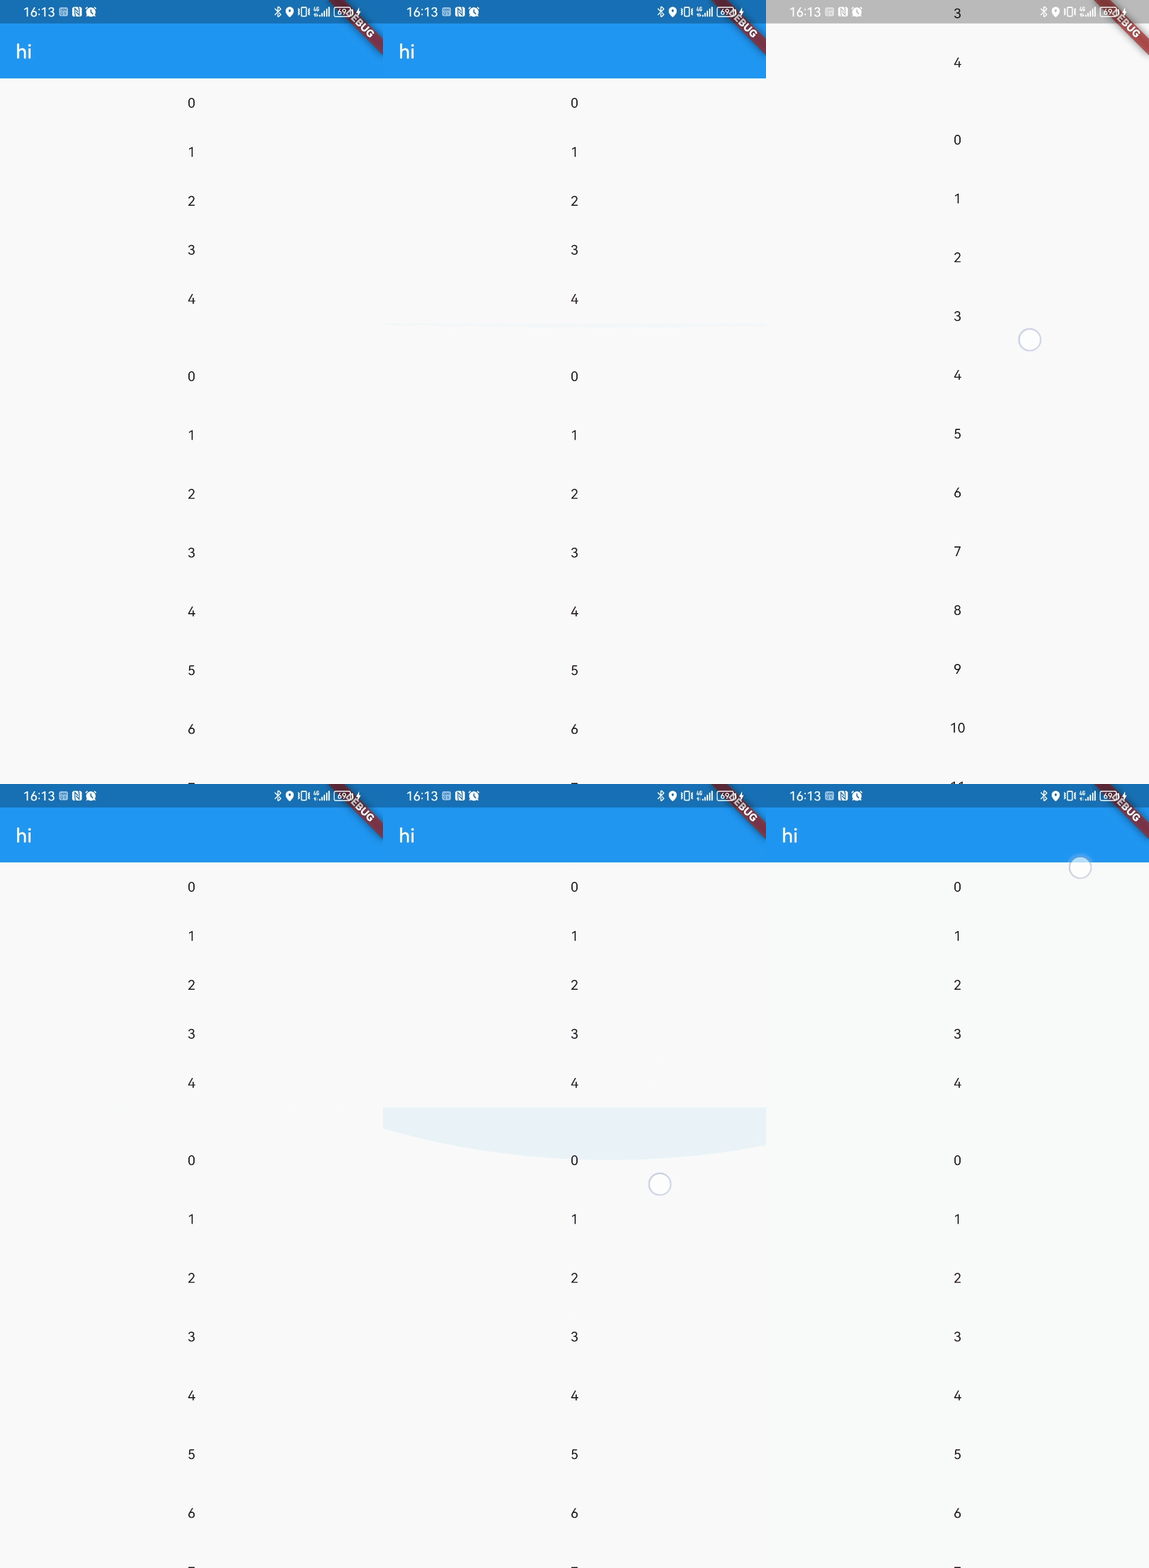
可以看到下面的body滑动会有一个水波纹效果,IOS则是一个弹性效果,如果想要去除效果,往下面看
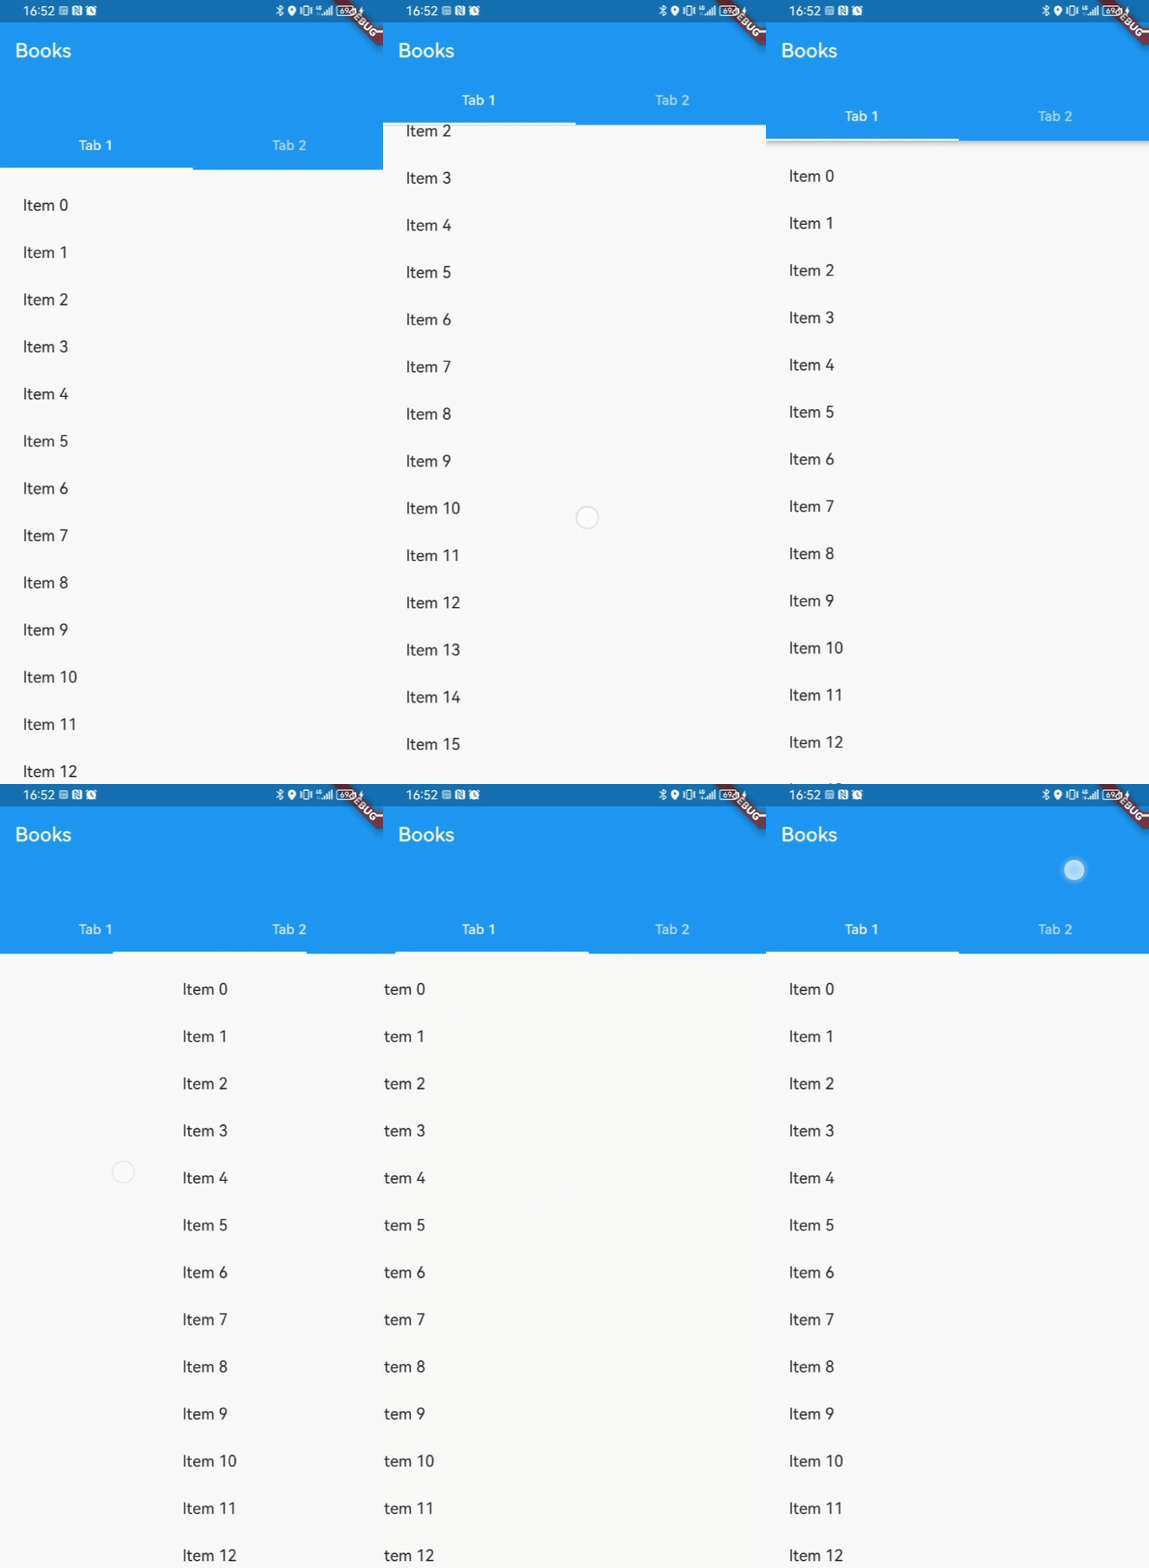
最后贴下官方的示例,其中原先为了解决SliverAppBar设置floating时,滚动展开导致遮挡body的冲突,官方给出了SliverOverlapAbsorber和SliverOverlapInjector组合使用的解决方案,现在这个组合的作用是SliverAppBar展开和缩小的动画效果、以及去除水波纹和IOS的弹性效果:
final List<String> tabs = <String>['Tab 1', 'Tab 2'];

DefaultTabController(
  length: tabs.length,
  child: Scaffold(
    body: NestedScrollView(
      headerSliverBuilder: (BuildContext context, bool innerBoxIsScrolled) {
        return <Widget>[
          SliverOverlapAbsorber(
            // This widget takes the overlapping behavior of the SliverAppBar,
            // and redirects it to the SliverOverlapInjector below. If it is
            // missing, then it is possible for the nested "inner" scroll view
            // below to end up under the SliverAppBar even when the inner
            // scroll view thinks it has not been scrolled.
            // This is not necessary if the "headerSliverBuilder" only builds
            // widgets that do not overlap the next sliver.
            handle:
            NestedScrollView.sliverOverlapAbsorberHandleFor(context),
            sliver: SliverAppBar(
              title:
              const Text('Books'),
              // This is the title in the app bar.
              pinned: true,
              expandedHeight: 150.0,
              // The "forceElevated" property causes the SliverAppBar to show
              // a shadow. The "innerBoxIsScrolled" parameter is true when the
              // inner scroll view is scrolled beyond its "zero" point, i.e.
              // when it appears to be scrolled below the SliverAppBar.
              // Without this, there are cases where the shadow would appear
              // or not appear inappropriately, because the SliverAppBar is
              // not actually aware of the precise position of the inner
              // scroll views.
              forceElevated: innerBoxIsScrolled,
              bottom: TabBar(
                // These are the widgets to put in each tab in the tab bar.
                tabs: tabs.map((String name) => Tab(text: name)).toList(),
              ),
            ),
          ),
        ];
      },
      body: TabBarView(
        // These are the contents of the tab views, below the tabs.
        children: tabs.map((String name) {
          // SafeArea适配避开屏幕顶部的状态栏和ios底部操作凹口
          return SafeArea(
            top: false,
            bottom: false,
            child: Builder(
              // This Builder is needed to provide a BuildContext that is
              // "inside" the NestedScrollView, so that
              // sliverOverlapAbsorberHandleFor() can find the
              // NestedScrollView.
              builder: (BuildContext context) {
                return CustomScrollView(
                  // The "controller" and "primary" members should be left
                  // unset, so that the NestedScrollView can control this
                  // inner scroll view.
                  // If the "controller" property is set, then this scroll
                  // view will not be associated with the NestedScrollView.
                  // The PageStorageKey should be unique to this ScrollView;
                  // it allows the list to remember its scroll position when
                  // the tab view is not on the screen.
                  key: PageStorageKey<String>(name),
                  slivers: <Widget>[
                    SliverOverlapInjector(
                      // This is the flip side of the SliverOverlapAbsorber
                      // above.
                      handle:
                      NestedScrollView.sliverOverlapAbsorberHandleFor(
                          context),
                    ),
                    SliverPadding(
                      padding: const EdgeInsets.all(8.0),
                      // In this example, the inner scroll view has
                      // fixed-height list items, hence the use of
                      // SliverFixedExtentList. However, one could use any
                      // sliver widget here, e.g. SliverList or SliverGrid.
                      sliver: SliverFixedExtentList(
                        // The items in this example are fixed to 48 pixels
                        // high. This matches the Material Design spec for
                        // ListTile widgets.
                        itemExtent: 48.0,
                        delegate: SliverChildBuilderDelegate(
                              (BuildContext context, int index) {
                            // This builder is called for each child.
                            // In this example, we just number each list item.
                            return ListTile(
                              title: Text('Item $index'),
                            );
                          },
                          // The childCount of the SliverChildBuilderDelegate
                          // specifies how many children this inner list
                          // has. In this example, each tab has a list of
                          // exactly 30 items, but this is arbitrary.
                          childCount: 30,
                        ),
                      ),
                    ),
                  ],
                );
              },
            ),
          );
        }).toList(),
      ),
    ),
  ),
);
效果:
本文借鉴:


 3504
3504

 被折叠的 条评论
为什么被折叠?


