


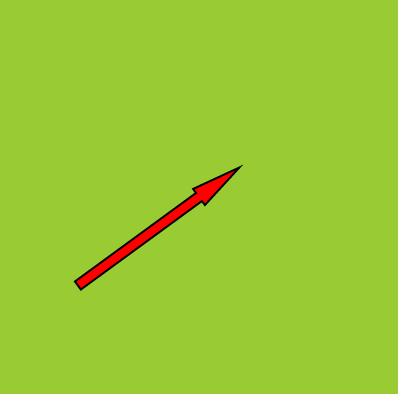
这里创建一个旋转动画,表现为指向图标将随着鼠标的移动变化方向,且箭头始终指向鼠标位置。
文件结构:
utils.js 文件代码(即是前两节函数封装代码):
var utils = {};
//当前需要用到的封装函数:获取鼠标位置
utils.captureMouse = function(element){
    var  mouse = {x:0 , y:0};
    element.addEventListener('mousemove' , function(event){
    var x , y;
    if(event.pageX || event.pageY){
        x = event.pageX;
        y = event.pageY;
    }else{
        x = event.clientX + document.body.scrollLeft + document.documentElement.scrollLeft;
        y = event.clientY + document.body.scrollTop + document.documentElement.scrollTop;
    }
    x -= element.offsetLeft;
    y -= element.offsetTop;
    mouse.x = x;
    mouse.y = y;
    } , false)
    return mouse;
}
//获取手指第一次触摸的位置
utils.captureTouch = function(element){
    var touch = {x:null , y:null , isPressed:false};
    element.addEventListener('touchstart' , function(event){
        touch.isPressed = true;
    },false);
    element.addEventListener('touchend' , function(event){
        touch.isPressed = false;
        touch.x = null;
        touch.y = null;
    },false);
    element.addEventListener('touchmove' , function(event){
        var x , y ,
            touch_event = event.touches[0];
        if(touch_event.pageX || touch_event.pageY){
            x = touch_event.pageX;
            y = touch_event.pageY;
        }else{
            x = touch_event.clientX + document.body.scrollLeft + document.documentElement.scrollLeft;
            y = touch_event.clientY + document.body.scrollTop + document.documentElement.scrollTop;
        }
        x -= offsetLeft;
        y -= offsetTop;
        touch.x = x;
        touch.y = y;
    },false);
    return touch;
};
arrow.js代码:
//提供一个可旋转的对象:一个箭头指向图标(属性可自行设定)
function Arrow(){
    this.x = 0;
    this.y = 0;
    this.color = "#f00";
    this.rotation = 0;
}
Arrow.prototype.draw = function(context){
    context.save();
    context.translate(this.x,this.y);
    context.rotate(this.rotation);
    context.lineWidth = 2;
    context.fillStyle = this.color;
    context.beginPath();
    context.moveTo(-150,-5);
    context.lineTo(0,-5);
    context.lineTo(0,-10);
    context.lineTo(50,0);
    context.lineTo(0,10);
    context.lineTo(0,5);
    context.lineTo(-150,5);
    context.lineTo(-150,-5);
    context.closePath();
    context.fill();
    context.stroke();
    context.restore();
}
rotate.html代码:
<!DOCTYPE html>
<html>
<head>
    <meta charset="utf-8">
    <title>旋转</title>
<style>
    #canvas{background-color: #99cc33;}
</style>
</head>
<body>
<canvas id="canvas" width="400" height="400"></canvas>
<script type="text/javascript" src="utils.js"></script>
<script type="text/javascript" src="arrow.js"></script>
<script type="text/javascript">
    window.onload = function(){
        var canvas = document.getElementById("canvas");
        var context = canvas.getContext("2d");
        var mouse = utils.captureMouse(canvas);
        var arrow = new Arrow();
        arrow.x = canvas.width/2;
        arrow.y = canvas.height/2;
        if (!window.requestAnimationFrame) {
            window.requestAnimationFrame = (window.webkitRequestAnimationFrame || window.mozRequestAnimationFrame || window.oRequestAnimationFrame || window.msRequestAnimationFrame || function(callback){
                return window.setTimeout(callback,1000/60);
            })
        };
        (function drawFrame(){
            window.requestAnimationFrame(drawFrame,canvas);
            context.clearRect(0,0,canvas.width,canvas.height);
            var dx = mouse.x - arrow.x;
            var dy = mouse.y - arrow.y;
            arrow.rotation = Math.atan2(dy,dx);
            arrow.draw(context);
        }());
    };
</script>
</body>
</html>
着重介绍requestAnimationFrame:
window.requestAnimationFrame函数接受一个回调函数作为参数,且确保在重绘屏幕前执行该回调函数,见以下代码:
(function drawFrame(){
    window.requestAnimationFrame(drawFrame,canvas);
    //animation code...
}());
这是实现动画循环的核心思想。该函数第一行代码调用了window.requestAnimationFrame函数并将drawFrame函数自身的应用作为参数传入,第二个可选参数是要回执的canvas,这里可能有点难懂。
切记:在函数运行到需要将它作为参数传入时,它早已定义好了。
想要具有更好的跨平台性,即采用以下代码:
if (!window.requestAnimationFrame) {
            window.requestAnimationFrame = (window.webkitRequestAnimationFrame || window.mozRequestAnimationFrame || window.oRequestAnimationFrame || window.msRequestAnimationFrame || function(callback){
                return window.setTimeout(callback,1000/60);
            })
        };
最后效果图:
参见《HTML5+Javascript动画基础》


 918
918


 被折叠的 条评论
为什么被折叠?
被折叠的 条评论
为什么被折叠?
 到【灌水乐园】发言


