


 本文详细介绍如何使用阿里云工业视觉智能服务进行图像标注、模型训练及部署的全过程。从创建数据集、标注数据到模型训练,再到部署并调用接口,提供了完整的代码示例,适合初学者快速上手。
一…前期准备
官方文档
https://help.aliyun.com/document_detail/134299.html?spm=a2c4g.11186623.6.548.444e420f8QWKVE
1.登录阿里云,进入控制台首页
https://homenew.console.aliyun.com/
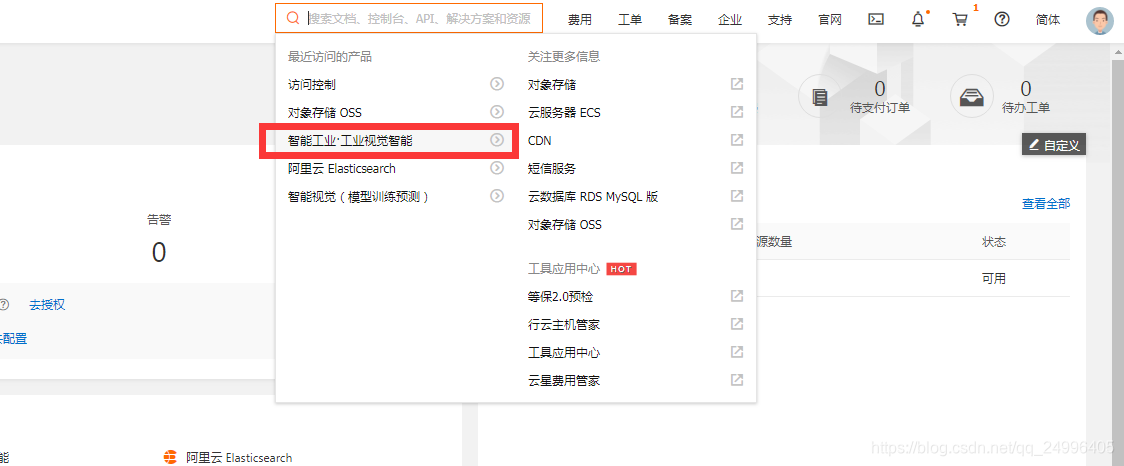
2.搜索 工业视觉智能
3.创建工作区
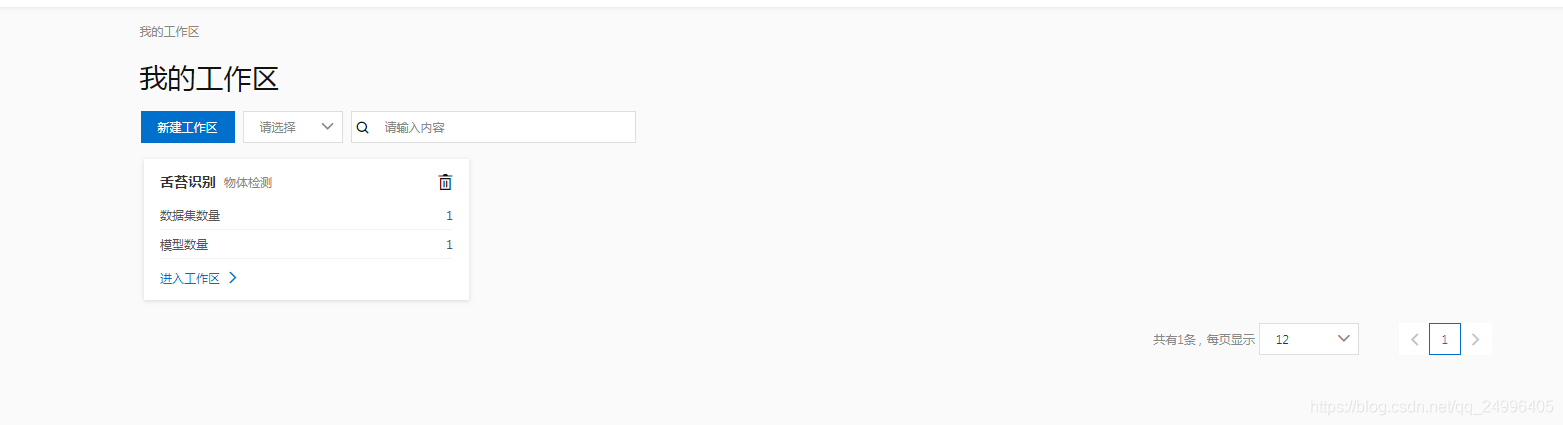
4.进入工作区
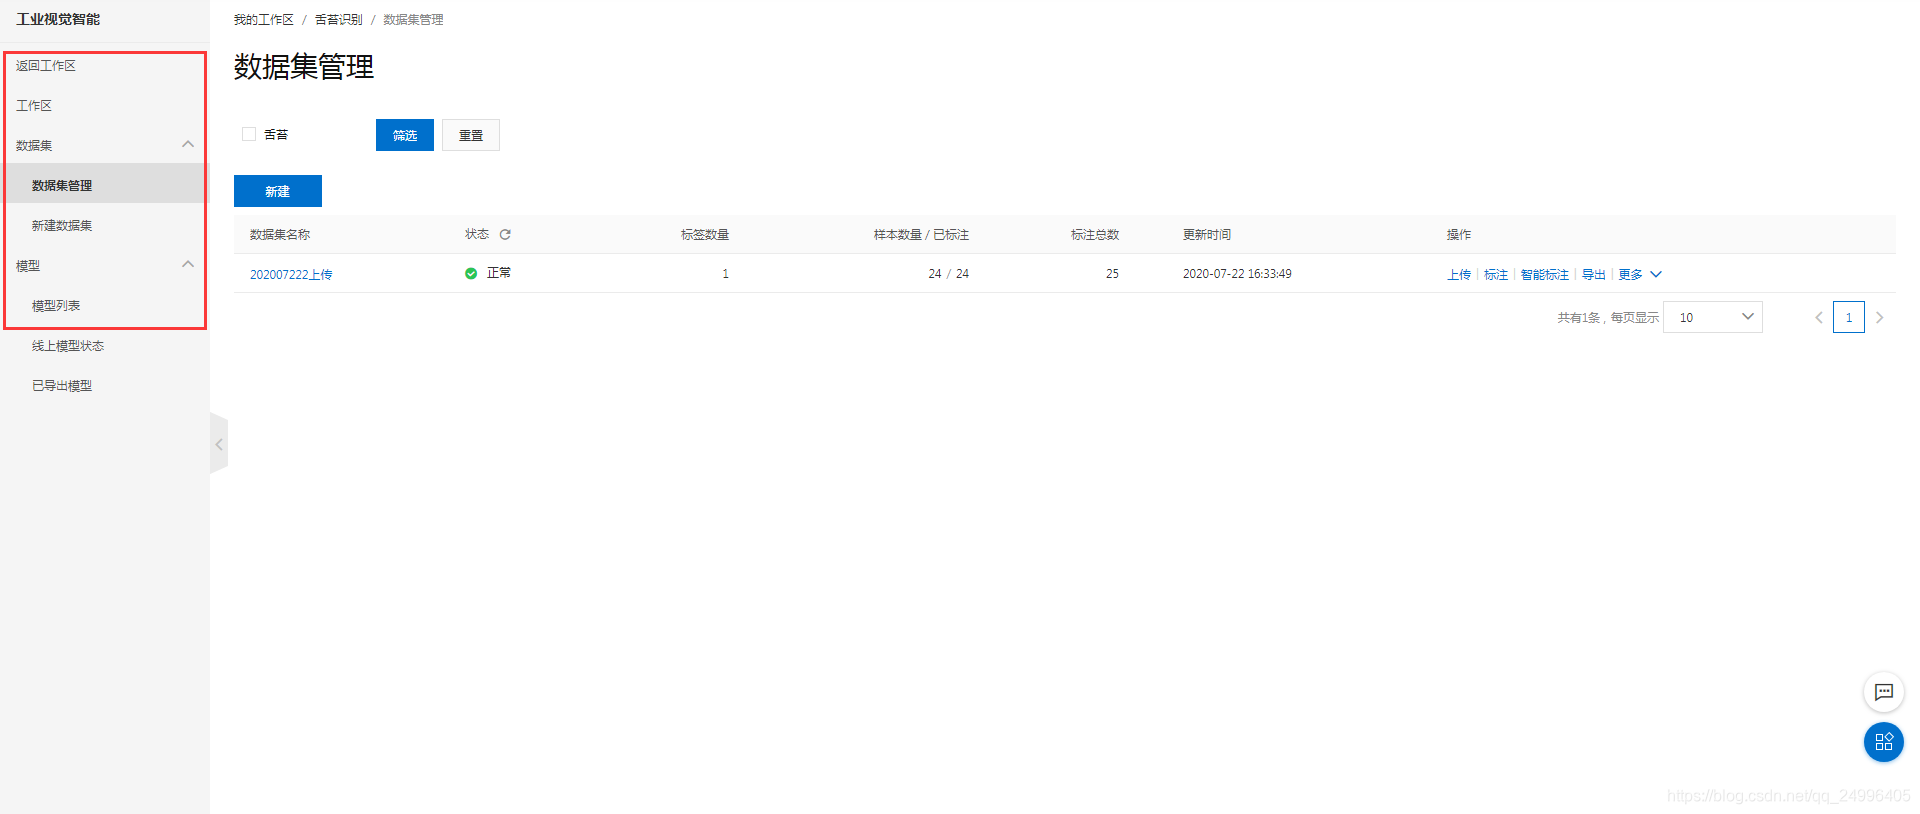
数据集管理==>新建数据集;之后回到数据集管理 进行标注; 标注时需要先手动创建标注的类型;
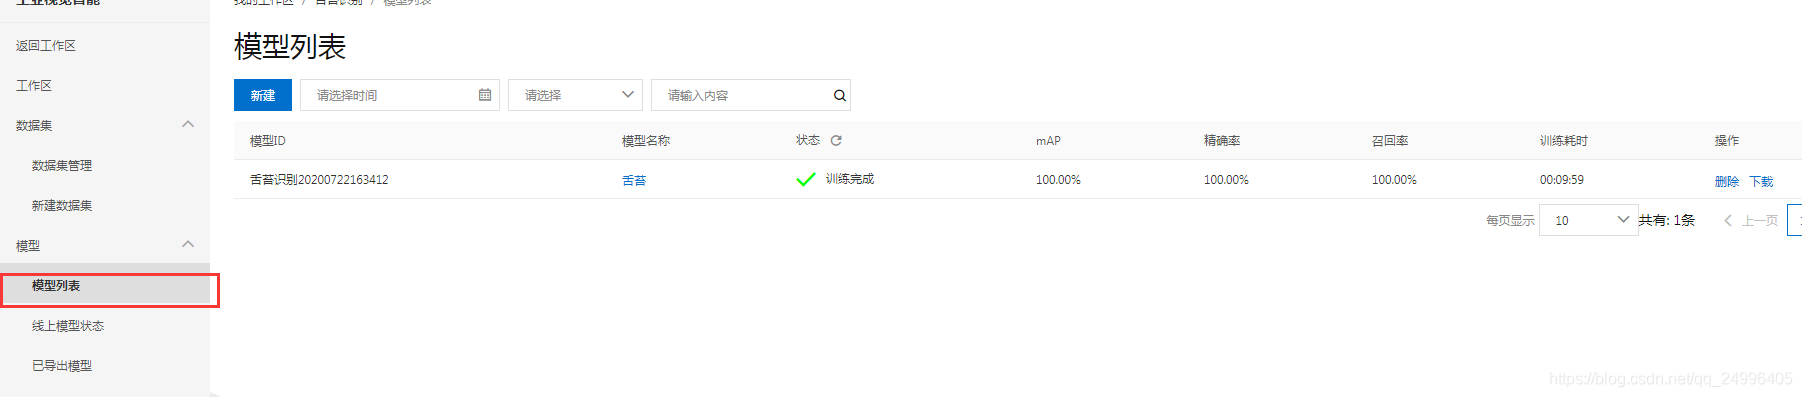
模型列表;点击进去
部署 输入自定义URL (此URL部署完成后叫标识,后续调用接口用它)
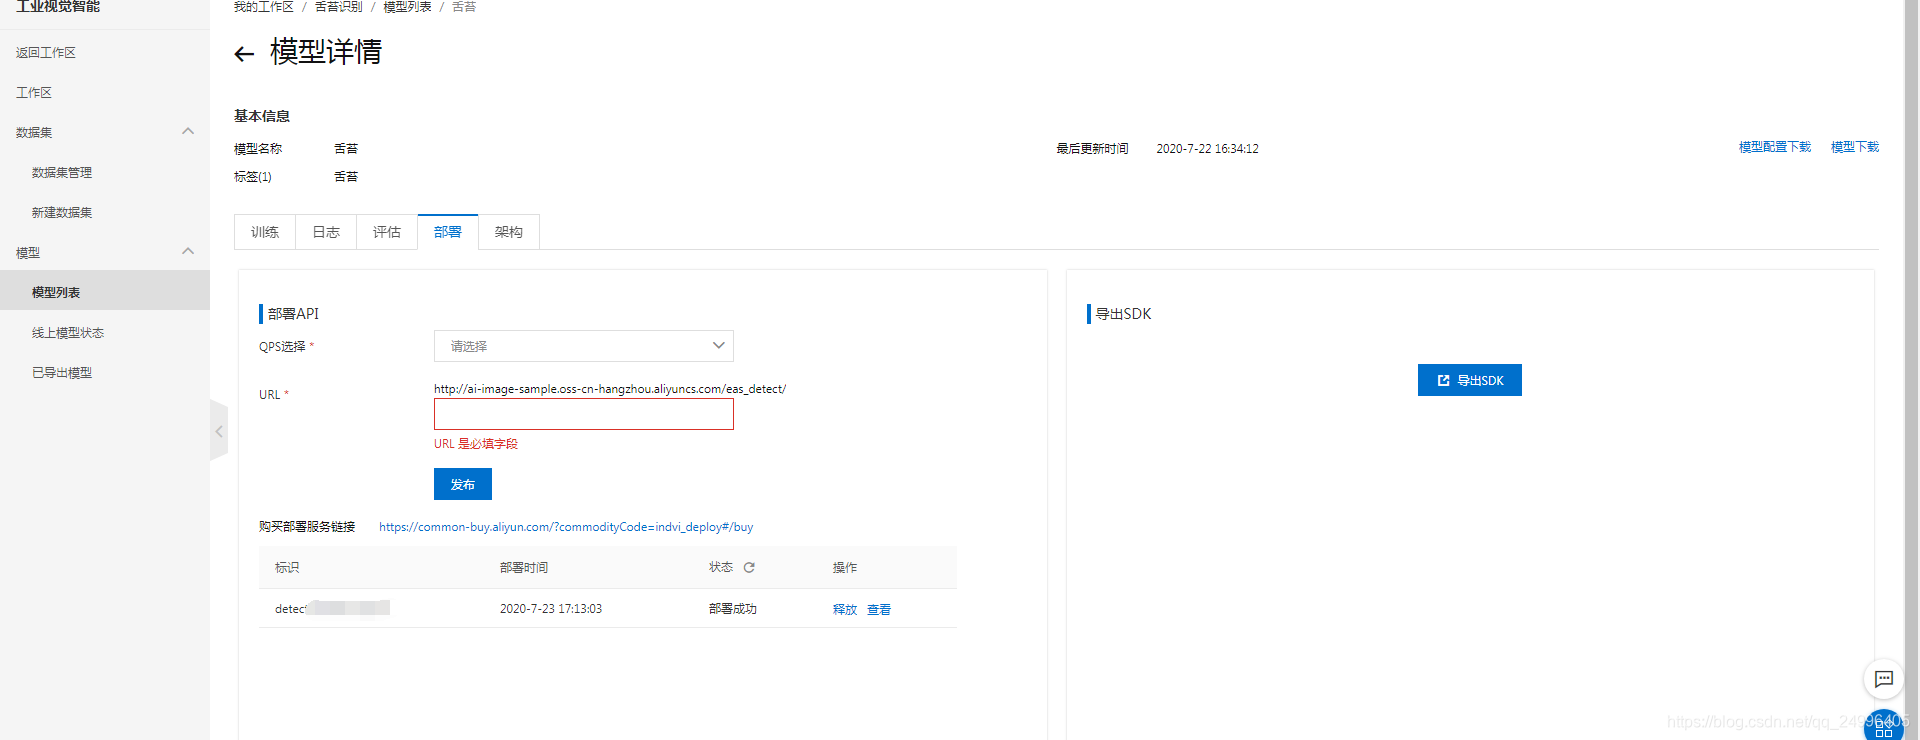
部署成功 编写代码
ps:图片对比需要用到公网能访问到的图片地址; 我用的阿里云对象存储服务OSS
添加链接描述
二.代码编写
依赖 pom.xml
    <dependency>
        <groupId>com.aliyun</groupId>
        <artifactId>aliyun-java-sdk-indvi</artifactId>
        <version>1.0.0</version>
    </dependency>
阿里云官方的SDK
IndviClient: 改成自己阿里云的
String accessKeyID = “”;
String accessKeySecret = “”;
DetectTestDemo:
private static String detectUrl = “detect_xx_xxxxx”; //刚才的部署的工作区标识
private static String imageUrl = “https://timgsa.baidu.com/timg” //公网能访问的图片地址
package com.tst.consumer.config.aliyun;

import com.aliyuncs.DefaultAcsClient;
import com.aliyuncs.IAcsClient;
import com.aliyuncs.profile.DefaultProfile;
import com.aliyuncs.profile.IClientProfile;

public class IndviClient {
    public static IAcsClient getClient() {
        IAcsClient client = null;

        try {
            String accessKeyID = "填写自己的";
            String accessKeySecret = "填写自己的";
            String regionId = "cn-hangzhou";
            DefaultProfile.addEndpoint(regionId, regionId, "indvi", "indvi.cn-hangzhou.aliyuncs.com");
            IClientProfile profile = DefaultProfile.getProfile(regionId, accessKeyID, accessKeySecret);
            //初始化client
            client = new DefaultAcsClient(profile);
        } catch (Exception e) {
            System.out.println("init client failed | excrption: " + e.getMessage());
        }

        return client;
    }
}
package com.tst.consumer.config.aliyun;

import com.aliyuncs.AcsResponse;
import com.aliyuncs.IAcsClient;
import com.aliyuncs.RpcAcsRequest;
import org.springframework.stereotype.Service;

@Service
public class BaseInit {
    private static IAcsClient client;

    static {
        client = IndviClient.getClient();
    }

    public  AcsResponse executeTest(RpcAcsRequest request) {
        AcsResponse response = null;
        try {
            response = client.getAcsResponse(request);
        } catch (Exception e) {
            System.out.println("执行失败:e:" + e.getMessage());
        }
        return response;
    }
}
package com.tst.consumer.config.aliyun;

import com.aliyuncs.indvi.model.v20190701.GetDetectionResultRequest;
import com.aliyuncs.indvi.model.v20190701.GetDetectionResultResponse;
import lombok.extern.slf4j.Slf4j;

@Slf4j
public class DetectTestDemo extends BaseInit {
    private static String detectUrl = "改成自己的";
    private static String imageUrl = "https://timgsa.baidu.com/timg?image&quality=80&size=b9999_10000&sec=1595476574517&di=a4ba875cf87f498ad62ae9ae9ef1c061&imgtype=0&src=http%3A%2F%2Fdpic.tiankong.com%2Fun%2Fgh%2FQJ8858697189.jpg";

    public static void main(String[] args) {
            detectTest();
    }

    public static void detectTest() {
        GetDetectionResultRequest request = new GetDetectionResultRequest();
        request.setDetectPath(detectUrl);
        request.setImageUrl(imageUrl);
        try {
            GetDetectionResultResponse response = (GetDetectionResultResponse) executeTest(request);
            if (null == response) {
                return;
            }
            if (response.getSuccess() == false) {
                log.info(response.getRequestId());
//                log.info(response.toString());
                log.info(response.getMessage());
                log.info(response.getCode());
                log.info(response.getResult());
                System.out.print("response-------------------------------"+response.toString());
                return;
            }
            String result = response.getResult();
            System.out.print("result----------------------------------------------"+result);
        } catch (Exception e) {
            e.printStackTrace();
        }
    }
}


 1013
1013

 被折叠的 条评论
为什么被折叠?
被折叠的 条评论
为什么被折叠?
 到【灌水乐园】发言


