


 这篇博客详细介绍了在Windows和Ubuntu系统下配置TensorFlow的CUDA环境的步骤,包括硬件和软件要求、CUDA和cuDNN的下载与安装、验证安装成功、以及在PyCharm中使用TensorFlow。内容涵盖了从选择合适的版本到设置环境变量,以及在GPU上启用TensorFlow的技巧。
由于各种深度学习框架(TensorFlow、Pytorch等等)和 cuda 版本的更新较快,可能出现程序的编译和运行需要之前版本的 cuda 进行运行环境支持的情况。
为了满足应用程序和框架本身对不同版本的 cuda 的需求,这里即记录笔者了解到的 Windows 和Ubuntu 环境下 TensorFlow 所使用 cuda 版本以及TensorFlow使用不同版本的 cuda 进行运行的方法。
一、硬件要求
官网链接:
https://developer.nvidia.com/cuda-gpus
选则自己显卡类型对应的NVIDIA系列,可以得到显卡的计算能力(compute capability)
注意标注Notebook的为笔记本电脑
不知道自己显卡版本的可以通过“设备管理器”查看,或者使用第三方软件GPU-Z查看。请注意,AMD的显卡不可以使用英伟达开发的CUDA…
二、软件要求
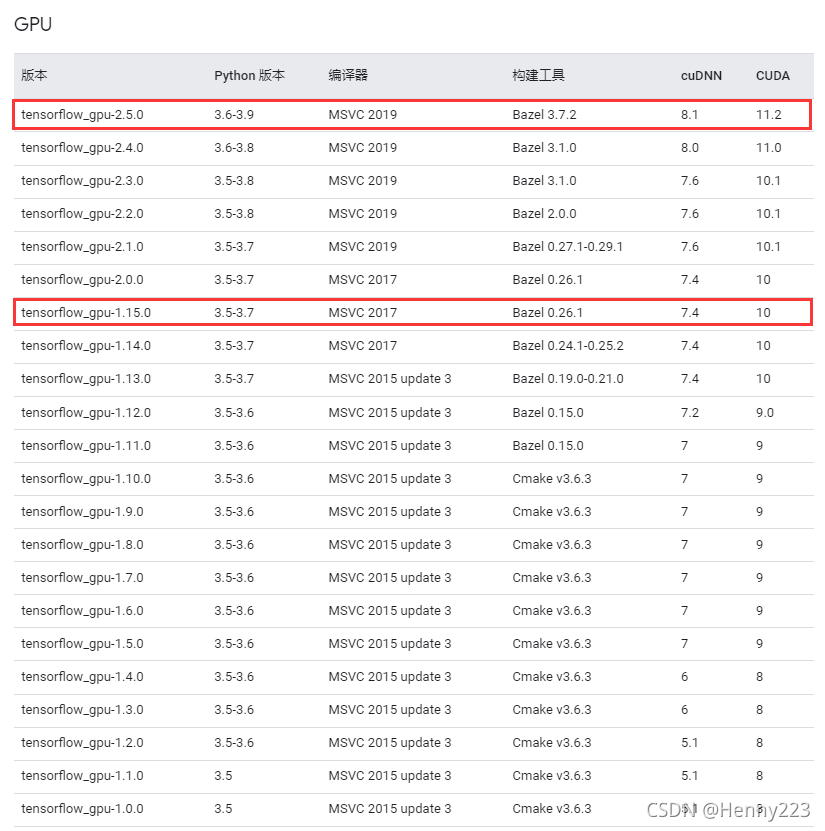
1. 查看Python、tensorflow、CUDA、Cudnn版本的对应关系,确定版本方案
注意记下自己需要的tensorflow版本、CUDA版本、Cudnn版本、Python版本
以下是我windows系统的安装方案:
tf1.15.0+CUDA10.0.130+CuDNN7.4.2+Python3.7.11
tf2.5.0+CUDA11.2.0+CuDNN8.1.1+Python3.7.11
安装文件我都下载好啦~如果系统和方案和我一样的就可以直接下载用
链接:https://pan.baidu.com/s/1VGCSy7yAOhXwgHtPfmzRtw
提取码:sau0
Windows用户Tensorflow官网链接
https://www.tensorflow.org/install/source_windows
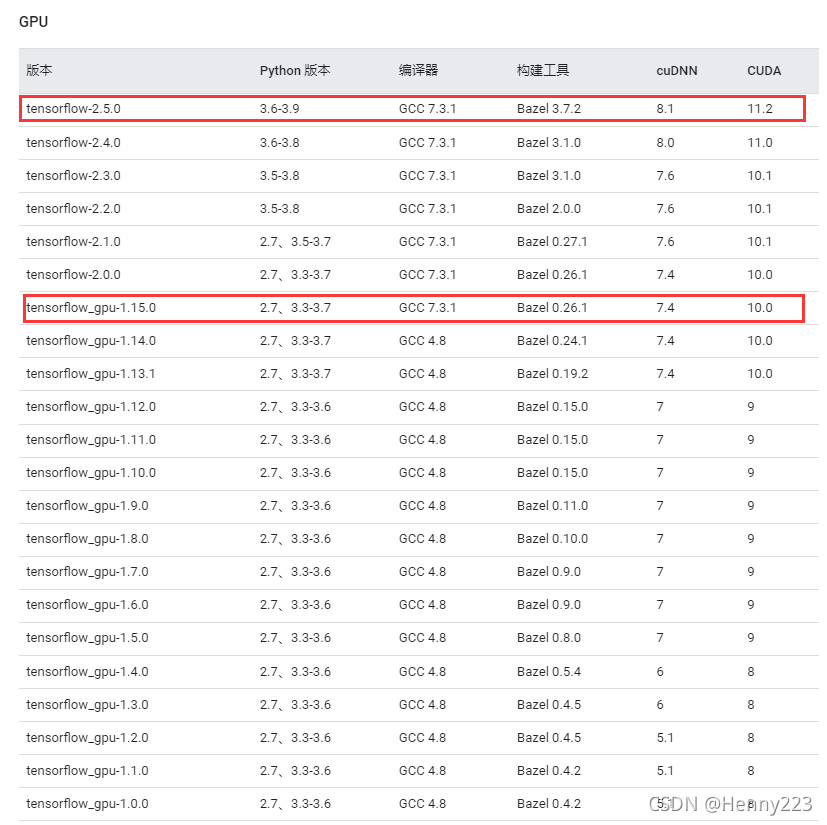
Linux用户Tensorflow官网链接
https://www.tensorflow.org/install/source#common_installation_problems
注意:
若要支持 Python 3.9,需要使用 TensorFlow 2.5 或更高版本。
若要支持 Python 3.8,需要使用 TensorFlow 2.2 或更高版本。
如果使用错误的Python版本,将无法安装TensorFlow!
2. 下载NVIDIA GPU 显卡驱动程序
显卡驱动的下载链接
https://www.nvidia.com/download/index.aspx?lang=en-us#
填入GPU的信息
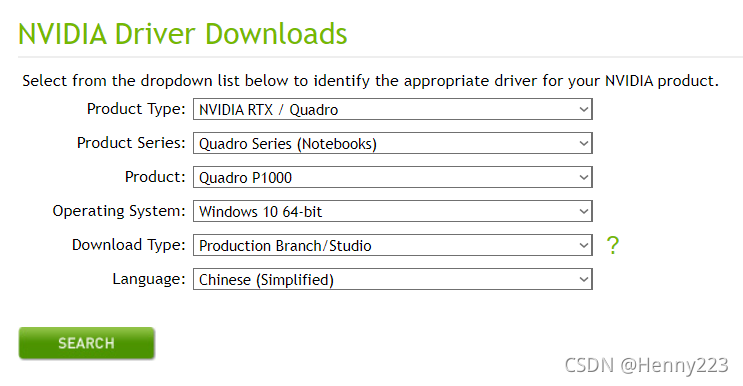
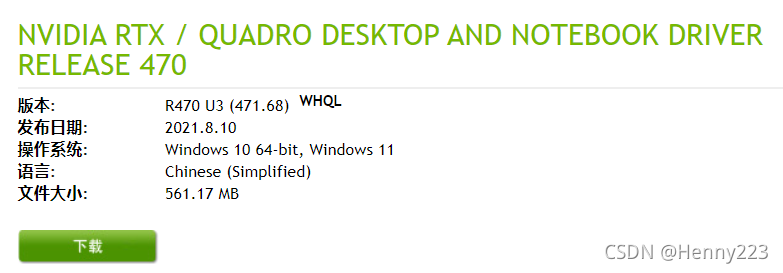
得到下载链接
验证驱动安装成功
查看N卡状态
nvidia-smi
3. 下载CUDA工具包
3.1 简介
CUDA 是NVIDIA专门负责管理分配运算单元的框架
CUDA的本质是一个工具包(ToolKit)
CUDA是NVIDIA推出的用于自家GPU的并行计算框架,也就是说CUDA只能在NVIDIA的GPU上运行,而且只有当要解决的计算问题是可以大量并行计算的时候才能发挥CUDA的作用。
3.2 下载方法
下载之前我们需要知道已经安装了什么版本的CUDA
至于怎样知道自己安装了多少个工具包,可以参考3.3的内容
安装最新版本CUDA工具包
下载链接:
https://developer.nvidia.com/cuda-toolkit-archive
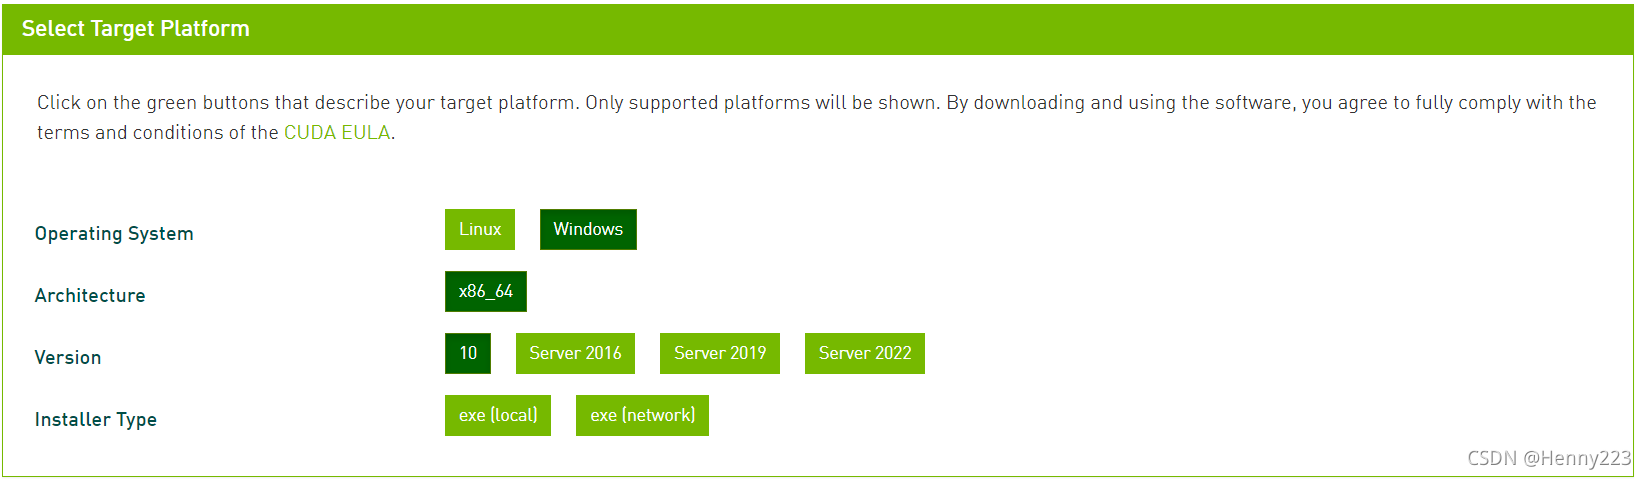
我们可以选择两种安装方式
一种是离线安装即本地安装(推荐第一次安装CUDA的用户使用)
一种是在线安装(推荐已经安装多个CUDA版本的用户使用)
解释:NVIDIA显卡驱动和CUDA工具包本身是不具有捆绑关系的,也不是一一对应的关系,只不过是离线安装的CUDA工具包会默认安装与之匹配的最新的驱动程序,这不太好,我们直接安装一个最新版的显卡驱动,然后在线安装不同版本的CUDA即可。
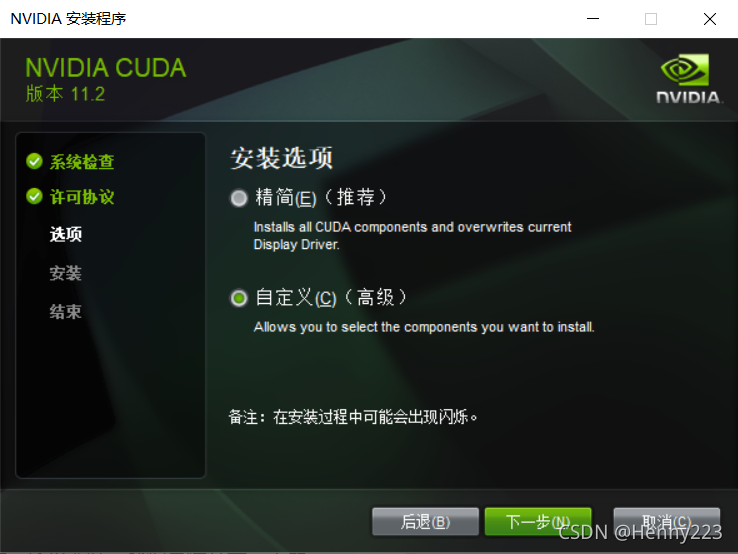
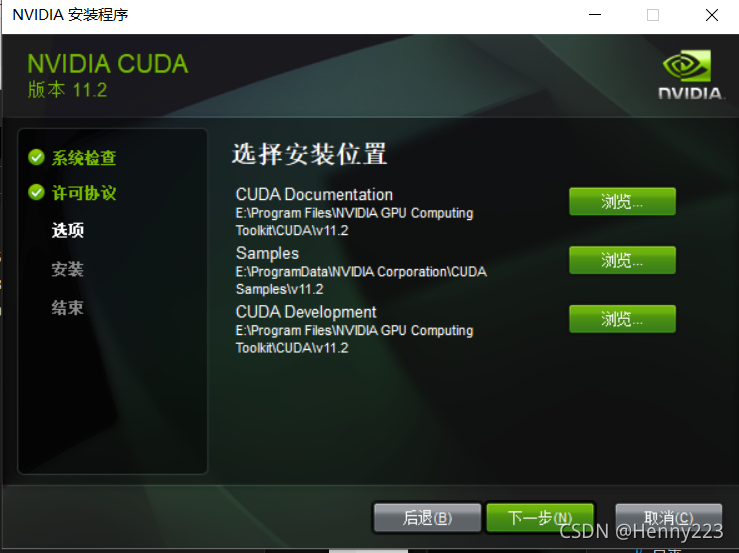
这里我要安装到E盘,不是默认目录,所以选则自定义
3.3 查看所安装的CUDA版本
(1)在windows平台下:
方法一(推荐):
直接进入CUDA的安装目录,默认是 C:\Program Files\NVIDIA GPU Computing Toolkit\CUDA然后执行:type version.xxx 即可查看(有的是.txt文件,有的是.json文件)
方法二(不推荐):
通过命令查看:nvcc -V 或者是nvcc --version都可以,但前提是添加了环境变量
(2)在Linux平台下:
同windows类似,进入到安装目录,然后执行 cat version.txt 命令
4. cuDNN
4.1 简介
cuDNN是一个SDK,是一个专门用于神经网络的加速包,注意,它跟我们的CUDA没有一一对应的关系,即每一个版本的CUDA可能有好几个版本的cuDNN与之对应,但一般有一个最新版本的cuDNN版本与CUDA对应更好。
cuDNN(CUDA Deep Neural Network library):是NVIDIA打造的针对深度神经网络的加速库,是一个用于深层神经网络的GPU加速库。如果你要用GPU训练模型,cuDNN不是必须的,但是一般会采用这个加速库。
4.2 下载及安装
需要注册和登陆NVIDIA 帐户并填写问卷才能下载
https://developer.nvidia.com/rdp/cudnn-archive
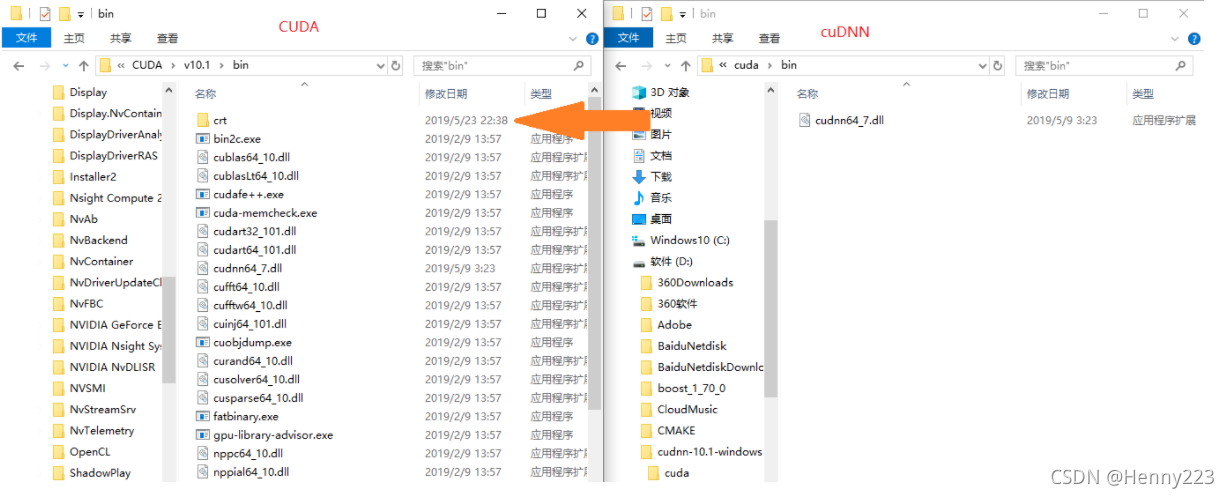
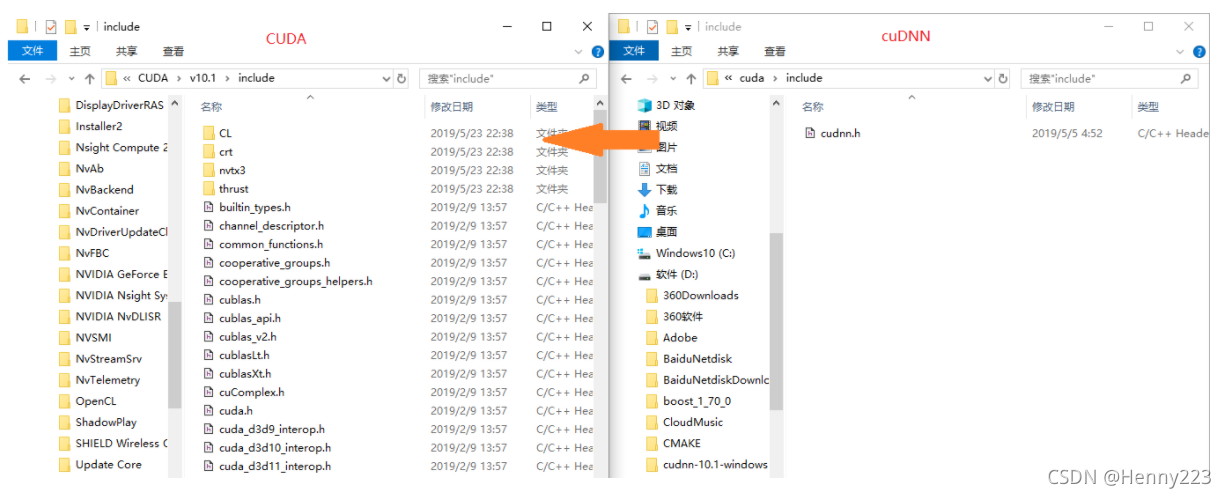
下载下来是个压缩包,解压后,里面有三个文件夹。
找到 CUDA 的安装路径,默认是 C:\Program Files\NVIDIA GPU Computing Toolkit\CUDA\v10.1
复制 cuDNN bin 目录下的文件到 CUDA 的 bin 目录下(.dll)
复制 cuDNN include 目录下的文件到 CUDA 的 include 目录下(.h)
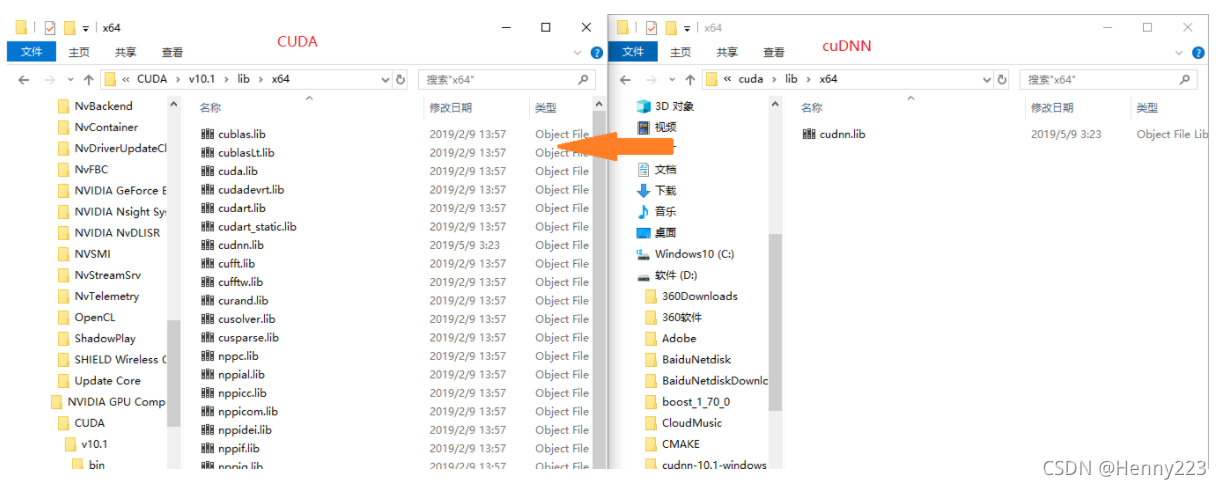
复制 cuDNN lib/x64 目录下的文件到 CUDA 的 lib/x64 目录下(.lib)
读不懂的看这个图
接下来设置环境变量:
计算机上点右键,打开属性->高级系统设置->环境变量,可以看到系统中多了CUDA_PATH和CUDA_PATH_V10_1两个环境变量,接下来,还要在系统中添加以下几个环境变量:
CUDA_SDK_PATH = C:\ProgramData\NVIDIA Corporation\CUDA Samples\v10.1
(这是默认安装位置的路径,经自定义路径后,我的路径为E:\ProgramData\NVIDIA Corporation\CUDA Samples\v10.1)
CUDA_LIB_PATH = %CUDA_PATH%\lib\x64
CUDA_BIN_PATH = %CUDA_PATH%\bin
CUDA_SDK_BIN_PAT
最低0.47元/天 解锁文章


 3万+
3万+

 被折叠的 条评论
为什么被折叠?
被折叠的 条评论
为什么被折叠?
 到【灌水乐园】发言


