


DolphinScheduler 是一个分布式易扩展的可视化工作流任务调度系统。集成了很多数据处理常用的功能,包括定时任务,脚本执行,错误预警等。
它具有以下一些主要特点和优势:
分布式架构:支持大规模任务的调度和管理,能够应对高并发和大数据量的处理需求。
例如,在大型互联网企业中,处理海量的用户数据时,DolphinScheduler 可以确保任务的高效分配和执行。
易扩展:可以方便地添加新的节点和资源,以适应不断增长的业务需求。
像业务快速发展的电商公司,能够轻松扩展系统来处理更多的订单数据处理任务。
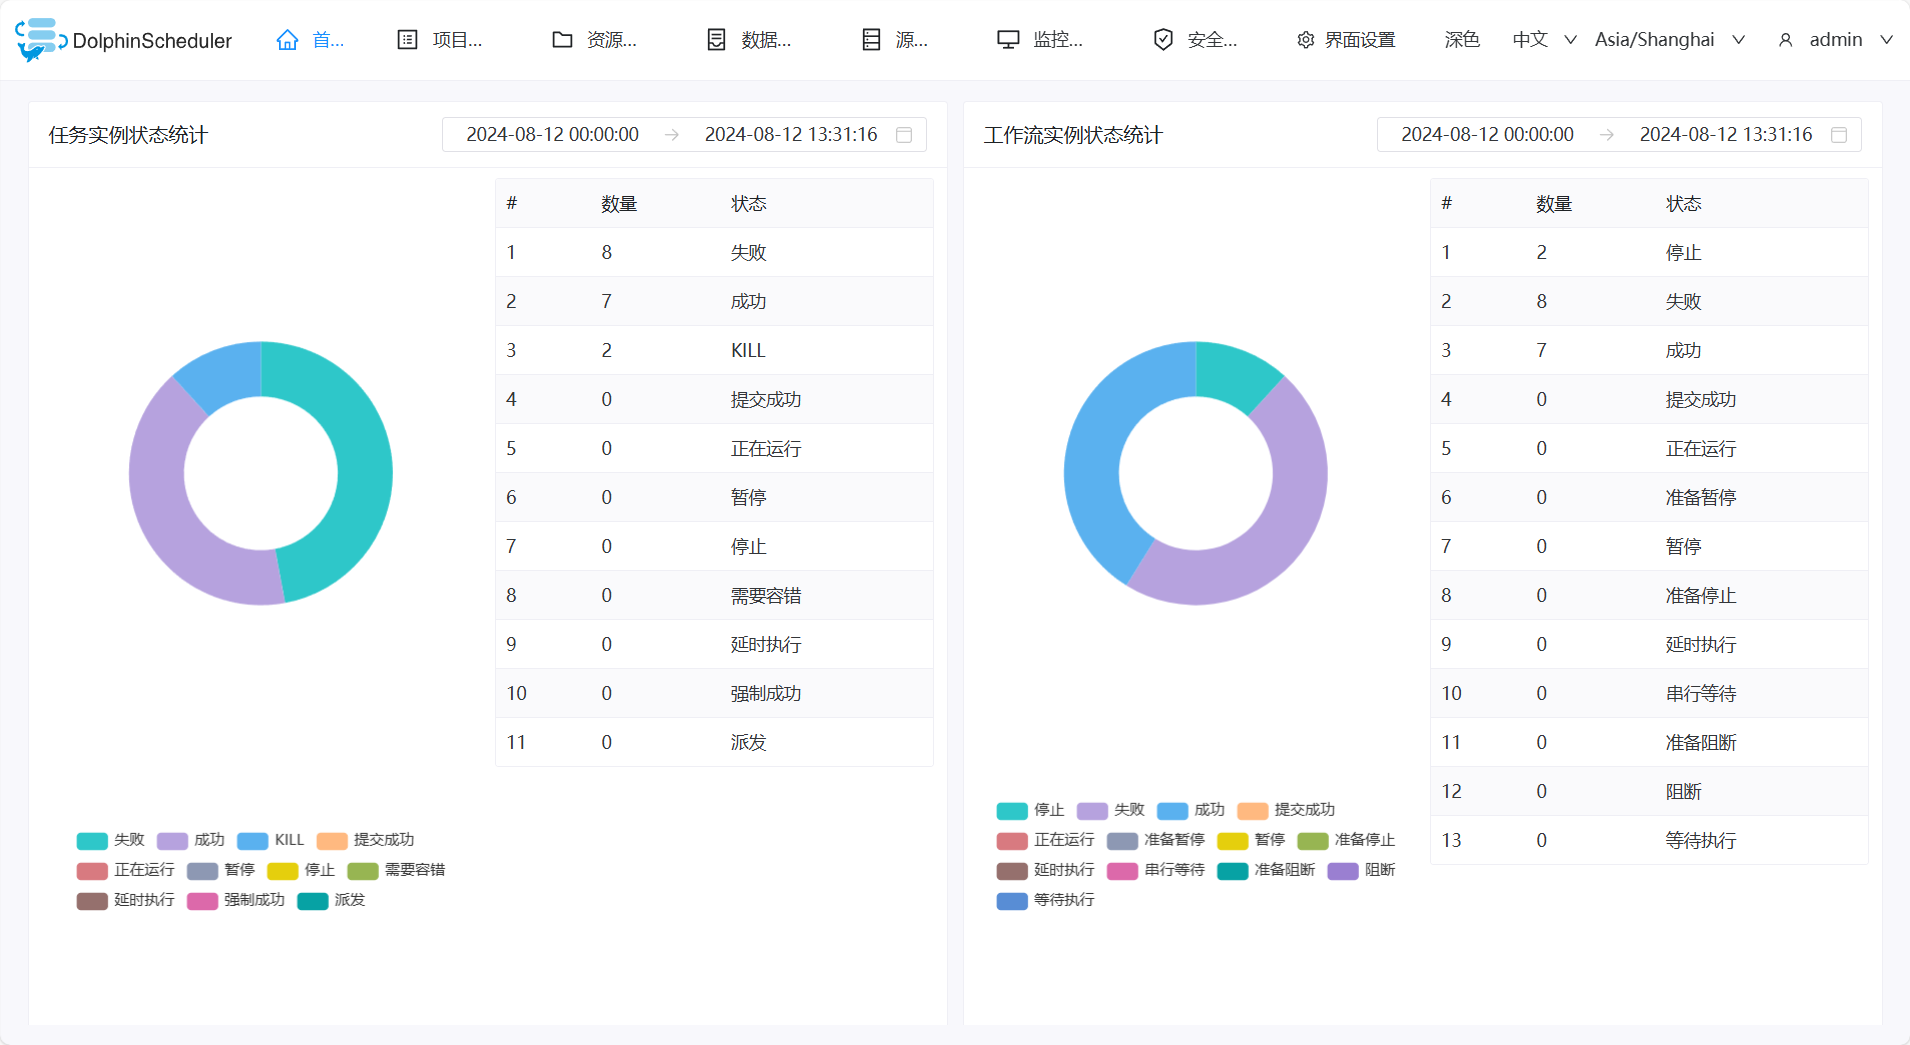
可视化操作:通过直观的界面,用户可以清晰地看到任务流程、依赖关系和执行状态。
对于不太熟悉技术的业务人员,也能轻松理解和管理数据处理流程。
高可靠性:具备容错和恢复机制,确保任务的稳定执行。
即便在系统出现故障或异常时,也能最大程度减少对业务的影响。
接下来介绍下如何在centos7上安装DolphinScheduler3.2.2。
一、安装前的准备工作,
服务器需要安装java1.8以上的环境,安装应用所需的数据库,我使用的mysql5.7,5.7以上的都可以,或者pg也行,看自身情况,还需要安装psmisc ,这些都不多介绍了,在网上自行搜索安装即可。
还需要安装Zookeeper,Zookeeper是一个分布式协调服务框架,我会详细介绍安装步骤,最后才是DolphinScheduler 的安装。

二、安装Zookeeper
1、下载解压zookeeper
官网推荐3.8.0以上的版本,我这里使用的3.8.4.

上传到服务器解压。我还是放在/usr/local/server下
tar -xvf apache-zookeeper-3.8.4-bin.tar.gz修改文件名
mv apache-zookeeper-3.8.4-bin.tar zookeeper2、创建文件夹
在安装目录下创建两个文件夹,data和log
mkdir data
mkdir log
3、修改配置文件
进入到conf目录,备份一份配置文件。
cp zoo_sample.cfg zoo.cfg打开zoo.cfg文件,修改配置目录
4、启动、停止zookeeper
# 启动zk服务
sh ./zkServer.sh start
# 查看zk服务状态
sh ./zkServer.sh status
# 停止zk服务
sh ./zkServer.sh stop
# 重启zk服务
sh ./zkServer.sh restart
# 显示日志启动
sh ./bin/zkServer.sh start-foreground
zookeeper默认是在2181 端口运行,其他服务器访问记得配防火墙。
测试安装是否成功。
./bin/zkCli.sh -server localhost:2181二、安装DolphinScheduler
1、下载解压DolphinScheduler
官网下载DolphinScheduler安装文件,下载

上传到服务器,我放在了/usr/local/server/下。解压。
tar -zxvf apache-dolphinscheduler-3.2.2-bin.tar.gz修改文件名
mv apache-dolphinscheduler-3.2.2-bin dolphinscheduler2、创建用户
# 创建用户需使用 root 登录
useradd dolphinscheduler

# 添加密码
echo "dolphinscheduler" | passwd --stdin dolphinscheduler

# 配置 sudo 免密
sed -i '$adolphinscheduler  ALL=(ALL)  NOPASSWD: NOPASSWD: ALL' /etc/sudoers
sed -i 's/Defaults    requirett/#Defaults    requirett/g' /etc/sudoers

# 修改目录权限,使得部署用户对二进制包解压后的 apache-dolphinscheduler-*-bin 目录有操作权限
chown -R dolphinscheduler:dolphinscheduler dolphinscheduler
chmod -R 755 dolphinscheduler
配置绵密登录
su dolphinscheduler

ssh-keygen -t rsa -P '' -f ~/.ssh/id_rsa
cat ~/.ssh/id_rsa.pub >> ~/.ssh/authorized_keys
chmod 600 ~/.ssh/authorized_keys
3、修改配置文件
- 修改 bin/env/dolphinscheduler_env.sh 文件
# applicationId auto collection related configuration, the following configurations are unnecessary if setting appId.collect=log
#export HADOOP_CLASSPATH=`hadoop classpath`:${DOLPHINSCHEDULER_HOME}/tools/libs/*
#export SPARK_DIST_CLASSPATH=$HADOOP_CLASSPATH:$SPARK_DIST_CLASS_PATH
#export HADOOP_CLIENT_OPTS="-javaagent:${DOLPHINSCHEDULER_HOME}/tools/libs/aspectjweaver-1.9.7.jar":$HADOOP_CLIENT_OPTS
#export SPARK_SUBMIT_OPTS="-javaagent:${DOLPHINSCHEDULER_HOME}/tools/libs/aspectjweaver-1.9.7.jar":$SPARK_SUBMIT_OPTS
#export FLINK_ENV_JAVA_OPTS="-javaagent:${DOLPHINSCHEDULER_HOME}/tools/libs/aspectjweaver-1.9.7.jar":$FLINK_ENV_JAVA_OPTS


# jdk
export JAVA_HOME=${JAVA_HOME:-/opt/module/jdk1.8.0_212/}

# 数据库
export DATABASE=${DATABASE:-mysql}
export SPRING_PROFILES_ACTIVE=${DATABASE}
export SPRING_DATASOURCE_URL="jdbc:mysql://localhost:3306/ds?useUnicode=true&characterEncoding=UTF-8&useSSL=false&serverTimezone=GMT%2B8&allowPublicKeyRetrieval=true"
export SPRING_DATASOURCE_USERNAME=root
export SPRING_DATASOURCE_PASSWORD=123456

# 时区
export SPRING_JACKSON_TIME_ZONE=${SPRING_JACKSON_TIME_ZONE:-Asia/Shanghai}

# zookeeper
export REGISTRY_TYPE=${REGISTRY_TYPE:-zookeeper}
export REGISTRY_ZOOKEEPER_CONNECT_STRING=${REGISTRY_ZOOKEEPER_CONNECT_STRING:-localhost:2181}
主要修改java安装目录以及数据库配置。
- 在bin/env 目录下新建 install_env.sh文件。
# censed to the Apache Software Foundation (ASF) under one or more
# contributor license agreements.  See the NOTICE file distributed with
# this work for additional information regarding copyright ownership.
# The ASF licenses this file to You under the Apache License, Version 2.0
# (the "License"); you may not use this file except in compliance with
# the License.  You may obtain a copy of the License at
#
#     http://www.apache.org/licenses/LICENSE-2.0
#
# Unless required by applicable law or agreed to in writing, software
# distributed under the License is distributed on an "AS IS" BASIS,
# WITHOUT WARRANTIES OR CONDITIONS OF ANY KIND, either express or implied.
# See the License for the specific language governing permissions and
# limitations under the License.
#

# ---------------------------------------------------------
# INSTALL MACHINE
# ---------------------------------------------------------
# A comma separated list of machine hostname or IP would be installed DolphinScheduler,
# including master, worker, api, alert. If you want to deploy in pseudo-distributed
# mode, just write a pseudo-distributed hostname
# Example for hostnames: ips="ds1,ds2,ds3,ds4,ds5", Example for IPs: ips="192.168.8.1,192.168.8.2,192.168.8.3,192.168.8.4,192.168.8.5"
ips=${ips:-"localhost"}

# Port of SSH protocol, default value is 22. For now we only support same port in all `ips` machine
# modify it if you use different ssh port
sshPort=${sshPort:-"22"}

# A comma separated list of machine hostname or IP would be installed Master server, it
# must be a subset of configuration `ips`.
# Example for hostnames: masters="ds1,ds2", Example for IPs: masters="192.168.8.1,192.168.8.2"
masters=${masters:-"localhost"}

# A comma separated list of machine <hostname>:<workerGroup> or <IP>:<workerGroup>.All hostname or IP must be a
# subset of configuration `ips`, And workerGroup have default value as `default`, but we recommend you declare behind the hosts
# Example for hostnames: workers="ds1:default,ds2:default,ds3:default", Example for IPs: workers="192.168.8.1:default,192.168.8.2:default,192.168.8.3:default"
workers=${workers:-"localhost:default"}

# A comma separated list of machine hostname or IP would be installed Alert server, it
# must be a subset of configuration `ips`.
# Example for hostname: alertServer="ds3", Example for IP: alertServer="192.168.8.3"
alertServer=${alertServer:-"localhost"}

# A comma separated list of machine hostname or IP would be installed API server, it
# must be a subset of configuration `ips`.
# Example for hostname: apiServers="ds1", Example for IP: apiServers="192.168.8.1"
apiServers=${apiServers:-"localhost"}

# The directory to install DolphinScheduler for all machine we config above. It will automatically be created by `install.sh` script if not exists.
# Do not set this configuration same as the current path (pwd). Do not add quotes to it if you using related path.
installPath=${installPath:-"/usr/local/server/dolphinscheduler"}

# The user to deploy DolphinScheduler for all machine we config above. For now user must create by yourself before running `install.sh`
# script. The user needs to have sudo privileges and permissions to operate hdfs. If hdfs is enabled than the root directory needs
# to be created by this user
deployUser=${deployUser:-"dolphinscheduler"}

# The root of zookeeper, for now DolphinScheduler default registry server is zookeeper.
# It will delete ${zkRoot} in the zookeeper when you run install.sh, so please keep it same as registry.zookeeper.namespace in yml files.
# Similarly, if you want to modify the value, please modify registry.zookeeper.namespace in yml files as well.
#zkRoot=${zkRoot:-"/dolphinscheduler"}
4、初始化数据库
bash tools/bin/upgrade-schema.sh5、启动dolphinscheduler
# 一键停止集群所有服务
bash ./bin/stop-all.sh

# 一键开启集群所有服务
bash ./bin/start-all.sh

# 查看日志
tail -f ./api-server/logs/dolphinscheduler-api.log

# 启停 Master
bash ./bin/dolphinscheduler-daemon.sh stop master-server
bash ./bin/dolphinscheduler-daemon.sh start master-server

# 启停 Worker
bash ./bin/dolphinscheduler-daemon.sh start worker-server
bash ./bin/dolphinscheduler-daemon.sh stop worker-server

# 启停 Api
bash ./bin/dolphinscheduler-daemon.sh start api-server
bash ./bin/dolphinscheduler-daemon.sh stop api-server

# 启停 Alert
bash ./bin/dolphinscheduler-daemon.sh start alert-server
bash ./bin/dolphinscheduler-daemon.sh stop alert-server
浏览器访问:http://127.0.0.1:12345/dolphinscheduler/ui/

用户名 admin
密码 dolphinscheduler123


 488
488

 被折叠的 条评论
为什么被折叠?
被折叠的 条评论
为什么被折叠?
 到【灌水乐园】发言


