


目录
一、前期规划
| 主机名 | IP | CPU | 内存 | 操作系统 | python | 节点 |
| node4 | 192.168.5.7 | 2核 | 4G | CentOS 7.9 | 3.6.8 | Primary |
| node5 | 192.168.5.8 | 2核 | 4G | CentOS 7.9 | 3.6.8 | Standby |
| node6 | 192.168.5.9 | 2核 | 4G | CentOS 7.9 | 3.6.8 | Standby |
二、依赖包安装
| libaio-devel | |
| readline-devel | 建议版本:7.0-13 |
| libnsl(openEuler+x86环境中) | 建议版本:2.28-36 |
同时还需要:expect和bzip2
注:每个节点都需要
1、检查安装情况
rpm -qa libaio-devel flex bison ncurses-devel glibc-devel patch lsb_release readline-devel expect bzip22、若没安装,则执行
yum install -y libaio-devel flex bison ncurses-devel glibc-devel patch lsb_release readline-devel expect bzip2三、环境配置
需在所有节点配置
1、修改操作系统参数
cat >>/etc/sysctl.conf<<EOF
net.ipv4.tcp_fin_timeout=60
net.ipv4.tcp_retries1=5
net.ipv4.tcp_syn_retries=5
EOF

# 检查
cat /etc/sysctl.conf
使其生效
sysctl -p如果有提示不存在的直接注释掉,再执行
2、关闭透明大页
# openGauss默认关闭使用transparent_hugepage服务,并将关闭命令写入操作系统启动文件
cat >> /etc/rc.d/rc.local<<EOF
if test -f /sys/kernel/mm/transparent_hugepage/enabled;
    then
	echo never > /sys/kernel/mm/transparent_hugepage/enabled
	fi
	if test -f /sys/kernel/mm/transparent_hugepage/defrag;
    then
	echo never > /sys/kernel/mm/transparent_hugepage/defrag
	fi
EOF

# 查看是否关闭:
cat /sys/kernel/mm/transparent_hugepage/enabled
cat /sys/kernel/mm/transparent_hugepage/defrag
3、关闭防火墙
systemctl disable firewalld.service
systemctl stop firewalld.service

# 检查防火墙状态
systemctl status firewalld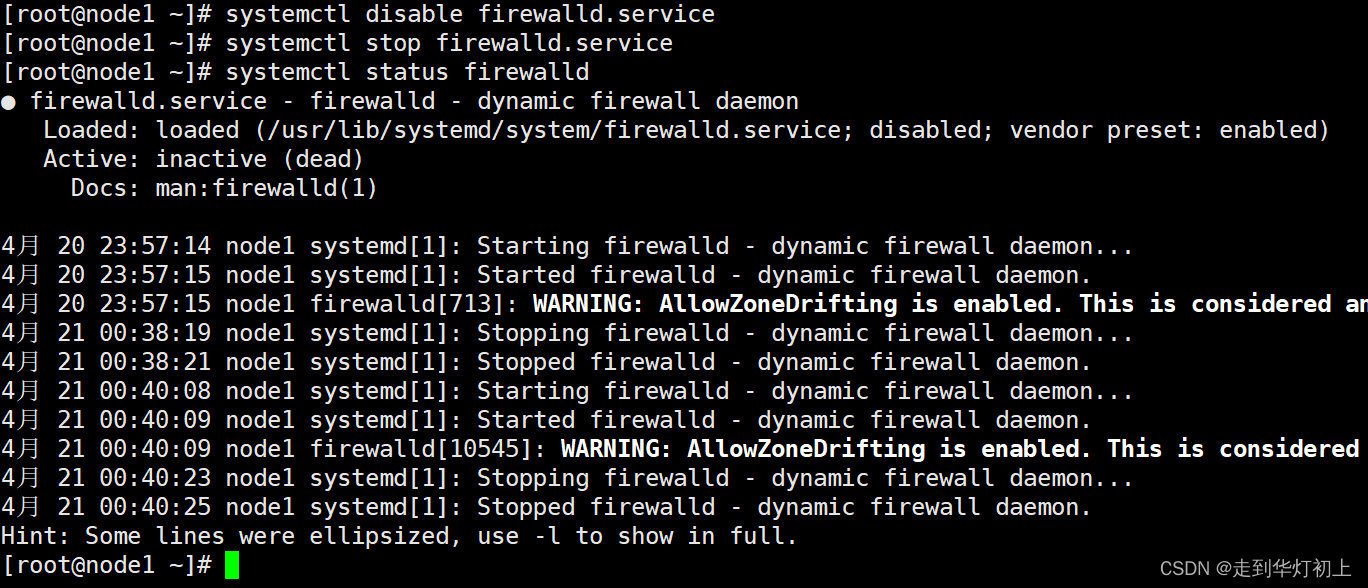
4、关闭SELINUX
sed -i 's/^SELINUX=enforcing/SELINUX=disabled/g' /etc/selinux/config

setenforce 0

# 检查
cat /etc/selinux/config | grep SELINUX
5、修改字符集
cat>> /etc/profile<<EOF
export LANG=en_US.UTF-8
EOF

source /etc/profile
# 检查
cat /etc/profile | grep LANG
6、修改时区
cp /usr/share/zoneinfo/Asia/Shanghai /etc/localtime

-- 查看
date
如果出现情况,说明时区正常,可跳过

7、关闭swap(可选)
关闭swap交换内存是为了保障数据库的访问性能,避免把数据库的缓冲区内存淘汰到磁盘上。 如果服务器内存比较小,内存过载时,可打开swap交换内存保障正常运行。
# 临时关闭
swapoff -a

# 永久关闭注释 swap 行
# vim /etc/fstab

# 查看swap一行全是 0 表示swap关闭
free -h
8、设置网卡MTU(可选)
要求数据库各节点的网卡MTU值设置为相同大小。MTU值推荐8192,要求不小于1500,使用默认值 1500 满足要求即可
# 设置网卡为1500
ifconfig 网卡名 mtu 8192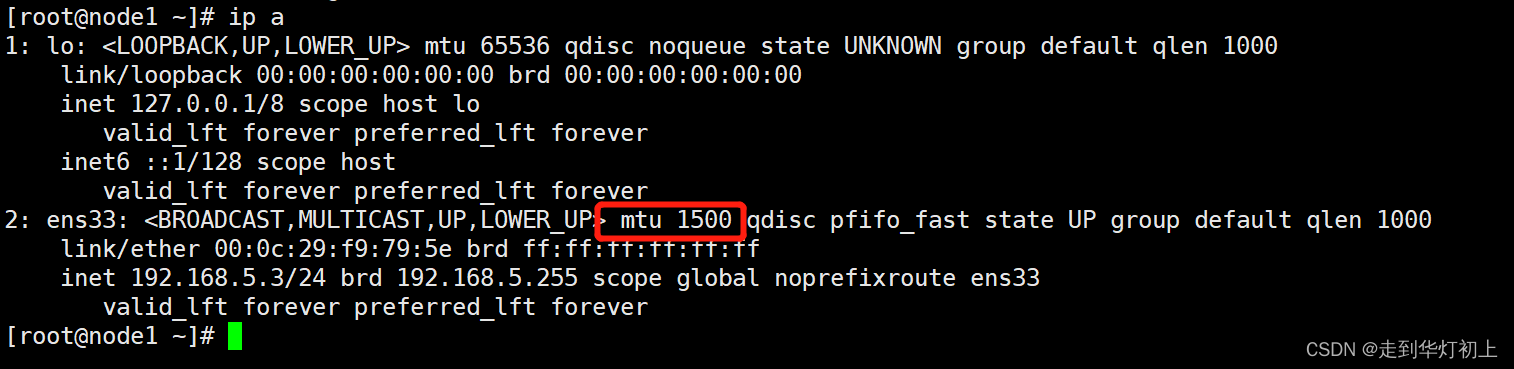 9、设置root用户远程登录
cat >>/etc/ssh/sshd_config<<EOF
PermitRootLogin yes
EOF

# 检查
cat /etc/ssh/sshd_config |grep PermitRootLogin
10、修改Banner配置
cat >>/etc/ssh/sshd_config<<EOF
Banner none
EOF
# 检查
cat /etc/ssh/sshd_config | grep Banner
# 重启生效
systemctl restart sshd.service
11、修改DNS
IP为网关IP,需要根据实际情况填写
# 节点一
cat >>/etc/resolv.conf<<EOF
nameserver 192.168.5.2
EOF

# 检查
cat /etc/resolv.conf
12、修改主机名和hosts(各节点按实际填写hostname,可选)
# 主机名修改
cat > /etc/hostname<<EOF
node4
EOF


# 检查
cat /etc/hostname

cat > /etc/hosts<<EOF
192.168.5.7 node4
192.168.5.8 node5
192.168.5.9 node6
EOF

# 检查
cat /etc/hosts
四、安装前准备
以下主节点执行
1、创建目录
# 创建存放安装包的目录
mkdir -p /opt/software/openGauss
chmod 755 -R /opt/software

# 创建数据库软件相关目录
mkdir -p /opt/openGauss
chmod -R 755 /opt/openGauss
2、下载安装包

或者直接命令行执行
wget https://opengauss.obs.cn-south-1.myhuaweicloud.com/5.0.0/x86/openGauss-5.0.0-CentOS-64bit-all.tar.gz3、解压安装包
# 将下载的安装包移到安装目录
mv openGauss-5.0.0-CentOS-64bit-all.tar.gz /opt/software/openGauss/
cd /opt/software/openGauss
tar -zxvf openGauss-5.0.0-CentOS-64bit-all.tar.gz
tar -zxvf openGauss-5.0.0-CentOS-64bit-om.tar.gz
4、修改xml配置文件
# cp script/gspylib/etc/conf/cluster_config_template.xml /opt/software/openGauss/cluster_config.xml

vi /opt/software/openGauss/cluster_config.xml主从节点配置主要区别在于xml配置文件,其他主从配置可参考:XML配置
<?xml version="1.0" encoding="UTF-8"?>
<ROOT>
    <!-- openGauss整体信息 -->
    <CLUSTER>
        <PARAM name="clusterName" value="gauss_cluster" />
        <PARAM name="nodeNames" value="node4,node5,node6" />

        <PARAM name="gaussdbAppPath" value="/opt/opengauss/app" />
        <PARAM name="gaussdbLogPath" value="/opt/opengauss/log/omm" />
        <PARAM name="tmpMppdbPath" value="/opt/opengauss/tmp"/>
        <PARAM name="gaussdbToolPath" value="/opt/opengauss/om" />
        <PARAM name="corePath" value="/opt/opengauss/corefile"/>
        <PARAM name="backIp1s" value="192.168.5.7,192.168.5.8,192.168.5.9"/>

    </CLUSTER>
    <!-- 每台服务器上的节点部署信息 -->
    <DEVICELIST>
        <!-- node1上的节点部署信息 -->
        <DEVICE sn="node4">
            <PARAM name="name" value="node4"/>
            <PARAM name="azName" value="AZ1"/>
            <PARAM name="azPriority" value="1"/>
            <!-- 如果服务器只有一个网卡可用,将backIP1和sshIP1配置成同一个IP -->
            <PARAM name="backIp1" value="192.168.5.7"/>
            <PARAM name="sshIp1" value="192.168.5.7"/>
            <!--CM节点部署信息-->
            <PARAM name="cmsNum" value="1"/>
            <PARAM name="cmServerPortBase" value="15000"/>
            <PARAM name="cmServerListenIp1" value="192.168.5.7,192.168.5.8,192.168.5.9"/>
            <PARAM name="cmServerHaIp1" value="192.168.5.7,192.168.5.8,192.168.5.9"/>
            <PARAM name="cmServerlevel" value="1"/>
            <PARAM name="cmServerRelation" value="node4,node5,node6"/>
            <PARAM name="cmDir" value="/opt/opengauss/data/cmserver"/>
	    <!--dn-->
            <PARAM name="dataNum" value="1"/>
	    <PARAM name="dataPortBase" value="15400"/>
	    <PARAM name="dataNode1" value="/opt/opengauss/data/dn,node5,/opt/opengauss/data/dn,node6,/opt/opengauss/data/dn"/>
            <PARAM name="dataNode1_syncNum" value="0"/>
        </DEVICE>

        <!-- node2上的节点部署信息,其中“name”的值配置为主机名称 -->
        <DEVICE sn="node5">
            <PARAM name="name" value="node5"/>
            <PARAM name="azName" value="AZ1"/>
            <PARAM name="azPriority" value="1"/>
            <!-- 如果服务器只有一个网卡可用,将backIP1和sshIP1配置成同一个IP -->
            <PARAM name="backIp1" value="192.168.5.8"/>
            <PARAM name="sshIp1" value="192.168.5.8"/>
            <!-- cm -->
            <PARAM name="cmServerPortStandby" value="15000"/>
            <PARAM name="cmDir" value="/opt/opengauss/data/cmserver"/>
	</DEVICE>

        <!-- node3上的节点部署信息,其中“name”的值配置为主机名称 -->
        <DEVICE sn="node6">
            <PARAM name="name" value="node6"/>
            <PARAM name="azName" value="AZ1"/>
            <PARAM name="azPriority" value="1"/>
            <!-- 如果服务器只有一个网卡可用,将backIP1和sshIP1配置成同一个IP -->
            <PARAM name="backIp1" value="192.168.5.9"/>
            <PARAM name="sshIp1" value="192.168.5.9"/>
            <!-- cm -->
            <PARAM name="cmServerPortStandby" value="15000"/>
            <PARAM name="cmDir" value="/opt/opengauss/data/cmserver"/>
	</DEVICE>
    </DEVICELIST>
</ROOT>
五、预安装
1、执行预安装
注:各节点需要设置互信或者root账号密码一样,否则预安装密码验证不通过
/opt/software/openGauss/script/gs_preinstall -U omm -G dbgrp -X /opt/software/openGauss/cluster_config.xml[root@node4 openGauss]# /opt/software/openGauss/script/gs_preinstall -U omm -G dbgrp -X /opt/software/openGauss/cluster_config.xml
Parsing the configuration file.
Successfully parsed the configuration file.
Installing the tools on the local node.
Successfully installed the tools on the local node.
Are you sure you want to create trust for root (yes/no)?yes
Please enter password for root
Password:
Successfully created SSH trust for the root permission user.
Setting host ip env
Successfully set host ip env.
Distributing package.
Begin to distribute package to tool path.
Successfully distribute package to tool path.
Begin to distribute package to package path.
Successfully distribute package to package path.
Successfully distributed package.
Are you sure you want to create the user[omm] and create trust for it (yes/no)? yes
Please enter password for cluster user.
Password:
Please enter password for cluster user again.
Password:
Generate cluster user password files successfully.
Successfully created [omm] user on all nodes.
Preparing SSH service.
Successfully prepared SSH service.
Installing the tools in the cluster.
Successfully installed the tools in the cluster.
Checking hostname mapping.
Successfully checked hostname mapping.
Creating SSH trust for [omm] user.
Please enter password for current user[omm].
Password:
Checking network information.
All nodes in the network are Normal.
Successfully checked network information.
Creating SSH trust.
Creating the local key file.
Successfully created the local key files.
Appending local ID to authorized_keys.
Successfully appended local ID to authorized_keys.
Updating the known_hosts file.
Successfully updated the known_hosts file.
Appending authorized_key on the remote node.
Successfully appended authorized_key on all remote node.
Checking common authentication file content.
Successfully checked common authentication content.
Distributing SSH trust file to all node.
Distributing trust keys file to all node successfully.
Successfully distributed SSH trust file to all node.
Verifying SSH trust on all hosts.
Successfully verified SSH trust on all hosts.
Successfully created SSH trust.
Successfully created SSH trust for [omm] user.
Checking OS software.
Successfully check os software.
Checking OS version.
Successfully checked OS version.
Creating cluster's path.
Successfully created cluster's path.
Set and check OS parameter.
Setting OS parameters.
Successfully set OS parameters.
Warning: Installation environment contains some warning messages.
Please get more details by "/opt/software/openGauss/script/gs_checkos -i A -h node4,node5,node6 --detail".
Set and check OS parameter completed.
Preparing CRON service.
Successfully prepared CRON service.
Setting user environmental variables.
Successfully set user environmental variables.
Setting the dynamic link library.
Successfully set the dynamic link library.
Setting Core file
Successfully set core path.
Setting pssh path
Successfully set pssh path.
Setting Cgroup.
Successfully set Cgroup.
Set ARM Optimization.
No need to set ARM Optimization.
Fixing server package owner.
Setting finish flag.
Successfully set finish flag.
Preinstallation succeeded.
2、查看预安装结果
/opt/software/openGauss/script/gs_checkos -i A -h node4,node5,node6 --detail[root@node4 ~]# /opt/software/openGauss/script/gs_checkos -i A -h node4,node5,node6 --detail
Checking items:
A1. [ OS version status ] : Normal
[node4]
centos_7.9.2009_64bit
[node6]
centos_7.9.2009_64bit
[node5]
centos_7.9.2009_64bit
A2. [ Kernel version status ] : Normal
The names about all kernel versions are same. The value is "3.10.0-1160.el7.x86_64".
A3. [ Unicode status ] : Normal
The values of all unicode are same. The value is "LANG=en_US.UTF-8".
A4. [ Time zone status ] : Normal
The informations about all timezones are same. The value is "+0800".
A5. [ Swap memory status ] : Normal
The value about swap memory is correct.
A6. [ System control parameters status ] : Normal
All values about system control parameters are correct.
A7. [ File system configuration status ] : Normal
Both soft nofile and hard nofile are correct.
A8. [ Disk configuration status ] : Normal
The value about XFS mount parameters is correct.
A9. [ Pre-read block size status ] : Normal
The value about Logical block size is correct.
A11.[ Network card configuration status ] : Warning
[node4]
BondMode Null
Warning reason: network 'ens33' 'mtu' RealValue '1500' ExpectedValue '8192'
[node6]
BondMode Null
Warning reason: network 'ens33' 'mtu' RealValue '1500' ExpectedValue '8192'
[node5]
BondMode Null
Warning reason: network 'ens33' 'mtu' RealValue '1500' ExpectedValue '8192'
A12.[ Time consistency status ] : Warning
[node4]
The NTPD not detected on machine and local time is "2023-05-16 22:37:26".
[node6]
The NTPD not detected on machine and local time is "2023-05-16 22:37:26".
[node5]
The NTPD not detected on machine and local time is "2023-05-16 22:37:26".
A13.[ Firewall service status ] : Normal
The firewall service is stopped.
A14.[ THP service status ] : Normal
The THP service is stopped.
Total numbers:13. Abnormal numbers:0. Warning numbers:2.六、安装
1、切换到omm用户
su omm2、执行安装
注:数据库初始账号omm,密码要求:
最少包含8个字符,最多包含16个字符。
不能和用户名、当前密码(ALTER)、或当前密码反序相同。
至少包含大写字母(A-Z)、小写字母(a-z)、数字、非字母数字字符(限定为~!@#$%^&*()-_=+\|[{}];:,<.>/?)四类字符中的三类字符
gs_install -X /opt/software/openGauss/cluster_config.xml
[omm@node4 ~]$ gs_install -X /opt/software/openGauss/cluster_config.xml
Parsing the configuration file.
Check preinstall on every node.
Successfully checked preinstall on every node.
Creating the backup directory.
Successfully created the backup directory.
begin deploy..
Installing the cluster.
begin prepare Install Cluster..
Checking the installation environment on all nodes.
begin install Cluster..
Installing applications on all nodes.
Successfully installed APP.
begin init Instance..
encrypt cipher and rand files for database.
Please enter password for database:
Please repeat for database:
begin to create CA cert files
The sslcert will be generated in /opt/opengauss/app/share/sslcert/om
Create CA files for cm beginning.
Create CA files on directory [/opt/opengauss/app_a07d57c3/share/sslcert/cm]. file list: ['cacert.pem', 'server.key', 'server.crt', 'client.key', 'client.crt', 'server.key.cipher', 'server.key.rand', 'client.key.cipher', 'client.key.rand']
Non-dss_ssl_enable, no need to create CA for DSS
Cluster installation is completed.
Configuring.
Deleting instances from all nodes.
Successfully deleted instances from all nodes.
Checking node configuration on all nodes.
Initializing instances on all nodes.
Updating instance configuration on all nodes.
Check consistence of memCheck and coresCheck on database nodes.
Successful check consistence of memCheck and coresCheck on all nodes.
Configuring pg_hba on all nodes.
Configuration is completed.
Starting cluster.
======================================================================
Successfully started primary instance. Wait for standby instance.
======================================================================
.
Successfully started cluster.
======================================================================
cluster_state      : Normal
redistributing     : No
node_count         : 3
Datanode State
    primary           : 1
    standby           : 2
    secondary         : 0
    cascade_standby   : 0
    building          : 0
    abnormal          : 0
    down              : 0

Successfully installed application.
end deploy..
3、安装验证
gs_om -t status --detail[omm@node4 ~]$ gs_om -t status --detail
[ CMServer State ]
node node_ip instance state
----------------------------------------------------------------------------
1 node4 192.168.5.7 1 /opt/opengauss/data/cmserver/cm_server Primary
2 node5 192.168.5.8 2 /opt/opengauss/data/cmserver/cm_server Standby
3 node6 192.168.5.9 3 /opt/opengauss/data/cmserver/cm_server Standby
[ Cluster State ]
cluster_state : Normal
redistributing : No
balanced : Yes
current_az : AZ_ALL
[ Datanode State ]
node node_ip instance state
----------------------------------------------------------------------
1 node4 192.168.5.7 6001 /opt/opengauss/data/dn P Primary Normal
2 node5 192.168.5.8 6002 /opt/opengauss/data/dn S Standby Normal
3 node6 192.168.5.9 6003 /opt/opengauss/data/dn S Standby Normal# 登录数据库
gsql -d postgres -p 15400
# 查看数据库版本
select version();[omm@node4 ~]$ gsql -d postgres -p 15400
gsql ((openGauss 5.0.0 build a07d57c3) compiled at 2023-03-29 03:07:56 commit 0 last mr )
Non-SSL connection (SSL connection is recommended when requiring high-security)
Type "help" for help.
openGauss=# select version();
version
------------------------------------------------------------------------------------------------------------------------------------------------------
(openGauss 5.0.0 build a07d57c3) compiled at 2023-03-29 03:07:56 commit 0 last mr on x86_64-unknown-linux-gnu, compiled by g++ (GCC) 7.3.0, 64-bit
(1 row)
openGauss=# show synchronous_commit;
synchronous_commit
--------------------
off
(1 row)


 698
698


 被折叠的 条评论
为什么被折叠?
被折叠的 条评论
为什么被折叠?
 到【灌水乐园】发言


