Hadoop Map,Reducer 输出压缩

Hadoop Map,Reducer 输出压缩

1 压缩位置的选择

在这里插入图片描述

1.1 压缩参数配置

  • Hadoop 引入了编码/解码器
    在这里插入图片描述

2 Map,Reducer 输出端采用压缩

MapReduce 的输入输出文件都是未压缩的文件,Hadoop可以对 Map 任务的中间结果输出做压缩,因为它要写在硬盘并且通过网络传输到 Reduce 节点,对其压缩可以提高很多性能,这些工作只要设置两个属性即可,Reduce输出压缩根据实际的需求场景判断, 我们来看下代码怎么设置

2.1 code

  • Driver
import org.apache.hadoop.conf.Configuration;
import org.apache.hadoop.fs.Path;
import org.apache.hadoop.io.IntWritable;
import org.apache.hadoop.io.Text;
import org.apache.hadoop.io.compress.BZip2Codec;
import org.apache.hadoop.io.compress.CompressionCodec;
import org.apache.hadoop.mapreduce.Job;
import org.apache.hadoop.mapreduce.lib.input.FileInputFormat;
import org.apache.hadoop.mapreduce.lib.output.FileOutputFormat;

public class WordCountDriver {

    public static void main(String[] args) throws Exception {
        // 1 获取配置信息以及获取 job 对象
        Configuration conf = new Configuration();
        // 开启 map 端输出压缩
        conf.setBoolean("mapreduce.map.output.compress", true);
        // 设置 map 端输出压缩方式
        conf.setClass("mapreduce.map.output.compress.codec", BZip2Codec.class, CompressionCodec.class);
        Job job = Job.getInstance(conf);
        // 2 关联本 Driver 程序的 jar
        job.setJarByClass(WordCountDriver.class);
        // 3 关联 Mapper 和 Reducer 的 jar
        job.setMapperClass(WordCountMapper.class);
        job.setReducerClass(WordCountReducer.class);
        // 4 设置 Mapper 输出的 kv 类型
        job.setMapOutputKeyClass(Text.class);
        job.setMapOutputValueClass(IntWritable.class);
        // 5 设置最终输出 kv 类型
        job.setOutputKeyClass(Text.class);
        job.setOutputValueClass(IntWritable.class);
        // 6 设置输入和输出路径
        FileInputFormat.setInputPaths(job, new Path("D:\\xxx\\input.txt"));
        FileOutputFormat.setOutputPath(job, new Path("D:\\xxx\\out"));
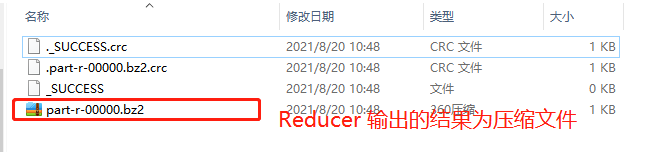
        // 设置 reduce 端输出压缩开启
        FileOutputFormat.setCompressOutput(job, true);
        // 设置压缩的方式
        FileOutputFormat.setOutputCompressorClass(job, BZip2Codec.class);
        // FileOutputFormat.setOutputCompressorClass(job, GzipCodec.class);
        // FileOutputForm
        // 7 提交 job
        boolean result = job.waitForCompletion(true);
        System.exit(result ? 0 : 1);
    }
}
  • Mapper
import org.apache.hadoop.io.IntWritable;
import org.apache.hadoop.io.LongWritable;
import org.apache.hadoop.io.Text;
import org.apache.hadoop.mapreduce.Mapper;

import java.io.IOException;

public class WordCountMapper extends Mapper<LongWritable, Text, Text, IntWritable> {

    Text k = new Text();
    IntWritable v = new IntWritable(1);

    @Override
    protected void map(LongWritable key, Text value, Context context) throws IOException, InterruptedException {
        // 1 获取一行
        String line = value.toString();
        // 2 切割
        String[] words = line.split(",");
        // 3 输出
        for (String word : words) {
            k.set(word);
            context.write(k, v);
        }
    }
}
  • Reducer

import org.apache.hadoop.io.IntWritable;
import org.apache.hadoop.io.Text;
import org.apache.hadoop.mapreduce.Reducer;

import java.io.IOException;

public class WordCountReducer extends Reducer<Text, IntWritable, Text, IntWritable> {

    int sum;
    IntWritable v = new IntWritable();

    @Override
    protected void reduce(Text key, Iterable<IntWritable> values, Context
            context) throws IOException, InterruptedException {
        // 1 累加求和
        sum = 0;
        for (IntWritable count : values) {
            sum += count.get();
        }
        // 2 输出
        v.set(sum);
        context.write(key, v);
    }

}

在这里插入图片描述

  • 0
    点赞
  • 0
    收藏
    觉得还不错? 一键收藏
  • 0
    评论
伪分布式搭建 Hadoop 可以在一台机器上运行 Hadoop,但是每个组件都运行在不同的端口上,以模拟一个多节点的分布式环境。下面是伪分布式 Hadoop 的搭建步骤: 1. 安装 Java Hadoop 是用 Java 编写的,需要先安装 Java。可以通过命令 `java -version` 查看是否已经安装 Java。如果没有,可以通过以下命令安装: ``` sudo apt-get update sudo apt-get install openjdk-8-jdk ``` 2. 安装 Hadoop 下载 Hadoop 并解压缩: ``` wget https://downloads.apache.org/hadoop/common/hadoop-3.3.1/hadoop-3.3.1.tar.gz tar -xzvf hadoop-3.3.1.tar.gz ``` 将 Hadoop 移动到 `/usr/local` 目录下: ``` sudo mv hadoop-3.3.1 /usr/local/hadoop ``` 3. 配置 Hadoop 进入 Hadoop 的配置目录: ``` cd /usr/local/hadoop/etc/hadoop ``` 配置 Hadoop 的环境变量,在 `hadoop-env.sh` 文件中添加以下代码: ``` export JAVA_HOME=/usr/lib/jvm/java-8-openjdk-amd64 export HADOOP_HOME=/usr/local/hadoop export PATH=$PATH:$HADOOP_HOME/bin ``` 配置 Hadoop 的核心配置文件 `core-site.xml`,在 `configuration` 标签中添加以下内容: ``` <property> <name>fs.defaultFS</name> <value>hdfs://localhost:9000</value> </property> ``` 配置 Hadoop 的 HDFS 文件系统,创建 `hdfs-site.xml` 文件并添加以下内容: ``` <property> <name>dfs.replication</name> <value>1</value> </property> ``` 配置 Hadoop 的 YARN 资源管理系统,创建 `yarn-site.xml` 文件并添加以下内容: ``` <property> <name>yarn.nodemanager.aux-services</name> <value>mapreduce_shuffle</value> </property> <property> <name>yarn.nodemanager.auxservices.mapreduce.shuffle.class</name> <value>org.apache.hadoop.mapred.ShuffleHandler</value> </property> ``` 配置 HadoopMapReduce 分布式计算框架,创建 `mapred-site.xml` 文件并添加以下内容: ``` <property> <name>mapreduce.framework.name</name> <value>yarn</value> </property> ``` 4. 启动 Hadoop 格式化 HDFS 文件系统: ``` hdfs namenode -format ``` 启动 Hadoop: ``` start-all.sh ``` 查看 Hadoop 是否成功启动: ``` jps ``` 如果成功启动,会看到以下进程: ``` 2325 Jps 2114 ResourceManager 1937 DataNode 2022 NodeManager 1825 NameNode 2185 JobHistoryServer ``` 现在,就可以通过浏览器访问 Hadoop 的 Web 界面了,地址为 `http://localhost:9870`。 5. 执行 MapReduce 任务 在 Hadoop 的安装目录下创建一个输入文件: ``` echo "Hello World" > input.txt ``` 将该文件上传到 HDFS 文件系统中: ``` hdfs dfs -put input.txt /input ``` 在 Hadoop 的安装目录下创建一个 MapReduce 程序: ``` mkdir wordcount cd wordcount ``` 创建一个名为 `WordCount.java` 的文件,并添加以下代码: ```java import java.io.IOException; import java.util.StringTokenizer; import org.apache.hadoop.conf.Configuration; import org.apache.hadoop.fs.Path; import org.apache.hadoop.io.IntWritable; import org.apache.hadoop.io.Text; import org.apache.hadoop.mapreduce.Job; import org.apache.hadoop.mapreduce.Mapper; import org.apache.hadoop.mapreduce.Reducer; import org.apache.hadoop.mapreduce.lib.input.FileInputFormat; import org.apache.hadoop.mapreduce.lib.output.FileOutputFormat; public class WordCount { public static class TokenizerMapper extends Mapper<Object, Text, Text, IntWritable>{ private final static IntWritable one = new IntWritable(1); private Text word = new Text(); public void map(Object key, Text value, Context context ) throws IOException, InterruptedException { StringTokenizer itr = new StringTokenizer(value.toString()); while (itr.hasMoreTokens()) { word.set(itr.nextToken()); context.write(word, one); } } } public static class IntSumReducer extends Reducer<Text,IntWritable,Text,IntWritable> { private IntWritable result = new IntWritable(); public void reduce(Text key, Iterable<IntWritable> values, Context context ) throws IOException, InterruptedException { int sum = 0; for (IntWritable val : values) { sum += val.get(); } result.set(sum); context.write(key, result); } } public static void main(String[] args) throws Exception { Configuration conf = new Configuration(); Job job = Job.getInstance(conf, "word count"); job.setJarByClass(WordCount.class); job.setMapperClass(TokenizerMapper.class); job.setCombinerClass(IntSumReducer.class); job.setReducerClass(IntSumReducer.class); job.setOutputKeyClass(Text.class); job.setOutputValueClass(IntWritable.class); FileInputFormat.addInputPath(job, new Path("hdfs://localhost:9000/input/")); FileOutputFormat.setOutputPath(job, new Path("hdfs://localhost:9000/output/")); System.exit(job.waitForCompletion(true) ? 0 : 1); } } ``` 编译这个程序: ``` export HADOOP_CLASSPATH=$(hadoop classpath) javac -classpath ${HADOOP_CLASSPATH} -d . WordCount.java ``` 打包这个程序: ``` jar cf wc.jar WordCount*.class ``` 执行这个程序: ``` hadoop jar wc.jar WordCount /input /output ``` 查看输出结果: ``` hdfs dfs -cat /output/* ``` 以上就是伪分布式 Hadoop 的搭建和运行 MapReduce 任务的步骤。

“相关推荐”对你有帮助么?

  • 非常没帮助
  • 没帮助
  • 一般
  • 有帮助
  • 非常有帮助
提交
评论
添加红包

请填写红包祝福语或标题

红包个数最小为10个

红包金额最低5元

当前余额3.43前往充值 >
需支付:10.00
成就一亿技术人!
领取后你会自动成为博主和红包主的粉丝 规则
hope_wisdom
发出的红包
实付
使用余额支付
点击重新获取
扫码支付
钱包余额 0

抵扣说明:

1.余额是钱包充值的虚拟货币,按照1:1的比例进行支付金额的抵扣。
2.余额无法直接购买下载,可以购买VIP、付费专栏及课程。

余额充值