


文章目录
一、使用 gunicorn 部署 python web
生产环境下,flask 自带的 服务器,无法满足性能要求。采用 gunicorn 做 wsgi容器,用来部署 python
安装 gunicorn
pip install gunicorn
gunicorn相关参数
1)-c CONFIG,–config=CONFIG
指定一个配置文件(py文件)
2)-b BIND,–bind=BIND
与指定socket进行板顶
3)-D,–daemon
后台进程方式运行gunicorn进程
4)-w WORKERS,–workers=WORKERS
工作进程的数量
5)-k WORKERCLASS,–worker-class=WORKERCLASS
工作进程类型,包括sync(默认),eventlet,gevent,tornado,gthread,gaiohttp
6)–backlog INT
最大挂起的连接数
7)–log-level LEVEL
日志输出等级
8)–access-logfile FILE
访问日志输出文件
9)–error-logfile FILE
错误日志输出文件
gunicorn的配置文件,名称为*.py
from gevent import monkey
monkey.patch_all()
from multiprocessing import cpu_count

bind = '127.0.0.1:8000'
workers = cpu_count() * 2 + 1

backlog = 2048
worker_class = "gevent"
worker_connections = 1000
daemon = False
debug = True
proc_name = 'gunicorn_demo'
pidfile = './log/gunicorn.pid'
errorlog = './log/gunicorn.log'
编写flask代码,flask-gunicorn.py代码如下
from flask import Flask
app = Flask(__name__)

@app.route("/")
def Hello():
    return "Hello world!"

if __name__ == '__main__':
    app.run()
需要注意的是要在配置文件的同层目录下创建log文件,否则运行gunicorn将报错。添加完配置内容并保存为gunicorn.conf.py文件后,也可以通过gunicorn来运行Flask应用了:
gunicorn -c gunicorn.conf.py flask-gunicorn:app
二、ubuntu安装supervisor
对于需要以进程的方式常驻在Ubuntu系统中或开机启动的脚本程序,通常使用supervisor进程管理工具进行管理。
安装
sudo apt-get install supervisor
新建进程配置
安装supervsor进程管理工具后,建议在/etc/supervisor/conf.d/文件夹中为每一个进程创建一个进程配置。
cd /etc/supervisor/conf.d/
sudo touch test.conf
[program:test]
command=/home/zh/anaconda/bin/gunicorn -c /home/work/test/gunicorn.conf.py test_services:app
directory=/home/work/test               ;项目路径
user=root
autorestart=true 		;设置自动重启
startretires=5  		;启动失败时的最多重试次数
numprocs=1                    ; 启动一个进程
autostart=true                ; 随着supervisord的启动而启动
exitcodes=0                     ; 正常退出代码
stopsignal=KILL               ; 用来杀死进程的信号
stopwaitsecs=10               ; 发送SIGKILL前的等待时间
redirect_stderr=true          ; 重定向stderr到stdout
stdout_logfile=logfile        ; 指定日志文件
保存配置文件之后,需要通过命令来更新配置文件:
supervisorctl update
启动进程
supervisorctl reload
supervisorctl start test
supervisor的基本使用命令
supervisorctl start xxx 	#启动进程
supervisorctl restart xxx  #重启进程
supervisorctl stop group #停止所有属于名为group的分组进程
supervisorctl stop all   #停止全部进程
supervisorctl reload   #载入最新配置的文件
supervisorctl update  #根据最新的配置文件,启动新配置或有改动的进程
web界面操作
需要在supervisor的配置文件里添加[inet_http_server]选项组:之后可以通过http://127.0.0.1:9001来访问控制子线程的管理。
[inet_http_server]         ; inet (TCP) server disabled by default
port=127.0.0.1:9001        ; (ip_address:port specifier, *:port for all iface)
username=user              ; (default is no username (open server))
password=123               ; (default is no password (open server))
三、ubuntu安装nginx
安装nginx
sudo apt-get install nginx
查看nginx是否安装成功
nginx -v
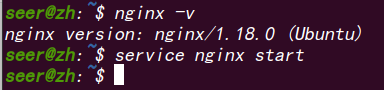
启动nginx
service nginx start

nginx文件安装完成之后的文件位置:
- /usr/sbin/nginx:主程序
- /etc/nginx:存放配置文件
- /usr/share/nginx:存放静态文件
- /var/log/nginx:存放日志
配置Nginx
和uWSGI的任意一种配置方法类似,只是在location中的配置有所不同:
server {
        listen 80;
        root /home/work/test ;
        server_name localhost;  #可以用服务器的ip当名字
        location / {
            proxy_pass http://localhost:8000/; # gunicorn绑定的端口号
            proxy_set_header x-Real-IP $remote_addr; # 请求头加入真实用户IP信息
            proxy_set_header X-Forwarded-For $proxy_add_x_forwarded_for;
            proxy_set_header Host $http_host;
            #禁用除GET|POST之外的方法
            if ($request_method !~* GET|POST) {
                return 403;
                }

        }
        # 配置static的静态文件:
        location ~ ^\/static\/.*$ {
            root /home/work/test ;
        }
}
通过Gunicorn的Nginx配置中,我们只需要通过proxy_pass参数反向代理给运行在http://localhost:8000/上的Gunicorn
四、在日志中加入用户真实的访问IP
通过Nginx负载均衡的情况下,gunicorn的log中记录的访问访问日志并不是用户的IP,而是Nginx主机的IP。
Ngin配置文件中添加
proxy_set_header X-Real-IP $remote_addr;
Gunicorn配置文件中添加
在access_log_format中添加配置,返回真实的访问IP:
%(h)s %(l)s %(u)s %(t)s "%(r)s" %(s)s %(b)s "%(f)s" "%(a)s" "%({X-Real-IP}i)s"
最后的"%({X-Real-IP}i)s"是在日志中加入用户真实的访问IP
默认访问日志格式由access_log_format配置


 297
297


 被折叠的 条评论
为什么被折叠?
被折叠的 条评论
为什么被折叠?
 到【灌水乐园】发言


