


YOLOX系列二
tools/demo.py代码详解
文章目录
- YOLOX系列二
- 前言
- 一、代码详解
- 1.网络参数设置,pycharm直接运行demo.py
- 1.# 获取图片(文件夹中所有图片)get_image_list(path)
- 2.预测参数初始化Predictor(object)
- 3.图片(帧)检测 inference(self, img)
- 4. visual(self, output, img_info, cls_conf=0.35)
- 5. image_demo(predictor, vis_folder, path, current_time, save_result)
- 6.imageflow_demo(predictor, vis_folder, current_time, args)
- 7.main(exp, args)
- 8.main()函数
- 总结
前言
本文主要对demo.py中的代码进行解释。
一、代码详解
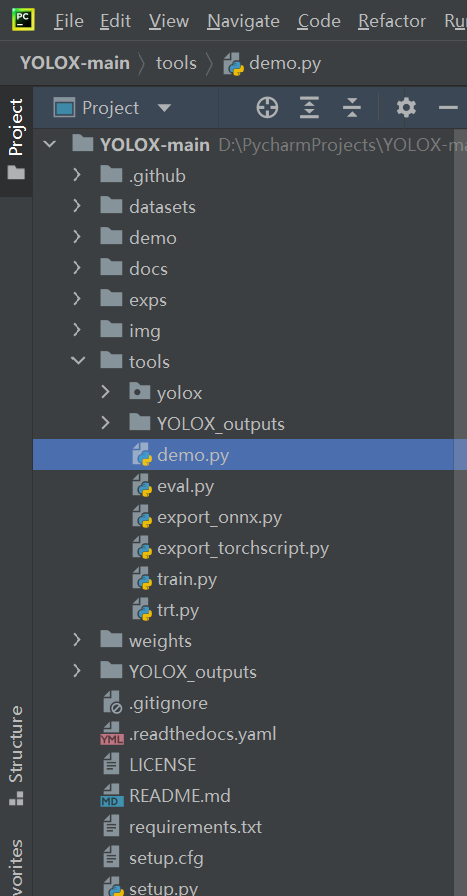
1.网络参数设置,pycharm直接运行demo.py
项目目录结构
# 网络参数设置
def make_parser():
    parser = argparse.ArgumentParser("YOLOX Demo!")
    parser.add_argument(                                                         # 检测对象类型
        "--demo", default="image", help="demo type, eg. image, video and webcam"
    )
    parser.add_argument("-expn", "--experiment-name", type=str, default=None)
    parser.add_argument("-n", "--name", type=str, default=None, help="model name")

    parser.add_argument(                                                       #检测对象路径
        "--path", default="../img", help="path to images or video"
    )
    parser.add_argument("--camid", type=int, default=0, help="webcam demo camera id")
    parser.add_argument(
        "--save_result",
        default="true",
        # action="store_true",
        help="whether to save the inference result of image/video",
    )

    # exp file
    parser.add_argument(                # 模型文件py路径
        "-f",
        "--exp_file",
        default="../exps/default/yolox_x.py",
        type=str,
        help="pls input your experiment description file",
    )
    parser.add_argument("-c", "--ckpt", default="../weights/yolox_x.pth", type=str, help="ckpt for eval")   #权重路径
    parser.add_argument(
        "--device",
        default="cpu",
        type=str,
        help="device to run our model, can either be cpu or gpu",
    )
    parser.add_argument("--conf", default=0.3, type=float, help="test conf")            #conf
    parser.add_argument("--nms", default=0.45, type=float, help="test nms threshold")    #nms
    parser.add_argument("--tsize", default=640, type=int, help="test img size")        #图片尺寸
    parser.add_argument(
        "--fp16",
        dest="fp16",
        default=False,
        action="store_true",
        help="Adopting mix precision evaluating.",
    )
    parser.add_argument(
        "--legacy",
        dest="legacy",
        default=False,
        action="store_true",
        help="To be compatible with older versions",
    )
    parser.add_argument(
        "--fuse",
        dest="fuse",
        default=False,
        action="store_true",
        help="Fuse conv and bn for testing.",
    )
    parser.add_argument(
        "--trt",
        dest="trt",
        default=False,
        action="store_true",
        help="Using TensorRT model for testing.",
    )
    return parser
通过在py文件中进行参数设置,也可以直接对demo.py进行运行,而不需要通过在命令行输入的方式运行demo.py。
--demo 用于设置检测对象类型,image, video, webcam
--path 检测对象路径,如果为文件夹,则对文件夹下所有复合条件的对象都进行检测
                    如果为单个图片,则只检测该图片
--save_result 设置为default='true' ,表示默认保存检测结果
-f     设置使用的模型,如yolox_x
-c     对应模型的权重路径
--device cpu还是gpu
--conf  置信度
--nms   NMS
--tsize 网络输入大小
其余参数设置默认即可,不需要修改
1.# 获取图片(文件夹中所有图片)get_image_list(path)
def get_image_list(path):
    image_names = []
    for maindir, subdir, file_name_list in os.walk(path):
        for filename in file_name_list:
            apath = os.path.join(maindir, filename)
            ext = os.path.splitext(apath)[1]
            if ext in IMAGE_EXT:
                image_names.append(apath)
    return image_names
get_image_list(path)函数用于获取网络输入,返回值为输入路径下(path)图片的数组。
在image_demo(predictor, vis_folder, path, current_time, save_result)函数中被调用。
2.预测参数初始化Predictor(object)
# 预测参数
class Predictor(object):
    def __init__(
        self,
        model,
        exp,
        cls_names=COCO_CLASSES,
        trt_file=None,
        decoder=None,
        device="cpu",
        fp16=False,
        legacy=False,
    ):
        self.model = model
        self.cls_names = cls_names
        self.decoder = decoder
        self.num_classes = exp.num_classes
        self.confthre = exp.test_conf
        self.nmsthre = exp.nmsthre
        self.test_size = exp.test_size
        self.device = device
        self.fp16 = fp16
        self.preproc = ValTransform(legacy=legacy)
        if trt_file is not None:
            from torch2trt import TRTModule

            model_trt = TRTModule()
            model_trt.load_state_dict(torch.load(trt_file))

            x = torch.ones(1, 3, exp.test_size[0], exp.test_size[1]).cuda()
            self.model(x)
            self.model = model_trt
3.图片(帧)检测 inference(self, img)
    def inference(self, img):
        '''
        图片检测
        Args:
            img: 待检测视频帧

        Returns:
            outputs:检测结果
            img_info:id,file_name,height,weight,raw_img,ratio(--tsize长比上img长或者--tsize宽比上img宽的最小值)

        '''

        img_info = {"id": 0}
        if isinstance(img, str):
            img_info["file_name"] = os.path.basename(img)
            img = cv2.imread(img)
        else:
            img_info["file_name"] = None

        height, width = img.shape[:2]
        img_info["height"] = height
        img_info["width"] = width
        img_info["raw_img"] = img

        ratio = min(self.test_size[0] / img.shape[0], self.test_size[1] / img.shape[1])
        img_info["ratio"] = ratio

        img, _ = self.preproc(img, None, self.test_size)
        img = torch.from_numpy(img).unsqueeze(0)
        img = img.float()
        if self.device == "gpu":
            img = img.cuda()
            if self.fp16:
                img = img.half()  # to FP16

        with torch.no_grad():
            t0 = time.time()
            outputs = self.model(img)       # 加载模型进行预测
            if self.decoder is not None:
                outputs = self.decoder(outputs, dtype=outputs.type())
            outputs = postprocess(
                outputs, self.num_classes, self.confthre,
                self.nmsthre, class_agnostic=True
            )
            logger.info("Infer time: {:.4f}s".format(time.time() - t0))
        return outputs, img_info
outputs为一个tensor,也可以理解为二维数组。
4. visual(self, output, img_info, cls_conf=0.35)
    def visual(self, output, img_info, cls_conf=0.35):
        '''

        Args:
            output: 图片检测结果
            img_info: 图片信息
            cls_conf: 置信度

        Returns:
            vis_res:处理完后的图片(画框等等)

        '''
        ratio = img_info["ratio"]
        img = img_info["raw_img"]
        if output is None:
            return img
        output = output.cpu()

        bboxes = output[:, 0:4]    #预测框坐标

        # preprocessing: resize, 获取原始图片中检测框尺寸
        bboxes /= ratio

        cls = output[:, 6]        # 类别
        scores = output[:, 4] * output[:, 5]  # 得分

        vis_res = vis(img, bboxes, scores, cls, cls_conf, self.cls_names)
        return vis_res
visual(self, output, img_info, cls_conf=0.35)用于将预测结果可视化到图片上,其中引用了vis(img, bboxes, scores, cls, cls_conf, self.cls_names)函数,在tools/yolox/utils/visualize.py中:
def vis(img, boxes, scores, cls_ids, conf=0.5, class_names=None):

    for i in range(len(boxes)):                                                          # 遍历检测结果
        box = boxes[i]
        cls_id = int(cls_ids[i])
        score = scores[i]
        if score < conf:
            continue
        x0 = int(box[0])
        y0 = int(box[1])
        x1 = int(box[2])
        y1 = int(box[3])

        color = (_COLORS[cls_id] * 255).astype(np.uint8).tolist()                            # 框颜色设置
        text = '{}:{:.1f}%'.format(class_names[cls_id], score * 100)                         # 文本格式
        txt_color = (0, 0, 0) if np.mean(_COLORS[cls_id]) > 0.5 else (255, 255, 255)         # 文本颜色设置
        font = cv2.FONT_HERSHEY_SIMPLEX                                                      # 字体格式

        txt_size = cv2.getTextSize(text, font, 0.4, 1)[0]
        cv2.rectangle(img, (x0, y0), (x1, y1), color, 2)                                     # 画框

        txt_bk_color = (_COLORS[cls_id] * 255 * 0.7).astype(np.uint8).tolist()
        cv2.rectangle(
            img,
            (x0, y0 + 1),
            (x0 + txt_size[0] + 1, y0 + int(1.5*txt_size[1])),
            txt_bk_color,
            -1
        )
        cv2.putText(img, text, (x0, y0 + txt_size[1]), font, 0.4, txt_color, thickness=1)    # 图片上打印文字

    return img
5. image_demo(predictor, vis_folder, path, current_time, save_result)
# 图片检测函数
def image_demo(predictor, vis_folder, path, current_time, save_result):
    if os.path.isdir(path):
        files = get_image_list(path)          # 获取待检测图片
    else:
        files = [path]
    files.sort()
    for image_name in files:
        outputs, img_info = predictor.inference(image_name)       # 调用inference()函数进行图片预测
        result_image = predictor.visual(outputs[0], img_info, predictor.confthre)  # 预测结果可视化
        if save_result:
            save_folder = os.path.join(
                vis_folder, time.strftime("%Y_%m_%d_%H_%M_%S", current_time)   # 保存文件名
            )
            os.makedirs(save_folder, exist_ok=True)              # 创建保存文件夹
            save_file_name = os.path.join(save_folder, os.path.basename(image_name))
            logger.info("Saving detection result in {}".format(save_file_name))
            cv2.imwrite(save_file_name, result_image)   # 保存图片
        ch = cv2.waitKey(0)
        if ch == 27 or ch == ord("q") or ch == ord("Q"):
            break
image_demo()函数用于对图片进行检测:
- get_image_list()获取待检测图片
- predictor.inference()对图片进行预测
- predictor.visual() 用于预测结果可视化
- cv2.imwrite()保存图片
6.imageflow_demo(predictor, vis_folder, current_time, args)
# 视频检测函数
def imageflow_demo(predictor, vis_folder, current_time, args):
    #设置视频路径
    cap = cv2.VideoCapture(args.path if args.demo == "video" else args.camid)  # 读取视频
    width = cap.get(cv2.CAP_PROP_FRAME_WIDTH)  # float
    height = cap.get(cv2.CAP_PROP_FRAME_HEIGHT)  # float
    fps = cap.get(cv2.CAP_PROP_FPS)
    save_folder = os.path.join(                                        # 保存文件名
        vis_folder, time.strftime("%Y_%m_%d_%H_%M_%S", current_time)
    )
    os.makedirs(save_folder, exist_ok=True)                            #建立文件夹
    # 保存视频文件路径
    if args.demo == "video":
        save_path = os.path.join(save_folder, args.path.split("/")[-1])
    else:
        save_path = os.path.join(save_folder, "camera.mp4")
    logger.info(f"video save_path is {save_path}")
    vid_writer = cv2.VideoWriter(
        save_path, cv2.VideoWriter_fourcc(*"mp4v"), fps, (int(width), int(height))
    )
    # 开始检测视频帧
    '''
    outputs[]检测结果,type为tensor
    其中每个output[6]为(x1,y1,x2,y2,conf,nms,cls)
    predictor.inference 进行帧检测
    predictor.visual   进行帧的画框
    '''
    while True:
        ret_val, frame = cap.read()
        if ret_val:
            outputs, img_info = predictor.inference(frame)
            result_frame = predictor.visual(outputs[0], img_info, predictor.confthre)
            if args.save_result:
                vid_writer.write(result_frame)
            ch = cv2.waitKey(1)
            if ch == 27 or ch == ord("q") or ch == ord("Q"):
                break
        else:
            break
7.main(exp, args)
def main(exp, args):
    if not args.experiment_name:
        args.experiment_name = exp.exp_name

    file_name = os.path.join(exp.output_dir, args.experiment_name)
    os.makedirs(file_name, exist_ok=True)

    vis_folder = None
    if args.save_result:
        vis_folder = os.path.join(file_name, "vis_res")
        os.makedirs(vis_folder, exist_ok=True)

    if args.trt:
        args.device = "gpu"

    logger.info("Args: {}".format(args))

    if args.conf is not None:
        exp.test_conf = args.conf
    if args.nms is not None:
        exp.nmsthre = args.nms
    if args.tsize is not None:
        exp.test_size = (args.tsize, args.tsize)

    model = exp.get_model()
    logger.info("Model Summary: {}".format(get_model_info(model, exp.test_size)))

    if args.device == "gpu":
        model.cuda()
        if args.fp16:
            model.half()                                      # to FP16
    model.eval()

    if not args.trt:
        if args.ckpt is None:
            ckpt_file = os.path.join(file_name, "best_ckpt.pth")
        else:
            ckpt_file = args.ckpt
        logger.info("loading checkpoint")
        ckpt = torch.load(ckpt_file, map_location="cpu")
        # 加载模型权重
        model.load_state_dict(ckpt["model"])
        logger.info("loaded checkpoint done.")

    if args.fuse:
        logger.info("\tFusing model...")
        model = fuse_model(model)

    if args.trt:
        assert not args.fuse, "TensorRT model is not support model fusing!"
        trt_file = os.path.join(file_name, "model_trt.pth")
        assert os.path.exists(
            trt_file
        ), "TensorRT model is not found!\n Run python3 tools/trt.py first!"
        model.head.decode_in_inference = False
        decoder = model.head.decode_outputs
        logger.info("Using TensorRT to inference")
    else:
        trt_file = None
        decoder = None

    predictor = Predictor(model, exp, COCO_CLASSES, trt_file, decoder, args.device, args.fp16, args.legacy)
    current_time = time.localtime()

    # 检测设置
    if args.demo == "image":
        image_demo(predictor, vis_folder, args.path, current_time, args.save_result)
    elif args.demo == "video" or args.demo == "webcam":
        imageflow_demo(predictor, vis_folder, current_time, args)
- 获取网络参数
- 如果为图片使用image_demo()
- 如果为视频或者摄像头使用imageflow_demo()
8.main()函数
if __name__ == "__main__":
    args = make_parser().parse_args()
    exp = get_exp(args.exp_file, args.name)

    main(exp, args)

总结
以上就是本文要讲的内容,本文对tools/demo.py的代码进行了解析,对主要函数功能及其调用进行了解释。 若发现文章有误,欢迎指出。 有用的话点个赞吧,万分感谢!


 7万+
7万+


 被折叠的 条评论
为什么被折叠?
被折叠的 条评论
为什么被折叠?
 到【灌水乐园】发言


