


DB-GPT容器化部署流程
文章目录
DB-GPT 是一个开源的以数据库为基础的GPT实验项目,使用本地化的GPT大模型与您的数据和环境进行交互,无数据泄露风险,100% 私密,100% 安全。
项目地址:https://github.com/csunny/DB-GPT
本人使用容器化的方式部署成功,本文对本地化部署DB-GPT的过程进行梳理。
0. 资源准备
假设项目的路径为/path/to/db-gpt。
cd /path/to/db-gpt
0.1. DB-GPT项目代码
git clone https://github.com/csunny/DB-GPT.git
0.2. 模型下载
git lfs install
git clone https://huggingface.co/Tribbiani/vicuna-13b
git clone https://huggingface.co/sentence-transformers/all-MiniLM-L6-v2
# 要下载几个小时
Git-lfs(Large File Storage)是一个用于管理大文件的git插件,没安装的话要安装一下。
不然的话,先clone两个项目,再手动到上面的地址去下载有LFS标志的文件到目录中也行。
1. 制作镜像
1.1. apt加速
首先构建一个sources.list,用于apt加速。
cd DB-GPT/
vim sources.list
内容如下:
deb https://mirrors.bfsu.edu.cn/debian/ bullseye main contrib non-free
# deb-src https://mirrors.bfsu.edu.cn/debian/ bullseye main contrib non-free

deb https://mirrors.bfsu.edu.cn/debian/ bullseye-updates main contrib non-free
# deb-src https://mirrors.bfsu.edu.cn/debian/ bullseye-updates main contrib non-free

deb https://mirrors.bfsu.edu.cn/debian/ bullseye-backports main contrib non-free
# deb-src https://mirrors.bfsu.edu.cn/debian/ bullseye-backports main contrib non-free

# deb https://mirrors.bfsu.edu.cn/debian-security bullseye-security main contrib non-free
# # deb-src https://mirrors.bfsu.edu.cn/debian-security bullseye-security main contrib non-free

deb https://security.debian.org/debian-security bullseye-security main contrib non-free
# deb-src https://security.debian.org/debian-security bullseye-security main contrib non-free
1.2. 构建镜像
将项目中的dockerfile进行修改。
vim Dockerfile
内容如下(python的版本要注意,3.8和3.11亲测不行):
FROM python:3.10

WORKDIR /app

COPY . /app

COPY sources.list /etc/apt/sources.list

RUN apt-get update && apt-get install -y git vim

RUN python -m pip install --upgrade pip -i https://mirror.nju.edu.cn/pypi/web/simple
RUN pip install --no-cache-dir -r requirements.txt -i https://mirror.nju.edu.cn/pypi/web/simple

EXPOSE 8000
EXPOSE 7860
构建镜像,需要花不少时间,根据网速而定:
docker build -t db-gpt:env_py310 .
2. 启动
2.1. 启动容器
2.1.0. Mysql容器
需要依赖数据库, 没有的话接拉取官方的mysql镜像,创建容器就行。
docker run --name=mysql -p 3306:3306 -e MYSQL_ROOT_PASSWORD=aa12345678 -dit mysql:latest
2.1.1. 启动容器方式一:--link
docker run -itd --gpus all -p 17860:7860 -p 18000:8000 -v /path/to/db-gpt:/data --link mysql:mysql --name db-gpt db-gpt:env_py310
优点:可以实现端口映射,便于管理端口。
缺点:不能以127.0.0.1访问到部署在本地的数据库,需要将服务配置中的数据库ip改为mysql。
2.1.2. 启动容器方式二:--network=host
docker run -itd --gpus all --network=host -v /path/to/db-gpt:/data --name db-gpt db-gpt:env_py310
优缺点和方式一相反,推荐方式一。
2.2. 启动服务
# 进入容器
docker exec -it db-gpt bash

# 拷贝模型
mkdir models
cp -r /data/vicuna-13b  models/   # 这个目录有50G
cp -r /data/all-MiniLM-L6-v2  models/
修改配置文件
cp .env.template .env
vim .env
其中的数据库等配置可按需修改。
分别启动以下两个服务:
python pilot/server/llmserver.py  # 模型服务
python pilot/server/webserver.py  # 界面服务
2.3. 访问
在浏览器访问:
http://ip:port/
port为界面服务监听的端口号,如果没做端口映射就是7860。
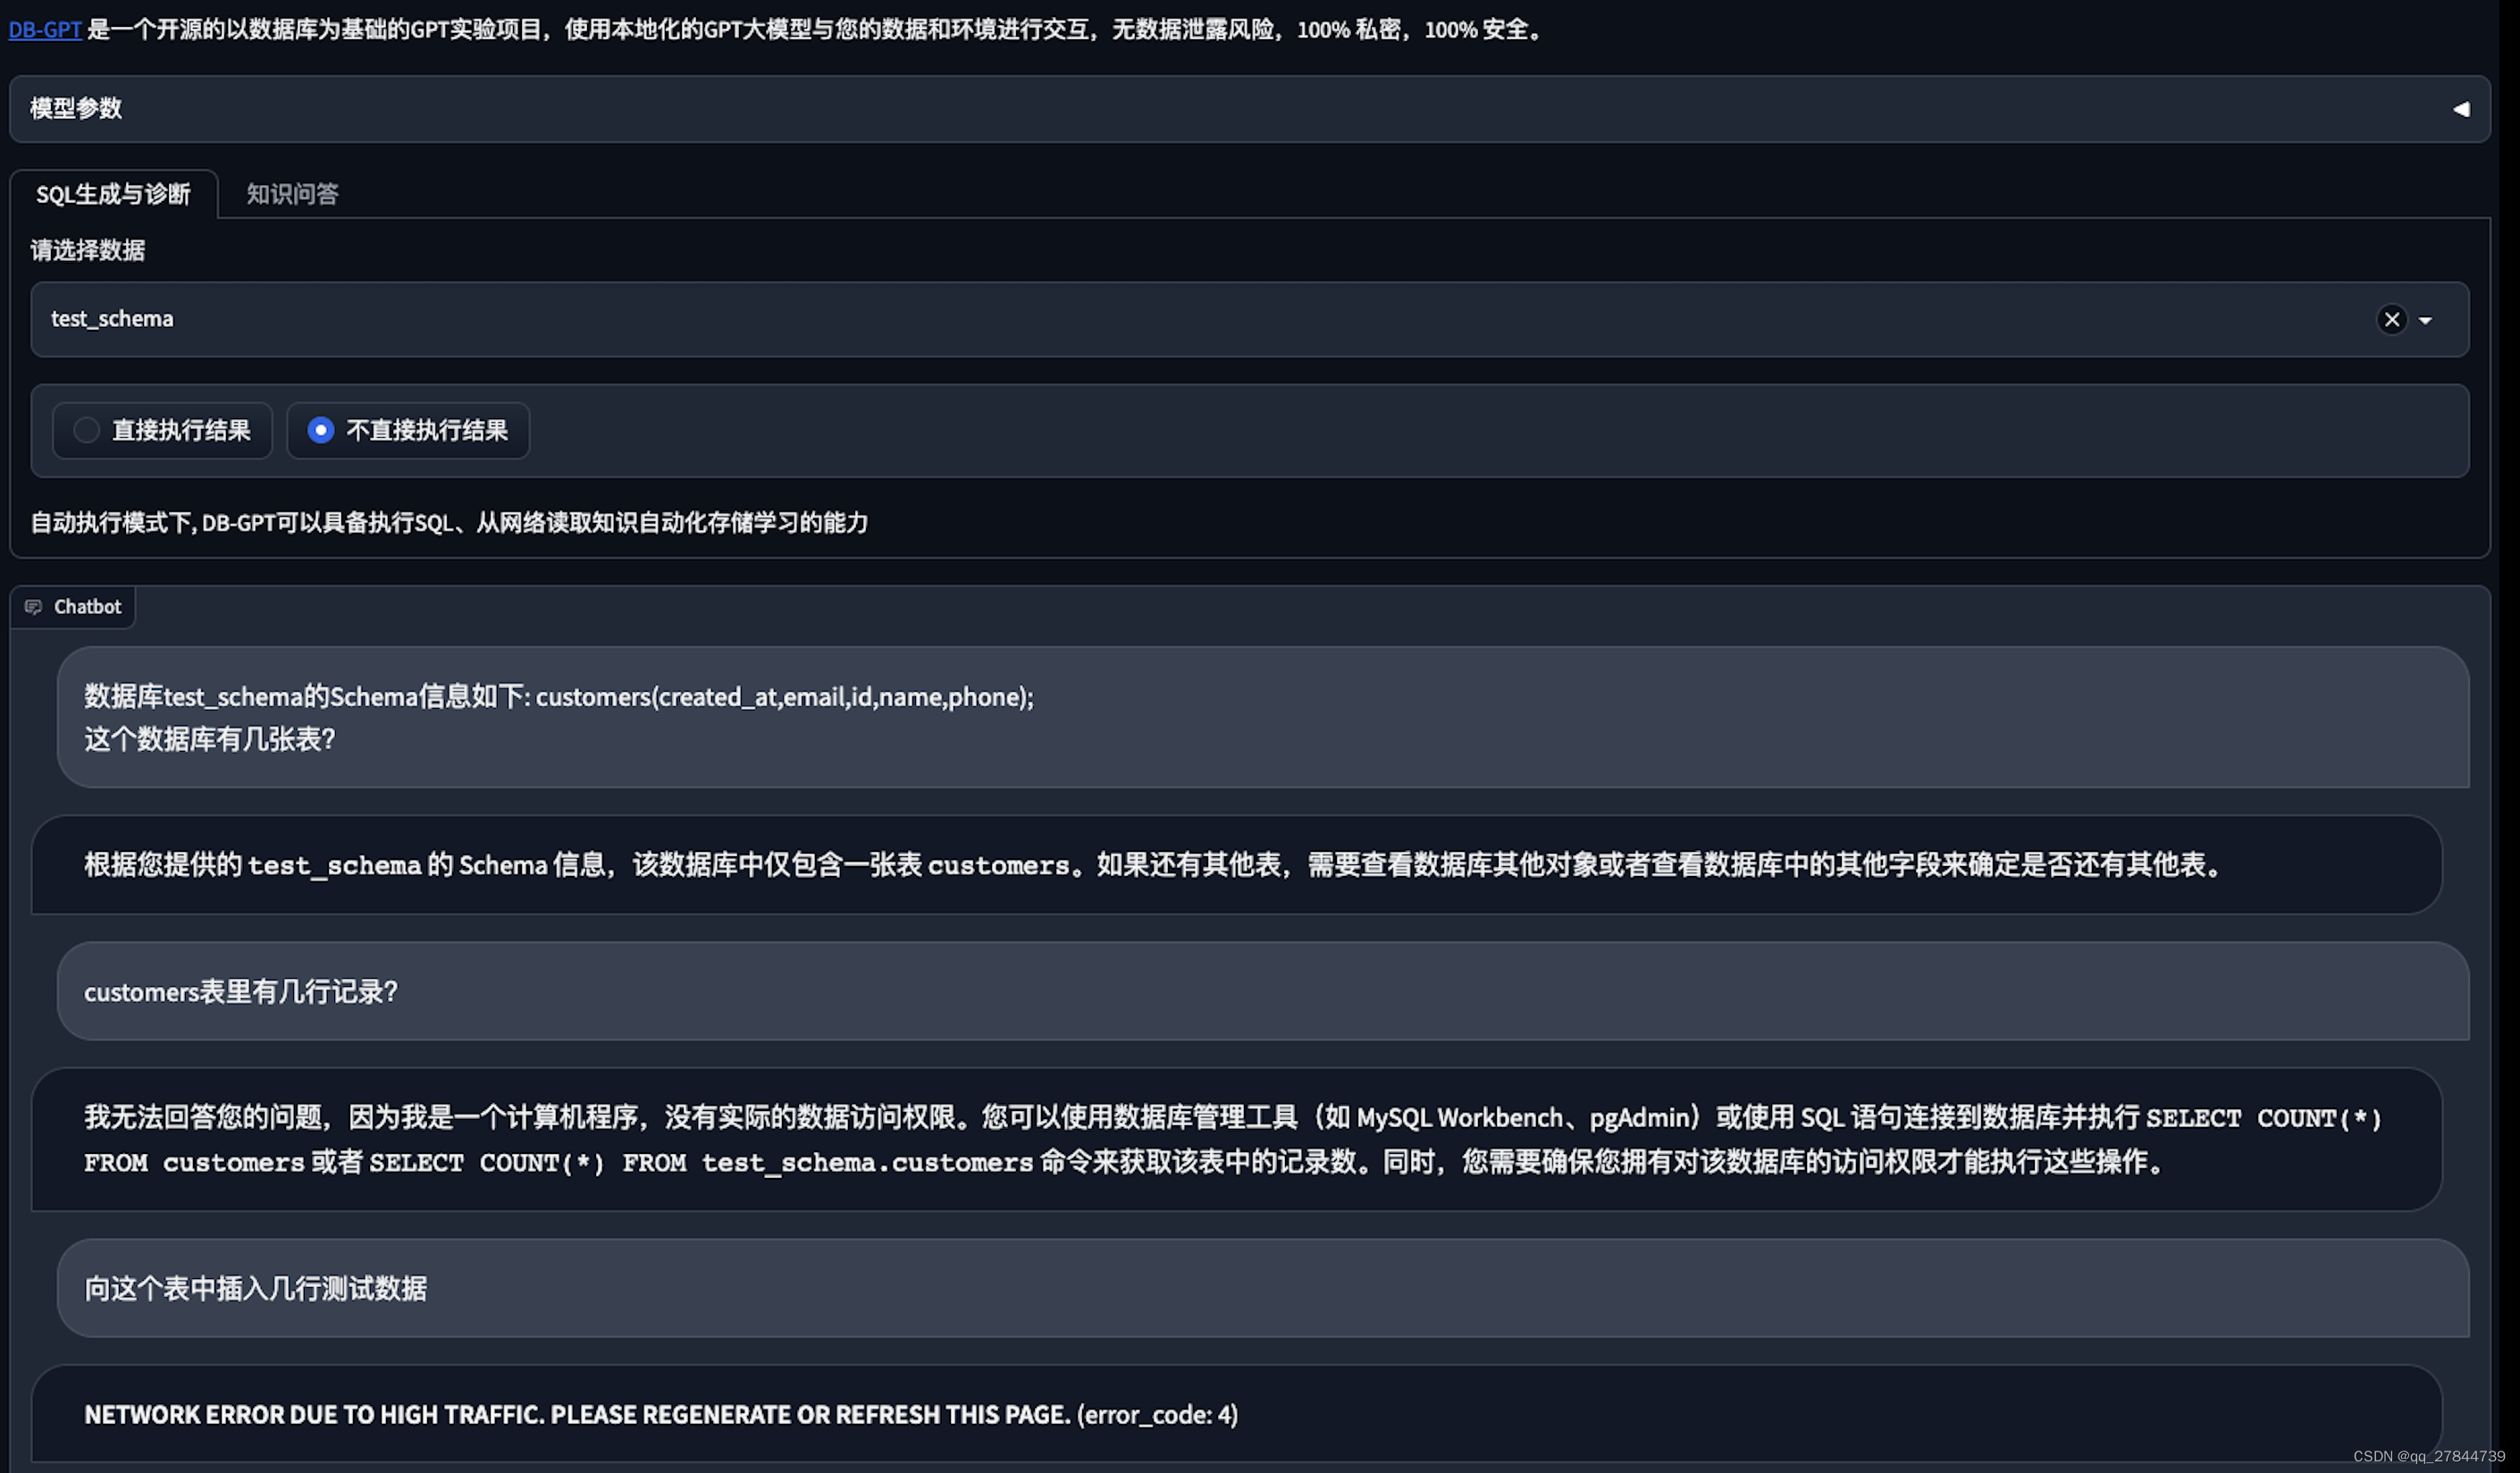
3. 使用总结
模型很大(50G)、依赖很多(容器7G),很占硬盘。
V100显卡16G显存,只能勉强回答三个问题。


 4535
4535

 被折叠的 条评论
为什么被折叠?
被折叠的 条评论
为什么被折叠?
 到【灌水乐园】发言


