


回首写过的(android)代码,发现里面有很大部分是findViewByid和serbnclicklistener,即便写的很规范,,,也让人觉的代码冗余,写的时候也很烦躁,,,还好碰见了ButterKnife框架,而且,,刚刚开始使用as,,,真的不太适应,,,
在as的环境下使用ButterKnife,首先我们需要在build.gradle(是app module中的build.grade而不是项目的)的dependencies标签下添加这样的一行 compile ‘com.jakewharton:butterknife:6.1.0’
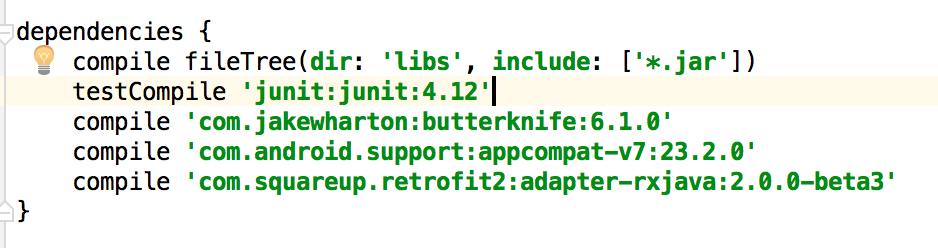
这样的话,在编译的时候,就会下载ButterKnife框架,就可以使用了,,该框架支持View和回调函数的注入,使用的时候也是非常简单,
public class MainActivity extends AppCompatActivity {
     @InjectView(R.id.hello_re)TextView textView;
    @Override
    protected void onCreate(Bundle savedInstanceState) {
        super.onCreate(savedInstanceState);
        setContentView(R.layout.activity_main);
        ButterKnife.inject(this);
        textView.setText("hellom ButterKnife");

    }
    @OnClick(R.id.hello_re)
    public void sayHi(TextView button) {
        button.setText("hi");
    }
}
@InjectView(R.id.hello_re)TextView textView;这一句就取代了findViewByid,,,,@OnClick(R.id.hello_re)这就取代了setonclicklistener,,,简直不要太方便!!!
看看这里句干了啥,,
/**
 * Bind a field to the view for the specified ID. The view will automatically be cast to the field
 * type.
 * <pre><code>
 * {@literal @}InjectView(R.id.title) TextView title;
 * </code></pre>
 *
 * @see Optional
 */
@Retention(CLASS) @Target(FIELD)
public @interface InjectView {
  /** View ID to which the field will be bound. */
  int value();
}
这段英文还是比较好懂的
onclick方法也是类似的
唯一需要注意的地方就是在使用控件前不要忘了ButterKnife.inject(this);这一句
跟着源码,,看看这句话到底有什么玄机,
/**
   * Inject annotated fields and methods in the specified {@code target} using the {@code source}
   * {@link Activity} as the view root.
   *
   * @param target Target class for field injection.
   * @param source Activity on which IDs will be looked up.
   */
  public static void inject(Object target, Activity source) {
    inject(target, source, Finder.ACTIVITY);
  }
好吧,,,并没有看出什么东西,,,好吧接着看,,这玩意先放这,,
其他的函数也是可以的,例如
View: @OnLongClick and @OnFocusChanged.
TextView: @OnEditorAction.
AdapterView: @OnItemClick and @OnItemLongClick.
CompoundButton: @OnCheckedChange
这些都是常用的,,,
除了可以在Activity中使用,,Fragment中自然也是Ok的,,甚至Adapter中的ViewHolder也是可以的,,,
只不过有些小小的变化,,
在Fragment和使用ViewHolder时都会有
View view = inflater.inflate(R.layout.XXXXx, container, );改变的地方就是ButterKnife.inject(this,view);将view传进去,,,,开始的时候,在Activity中使用的时候,我以为ButterKnife.inject(this)中传入的是上下文(context),,但是在Fragment中,也是传入this,而不是getActivity,所以传入的不是上下文,,,
接着到源码中看
  /**
   * Inject annotated fields and methods in the specified {@link Activity}. The current content
   * view is used as the view root.
   *
   * @param target Target activity for field injection.
   */
  public static void inject(Activity target) {
    inject(target, target, Finder.ACTIVITY);
  }

  /**
   * Inject annotated fields and methods in the specified {@link View}. The view and its children
   * are used as the view root.
   *
   * @param target Target view for field injection.
   */
  public static void inject(View target) {
    inject(target, target, Finder.VIEW);
  }

  /**
   * Inject annotated fields and methods in the specified {@link Dialog}. The current content
   * view is used as the view root.
   *
   * @param target Target dialog for field injection.
   */
  public static void inject(Dialog target) {
    inject(target, target, Finder.DIALOG);
  }

  /**
   * Inject annotated fields and methods in the specified {@code target} using the {@code source}
   * {@link Activity} as the view root.
   *
   * @param target Target class for field injection.
   * @param source Activity on which IDs will be looked up.
   */
  public static void inject(Object target, Activity source) {
    inject(target, source, Finder.ACTIVITY);
  }

  /**
   * Inject annotated fields and methods in the specified {@code target} using the {@code source}
   * {@link View} as the view root.
   *
   * @param target Target class for field injection.
   * @param source View root on which IDs will be looked up.
   */
  public static void inject(Object target, View source) {
    inject(target, source, Finder.VIEW);
  }

  /**
   * Inject annotated fields and methods in the specified {@code target} using the {@code source}
   * {@link Dialog} as the view root.
   *
   * @param target Target class for field injection.
   * @param source Dialog on which IDs will be looked up.
   */
  public static void inject(Object target, Dialog source) {
    inject(target, source, Finder.DIALOG);
  }
这里能看到,,重载了很多种,包括开始用的最简单的那种,,,也更加清楚的看到,,并不是传入上下文,而是传入控件所在的Activity或者View,并且,这些方法都是调用了inject(xxx,xxx,xxx方法
看看这个方法
static void inject(Object target, Object source, Finder finder) {
    Class<?> targetClass = target.getClass();
    try {
      if (debug) Log.d(TAG, "Looking up view injector for " + targetClass.getName());
      Injector<Object> injector = findInjectorForClass(targetClass);
      if (injector != null) {
        injector.inject(finder, target, source);
      }
    } catch (RuntimeException e) {
      throw e;
    } catch (Exception e) {
      throw new RuntimeException("Unable to inject views for " + target, e);
    }
  }
在进入findInjectorForClass方法
 private static Injector<Object> findInjectorForClass(Class<?> cls)
      throws IllegalAccessException, InstantiationException {
    Injector<Object> injector = INJECTORS.get(cls);
    if (injector != null) {
      if (debug) Log.d(TAG, "HIT: Cached in injector map.");
      return injector;
    }
    String clsName = cls.getName();
    if (clsName.startsWith(ANDROID_PREFIX) || clsName.startsWith(JAVA_PREFIX)) {
      if (debug) Log.d(TAG, "MISS: Reached framework class. Abandoning search.");
      return NOP_INJECTOR;
    }
    try {
      Class<?> injectorClass = Class.forName(clsName + ButterKnifeProcessor.SUFFIX);
      //noinspection unchecked
      injector = (Injector<Object>) injectorClass.newInstance();
      if (debug) Log.d(TAG, "HIT: Class loaded injection class.");
    } catch (ClassNotFoundException e) {
      if (debug) Log.d(TAG, "Not found. Trying superclass " + cls.getSuperclass().getName());
      injector = findInjectorForClass(cls.getSuperclass());
    }
    INJECTORS.put(cls, injector);
    return injector;
  }
这里通过反射的方法的到类的实例,并且该类就是先前说过的this,,
其中的INJECTORS是一个map
 static final Map<Class<?>, Injector<Object>> INJECTORS =
      new LinkedHashMap<Class<?>, Injector<Object>>();
Injector是一个interface,,里面就是
 public interface Injector<T> {
    void inject(Finder finder, T target, Object source);
    void reset(T target);
  }
findInjectorForClass就是找到该类对应的Injector并返回,没有的话添加并返回,,然后执行其中的inject方法,
该方法中执行view = finder.findRequiredView(xxx,xxx,xxx);
View view;
    view = finder.findRequiredView(source, xxxx, "field 'xxxx'");
1    target.iv_title_left = finder.castView(view, xxx, "field 'xxxx'");
第三个参数就是 被绑定的控件,在Activity(或者其他)已经赋值了,
接下来看看finder是什么神奇的东西,,
 public enum Finder {
    VIEW {
      @Override protected View findView(Object source, int id) {
        return ((View) source).findViewById(id);
      }

      @Override protected Context getContext(Object source) {
        return ((View) source).getContext();
      }
    },
    ACTIVITY {
      @Override protected View findView(Object source, int id) {
        return ((Activity) source).findViewById(id);
      }

      @Override protected Context getContext(Object source) {
        return (Activity) source;
      }
    },
    DIALOG {
      @Override protected View findView(Object source, int id) {
        return ((Dialog) source).findViewById(id);
      }

      @Override protected Context getContext(Object source) {
        return ((Dialog) source).getContext();
      }
    };

    public static <T> T[] arrayOf(T... views) {
      return views;
    }

    public static <T> List<T> listOf(T... views) {
      return new ImmutableList<T>(views);
    }

    public <T> T findRequiredView(Object source, int id, String who) {
      T view = findOptionalView(source, id, who);
      if (view == null) {
        String name = getContext(source).getResources().getResourceEntryName(id);
        throw new IllegalStateException("Required view '"
            + name
            + "' with ID "
            + id
            + " for "
            + who
            + " was not found. If this view is optional add '@Optional' annotation.");
      }
      return view;
    }

    public <T> T findOptionalView(Object source, int id, String who) {
      View view = findView(source, id);
      return castView(view, id, who);
    }

    @SuppressWarnings("unchecked") // That's the point.
    public <T> T castView(View view, int id, String who) {
      try {
        return (T) view;
      } catch (ClassCastException e) {
        if (who == null) {
          throw new AssertionError();
        }
        String name = view.getResources().getResourceEntryName(id);
        throw new IllegalStateException("View '"
            + name
            + "' with ID "
            + id
            + " for "
            + who
            + " was of the wrong type. See cause for more info.", e);
      }
    }

    @SuppressWarnings("unchecked") // That's the point.
    public <T> T castParam(Object value, String from, int fromPosition, String to, int toPosition) {
      try {
        return (T) value;
      } catch (ClassCastException e) {
        throw new IllegalStateException("Parameter #"
            + (fromPosition + 1)
            + " of method '"
            + from
            + "' was of the wrong type for parameter #"
            + (toPosition + 1)
            + " of method '"
            + to
            + "'. See cause for more info.", e);
      }
    }
好吧,,比较长,,重点看findRequiredView方法,,,调用了findOptionalView方法,,一层一层找,,最后是一个抽象函数

那么在哪实现的呢,,假设是在activity中使用的,,那么这个类型就是Finder.ACTIVITY,,
然后里面就有一行激动人心的代码
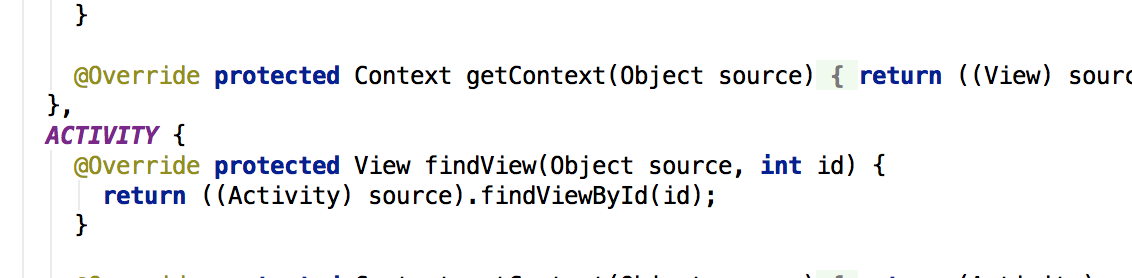
findViewById()!!!!!,
总结来说就是,绑定控件,并把Activity或者其他的View传给框架,它就会帮你绑定好,那些很长很长的代码做的工作就是统一各种情况,,,
使用这个框架,,在配合Rxandroid,,能够节省成吨的代码


 1421
1421


 被折叠的 条评论
为什么被折叠?
被折叠的 条评论
为什么被折叠?
 到【灌水乐园】发言


