


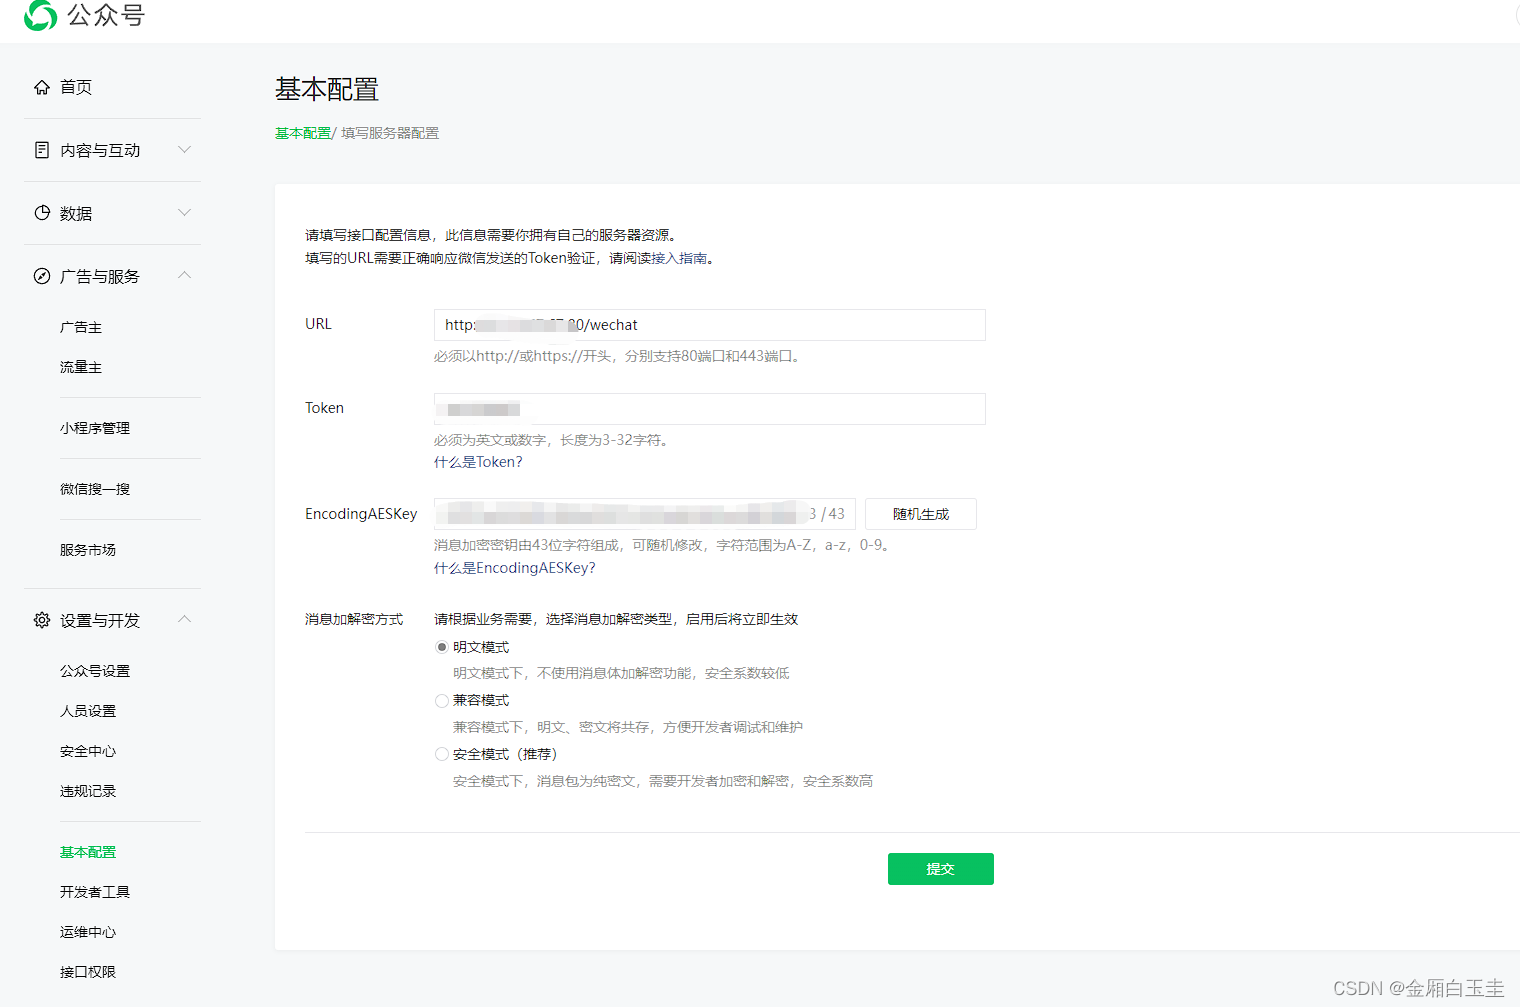
先定义访问url和token
因为微信要求http接口必须通过80端口调用,而我的80端口已经被其它服务占用了
这里可以考虑使用反向代理或者端口转发等方式来实现
nginx反向代理
# 下面就是把http:/localhost:80/wechat路径的请求转发到9999端口
server {
    listen       80;
    server_name  localhost;

    location /wechat {
        proxy_pass http://localhost:9999;
    }
}
端口转发
使用iptables等工具,将访问80端口的请求转发到另一个端口。
sudo iptables -t nat -A PREROUTING -p tcp --dport 80 -j REDIRECT --to-port 9999
注意:端口转发是基于网络层的转发,只能转发端口,不能转发路径。所以如果有路径的话用nginx反向代理。
创建服务端
微信官方用的是php的代码示例
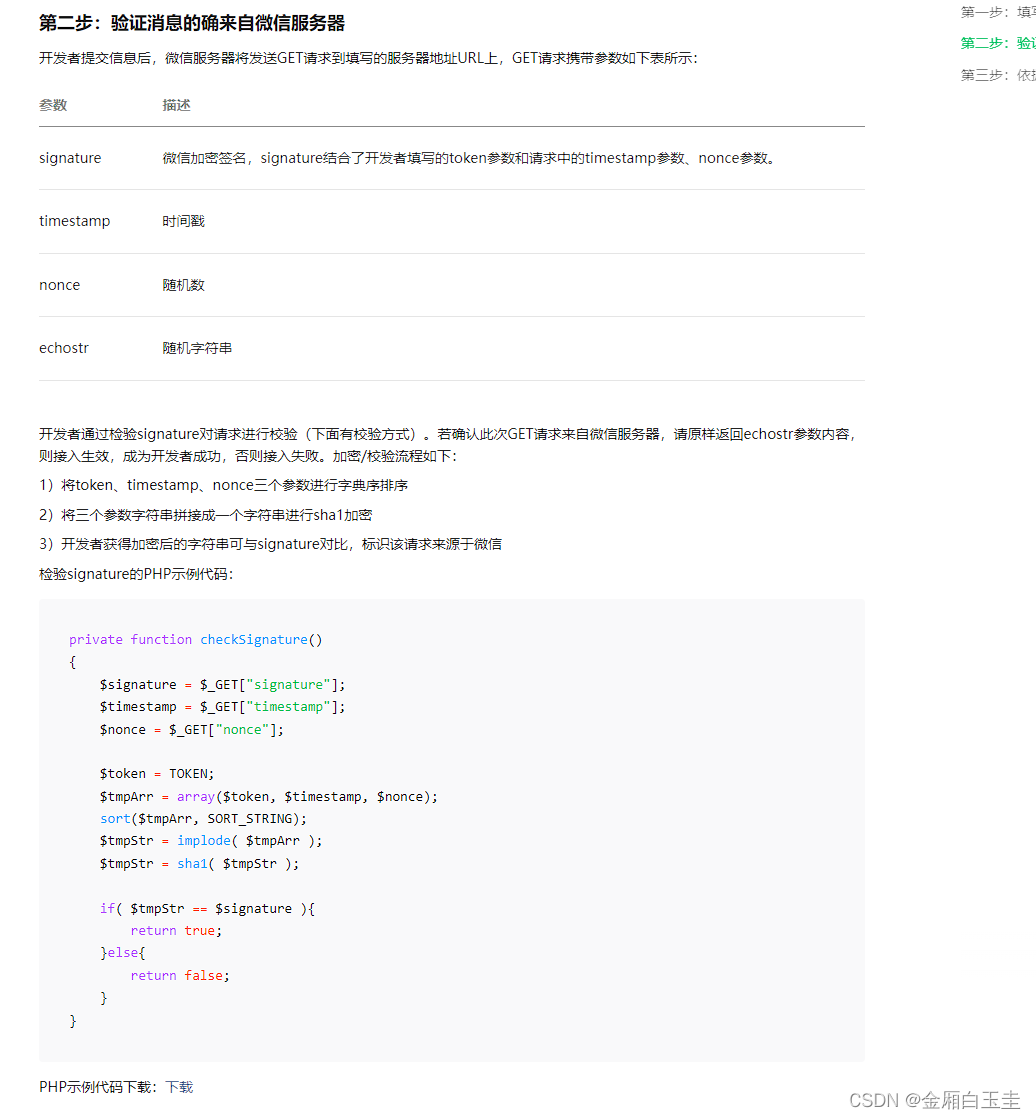
我这里使用python的flask按照官方的参数做个简单的服务端验证即可
from flask import Flask, request
from wechatpy.utils import check_signature
from wechatpy.exceptions import InvalidSignatureException

app = Flask(__name__)

const = {
    "token": "你的token"
}

@app.route('/wechat', methods=['GET', 'POST'])
def wechat():
    timestamp = request.args.get("timestamp")
    nonce = request.args.get("nonce")
    if request.method == 'GET':
        # token, signature, timestamp, nonce
        echostr = request.args.get("echostr")
        signature = request.args.get("signature")
        if echostr:
            try:
                check_signature(const["token"], signature, timestamp, nonce)
                return echostr
            except InvalidSignatureException:
                logging.error("invalid message from request")


if __name__ == '__main__':
    app.run(host='0.0.0.0', port=9999, debug=True)
验证
基本配置页面提交后就调用了接口了
可以看到flask的打印


 7410
7410


 被折叠的 条评论
为什么被折叠?
被折叠的 条评论
为什么被折叠?
 到【灌水乐园】发言


