


目录
一、引言
Android初学者开发第一个完整的基础实例项目应该就属《记事本》了,该项目基于Android Studio开发使用Java语言,该项目包含SQLlit数据库的使用、listview、等。话不多说先上成品:
视频效果展示:
Android studio期末设计大作业~记事本App
二、详细设计
1.首页
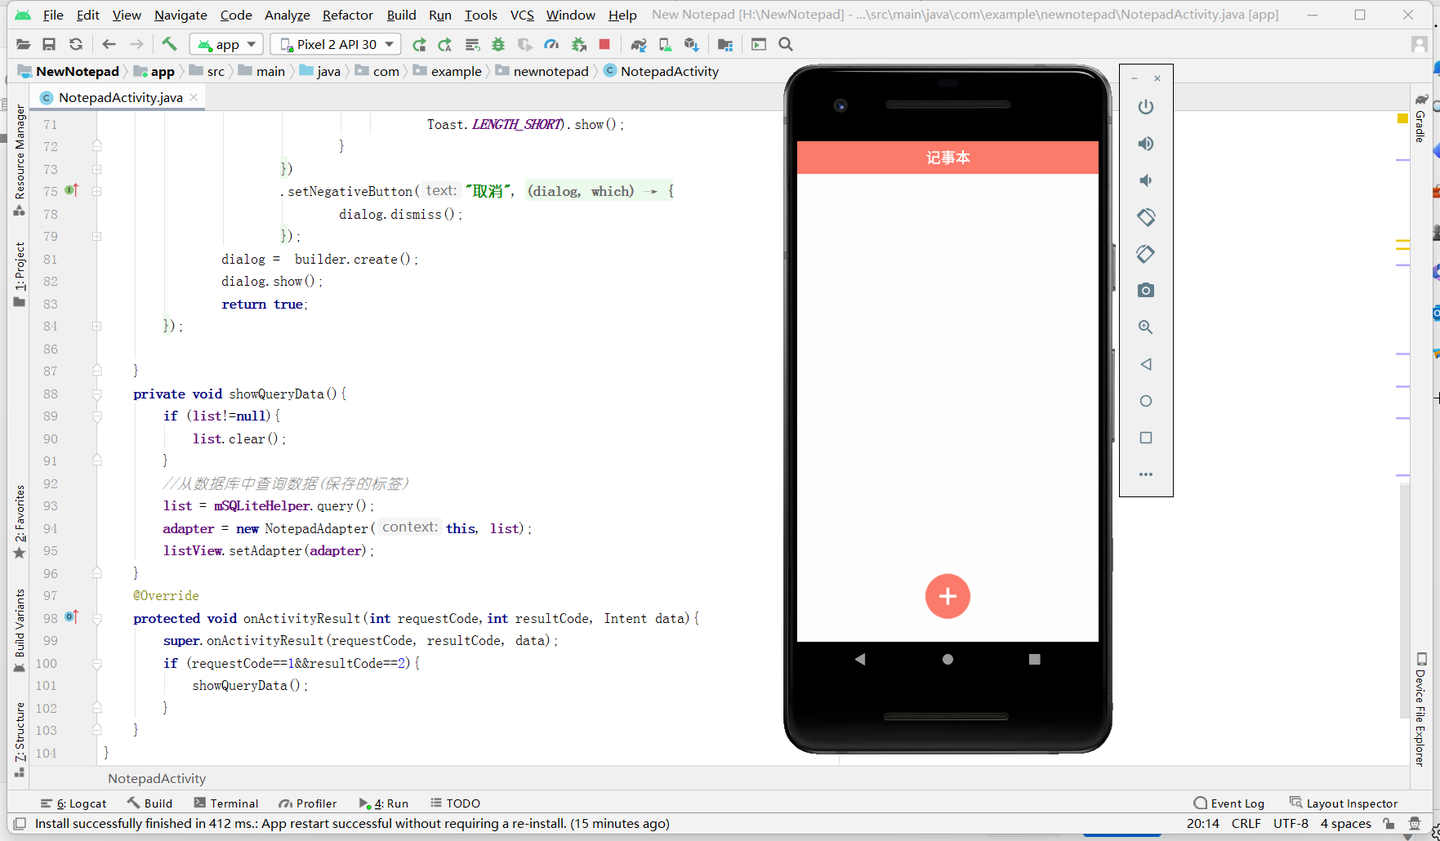
用户进行笔记添加,使用listview显示笔记。
该代码实现了一个记事本应用的主活动(NotepadActivity)。在该活动中,使用了一个ListView来显示便签的列表。主要包括以下几个部分:
-
onCreate()方法:在该方法中,设置了活动的布局文件(activity_notepad.xml),并初始化了ListView和一个添加按钮(ImageView)。添加按钮的点击事件监听器被设置为打开另一个活动(RecordActivity)的意图,并在该意图中传递了一个请求码(1)。
-
initData()方法:该方法被调用来初始化数据。在该方法中,清空了列表数据(如果存在),并从SQLite数据库中查询数据,并将查询结果传递给自定义的适配器(NotepadAdapter)。最后,将适配器设置给ListView。
-
showQueryData()方法:该方法用于显示查询的数据。在该方法中,先清空列表数据(如果存在),然后再从SQLite数据库中查询数据,并将查询结果传递给适配器,最后将适配器设置给ListView。
-
onActivityResult()方法:当从另一个活动(RecordActivity)返回时,该方法会被调用。在该方法中,检查返回的请求码和结果码,如果满足条件,则调用showQueryData()方法来显示查询的数据。
public class NotepadActivity extends Activity {
    ListView listView;
    List<NotepadBean> list;
    SQLiteHelper mSQLiteHelper;
    NotepadAdapter adapter;
    @Override
    protected void onCreate(Bundle savedInstanceState) {
        super.onCreate(savedInstanceState);
        setContentView(R.layout.activity_notepad);
        //用于显示便签的列表
        listView = (ListView) findViewById(R.id.listview);
        ImageView add = (ImageView) findViewById(R.id.add);
        add.setOnClickListener(new View.OnClickListener() {
            @Override
            public void onClick(View v) {
                Intent intent = new Intent(NotepadActivity.this,
                        RecordActivity.class);
                startActivityForResult(intent, 1);
            }
        });
        initData();
    }

    }
    private void showQueryData(){
        if (list!=null){
            list.clear();
        }
        //从数据库中查询数据(保存的标签)
        list = mSQLiteHelper.query();
        adapter = new NotepadAdapter(this, list);
        listView.setAdapter(adapter);
    }
    @Override
    protected void onActivityResult(int requestCode,int resultCode, Intent data){
        super.onActivityResult(requestCode, resultCode, data);
        if (requestCode==1&&resultCode==2){
            showQueryData();
        }
    }
}
2.添加和修改页面


点击首页加号按钮或者点击列表项按钮进行对应的页面跳转。
这段代码是一个Android应用程序中的一部分,用于初始化数据和处理点击事件。下面对代码进行简要的概括:
-
initData()方法用于初始化数据。首先创建一个SQLiteHelper对象用于操作数据库。然后根据传入的Intent对象获取传递过来的数据,并根据数据的有无设置相应的文本内容和可见性。 -
onClick()方法是一个点击事件的处理方法。根据点击的控件的id,执行相应的操作。-
当点击了id为
note_back的控件时,调用finish()方法结束当前Activity。 -
当点击了id为
delete的控件时,将content控件的文本内容置空。 -
当点击了id为
note_save的控件时,首先获取content控件的文本内容,并进行相应的操作。- 如果
id不为null,表示是修改操作。判断内容是否为空,若不为空,则调用mSQLiteHelper的updateData()方法进行数据库的更新操作,并根据更新结果显示相应的提示信息。 - 如果
id为null,表示是添加操作。判断内容是否为空,若不为空,则调用mSQLiteHelper的insertData()方法进行数据库的插入操作,并根据插入结果显示相应的提示信息。
- 如果
-
这段代码的主要目的是根据传入的数据进行新增或修改数据库中的记录,并根据操作结果显示相应的提示信息。
protected void initData() {
mSQLiteHelper = new SQLiteHelper(this);
noteName.setText("添加记录");
Intent intent = getIntent();
if(intent!= null){
id = intent.getStringExtra("id");
if (id != null){
noteName.setText("修改记录");
content.setText(intent.getStringExtra("content"));
note_time.setText(intent.getStringExtra("time"));
note_time.setVisibility(View.VISIBLE);
}
}
}
@Override
public void onClick(View v) {
switch (v.getId()) {
case R.id.note_back:
finish();
break;
case R.id.delete:
content.setText("");
break;
case R.id.note_save:
String noteContent=content.getText().toString().trim();
if (id != null){//修改操作
if (noteContent.length()>0){
if (mSQLiteHelper.updateData(id, noteContent, DBUtils.getTime())){
showToast("修改成功");
setResult(2);
finish();
}else {
showToast("修改失败");
}
}else {
showToast("修改内容不能为空!");
}
}else {
//向数据库中添加数据
if (noteContent.length()>0){
if (mSQLiteHelper.insertData(noteContent, DBUtils.getTime())){
showToast("保存成功");
setResult(2);
finish();
}else {
showToast("保存失败");
}
}else {
showToast("修改内容不能为空!");
}
}
break;
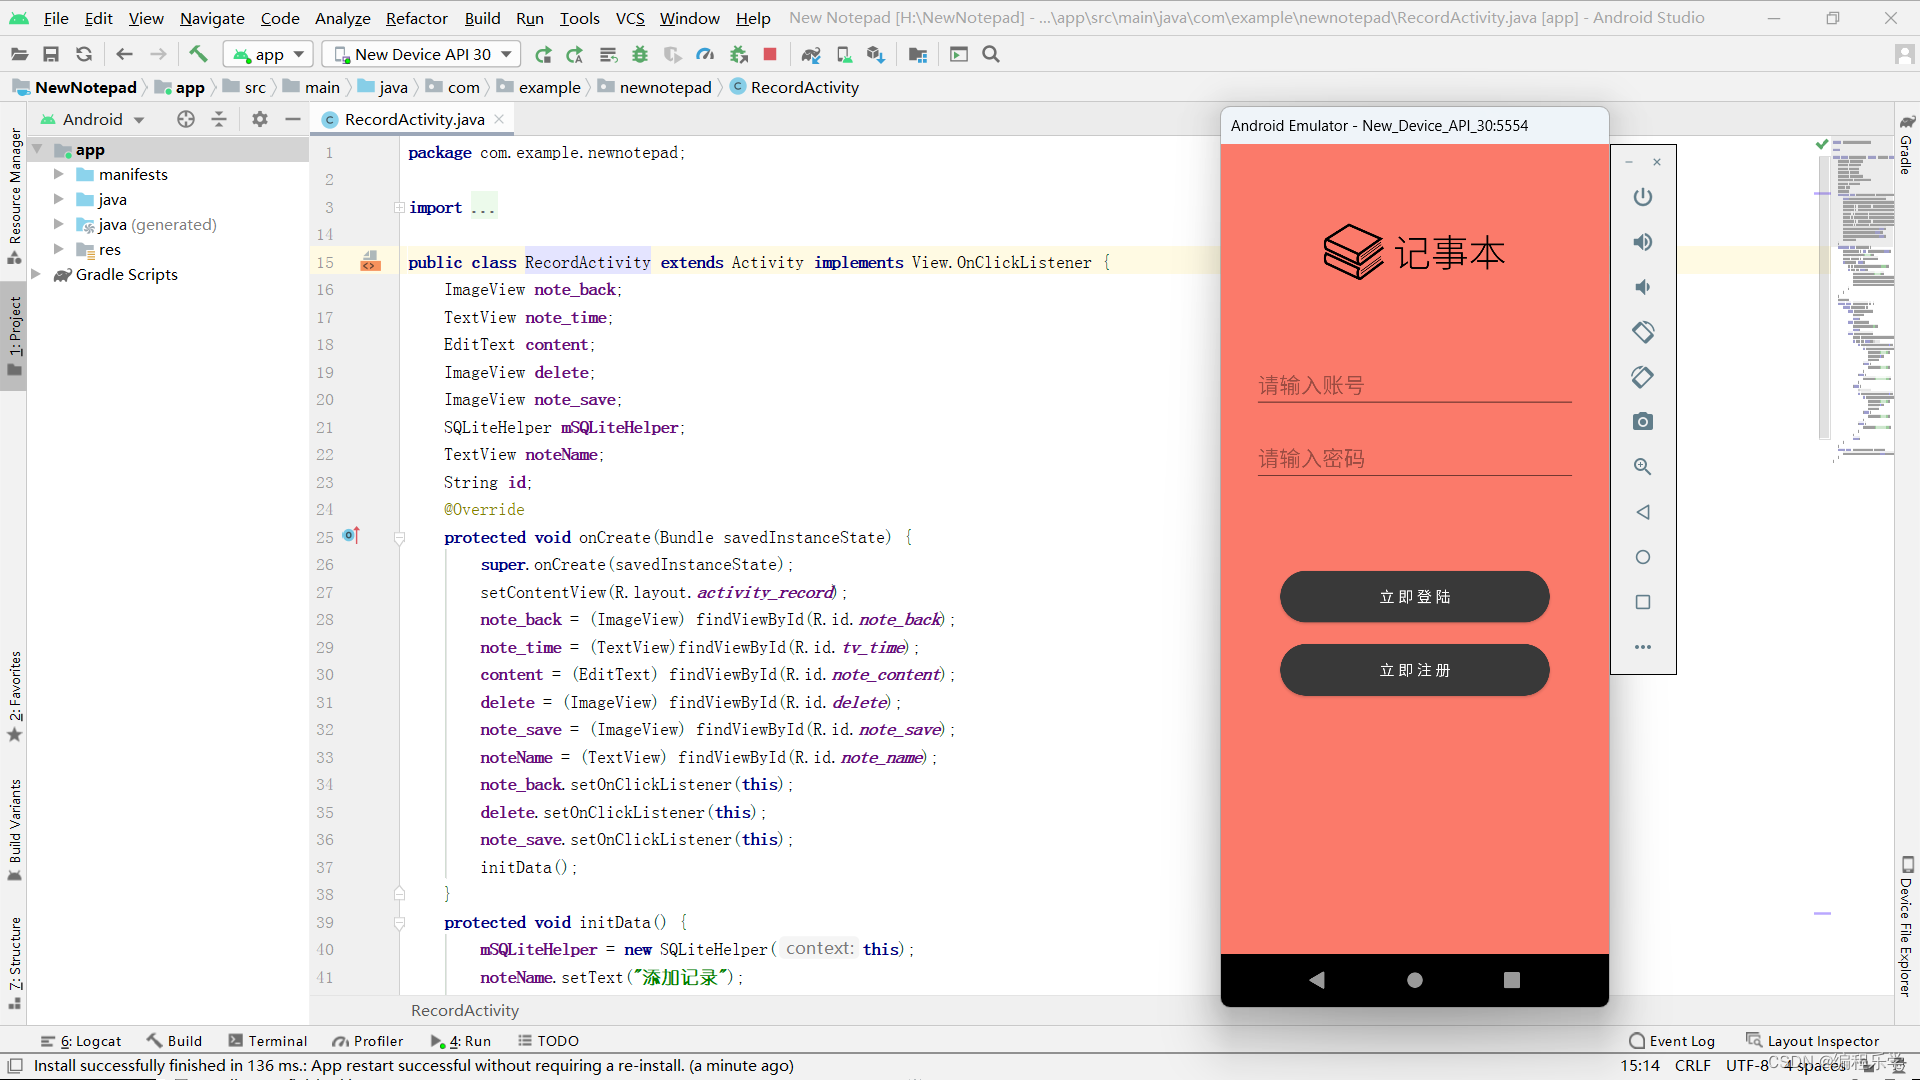
}3.登录页
<?xml version="1.0" encoding="utf-8"?>
<androidx.constraintlayout.widget.ConstraintLayout xmlns:android="http://schemas.android.com/apk/res/android"
xmlns:app="http://schemas.android.com/apk/res-auto"
xmlns:tools="http://schemas.android.com/tools"
android:layout_width="match_parent"
android:layout_height="match_parent"
android:background="#fb7a6a"
tools:context=".Login.LoginActivity">
<LinearLayout
android:layout_width="300dp"
android:layout_height="0dp"
android:gravity="center|top"
android:orientation="vertical"
app:layout_constraintBottom_toBottomOf="parent"
app:layout_constraintEnd_toEndOf="parent"
app:layout_constraintStart_toStartOf="parent"
app:layout_constraintTop_toBottomOf="@+id/imageView">
<EditText
android:id="@+id/username_edittext"
android:layout_width="match_parent"
android:layout_height="wrap_content"
android:hint="请输入账号"
android:textSize="20sp" />
<EditText
android:id="@+id/password_edittext"
android:layout_width="match_parent"
android:layout_height="wrap_content"
android:layout_marginTop="20dp"
android:hint="请输入密码"
android:inputType="textPassword"
android:textSize="20sp" />
<Button
android:id="@+id/login_button"
android:layout_width="250dp"
android:layout_height="wrap_content"
android:layout_marginTop="80dp"
android:background="@drawable/button"
android:text="立 即 登 陆"
android:textColor="#fff"
android:textSize="14sp" />
<Button
android:id="@+id/register_button"
android:layout_width="250dp"
android:layout_height="wrap_content"
android:layout_marginTop="20dp"
android:background="@drawable/button"
android:text="立 即 注 册"
android:textColor="#fff"
android:textSize="14sp" />
</LinearLayout>
<ImageView
android:id="@+id/imageView"
android:layout_width="0dp"
android:layout_height="200dp"
android:scaleType="centerCrop"
app:layout_constraintEnd_toEndOf="parent"
app:layout_constraintHorizontal_bias="0.0"
app:layout_constraintStart_toStartOf="parent"
app:layout_constraintTop_toTopOf="parent"
app:srcCompat="@drawable/logo" />
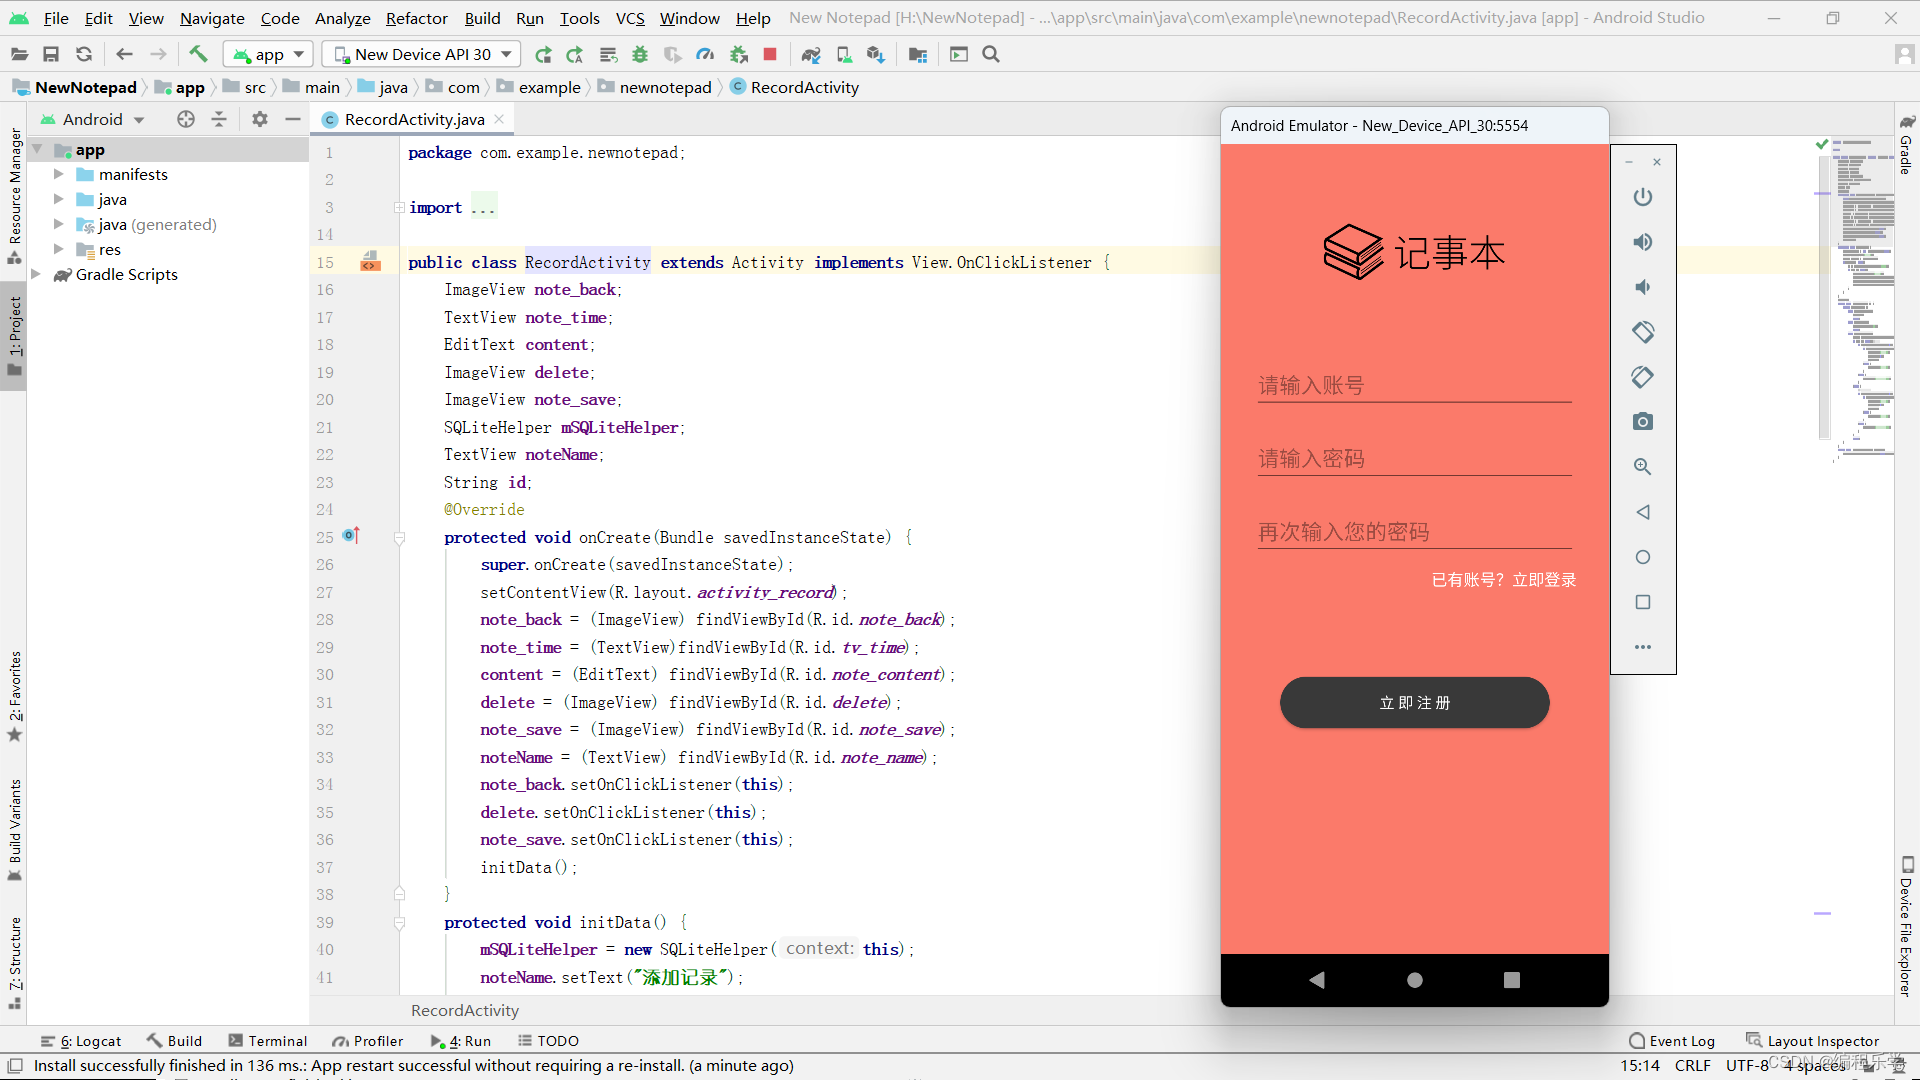
</androidx.constraintlayout.widget.ConstraintLayout>4.注册页
<?xml version="1.0" encoding="utf-8"?>
<androidx.constraintlayout.widget.ConstraintLayout xmlns:android="http://schemas.android.com/apk/res/android"
    xmlns:app="http://schemas.android.com/apk/res-auto"
    xmlns:tools="http://schemas.android.com/tools"
    android:layout_width="match_parent"
    android:layout_height="match_parent"
    android:background="#fb7a6a"
    tools:context=".Register.RegisterActivity">

    <LinearLayout
        android:layout_width="300dp"
        android:layout_height="0dp"
        android:gravity="center|top"
        android:orientation="vertical"
        app:layout_constraintBottom_toBottomOf="parent"
        app:layout_constraintEnd_toEndOf="parent"
        app:layout_constraintStart_toStartOf="parent"
        app:layout_constraintTop_toBottomOf="@+id/imageView2">

        <EditText
            android:id="@+id/username_edittext"
            android:layout_width="match_parent"
            android:layout_height="wrap_content"
            android:hint="请输入账号"
            android:textSize="20sp" />

        <EditText
            android:id="@+id/password_edittext"
            android:layout_width="match_parent"
            android:layout_height="wrap_content"
            android:layout_marginTop="20dp"
            android:hint="请输入密码"
            android:inputType="textPassword"
            android:textSize="20sp" />

        <EditText
            android:id="@+id/repeat"
            android:layout_width="match_parent"
            android:layout_height="wrap_content"
            android:layout_marginTop="20dp"
            android:ems="10"
            android:hint="再次输入您的密码"
            android:inputType="textPassword"
            android:textSize="20sp" />

        <TextView
            android:id="@+id/tv_login"
            android:layout_width="match_parent"
            android:layout_height="wrap_content"
            android:layout_marginTop="10dp"
            android:gravity="center|right"
            android:text="已有账号?立即登录"
            android:textColor="#fff"
            android:textSize="15sp" />

        <Button
            android:id="@+id/register_button"
            android:layout_width="250dp"
            android:layout_height="wrap_content"
            android:layout_marginTop="80dp"
            android:background="@drawable/button"
            android:text="立 即 注 册"
            android:textColor="#fff"
            android:textSize="14sp" />

    </LinearLayout>

    <ImageView
        android:id="@+id/imageView2"
        android:layout_width="0dp"
        android:layout_height="200dp"
        android:scaleType="centerCrop"
        app:layout_constraintEnd_toEndOf="parent"
        app:layout_constraintHorizontal_bias="0.0"
        app:layout_constraintStart_toStartOf="parent"
        app:layout_constraintTop_toTopOf="parent"
        app:srcCompat="@drawable/logo" />
</androidx.constraintlayout.widget.ConstraintLayout>
Get 项目模板源码
👇👇👇快捷获取方式👇👇👇


 692
692

 被折叠的 条评论
为什么被折叠?
被折叠的 条评论
为什么被折叠?
 到【灌水乐园】发言


