


环境 centos7
3台虚拟机(vagrant创建的)
node1=192.168.3.51,node2=192.168.3.61,node3=192.168.3.62
第一步:下载tar.gz文件,并且解压,我的是解压到/usr/local/
#node1、node2、node3 采用安装包安装

wget https://artifacts.elastic.co/downloads/elasticsearch/elasticsearch-8.5.2-linux-x86_64.tar.gz
wget https://artifacts.elastic.co/downloads/elasticsearch/elasticsearch-8.5.2-linux-x86_64.tar.gz.sha512
shasum -a 512 -c elasticsearch-8.5.2-linux-x86_64.tar.gz.sha512
#如果没有命令:yum install perl-Digest-SHA
tar -xzf elasticsearch-8.5.2-linux-x86_64.tar.gz
cd elasticsearch-8.5.2/
第二步:系统配置
#ElasticSearch不能以Root身份运行, node1、node2、node3需要单独创建一个用户

groupadd elsearch
useradd elsearch -g elsearch -p elasticsearch
chown -R elsearch:elsearch  /usr/local/elasticsearch-8.5.2
问题描述:后面启动的时候可能出现问题,我的出现了
max virtual memory areas vm.max_map_count [65530] is too low, increase to at least 错误信息
#修改系统配置
vi /etc/sysctl.conf

#添加
vm.max_map_count=655360

#执行生效
sysctl -p

#继续修改
vi /etc/security/limits.conf

#在文件末尾添加(注意这些带*的也要添加,我开始以为是注销的就没有添加,然后就一堆错误)
* soft nofile 65536

* hard nofile 131072

* soft nproc 2048

* hard nproc 4096

elsearch soft nproc 125535

elsearch hard nproc 125535
第二步:修改配置文件
[elsearch@worker02 config]$ pwd
/usr/local/elasticsearch-8.5.2/config
[elsearch@worker02 config]$ vim elasticsearch.yml
需要注意一点:path.data参数三个节点的目录地址设置成不一样的路径,不然启动第二个节点的时候,有错误提示,大概意思是有节点以及获取了相同路径的锁,再次获取失败
[2022-12-18T01:00:30,311][ERROR][o.e.b.Elasticsearch      ] [node-2] fatal exception while booting Elasticsearchjava.lang.IllegalStateException: failed to obtain node locks, tried [/usr/local/elasticsearch-8.5.2/data]; maybe these locations are not writable or multiple nodes were started on the same data path?
	at org.elasticsearch.server@8.5.2/org.elasticsearch.env.NodeEnvironment.<init>(NodeEnvironment.java:285)
	at org.elasticsearch.server@8.5.2/org.elasticsearch.node.Node.<init>(Node.java:474)
	at org.elasticsearch.server@8.5.2/org.elasticsearch.node.Node.<init>(Node.java:318)
	at org.elasticsearch.server@8.5.2/org.elasticsearch.bootstrap.Elasticsearch$2.<init>(Elasticsearch.java:214)
	at org.elasticsearch.server@8.5.2/org.elasticsearch.bootstrap.Elasticsearch.initPhase3(Elasticsearch.java:214)
1、node1节点
在路径:/usr/local/elasticsearch-8.5.2/需要创建data目录(名字任取,只是要和配置文件一致 path.data: /usr/local/elasticsearch-8.5.2/data)
# ======================== Elasticsearch Configuration =========================
#
# NOTE: Elasticsearch comes with reasonable defaults for most settings.
#       Before you set out to tweak and tune the configuration, make sure you
#       understand what are you trying to accomplish and the consequences.
#
# The primary way of configuring a node is via this file. This template lists
# the most important settings you may want to configure for a production cluster.
#
# Please consult the documentation for further information on configuration options:
# https://www.elastic.co/guide/en/elasticsearch/reference/index.html
#
# ---------------------------------- Cluster -----------------------------------
#
# Use a descriptive name for your cluster:
#
cluster.name: es8.5
#
# ------------------------------------ Node ------------------------------------
#
# Use a descriptive name for the node:
#
node.name: node-1
#
# Add custom attributes to the node:
#
#node.attr.rack: r1
#
# ----------------------------------- Paths ------------------------------------
#
# Path to directory where to store the data (separate multiple locations by comma):
#
path.data: /usr/local/elasticsearch-8.5.2/data
#
# Path to log files:
#
path.logs: /usr/local/elasticsearch-8.5.2/logs
#
# ----------------------------------- Memory -----------------------------------
#
# Lock the memory on startup:
#
#bootstrap.memory_lock: true
#
# Make sure that the heap size is set to about half the memory available
# on the system and that the owner of the process is allowed to use this
# limit.
#
# Elasticsearch performs poorly when the system is swapping the memory.
#
# ---------------------------------- Network -----------------------------------
#
# By default Elasticsearch is only accessible on localhost. Set a different
# address here to expose this node on the network:
#
network.host: 192.168.3.51
#
# By default Elasticsearch listens for HTTP traffic on the first free port it
# finds starting at 9200. Set a specific HTTP port here:
#
http.port: 9200
#
# For more information, consult the network module documentation.
#
# --------------------------------- Discovery ----------------------------------
#
# Pass an initial list of hosts to perform discovery when this node is started:
# The default list of hosts is ["127.0.0.1", "[::1]"]
discovery.seed_hosts: ["192.168.3.51", "192.168.3.61","192.168.62"]
#
#
# Bootstrap the cluster using an initial set of master-eligible nodes:
#
#
cluster.initial_master_nodes: ["node-1", "node-2","node-3"]
#
# For more information, consult the discovery and cluster formation module documentation.
#
# --------------------------------- Readiness ----------------------------------
#
# Enable an unauthenticated TCP readiness endpoint on localhost
#
#readiness.port: 9399
#
# ---------------------------------- Various -----------------------------------
#
# Allow wildcard deletion of indices:
#
action.destructive_requires_name: false

xpack.security.enabled: false
2、node2节点
在路径:/usr/local/elasticsearch-8.5.2/需要创建data02目录(名字任取,只是要和配置文件一致 path.data: /usr/local/elasticsearch-8.5.2/data02)
# ======================== Elasticsearch Configuration =========================
#
# NOTE: Elasticsearch comes with reasonable defaults for most settings.
#       Before you set out to tweak and tune the configuration, make sure you
#       understand what are you trying to accomplish and the consequences.
#
# The primary way of configuring a node is via this file. This template lists
# the most important settings you may want to configure for a production cluster.
#
# Please consult the documentation for further information on configuration options:
# https://www.elastic.co/guide/en/elasticsearch/reference/index.html
#
# ---------------------------------- Cluster -----------------------------------
#
# Use a descriptive name for your cluster:
#
cluster.name: es8.5
#
# ------------------------------------ Node ------------------------------------
#
# Use a descriptive name for the node:
#
node.name: node-2
#
# Add custom attributes to the node:
#
#node.attr.rack: r1
#
# ----------------------------------- Paths ------------------------------------
#
# Path to directory where to store the data (separate multiple locations by comma):
#
path.data: /usr/local/elasticsearch-8.5.2/data02
#
# Path to log files:
#
path.logs: /usr/local/elasticsearch-8.5.2/logs
#
# ----------------------------------- Memory -----------------------------------
#
# Lock the memory on startup:
#
#bootstrap.memory_lock: true
#
# Make sure that the heap size is set to about half the memory available
# on the system and that the owner of the process is allowed to use this
# limit.
#
# Elasticsearch performs poorly when the system is swapping the memory.
#
# ---------------------------------- Network -----------------------------------
#
# By default Elasticsearch is only accessible on localhost. Set a different
# address here to expose this node on the network:
#
network.host: 192.168.3.61
#
# By default Elasticsearch listens for HTTP traffic on the first free port it
# finds starting at 9200. Set a specific HTTP port here:
#
http.port: 9200
#
# For more information, consult the network module documentation.
#
# --------------------------------- Discovery ----------------------------------
#
# Pass an initial list of hosts to perform discovery when this node is started:
# The default list of hosts is ["127.0.0.1", "[::1]"]
discovery.seed_hosts: ["192.168.3.51", "192.168.3.61","192.168.62"]
#
#
# Bootstrap the cluster using an initial set of master-eligible nodes:
cluster.initial_master_nodes: ["node-1", "node-2","node-3"]
#
#
# For more information, consult the discovery and cluster formation module documentation.
#
# --------------------------------- Readiness ----------------------------------
#
# Enable an unauthenticated TCP readiness endpoint on localhost
#
#readiness.port: 9399
#
# ---------------------------------- Various -----------------------------------
#
# Allow wildcard deletion of indices:
#
action.destructive_requires_name: false


xpack.security.enabled: false
3、node3
在路径:/usr/local/elasticsearch-8.5.2/需要创建data03目录(名字任取,只是要和配置文件一致 path.data: /usr/local/elasticsearch-8.5.2/data03)
# ======================== Elasticsearch Configuration =========================
#
# NOTE: Elasticsearch comes with reasonable defaults for most settings.
#       Before you set out to tweak and tune the configuration, make sure you
#       understand what are you trying to accomplish and the consequences.
#
# The primary way of configuring a node is via this file. This template lists
# the most important settings you may want to configure for a production cluster.
#
# Please consult the documentation for further information on configuration options:
# https://www.elastic.co/guide/en/elasticsearch/reference/index.html
#
# ---------------------------------- Cluster -----------------------------------
#
# Use a descriptive name for your cluster:
#
cluster.name: es8.5
#
# ------------------------------------ Node ------------------------------------
#
# Use a descriptive name for the node:
#
node.name: node-3
#
# Add custom attributes to the node:
#
#node.attr.rack: r1
#
# ----------------------------------- Paths ------------------------------------
#
# Path to directory where to store the data (separate multiple locations by comma):
#
path.data: /usr/local/elasticsearch-8.5.2/data03
#
# Path to log files:
#
path.logs: /usr/local/elasticsearch-8.5.2/logs
#
# ----------------------------------- Memory -----------------------------------
#
# Lock the memory on startup:
#
#bootstrap.memory_lock: true
#
# Make sure that the heap size is set to about half the memory available
# on the system and that the owner of the process is allowed to use this
# limit.
#
# Elasticsearch performs poorly when the system is swapping the memory.
#
# ---------------------------------- Network -----------------------------------
#
# By default Elasticsearch is only accessible on localhost. Set a different
# address here to expose this node on the network:
#
network.host: 192.168.3.62
#
# By default Elasticsearch listens for HTTP traffic on the first free port it
# finds starting at 9200. Set a specific HTTP port here:
#
http.port: 9200
#
# For more information, consult the network module documentation.
#
# --------------------------------- Discovery ----------------------------------
#
# Pass an initial list of hosts to perform discovery when this node is started:
# The default list of hosts is ["127.0.0.1", "[::1]"]
discovery.seed_hosts: ["192.168.3.51", "192.168.3.61","192.168.62"]
#
#
# Bootstrap the cluster using an initial set of master-eligible nodes:
cluster.initial_master_nodes: ["node-1", "node-2","node-3"]
#
#
# For more information, consult the discovery and cluster formation module documentation.
#
# --------------------------------- Readiness ----------------------------------
#
# Enable an unauthenticated TCP readiness endpoint on localhost
#
#readiness.port: 9399
#
# ---------------------------------- Various -----------------------------------
#
# Allow wildcard deletion of indices:
#
action.destructive_requires_name: false

xpack.security.enabled: false
第三步:启动ElasticSearch
node1、node2、node3 依次启动
#切换用户

su elsearch

#以后台常驻方式启动
#当前目录:/usr/local/elasticsearch-8.5.2
bin/elasticsearch -d
第四步:验证是否集群部署成功
一、先看单节点是否安装成功
1、访问node1地址 http://192.168.3.51:9200/_cat/health
1671329645 02:14:05 es8.5 green 3 3 19 9 0 0 0 0 - 100.0%2、访问node2地址http://192.168.3.61:9200/_cat/health
1671329720 02:15:20 es8.5 green 3 3 19 9 0 0 0 0 - 100.0%3、访问node2地址http://192.168.3.62:9200/_cat/health
1671329773 02:16:13 es8.5 green 3 3 19 9 0 0 0 0 - 100.0%二、再看集群是否安装成功
http://192.168.3.51:9200/_cat/nodes?pretty
http://192.168.3.61:9200/_cat/nodes?pretty
http://192.168.3.62:9200/_cat/nodes?pretty
访问上面三个地址都会出现下面的内容
192.168.3.62 38 96 0 0.00 0.01 0.05 cdfhilmrstw - node-3
192.168.3.51 50 96 0 0.04 0.05 0.05 cdfhilmrstw - node-1
192.168.3.61 19 96 0 0.05 0.06 0.05 cdfhilmrstw * node-2
至此集群安装成功了
第五步:通过kibana使用集群 只在node1上安装
一、安装
#下载
wget https://artifacts.elastic.co/downloads/kibana/kibana-8.5.3-linux-x86_64.tar.gz
#解压 我的解压到/usr/local/
tar -xzf kibana-8.5.3-linux-x86_64.tar.gz
二、配置,修改配置文件
[root@master config]# pwd
/usr/local/kibana-8.5.2/config
[root@master config]# vim kibana.yml
主要配置两项,其它默认,注意没有用https
elasticsearch.hosts: ['http://192.168.3.51:9200','http://192.168.3.61:9200','http://192.168.3.62:9200']
xpack.fleet.outputs: [{id: fleet-default-output, name: default, is_default: true, is_default_monitoring: true, type: elasticsearch, hosts: ['http://192.168.3.51:9200','http://192.168.3.61:9200','http://192.168.3.62:9200'], ca_trusted_fingerprint: d1894733c1444554b6a412b9bf27707bbdeeb661aa1d458a507dc7522abed0e2}]
三、启动
一、Kibana启动不能使用root用户, 使用上面创建的elsearch用户, 进行赋权:
chown -R elsearch:elsearch kibana-8.5.2#切换用户
su elsearch
[elsearch@master kibana-8.5.2]$ pwd
/usr/local/kibana-8.5.2
[elsearch@master kibana-8.5.2]$ bin/kibana & 四、登陆
用户名:elastic
密码说明:这种方式启动的elasticsearch(yum 安装的能看到初始秘密),启动日志好像没有看到初始秘密,可以通过修改密码
[elsearch@master bin]$ pwd
/usr/local/elasticsearch-8.5.2/bin
[elsearch@master bin]$ ./elasticsearch-reset-password -u elastic
warning: ignoring JAVA_HOME=/usr/app/jdk1.8.0_341; using bundled JDK
This tool will reset the password of the [elastic] user to an autogenerated value.
The password will be printed in the console.
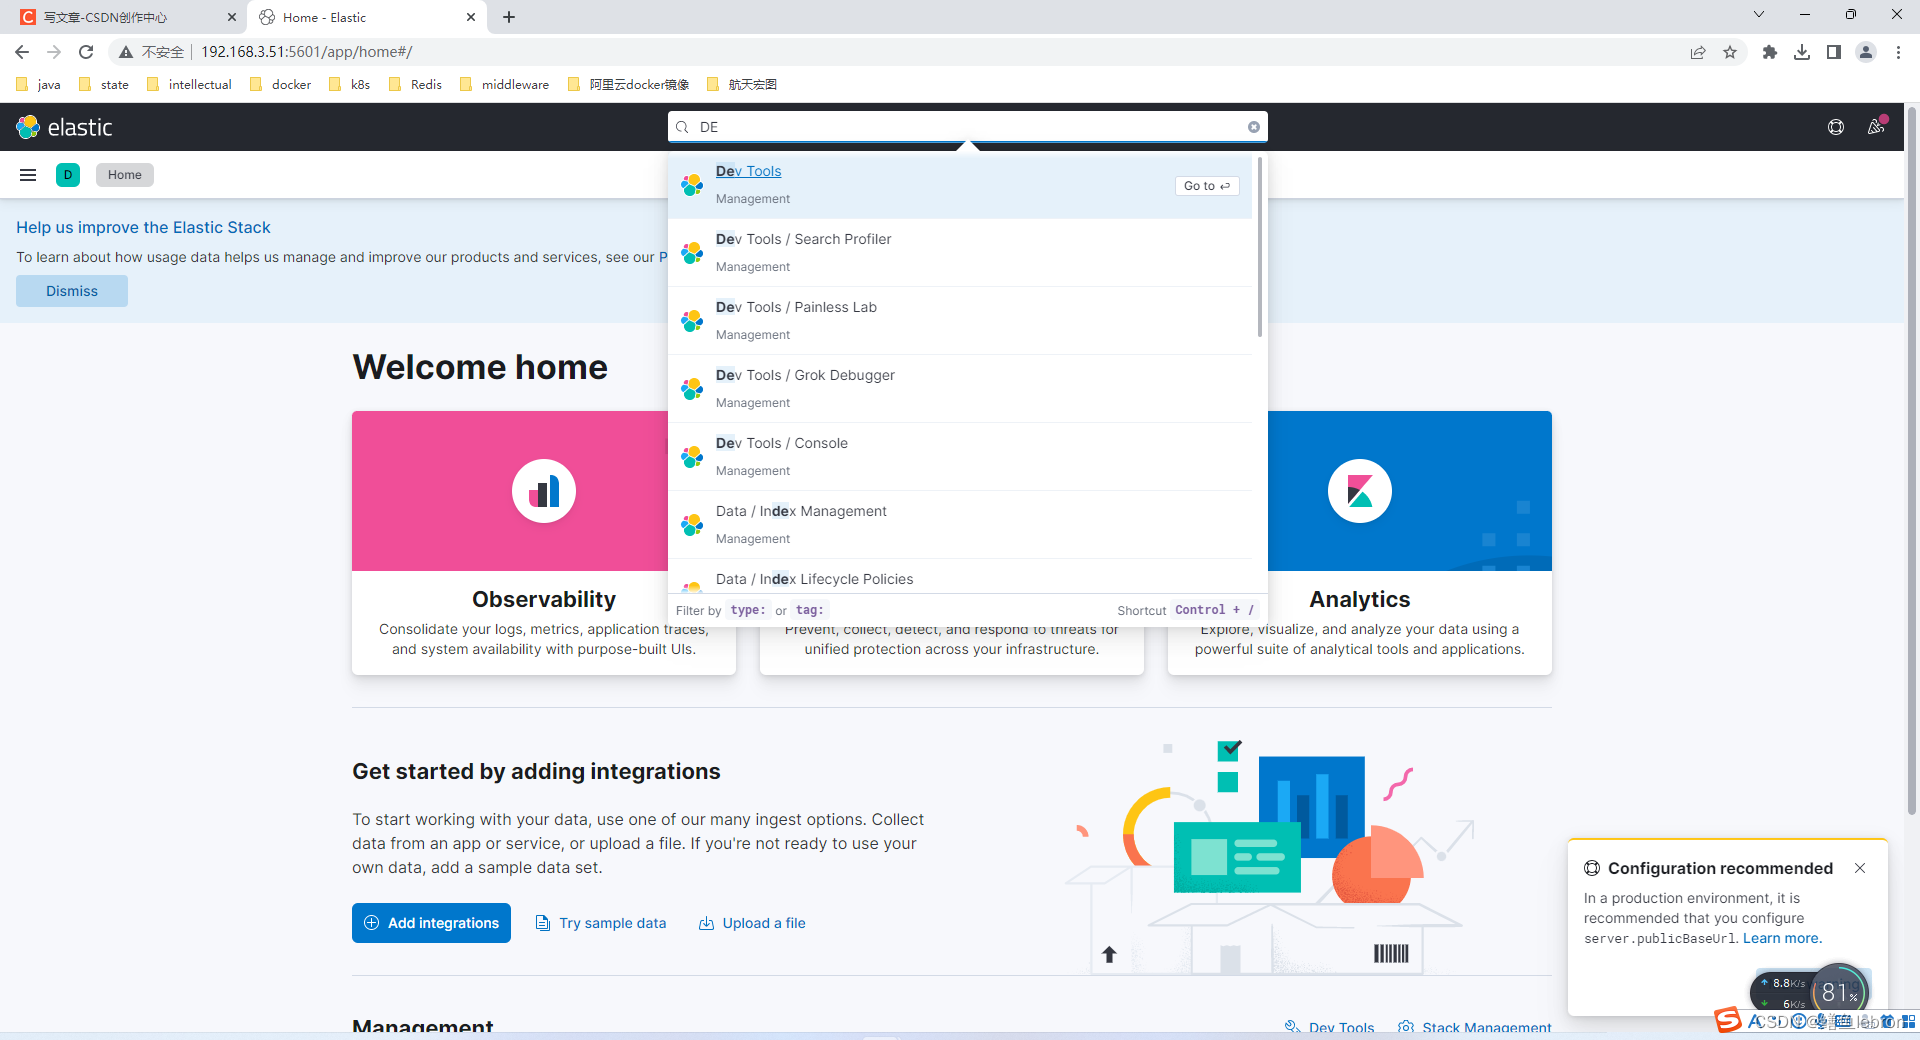
Please confirm that you would like to continue [y/N]五、使用kibana 搜索框输入Dev Tools
PUT orders
{
"settings": {
"index": {
"number_of_shards": 2, #分片数
"number_of_replicas": 2 #副本数 当前三个节点(node1、node2、node3)有两个副本数
}
}
}
可以看到health 是green 表示集群建立成功,如果elasticsearch是单节点,副本数为2health 是yellow
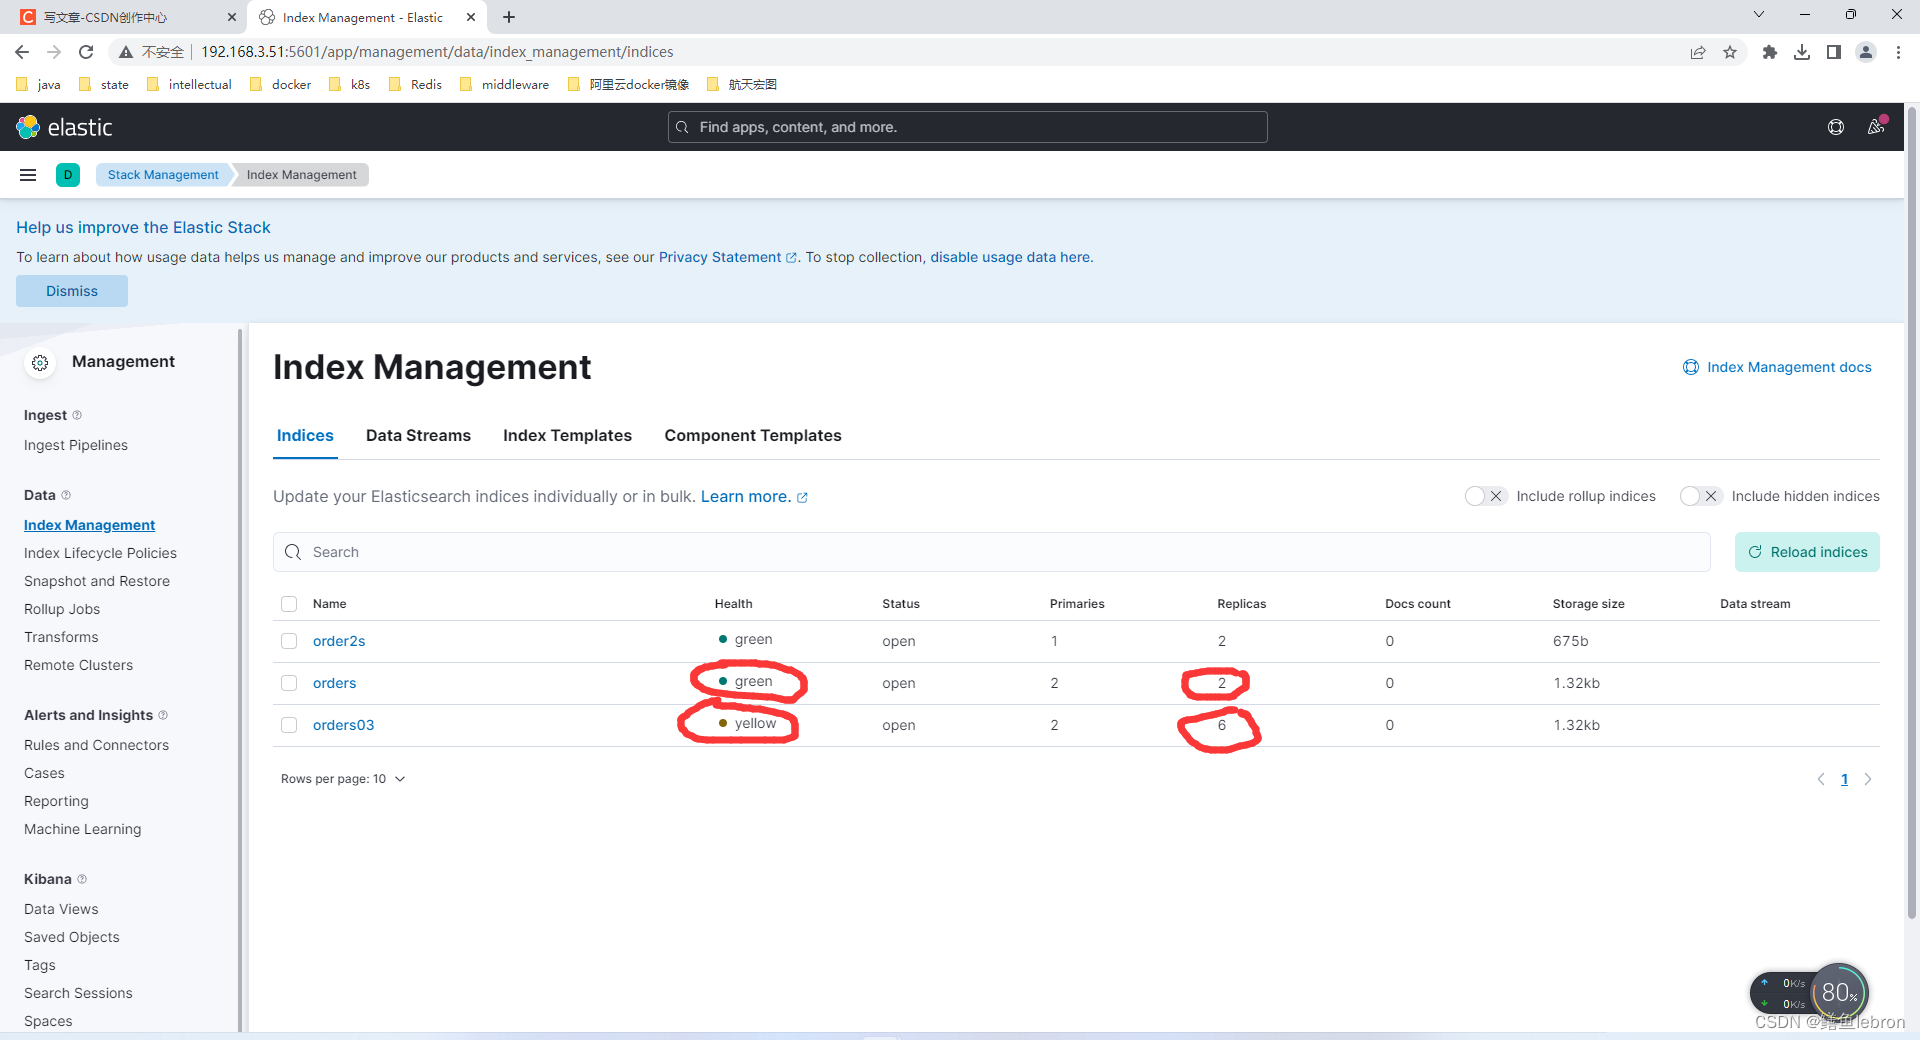
如果修改副本数超过2 ,就会是yellon ,我这里设置了6,因为只有两个节点当副本
PUT orders03
{
"settings": {
"index": {
"number_of_shards": 2,
"number_of_replicas": 6
}
}
}
以上内容属于入门级,还有很多不懂的地方,努力学习实践


 5753
5753


 被折叠的 条评论
为什么被折叠?
被折叠的 条评论
为什么被折叠?
 到【灌水乐园】发言


