


Android 中,View包含View和ViewGroup,以下是API上面的介绍:
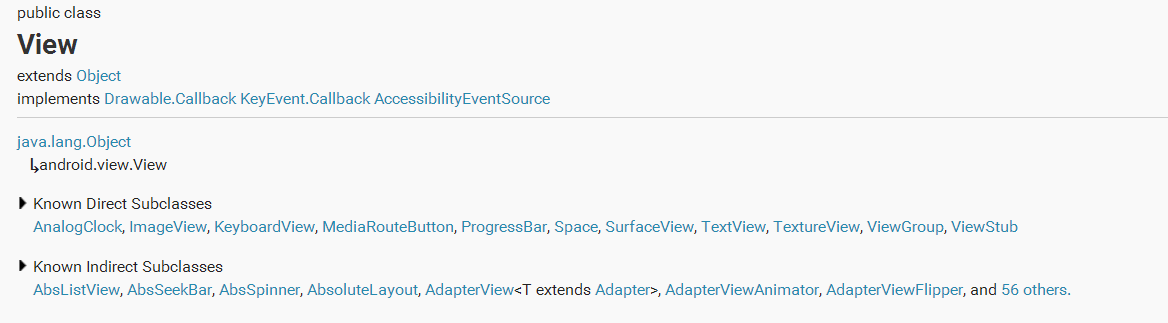
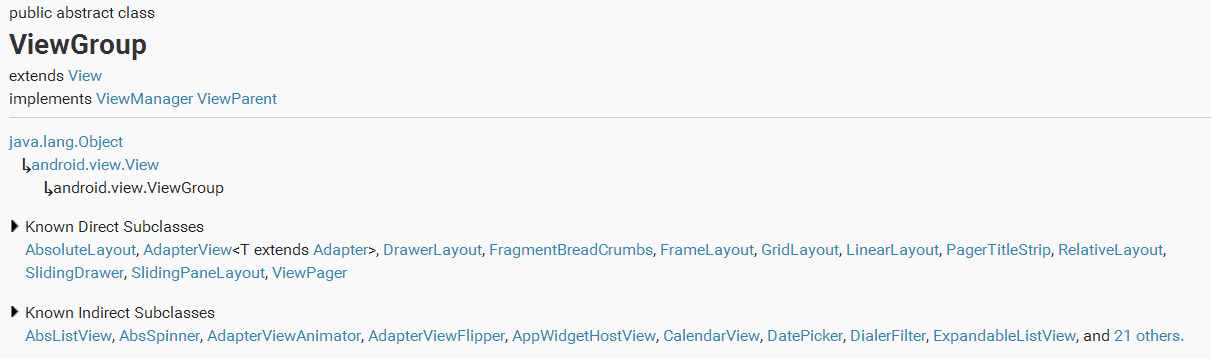
特别注意一点:ViewGroup是抽象类,继承ViewGroup必须重写onLayout方法。
(1)构造器的理解:
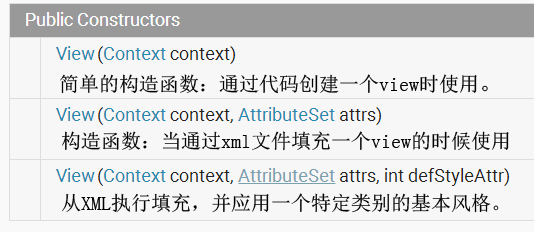
如果在代码中实例化一个View会调用第一个构造函数;
如果在xml中定义会调用第二个构造函数(attrs:我们要获取的属性的资源ID的一个数组);
而第三个函数系统是不调用的,要由View(我们自定义的或系统预定义的View)显式调用,比如在这里我们在第二个构造函数中调用了第三个构造函数,并将R.attr.CustomizeStyle传给了第三个参数。(buttonStyle是系统中定义的一个attribute)
public Button(Context context, AttributeSet attrs) {
    this(context, attrs, com.android.internal.R.attr.buttonStyle);
}

public Button(Context context, AttributeSet attrs, int defStyle) {
    super(context, attrs, defStyle);
}
详细:http://wenku.baidu.com/view/7e08c2d4a8956bec0875e38d.html
(2)重要方法理解:
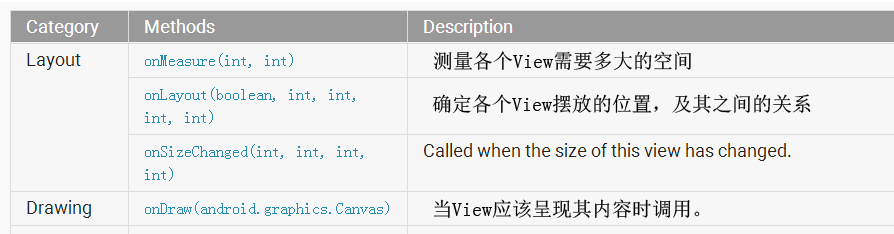
注意:draw或layout的过程有可能是一个频繁重复执行的过程,所以不应该在这两个方法中去new对象,放在构造器中。
(3)测试一下:
等级一:最简单的自定义View--画一个圆形:
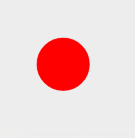
public class CustomView extends View  {
    Context mContext;
    Paint paint;

    public CustomView(Context context) {
        super(context);
        mContext = context;
        initAll();
    }

    // AttributeSet attrs 属性值,比如android:layout_width,android:layout_height,或者res/values/attrs.xml中自定义的属性
    public CustomView(Context context, AttributeSet attrs) {
        super(context, attrs);
        mContext = context;
        initAll();
    }

    public CustomView(Context context, AttributeSet attrs, int defStyleAttr) {
        super(context, attrs, defStyleAttr);
        mContext = context;
        initAll();
    }

    //该方法让我们绘制自己想要的东西,必须要两种东西:Canvas(画布)和Paint(画笔)
    //画布Canvas作为签名被传递进来,Android为我们准备好的,不需要你去管。
    //Paint需要自己new一个,但是draw或layout的过程有可能是一个频繁重复执行的过程,所以不应该在这两个方法中去new对象,放在构造器中
    @Override
    protected void onDraw(Canvas canvas) {
        super.onDraw(canvas);
        // 绘制圆环
        canvas.drawCircle(300, 300, 50, paint);
    }


    private void initAll() {
        paint = new Paint();
        paint.setAntiAlias(true);
        //画笔样式分描边
        paint.setStyle(Paint.Style.FILL);
        // 设置画笔颜色为浅灰色
        paint.setColor(Color.RED);
        paint.setStrokeWidth(10);
    }
}
xml使用:
<com.hujing.android22.test.view.MyView
   android:layout_width="wrap_content"
   android:layout_height="wrap_content" />
等级二:自定义ViewGroup(LinearLayout)
(a)效果图:
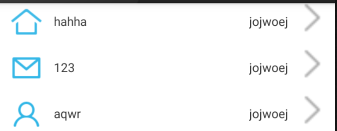
(b)需求解说:上面这张图,你不要理解为listView显示一条一个信息,在adapter里面改变内容。我们的想法是这一块

(c)步骤:
1、自定义的属性:
在res/values下自定义一个名字的values文件,多数开发者喜欢用attrs.xml,内容就是自定义的属性,如下icon表示左边的图标,name代表中间的属性名,info代表靠右边的属性名。这里我们只是改变三个地方,不改变最右边的>,所以不用在这里写属性。
<?xml version="1.0" encoding="utf-8"?>
<resources>

    <declare-styleable name="MyLayout">
        <attr name="icon" format="reference" />
        <attr name="name" format="string" />
        <attr name="info" format="string" />
    </declare-styleable>

</resources>
format是值该属性的取值类型: string,color,demension,integer,enum,reference,float,boolean,fraction,flag;见文章最后
2、在View的构造器中获得我们的属性:
TypedArray a = context.getTheme().obtainStyledAttributes(attrs, R.styleable.MyLayout, defStyle, 0);
第二个参数:R.styleable.MyLayout就是上一步中的res/values/attrs.xml文件里面的,name="MyLayout"的Styleable
public class MyViewGroup extends LinearLayout {
   Context context;
   ImageView image;
   TextView tv_name;
   TextView tv_info;
   public MyViewGroup(Context context) {
      super(context);
      loadLayout(context);
   }


   public MyViewGroup(Context context, AttributeSet attrs) {
      super(context, attrs);
      loadLayout(context);
      loadAttributeSet(attrs);
   }

   public MyViewGroup(Context context, AttributeSet attrs, int defStyle) {
      super(context, attrs, defStyle);
   }/**
 * 为当前容器加载布局
 * @param context
 */
private void loadLayout(Context context) {
   this.context=context;
   setOrientation(LinearLayout.HORIZONTAL);
   LayoutInflater.from(context).inflate(R.layout.custom_viewgroup, this);
   image=(ImageView) findViewById(R.id.image);
   tv_name= (TextView) findViewById(R.id.tv_name);
   tv_info= (TextView) findViewById(R.id.tv_info);
   setOnClickListener(Listener);
}

private void loadAttributeSet(AttributeSet attrs) {
   TypedArray a = context.obtainStyledAttributes(attrs,
         R.styleable.MyLayout);// R.styleable.MyLayout属性集
   Drawable icon = a.getDrawable(R.styleable.MyLayout_icon);
   String name=a.getString(R.styleable.MyLayout_name);
   String info=a.getString(R.styleable.MyLayout_info);
   a.recycle();
   image.setImageDrawable(icon);
   tv_name.setText(name);
   tv_info.setText(info);
}
为什么是继承LinearLayout,因为custom_viewgroup.xml的根是LinearLayout,而下面看到的根元素选择merge是为了在自定义的ViewGroup代码里面减少层级。
custom_viewgroup.xml代码
<merge
    xmlns:android="http://schemas.android.com/apk/res/android"
    android:layout_width="match_parent"
    android:layout_height="wrap_content" >

    <ImageView
        android:id="@+id/image"
        android:layout_width="wrap_content"
        android:layout_height="wrap_content"
        android:paddingLeft="10dp"
        android:src="@drawable/icon_1_d" />

    <TextView
        android:id="@+id/tv_name"
        android:layout_width="0dip"
        android:layout_height="wrap_content"
        android:layout_gravity="center_vertical"
        android:layout_weight="1"
        android:paddingLeft="10dp"
        android:text="软件升级" />

    <TextView
        android:id="@+id/tv_info"
        android:layout_width="wrap_content"
        android:layout_height="wrap_content"
        android:layout_gravity="center_vertical"
        android:paddingRight="10dp"
        android:text="已为最新版" />

    <ImageView
        android:layout_width="wrap_content"
        android:layout_height="wrap_content"
        android:layout_marginRight="10dp"
        android:src="@drawable/common_icon_arrow" />

</merge>
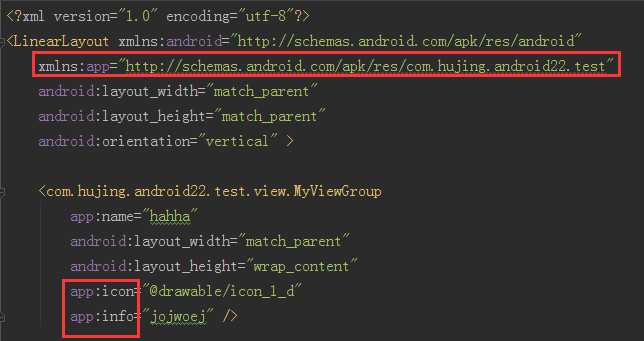
3、在布局中加载自己自定义的ViewGroup,并改变属性值
<LinearLayout xmlns:android="http://schemas.android.com/apk/res/android"
    xmlns:app="http://schemas.android.com/apk/res/com.hujing.android22.test"
    android:layout_width="match_parent"
    android:layout_height="match_parent"
    android:orientation="vertical" >

    <com.hujing.android22.test.view.MyViewGroup
        app:name="hahha"
        android:layout_width="match_parent"
        android:layout_height="wrap_content"
        app:icon="@drawable/icon_1_d"
        app:info="jojwoej" />

    <com.hujing.android22.test.view.MyViewGroup
        app:name="123"
        android:layout_width="match_parent"
        android:layout_height="wrap_content"
        android:layout_marginTop="10dp"
        app:icon="@drawable/icon_2_d"
        app:info="jojwoej" />

    <com.hujing.android22.test.view.MyViewGroup
        app:name="aqwr"
        android:layout_width="match_parent"
        android:layout_height="wrap_content"
        android:layout_marginTop="10dp"
        app:icon="@drawable/icon_3_d"
        app:info="jojwoej" />

</LinearLayout>
注意下图中红色的部分,这就是自定义的属性,app:icon就类似android:xxx去找属性名一样的意思。
以上只是简单的自定义View,复杂的自定义View是需要其他方法的,比如onDraw,onLayout,onMesure等方法的合理使用来完成。
format取值类型:
format表示的属性类型可以为boolean, string, integer, dimension, float, reference, color, fraction, enum, flag及其混合。
(1)boolean表示布尔值,调用如 xx:attr1="false"
(2)integer表示整型,调用如 xx:attr1="1"
(3)dimension表示尺寸值,调用如 xx:attr1="42dp"
(4)float表示浮点型,调用如 xx:attr1="0.7"
(5)color表示颜色值,调用如 xx:attr1="#00FF00"
(6)string表示字符串,调用如 xx:attr1="adbddd"
(7)reference表示参考某一资源id,调用如 xx:attr1 = "@drawable/图片ID"
(8)fraction表示百分数,调用如 xx:attr1="30%"
以上类型定义都为<attr name="attr1" format="xxxtype"/>
(9)enum表示枚举值,定义为
<attr name="enum_attr">
      <enum name="horizontal" value="0" />
      <enum name="vertical" value="1" />
</attr>
调用如 xx:attr1="horizontal"
(10)flag表示位或运算,定义为
<attr name="windowSoftInputMode">
    <flag name = "stateUnspecified" value = "0" />
    <flag name = "stateUnchanged" value = "1" />
    <flag name = "stateHidden" value = "2" />
    <flag name = "stateAlwaysHidden" value = "3" />
    <flag name = "stateVisible" value = "4" />
    <flag name = "stateAlwaysVisible" value = "5" />
    <flag name = "adjustUnspecified" value = "0x00" />
    <flag name = "adjustResize" value = "0x10" />
    <flag name = "adjustPan" value = "0x20" />
    <flag name = "adjustNothing" value = "0x30" />
 </attr>
调用如:xx:attr1="stateUnspecified | stateUnchanged | stateHidden"
(11)混合类型,定义为
<declare-styleable name = "combine_type">
    <attr name = "background" format = "reference|color" />
</declare-styleable>
调用如 xx:attr1 = "@drawable/图片ID|#DDFF00"
鸿洋大神推送的文章:
某个效果绘制不出来不代表你不会自定义View,只要你熟知流程,能够很好的把握测量,能够绘制一个圆圈,也能说你会自定义View了。所以很多时候,你不是不会自定View,而是你可能不太熟悉知识的组合或者某个API没有了解过,无法绘制出别人那种炫酷的效果而已。
其实学习系统提供的控件是非常好的学习方式,你最起码可以知道一些可靠性比较高的处理方式,比如什么时候拦截,多少距离算触发滚动等。
对于系统提供的这些辅助类,原则上一定要好好理解,更可能的去使用它们,可以帮助你更好的掌握自定义ViewGroup。

NestedScrolling的确很神奇,不过网上也有很多资料了,灵活的使用,可以帮助你减少嵌套滑动的非常多的代码,而且还有一定的解耦能力。


 1585
1585

 被折叠的 条评论
为什么被折叠?
被折叠的 条评论
为什么被折叠?
 到【灌水乐园】发言


