


❤️砥砺前行,不负余光,永远在路上❤️
目录
前言
因为业务需要我这里是小程序 结合 nodejs来实现的websocket通信
一、服务端
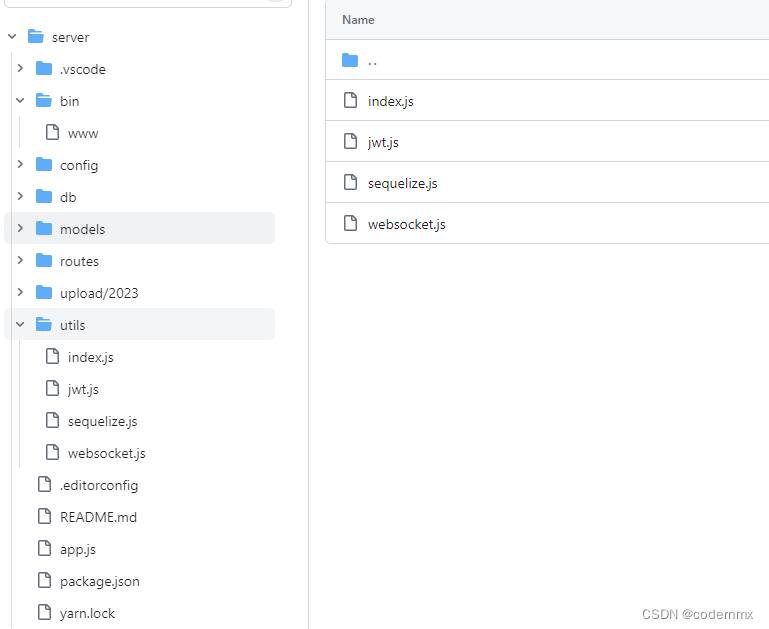
1、主要是通过node+express+websocket搭建
2、代码大概结构
3、nodejs 启动入口文件 引入自己的websocket文件,这里是为了和 http 服务结合起来,将server传入
自己的文件中,http.createServer(app)
客户端那边就可以通过以下网址去访问了
ws://${IP}:3000/ // 3000也就是自己node启动的端口 另外 + 本机ip
const { port } = require('../config/index')
var app = require('../app');
var debug = require('debug')('projectname:server');
var http = require('http');
app.set('port', port);
var server = http.createServer(app);

try {
	const Websocket = require('../utils/websocket')(server)
} catch (error) {
	console.log(error);
}
4、websocket.js 工具文件完整代码
做个说明,这个是包含了我自己的部分业务需要,如果自己用不上数据库相关的东西可以删除,
我是在 headres 拿到token自己去去解析用户信息,还在headers 中携带了一个用户信息,
区分空间主要是在 连接websocket 的url上处理的,相同的房间请求同一个url,代码中也包含了详细注释。
/*
 * @Date: 2023-05-24 09:23:47
 * @LastEditTime: 2023-05-26 13:51:52
 */

const jwt = require('../utils/jwt')
const { literal, Op, Sequelize } = require("sequelize");
const { User, Room, RoomUser, Record, Standings } = require('../models/index')
const { uuid } = require('../utils/index');


const WebSocket = require('ws');
module.exports = function (server) {
	try {
		// 创建WebSocket服务器
		const wss = new WebSocket.Server({ server });
		// 管理连接和空间的数据结构
		const connections = new Map(); // 存储连接的Map,key为空间名称,value为连接数组

		// 监听连接事件
		wss.on('connection', async function connection (ws, req) {
			addToSpace(ws, req.url.split('/')[1]);
			console.log('New client connected', '------------------------------>');
			// 在这里可以访问 WebSocket 请求的请求头
			let { id } = jwt.verifyToken(req.headers.token);
			const roomId = req.headers['room-id']


			//通过 id去获取用户信息  / 不然可能用户更新了信息但是还是原来的token
			const res = await User.findOne({
				where: { id },
				raw: true,
			});
			//查看用户是否加入到房间
			let userIsJoin = await Record.findOne({
				where: { roomId, fromId: id, type: '2' },
				raw: true,
			});
			if (!userIsJoin) { //没有就加一个
				await Record.create({ id: uuid(), roomId, fromId: id, type: '2', createTime: Sequelize.fn('NOW') })
			}
			//有新的连接 也要下发信息
			console.log(`${res.nickName}加入了房间`, roomId);
			const data = { spaceName: req.url.split('/')[1], userJoin: `${res.nickName}加入了房间` }
			handleIncomingMessage(ws, JSON.stringify(data));

			// 监听消息接收事件
			ws.on('message', function incoming (message) {
				console.log('Received message:', message.toString('utf8'), '----------->', message);
				handleIncomingMessage(ws, message.toString('utf8'));
			});

			// 监听连接关闭事件
			ws.on('close', async function close () {
				console.log('Client disconnected');
				//查看用户是否加入到房间
				let userIsJoin = await Record.findOne({
					where: { roomId, fromId: id, type: '3' },
					raw: true,
				});
				if (!userIsJoin) { //没有就加一个
					await Record.create({ id: uuid(), roomId, fromId: id, type: '3', createTime: Sequelize.fn('NOW') })
				}

				const data = { spaceName: req.url.split('/')[1], userLeave: `${res.nickName}退出了房间` }
				handleIncomingMessage(ws, JSON.stringify(data));

				removeConnectionFromAllSpaces(ws);
			});
		});

		// 处理接收到的消息
		function handleIncomingMessage (ws, message) {
			const messageString = JSON.parse(message);
			// 假设消息格式为 "SPACE_NAME|MESSAGE_CONTENT"
			const { spaceName } = messageString
			// connection.send(content);
			const connectionsInSpace = connections.get(spaceName);
			if (connectionsInSpace) {
				// 向当前空间的所有连接发送消息
				connectionsInSpace.forEach(connection => {
					// if (connection == ws && connection.readyState === WebSocket.OPEN) {
					// 	console.log('send----------------------------');
					connection.send(JSON.stringify(messageString));
					// }
				});
			}
		}

		// 将连接添加到指定空间
		function addToSpace (ws, spaceName) {
			console.log(spaceName, '房间名称');
			let connectionsInSpace = connections.get(spaceName);
			if (!connectionsInSpace) {
				connectionsInSpace = new Set();
				connections.set(spaceName, connectionsInSpace);
			}
			connectionsInSpace.add(ws);
		}

		// 将连接从所有空间中移除
		function removeConnectionFromAllSpaces (ws) {
			connections.forEach(connectionsInSpace => {
				connectionsInSpace.delete(ws);
			});
		}
	} catch (error) {
		console.log(error);
	}
}
二、客户端部分
1、小程序在oonload中 连接websocket
onLoad(options) {
        console.log(options);
        const { roomNum, roomId } = options
        if (roomNum) {
                this.setData({ roomNum })
        }
        // this.getRoomInfo(wx.getStorageSync('roomId')) 这是拉取房间信息的接口  相当yu是在收到服务端消息之后自己去获取最新的信息
        this.connectWebSocket()  // 连接WebSocket服务器
},
2、this.connectWebSocket 代码和向服务器发送消息的代码如下
下面的WS_URL有标注。roomNum 就是房间编号是需要客户端这边确定 。
// WS_URL = ws://${IP}:3000/
/**
 * 连接WebSocket服务器
 */
connectWebSocket: function () {
        var _this = this
        wx.connectSocket({
                url: WS_URL + wx.getStorageSync('roomNum'),
                header: {
                        "token": wx.getStorageSync('token'),
                        "room-id": wx.getStorageSync('roomId'),
                },
                success: (res) => {
                        console.log('WebSocket连接成功:', res)
                        // wechatSIPlayAudio('WebSocket连接成功')
                        // _this.getRoomInfo(wx.getStorageSync('roomId'))
                },
                fail: function (res) {
                        console.log('WebSocket连接失败:', res)
                }
        })
        wx.onSocketOpen(function (res) {
                console.log('WebSocket连接已打开')
                _this.setData({ socketOpen: true })
        })
        wx.onSocketError(function (res) {
                console.log('WebSocket连接打开失败:', res)
        })
        wx.onSocketClose(function (res) {
                console.log('WebSocket连接已关闭:', res)
                _this.setData({
                        socketOpen: false
                })
        })
        wx.onSocketMessage(function (res) {
                //  收到服务器发送的数据之后  重新拉取 更新列表
                const data = JSON.parse(res.data)
                console.log('接收到服务器发送的数据:', data)
                if (data.toId === wx.getStorageSync('userId')) {
                        getApp().util.toast(data.toMsg)
                        wechatSIPlayAudio(data.toMsg)
                        setTimeout(() => {
                                _this.getRoomInfo(wx.getStorageSync('roomId'))
                        }, 3000);
                } else {
                        _this.getRoomInfo(wx.getStorageSync('roomId'))
                }
                //用户加入 播报
                if (data.userJoin) {
                        wechatSIPlayAudio(data.userJoin)
                }

                //用户退出 播报
                if (data.userLeave) {
                        wechatSIPlayAudio(data.userLeave)
                }
        })
},
/**
 * 发送WebSocket消息
 */
sendSocketMessage: function (params) {
        if (this.data.socketOpen) {
                wx.sendSocketMessage({
                        data: JSON.stringify({
                                spaceName: wx.getStorageSync('roomNum'),
                                ...params
                        })
                })
        }
},
3、客户端说明
小程序这边逻辑 主要是在 收到服务端发送的消息之后去拉取最新的数据,来更新界面。


 256
256


 被折叠的 条评论
为什么被折叠?
被折叠的 条评论
为什么被折叠?
 到【灌水乐园】发言


