


目录
4.2 将项目用到的图片和公共样式放入到images和style文件夹下
一、uni-app简介
uni-app 是一个使用 Vue.js 开发所有前端应用的框架,开发者编写一套代码,可发布到iOS、Android、Web(响应式)、以及各种小程序(微信/支付宝/百度/头条/飞书/QQ/快手/钉钉/淘宝)、快应用等多个平台。
uni-app在手,做啥都不愁。即使不跨端,uni-app也是更好的小程序开发框架(详见)、更好的App跨平台框架、更方便的H5开发框架。不管领导安排什么样的项目,你都可以快速交付,不需要转换开发思维、不需要更改开发习惯。
二、快速上手
uni-app支持通过 可视化界面、vue-cli命令行 两种方式快速创建项目。
可视化的方式比较简单,HBuilderX内置相关环境,开箱即用,无需配置nodejs。
开始之前,开发者需先下载安装如下工具:
- HBuilderX:官方IDE下载地址
HBuilderX是通用的前端开发工具,但为uni-app做了特别强化。
2.1 创建uni-app
在点击工具栏里的文件 -> 新建 -> 项目(快捷键Ctrl+N):
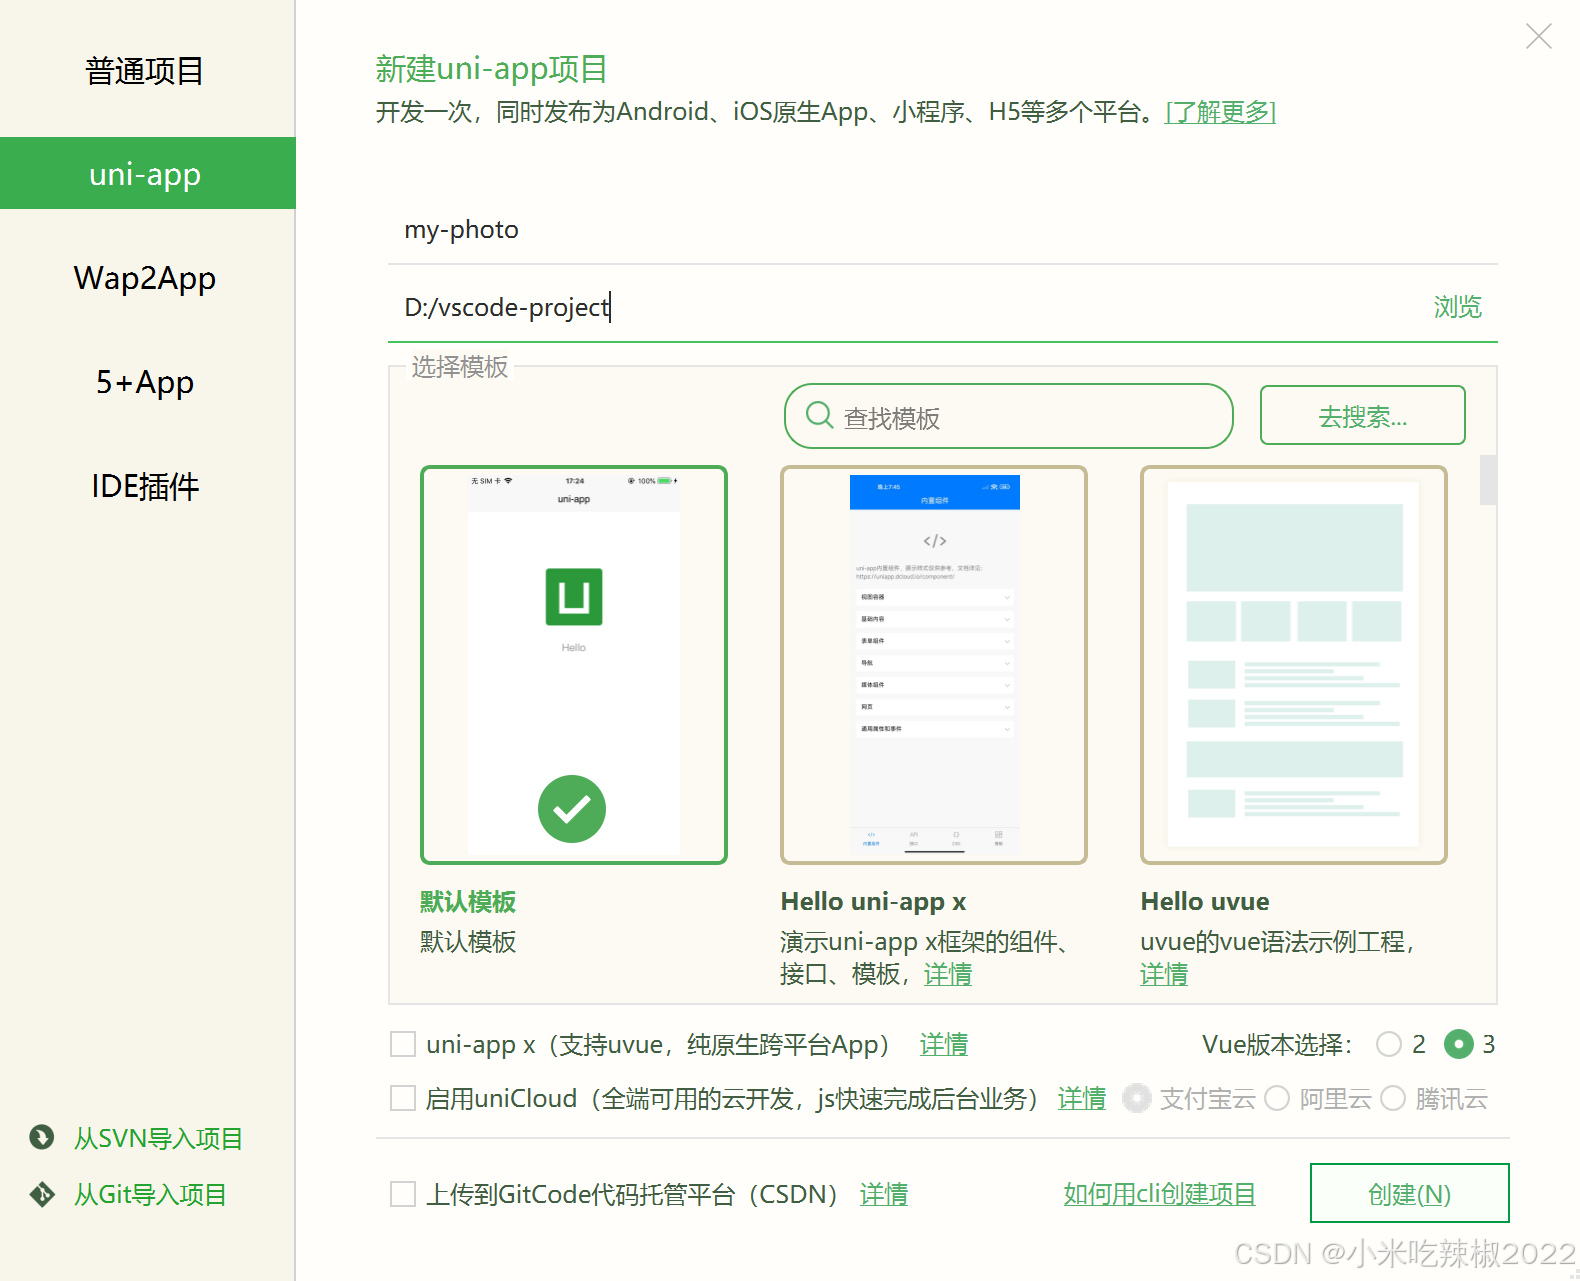
这里我们创建一个uni-app项目,命名为my-photo,vue版本选择3,点击创建按钮。
2.2 运行uni-app
-
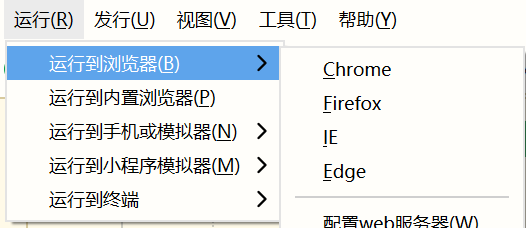
浏览器运行:进入hello-uniapp项目,点击工具栏的运行 -> 运行到浏览器 -> 选择浏览器,即可体验 uni-app 的 web 版。
-
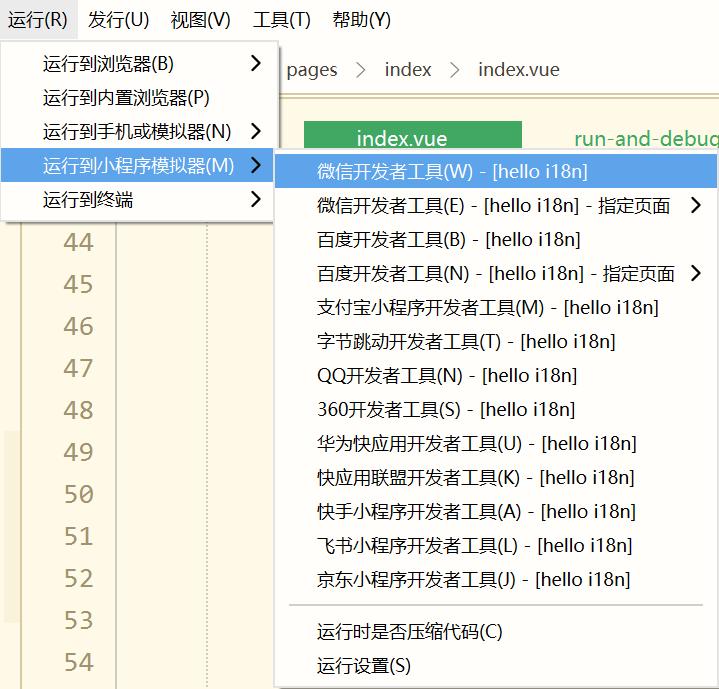
在微信开发者工具里运行:进入hello-uniapp项目,点击工具栏的运行 -> 运行到小程序模拟器 -> 微信开发者工具,即可在微信开发者工具里面体验uni-app。
注意:如果是第一次使用,需要先配置小程序ide的相关路径,才能运行成功。如下图,需在输入框输入微信开发者工具的安装路径。

注意:微信开发者工具需要开启服务端口 在微信工具的设置->安全中。
三、项目代码结构
一个uni-app工程,默认包含如下目录及文件:
┌─uniCloud 云空间目录,支付宝小程序云为uniCloud-alipay,阿里云为uniCloud-aliyun,腾讯云为uniCloud-tcb(详见uniCloud)
│─components 符合vue组件规范的uni-app组件目录
│ └─comp-a.vue 可复用的a组件
├─utssdk 存放uts文件
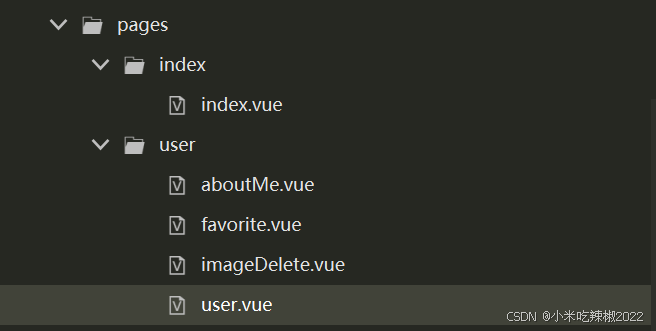
├─pages 业务页面文件存放的目录
│ ├─index
│ │ └─index.vue index页面
│ └─list
│ └─list.vue list页面
├─static 存放应用引用的本地静态资源(如图片、视频等)的目录,注意:静态资源都应存放于此目录
├─uni_modules 存放uni_module 详见
├─platforms 存放各平台专用页面的目录,详见
├─nativeplugins App原生语言插件 详见
├─nativeResources App端原生资源目录
│ ├─android Android原生资源目录 详见
| └─ios iOS原生资源目录 详见
├─hybrid App端存放本地html文件的目录,详见
├─wxcomponents 存放小程序组件的目录,详见
├─unpackage 非工程代码,一般存放运行或发行的编译结果
├─main.js Vue初始化入口文件
├─App.vue 应用配置,用来配置App全局样式以及监听 应用生命周期
├─pages.json 配置页面路由、导航条、选项卡等页面类信息,详见
├─manifest.json 配置应用名称、appid、logo、版本等打包信息,详见
├─AndroidManifest.xml Android原生应用清单文件 详见
├─Info.plist iOS原生应用配置文件 详见
└─uni.scss 内置的常用样式变量
static目录
- 为什么需要static这样的目录?
uni-app编译器根据pages.json扫描需要编译的页面,并根据页面引入的js、css合并打包文件。
对于本地的图片、字体、视频、文件等资源,如果可以直接识别,那么也会把这些资源文件打包进去,但如果这些资源以变量的方式引用, 比如:<image :src="url"></image>,甚至可能有更复杂的函数计算,此时编译器无法分析。
那么有了static目录,编译器就会把这个目录整体复制到最终编译包内。这样只要运行时确实能获取到这个图片,就可以显示。
当然这也带来一个注意事项,如果static里有一些没有使用的废文件,也会被打包到编译包里,造成体积变大。
另外注意,static目录支持特殊的平台子目录,比如web、app、mp-weixin等,这些目录存放专有平台的文件,这些平台的文件在打包其他平台时不会被包含。详见条件编译
非 static 目录下的文件(vue组件、js、css 等)只有被引用时,才会被打包编译。
css、less/scss 等资源不要放在 static 目录下,建议这些公用的资源放在自建的 common 目录下。
- static目录和App原生资源目录有关系吗?
uni-app支持App原生资源目录nativeResources,下面有assets、res等目录,详见。但和static目录没有关系。
static目录下的文件,在app第一次启动时,解压到了app的外部存储目录(external-path)。(uni-app x 从3.99+不再解压)
所以注意控制static目录的大小,太大的static目录和太多文件,会造成App安装后第一次启动变慢。
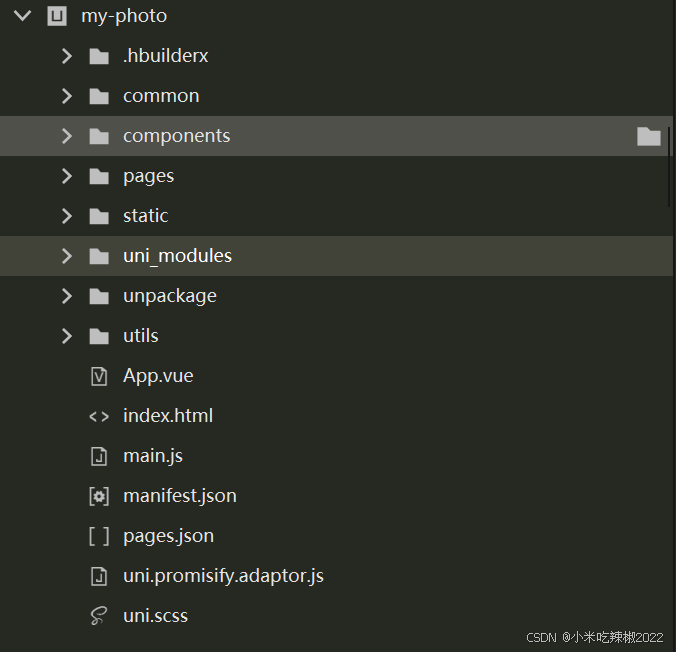
例如我们创建的项目代码结构如下:
四、静态资源配置
4.1 在项目跟目录下创建common目录
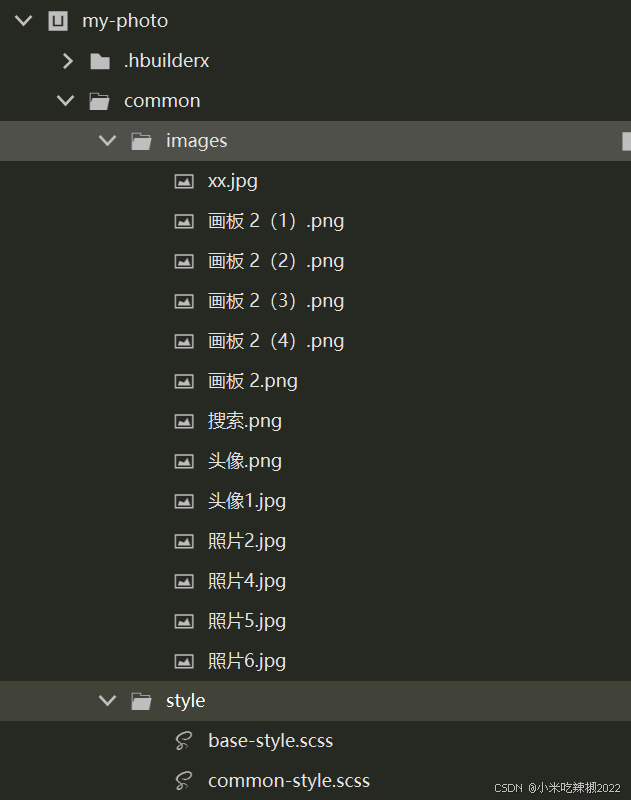
4.2 将项目用到的图片和公共样式放入到images和style文件夹下
编写base-style.scss, 后面会将这个css文件引入到uni.scss中,便于使用$text-font-color-1; 的形式使用样式。
$brand-theme-color:#28B389;      //品牌主体红色

$border-color:#e0e0e0;           //边框颜色
$border-color-light:#efefef;     //边框亮色

$text-font-color-1:#000;         //文字主色
$text-font-color-2:#676767;      //副标题颜色
$text-font-color-3:#a7a7a7;      //浅色
$text-font-color-4:#e4e4e4;      //更浅
编写common-style.scss
view,swiper,swiper-item{
	box-sizing: border-box;
}

.pageBg{
	background:
	linear-gradient(to bottom,transparent,#fff 400rpx),
	linear-gradient(to right,#beecd8 20%,#F4E2D8);
	min-height: 80vh;
}
使用@import在uni.scss中引入base-style.scss
/**
 * 这里是uni-app内置的常用样式变量
 *
 * uni-app 官方扩展插件及插件市场(https://ext.dcloud.net.cn)上很多三方插件均使用了这些样式变量
 * 如果你是插件开发者,建议你使用scss预处理,并在插件代码中直接使用这些变量(无需 import 这个文件),方便用户通过搭积木的方式开发整体风格一致的App
 *
 */

/**
 * 如果你是App开发者(插件使用者),你可以通过修改这些变量来定制自己的插件主题,实现自定义主题功能
 *
 * 如果你的项目同样使用了scss预处理,你也可以直接在你的 scss 代码中使用如下变量,同时无需 import 这个文件
 */

/* 颜色变量 */
@import "@/common/style/base-style.scss";
/* 行为相关颜色 */
$uni-color-primary: #007aff;
$uni-color-success: #4cd964;
$uni-color-warning: #f0ad4e;
$uni-color-error: #dd524d;

/* 文字基本颜色 */
$uni-text-color:#333;//基本色
$uni-text-color-inverse:#fff;//反色
$uni-text-color-grey:#999;//辅助灰色,如加载更多的提示信息
$uni-text-color-placeholder: #808080;
$uni-text-color-disable:#c0c0c0;

/* 背景颜色 */
$uni-bg-color:#ffffff;
$uni-bg-color-grey:#f8f8f8;
$uni-bg-color-hover:#f1f1f1;//点击状态颜色
$uni-bg-color-mask:rgba(0, 0, 0, 0.4);//遮罩颜色

/* 边框颜色 */
$uni-border-color:#c8c7cc;

/* 尺寸变量 */

/* 文字尺寸 */
$uni-font-size-sm:12px;
$uni-font-size-base:14px;
$uni-font-size-lg:16px;

/* 图片尺寸 */
$uni-img-size-sm:20px;
$uni-img-size-base:26px;
$uni-img-size-lg:40px;

/* Border Radius */
$uni-border-radius-sm: 2px;
$uni-border-radius-base: 3px;
$uni-border-radius-lg: 6px;
$uni-border-radius-circle: 50%;

/* 水平间距 */
$uni-spacing-row-sm: 5px;
$uni-spacing-row-base: 10px;
$uni-spacing-row-lg: 15px;

/* 垂直间距 */
$uni-spacing-col-sm: 4px;
$uni-spacing-col-base: 8px;
$uni-spacing-col-lg: 12px;

/* 透明度 */
$uni-opacity-disabled: 0.3; // 组件禁用态的透明度

/* 文章场景相关 */
$uni-color-title: #2C405A; // 文章标题颜色
$uni-font-size-title:20px;
$uni-color-subtitle: #555555; // 二级标题颜色
$uni-font-size-subtitle:26px;
$uni-color-paragraph: #3F536E; // 文章段落颜色
$uni-font-size-paragraph:15px;
在App.vue中引入全局公共样式
<script>
export default {
onLaunch: function() {
console.log('App Launch')
},
onShow: function() {
console.log('App Show')
},
onHide: function() {
console.log('App Hide')
}
}
</script>
<style>
/*每个页面公共css */
@import "common/style/common-style.scss"
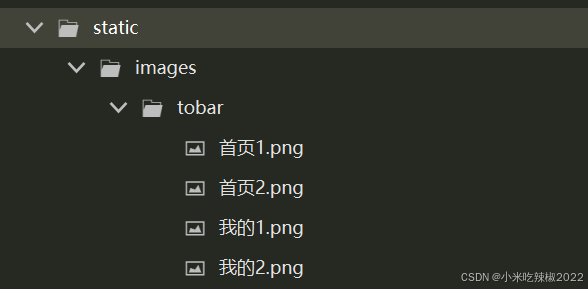
</style>4.3 将页面tobar用到的图片放到static文件夹下
五、配置页面路由、导航条、选项卡等页面类信息
修改pages.json文件内容
{
	"pages": [ //pages数组中第一项表示应用启动页,参考:https://uniapp.dcloud.io/collocation/pages
		{
			"path": "pages/index/index",
			"style": {
				"navigationBarTitleText": "相册"
			}
		},
		{
			"path": "pages/user/user",
			"style": {
				"navigationBarTitleText": "我的"
			}
		},
		{
			"path": "pages/user/favorite",
			"style": {
				"navigationBarTitleText": "我的收藏"
			}
		},
		{
			"path": "pages/user/imageDelete",
			"style": {
				"navigationBarTitleText": "图片回收站"
			}
		},
		{
			"path": "pages/user/aboutMe",
			"style": {
				"navigationBarTitleText": "关于我们"
			}
		}
	],
	"globalStyle": {
		"navigationBarTextStyle": "black",
		"navigationBarTitleText": "uni-app",
		"navigationBarBackgroundColor": "#F8F8F8",
		"backgroundColor": "#F8F8F8"
	},
	"uniIdRouter": {},
	"tabBar": {
		"color": "#9799a5",
		"selectedColor": "#28B389",
		"list": [{
			"text": "首页",
			"pagePath": "pages/index/index",
			"iconPath": "static/images/tobar/首页1.png",
			"selectedIconPath": "static/images/tobar/首页2.png"
		}, {
			"text": "我的",
			"pagePath": "pages/user/user",
			"iconPath": "static/images/tobar/我的1.png",
			"selectedIconPath": "static/images/tobar/我的2.png"
		}]
	}
}
六、项目开发
6.1 编写网络请求工具类

const BASE_URL = 'https://mijiao.photo.com/api/';
export function request(config = {}) {
let {
url,
data = {},
method = "GET",
header = {}
} = config
url = BASE_URL + url
header['access-key'] = "425174"
return new Promise((resolve, reject) => {
uni.request({
url,
data,
method,
header,
success: res => {
if (res.data.errCode === 0) {
resolve(res.data)
} else if (res.data.errCode === 400) {
uni.showModal({
title: "错误提示",
content: res.data.errMsg,
showCancel: false
})
reject(res.data)
} else {
uni.showToast({
title: res.data.errMsg,
icon: "none"
})
reject(res.data)
}
},
fail: err => {
reject(err)
}
})
})
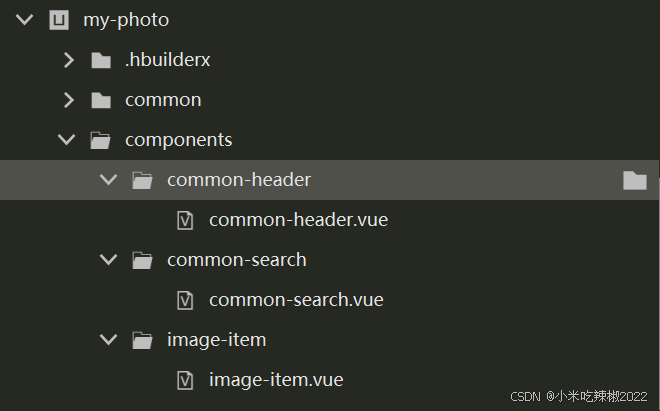
}6.2 创建页面头部组件
<template>
	<view class="header">
		<view class="image-box">
			<image src="../../common/images/照片2.jpg" @click="ClickImage('../../common/images/照片2.jpg')"></image>
		</view>
		<view v-if="showNameContent" class="content">
			<text class="name">小米椒</text>
			<text class="zuoyouming">我喜欢读书看电影照相旅行</text>
		</view>
	</view>
</template>

<script lang="ts" setup>
	import { ref } from 'vue'
	let showNameContent = ref(true)
	const props = defineProps(['showNameContent'])
	showNameContent.value = props.showNameContent ? props.showNameContent : showNameContent.value;

	const ClickImage = (imageUrl) => {
		uni.previewImage({
			urls: [imageUrl],
			longPressActions: {
				itemList: ['发送给朋友', '保存图片', '收藏'],
				success: function (data) {
					console.log('选中了第' + (data.tapIndex + 1) + '个按钮,第' + (data.index + 1) + '张图片');
				},
				fail: function (err) {
					console.log(err.errMsg);
				}
			}
		});
	}
</script>

<style lang="scss" scoped>
	.header {
		margin-top: 10rpx;
		// border: 1px solid red;
		padding: 0 16rpx;
		width: 100%;
		height: 100rpx;
		display: flex;
		// justify-content: center;
		align-items: center;

		.image-box {
			width: 100rpx;
			height: 100rpx;

			image {
				width: 100%;
				height: 100%;
				border-radius: 50%;
			}
		}

		.content {
			display: flex;
			flex-direction: column;
			padding-left: 20rpx;

			.name {
				font-size: 36rpx;
				font-weight: bold;
			}

			.zuoyouming {}
		}
	}
</style>
运行后头部组件预览效果如下:

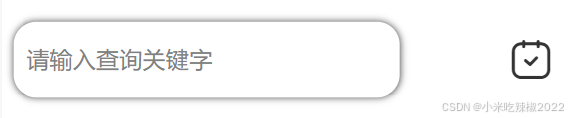
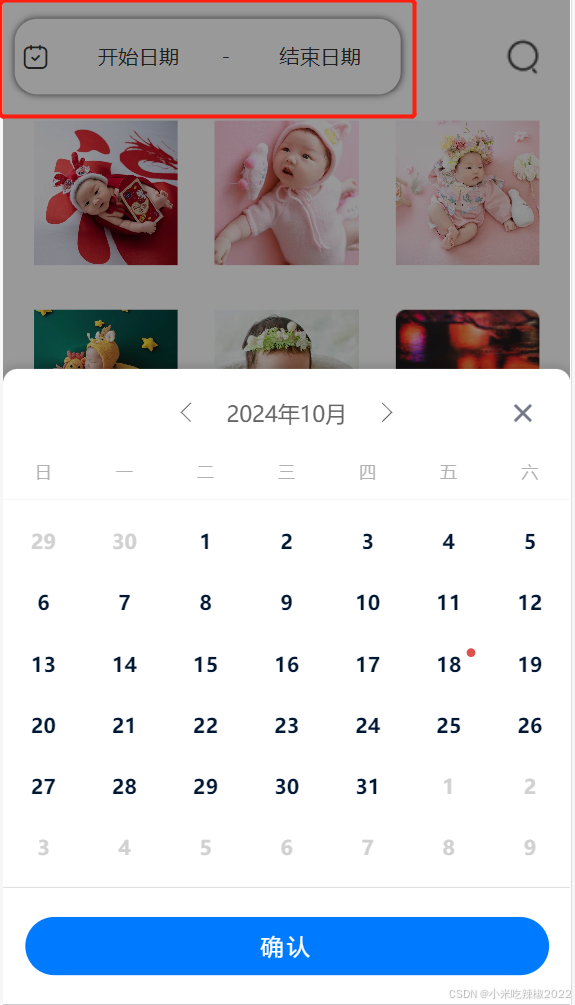
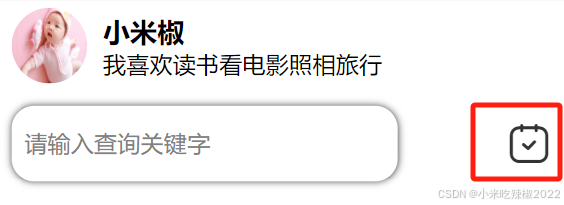
6.3 创建日期|搜索框组件
<template>
	<view class="search">

		<view class="left" v-if="!showSearchStatus">
			<uni-datetime-picker v-model="range" type="daterange" @maskClick="maskClick" @change="change"
				:border="false" :clearIcon="false" />
			<uni-section :title="'日期范围用法:' + '[' + range + ']'" type="line"></uni-section>
		</view>

		<view class="searchBox" v-if="showSearchStatus">
			<input class="uni-input" placeholder="请输入查询关键字" :value="inputClearValue" @input="clearInput" />
			<uni-icons class="uni-icon" v-if="showClearIcon" @click="clearIcon" type="close" size="36"></uni-icons>
		</view>

		<view class="right" v-if="!showSearchStatus">
			<image src="../../common/images/搜索.png" @click="showSearch"></image>
		</view>

		<view class="right" v-if="showSearchStatus">
			<uni-icons @click="showSearch" type="calendar" size="36"></uni-icons>
		</view>


	</view>
</template>

<script lang="ts" setup>
	import { ref } from 'vue'
	import { request } from '../../utils/request'
	// import "UniDatetimePicker " from 'uni-datetime-picker'
	let range = ref([])
	let showSearchStatus = ref(false)
	let inputClearValue = ref('')
	let showClearIcon = ref(false)
	const maskClick = () => {
		console.log('Mask clicked, do something...');
		// 在这里处理遮罩层点击事件
	}
	const change = (e) => {
		console.log('change事件:', e);
	}

	const showSearch = () => {
		showSearchStatus.value = !showSearchStatus.value
	}

	const clearInput = async (event) => {
		inputClearValue.value = event.detail.value;
		if (event.detail.value.length > 0) {
			showClearIcon.value = true;
		} else {
			showClearIcon.value = false;
		}
	}

	const clearIcon = () => {
		inputClearValue.value = '';
		showClearIcon.value = false;
	}
</script>

<style lang="scss" scoped>
	.search {
		margin-top: 30rpx;
		width: 100%;
		height: 100rpx;
		// border: 1px solid red;
		display: flex;

		.left {
			width: 70%;
			height: 100%;
			padding-left: 16rpx;

			:deep() {
				.uni-date-range {
					height: 100rpx;
					color: #363637;
					// border: 1px solid #363637;
					border-radius: 30rpx;
					box-shadow: 0rpx 0rpx 10rpx 0rpx #363637;
				}

				.uniui-calendar[data-v-d31e1c47]:before {
					color: #363637;
				}

			}


		}


		.right {
			// border: 1px solid blue;
			width: 30%;
			height: 100%;
			display: flex;
			justify-content: flex-end;
			align-items: center;
			padding: 0 16rpx;

			image {
				padding: 20rpx;
				width: 50rpx;
				height: 50rpx;
				// border: 1px solid red;
			}
		}

		.searchBox {
			width: 70%;
			height: 100%;
			padding-left: 16rpx;
			display: flex;
			// border: 1px solid red;
			justify-content: flex-start;
			align-items: center;
			position: relative;

			input {
				width: 100%;
				// border: 1px solid red;
				height: 100rpx;
				color: #363637;
				// border: 1px solid #363637;
				border-radius: 30rpx;
				box-shadow: 0rpx 0rpx 10rpx 0rpx #363637;
				padding-left: 16rpx;
			}

			.uni-icons {
				position: absolute;
				right: 0;
			}

		}
	}
</style>
运行后日期|搜索框组件预览效果如下:
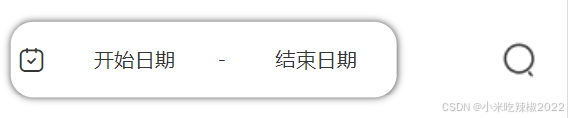
点击右侧搜索按钮,可切换为文本输入框,点击右侧日历按钮可以切换为日期选择。
6.4 创建单个照片组件
<template>
<view class="box">
<image :src="item" mode="aspectFill" @click="ClickImage(item)" />
</view>
</template>
<script lang="ts" setup>
import { onLoad, onUnload, onReachBottom, onShareAppMessage, onShareTimeline } from "@dcloudio/uni-app"
const props = defineProps(['item'])
onLoad((e) => {
console.log(e, decodeURIComponent(props.item))
decodeURIComponent(props.item)
})
const ClickImage = (imageUrl) => {
uni.previewImage({
urls: [imageUrl],
longPressActions: {
itemList: ['发送给朋友', '保存图片', '收藏'],
success: function (data) {
console.log('选中了第' + (data.tapIndex + 1) + '个按钮,第' + (data.index + 1) + '张图片');
},
fail: function (err) {
console.log(err.errMsg);
}
}
});
}
</script>
<style lang="scss" scoped>
.box {
width: 200rpx;
height: 200rpx;
// height: 200rpx;
// border: 1px solid red;
padding: 5rpx;
image {
width: 100%;
height: 100%;
}
}
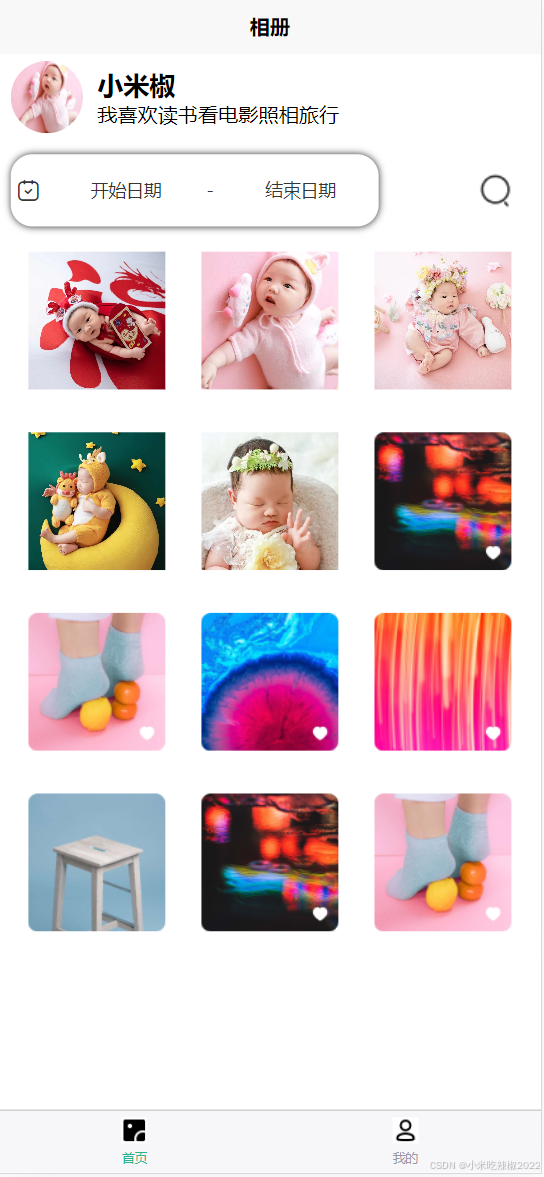
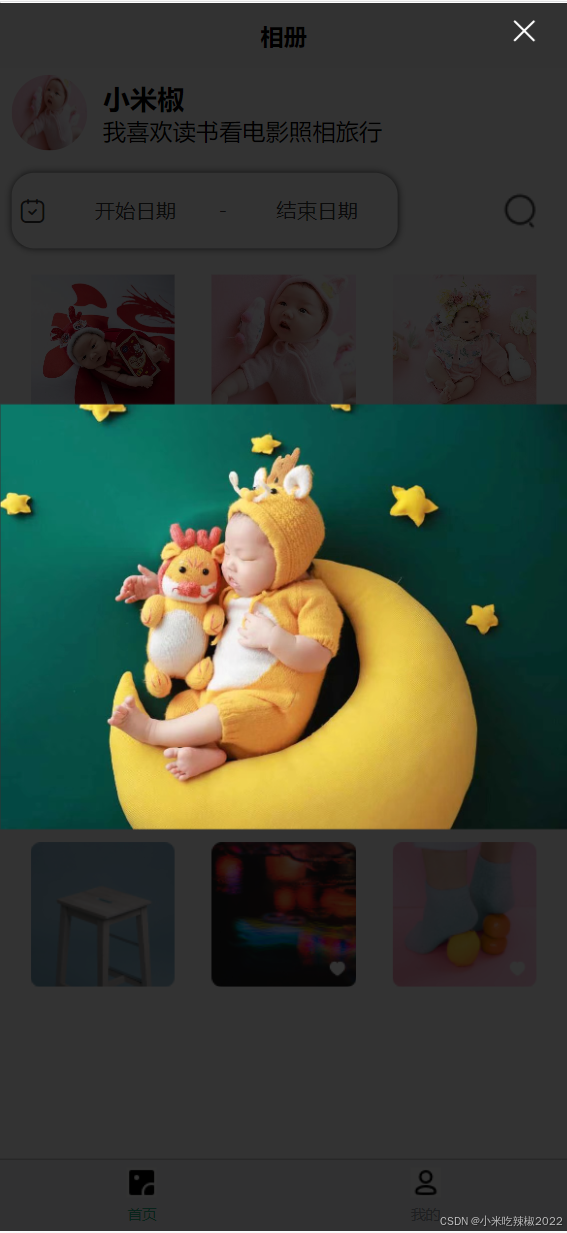
</style>6.5 开发首页
在pages下创建index.vue 页面
<template>
	<view class="index">
		<common-header></common-header>
		<common-search></common-search>
		<view class="content">
			<!-- <view class="box" v-for="(item,index) in imageUrlList" :key="index">
				<image :src="item" mode="aspectFill" @click="ClickImage(item)" />
			</view> -->
			<image-item v-for="(item,index) in imageUrlList" :key="index" :item="item"></image-item>
		</view>
	</view>
</template>

<script lang="ts" setup>
	import { ref } from 'vue'

	let imageUrlList = ref([
		'../../common/images/头像1.jpg',
		'../../common/images/照片2.jpg',
		'../../common/images/照片4.jpg',
		'../../common/images/照片5.jpg',
		'../../common/images/照片6.jpg',
		'../../common/images/画板 2(3).png',
		'../../common/images/画板 2(4).png',
		'../../common/images/画板 2.png',
		'../../common/images/画板 2(1).png',
		'../../common/images/画板 2(2).png',
		'../../common/images/画板 2(3).png',
		'../../common/images/画板 2(4).png'
	])
</script>

<style lang="scss" scoped>
	.content {
		margin-top: 30rpx;
		padding: 0 16rpx;
		// column-count: 3;
		// column-gap: 2px;
		// border: 1px solid red;
		height: 1000rpx;
		width: 100%;
		// overflow: hidden;
		display: flex;
		justify-content: space-around;
		justify-items: center;
		flex-wrap: wrap;


	}
</style>
运行后首页预览效果如下:
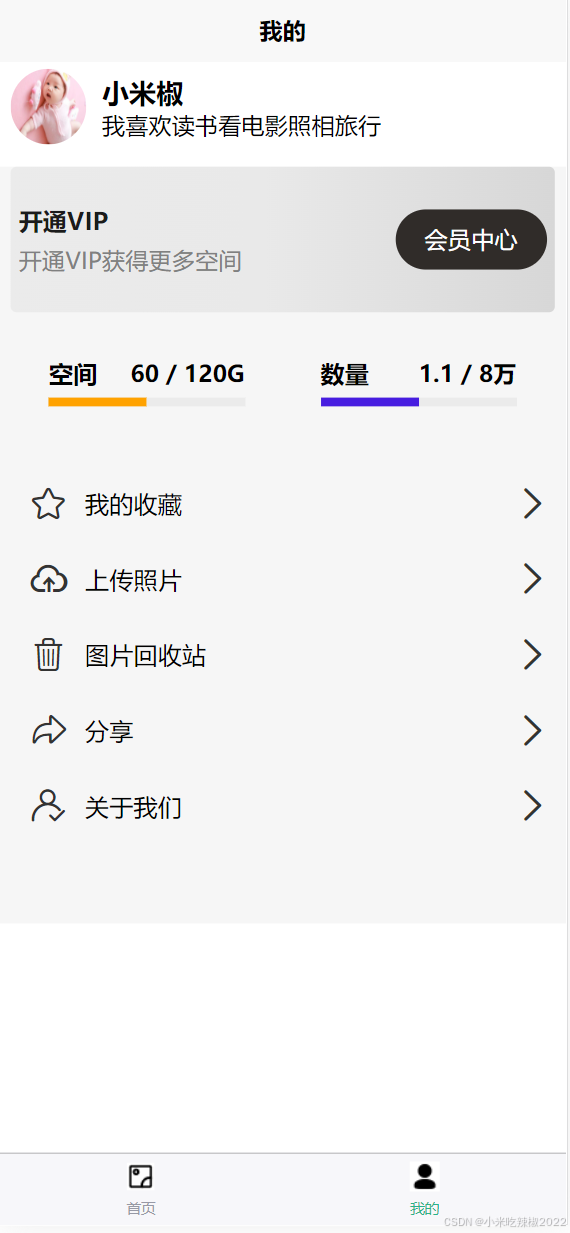
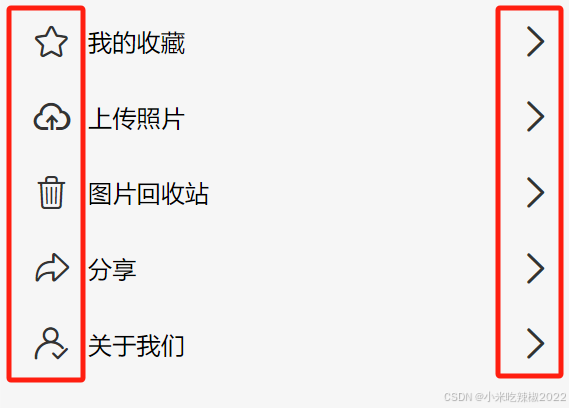
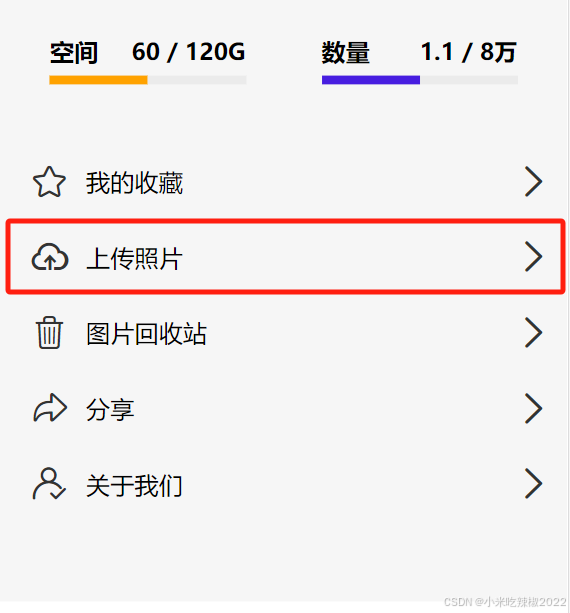
6.6 开发“我的”页面
在pages下创建user.vue 页面
<template>
<view class="user">
<common-header :showNameContent="true">
</common-header>
<view class="content">
<view class="vip">
<view class="left">
<text class="openvip">开通VIP</text>
<text class="vipspace">开通VIP获得更多空间</text>
</view>
<view class="right">
<text>会员中心</text>
</view>
</view>
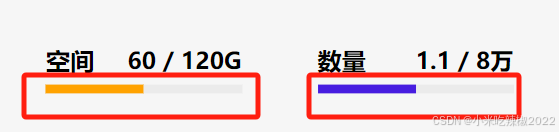
<view class="spaceAndCount">
<view class="space">
<view class="top">
<text>空间</text>
<text>60 / 120G</text>
</view>
<view class="bottom">
<progress :percent="50" stroke-width="6" border-radius="100" activeColor="rgba(255, 162, 0, 1)"
:active="true" duration="10" />
</view>
</view>
<view class="count">
<view class="top">
<text>数量</text>
<text>1.1 / 8万</text>
</view>
<view class="bottom">
<progress :percent="50" stroke-width="6" border-radius="100" activeColor="rgba(71, 29, 224, 1)"
:active="true" duration="10" />
</view>
</view>
</view>
<view class="optionList">
<view class="item">
<view class="left" @click="navigateTo">
<uni-icons type="star" size="30"></uni-icons>
<text>我的收藏</text>
</view>
<view class="right" @click="navigateTo">
<uni-icons type="right" size="30"></uni-icons>
</view>
</view>
<view class="item">
<view class="left" @click="onImgsUpload">
<uni-icons type="cloud-upload" size="30"></uni-icons>
<text>上传照片</text>
</view>
<view class="right" @click="onImgsUpload">
<uni-icons type="right" size="30"></uni-icons>
</view>
</view>
<view class="item">
<view class="left" @click="navigateToDelete">
<uni-icons type="trash" size="30"></uni-icons>
<text>图片回收站</text>
</view>
<view class="right" @click="navigateToDelete">
<uni-icons type="right" size="30"></uni-icons>
</view>
</view>
<view class="item">
<view class="left">
<uni-icons type="redo" size="30"></uni-icons>
<text>分享</text>
</view>
<view class="right">
<uni-icons type="right" size="30"></uni-icons>
</view>
</view>
<view class="item">
<view class="left" @click="navigateToAboutMe">
<uni-icons type="auth" size="30"></uni-icons>
<text>关于我们</text>
</view>
<view class="right" @click="navigateToAboutMe">
<uni-icons type="right" size="30"></uni-icons>
</view>
</view>
</view>
</view>
</view>
</template>
<script lang="ts" setup>
const onImgsUpload = () => {
uni.chooseImage({
count: 9,
sourceType: ['album'], //从相册选择
success: (res) => {
console.log(res)
res.tempFilePaths.forEach((item) => {
uni.uploadFile({
url: "http://photo-project/file/upload",
// header: {
// Authorization: "Bearer " + this.userInfo.token,
// },
filePath: item,
name: "file",
success: function (uploadFileRes) {
console.log('111')
// this.picUrls = [];
// this.picUrls.push(JSON.parse(uploadFileRes.data).data.url);
// this.gallery = this.gallery.concat(this.picUrls);
},
});
});
},
});
}
const navigateTo = () => {
uni.navigateTo({
url: '/pages/user/favorite'
});
}
const navigateToDelete = () => {
uni.navigateTo({
url: '/pages/user/imageDelete'
});
}
const navigateToAboutMe = () => {
uni.navigateTo({
url: '/pages/user/aboutMe'
});
}
</script>
<style lang="scss" scoped>
.content {
margin-top: 10rpx;
padding: 0 16rpx;
// column-count: 3;
// column-gap: 2px;
// border: 1px solid red;
height: 1000rpx;
width: 100%;
// overflow: hidden;
// display: flex;
background-color: rgba(246, 246, 246, 1);
// justify-content: center;
// justify-items: center;
// flex-wrap: wrap;
.vip {
// left: 16px;
// top: 186px;
margin-top: 30rpx;
display: flex;
width: 100%;
height: 100px;
opacity: 1;
border-radius: 4px;
// justify-content: center;
align-items: center;
background: linear-gradient(90deg, rgba(235, 235, 235, 1) 0%, rgba(233, 233, 233, 1) 43.31%, rgba(233, 233, 233, 1) 46.81%, rgba(215, 215, 215, 1) 100%);
.left {
width: 50%;
display: flex;
flex-direction: column;
// border: 1px solid red;
padding-left: 10rpx;
.openvip {
font-size: 32rpx;
font-weight: bold;
color: rgba(27, 27, 27, 1);
margin-bottom: 10rpx;
}
.vipspace {
color: rgba(128, 128, 128, 1);
}
}
.right {
padding-right: 10rpx;
width: 50%;
display: flex;
justify-content: flex-end;
// border: 1px solid red;
text {
border-radius: 80rpx;
width: 200rpx;
align-items: center;
height: 80rpx;
line-height: 80rpx;
display: flex;
justify-content: center;
align-items: center;
color: rgba(255, 255, 255, 1);
background-color: rgba(48, 44, 41, 1);
}
}
}
.spaceAndCount {
width: 100%;
margin-top: 30rpx;
// border: 1PX solid red;
display: flex;
.space {
// border: 1PX solid black;
width: 50%;
display: flex;
flex-direction: column;
padding: 30rpx 50rpx;
.top {
display: flex;
flex-direction: row;
// padding: 50rpx;
justify-content: space-between;
text {
font-weight: bold;
&:first-child {
color: rgba(0, 0, 0, 1);
font-size: 32rpx;
font-weight: bold;
// margin-bottom: 10rpx;
}
}
}
.bottom {
margin-top: 10rpx;
}
}
.count {
// border: 1PX solid blue;
width: 50%;
display: flex;
flex-direction: column;
padding: 30rpx 50rpx;
.top {
display: flex;
flex-direction: row;
// padding: 50rpx;
justify-content: space-between;
text {
font-weight: bold;
&:first-child {
color: rgba(0, 0, 0, 1);
font-size: 32rpx;
font-weight: bold;
// margin-bottom: 10rpx;
}
}
}
.bottom {
margin-top: 10rpx;
}
}
}
.optionList {
width: 100%;
height: 750rpx;
margin-top: 50rpx;
// border: 1px solid red;
.item {
width: 100%;
height: 100rpx;
display: flex;
line-height: 100rpx;
justify-content: center;
align-items: center;
// border: 1px solid red;
.shareButton {
width: 750rpx;
height: 100rpx;
border: 1px solid red;
}
button::after {
border: none;
}
.left {
width: 50%;
// border: 1px solid red;
display: flex;
text {
// display: block;
margin-left: 20rpx;
font-size: 32rpx;
font-weight: 550rpx;
}
}
.right {
width: 50%;
display: flex;
justify-content: flex-end;
// border: 1px solid red;
}
}
}
}
</style>运行后预览效果如下:
6.7 开发垃圾回收站页面
在pages下创建imageDelete.vue 页面
<template>
<view class="content">
<image-item v-for="(item,index) in imageUrlList" :key="index" :item="item"></image-item>
</view>
</template>
<script lang="ts" setup>
import { ref } from 'vue'
let imageUrlList = ref([
'../../common/images/xx.jpg',
'../../common/images/xx.jpg',
'../../common/images/xx.jpg',
'../../common/images/xx.jpg',
'../../common/images/xx.jpg',
'../../common/images/xx.jpg',
'../../common/images/xx.jpg',
'../../common/images/xx.jpg',
'../../common/images/xx.jpg',
'../../common/images/xx.jpg',
'../../common/images/xx.jpg',
'../../common/images/xx.jpg',
'../../common/images/xx.jpg',
'../../common/images/xx.jpg',
'../../common/images/xx.jpg',
'../../common/images/xx.jpg',
'../../common/images/xx.jpg',
'../../common/images/xx.jpg',
'../../common/images/xx.jpg',
'../../common/images/xx.jpg',
'../../common/images/xx.jpg',
])
</script>
<style lang="scss" scoped>
.content {
margin-top: 30rpx;
padding: 0 16rpx;
// column-count: 3;
// column-gap: 2px;
// border: 1px solid red;
height: 1000rpx;
width: 100%;
// overflow: hidden;
display: flex;
justify-content: space-around;
justify-items: center;
flex-wrap: wrap;
}
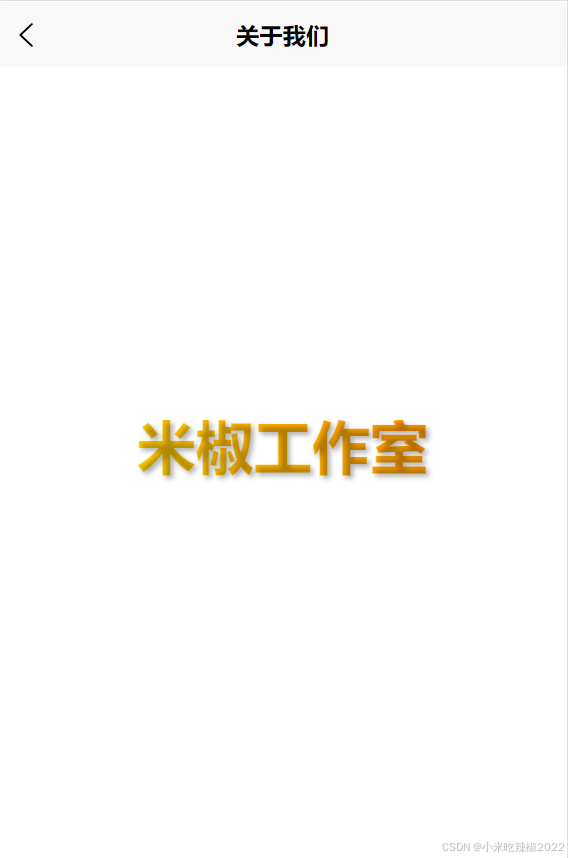
</style>6.8 开发关于我们页面
在pages下创建aboutMe.vue 页面
<template>
	<view class="content">
		<text class="gongzuoshi">米椒工作室</text>
	</view>
</template>

<script lang="ts" setup>

</script>

<style lang="scss" scoped>
	.content {
		padding: 0 16rpx;
		width: 100%;
		height: 1000rpx;
		// border: 1px solid red;
		display: flex;
		justify-content: center;
		align-items: center;

		.gongzuoshi {
			font-family: 'Arial', sans-serif;
			/* 选择一个合适的字体 */
			font-size: 2.5em;
			/* 设置字体大小 */
			font-weight: bold;
			/* 加粗字体 */
			// color: #FF6347;
			/* 设置字体颜色,这里使用了一种鲜艳的红色 */
			text-shadow: 2px 2px 4px rgba(0, 0, 0, 0.3);
			/* 添加文本阴影 */
			background: linear-gradient(45deg, #FFD700, #FF8C00);
			/* 添加背景渐变 */
			-webkit-background-clip: text;
			/* 将背景渐变应用于文本 */
			-webkit-text-fill-color: transparent;
			/* 使文本颜色透明,以便显示背景渐变 */
			margin: 20px;
			/* 设置外边距 */
			display: inline-block;
			/* 使元素成为行内块级元素,以便应用外边距和背景 */
			// border: 2px solid #FF6347;
			/* 添加边框,颜色与文本颜色相匹配 */
			padding: 10px 20px;
			/* 设置内边距,使文本周围有一些空间 */
			border-radius: 10px;
			/* 添加圆角边框 */
			// box-shadow: 0 4px 8px rgba(0, 0, 0, 0.2);
			/* 添加盒子阴影 */
			transition: all 0.3s ease;

			/* 添加过渡效果 */
			&:hover {
				color: #FFD700;
				/* 鼠标悬停时改变文本颜色(尽管文本是透明的,这里为了完整性还是写上) */
				text-shadow: 4px 4px 8px rgba(0, 0, 0, 0.5);
				/* 鼠标悬停时改变文本阴影 */
				transform: scale(1.05);
				/* 鼠标悬停时稍微放大文本 */
			}
		}
	}
</style>
运行后预览关于我们页面效果如下:
6.9 项目中用到的uni组件和api
- 图片预览:点击照片,显示图片放大效果
这里我们的实现逻辑是给照片增加一个点击事件,当触发点击时间时调用uni.previewImage函数实现图片放大预览效果。
- 日期选择器:uni-datetime-picker 、uni-section 组件
- 图标:uni-icons 组件
- 进度条:progress 组件
- 选择图片进行上传
这里我们也是给上传图片的view增加点击事件,当触发点击事件时调用uni.chooseImage函数实现图片选择,以及调用uni.uploadFile函数实现图片的上传功能。
- api方式路由跳转:uni.navigateTo
代码已上传至gitee仓库,有需要的可自行下载学习!一键三连~!


 2万+
2万+

 被折叠的 条评论
为什么被折叠?
被折叠的 条评论
为什么被折叠?
 到【灌水乐园】发言


