


1、线性布局
1.1沿水平方向对控件进行排列
<LinearLayout xmlns:android="http://schemas.android.com/apk/res/android"
    xmlns:tools="http://schemas.android.com/tools"
    android:layout_width="match_parent"
    android:layout_height="match_parent"
    android:orientation="horizontal"
    tools:context="com.example.linearlayouttest.MainActivity" >

    <Button
        android:id="@+id/button1"
        android:layout_width="wrap_content"
        android:layout_height="wrap_content"
        android:text="@string/btn1text"
        />
    <Button
        android:id="@+id/button2"
        android:layout_width="wrap_content"
        android:layout_height="wrap_content"
        android:text="@string/btn2text"
        />
    <Button
        android:id="@+id/button3"
        android:layout_width="wrap_content"
        android:layout_height="wrap_content"
        android:text="@string/btn3text"
        />


</LinearLayout>
1.2沿垂直方向对控件进行排列
<LinearLayout xmlns:android="http://schemas.android.com/apk/res/android"
    xmlns:tools="http://schemas.android.com/tools"
    android:layout_width="match_parent"
    android:layout_height="match_parent"
    android:orientation="vertical"
    tools:context="com.example.linearlayouttest.MainActivity" >

    <Button
        android:id="@+id/button1"
        android:layout_width="wrap_content"
        android:layout_height="wrap_content"
        android:text="@string/btn1text"
        />
    <Button
        android:id="@+id/button2"
        android:layout_width="wrap_content"
        android:layout_height="wrap_content"
        android:text="@string/btn2text"
        />
    <Button
        android:id="@+id/button3"
        android:layout_width="wrap_content"
        android:layout_height="wrap_content"
        android:text="@string/btn3text"
        />


</LinearLayout>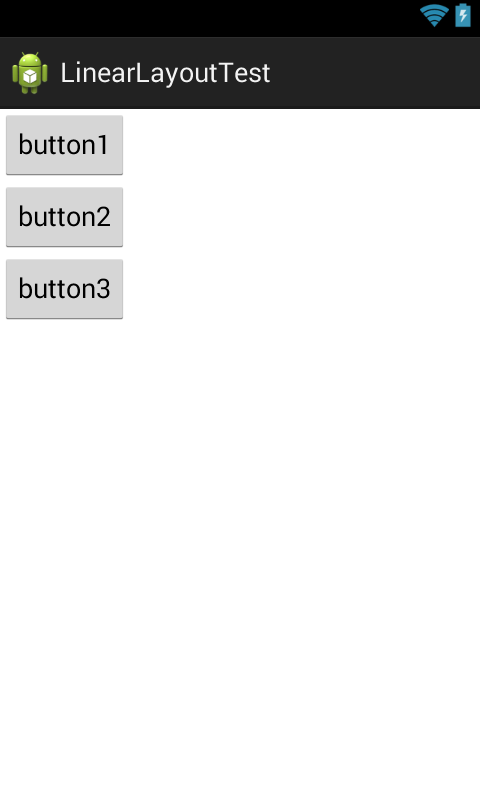
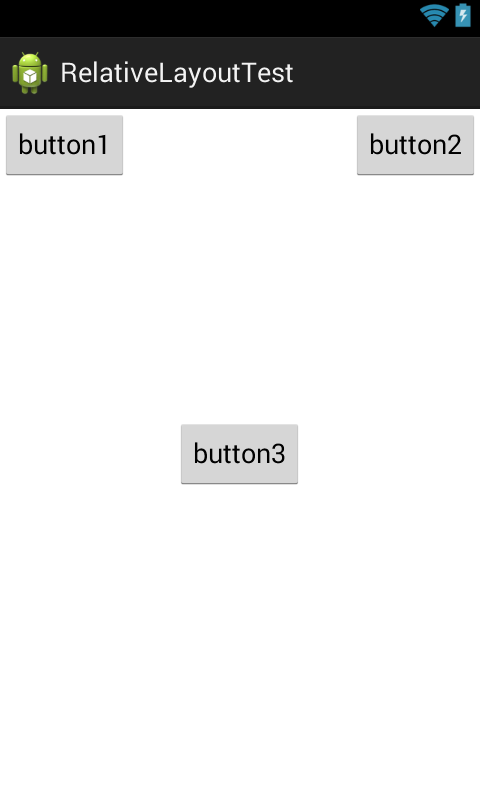
2、相对布局
<RelativeLayout xmlns:android="http://schemas.android.com/apk/res/android"
    xmlns:tools="http://schemas.android.com/tools"
    android:layout_width="match_parent"
    android:layout_height="match_parent"
    tools:context="com.example.relativelayouttest.MainActivity" >

	<Button
	    android:id="@+id/button1"
	    android:layout_width="wrap_content"
	    android:layout_height="wrap_content"
	    android:layout_alignParentLeft="true"
	    android:layout_alignParentStart="true"
	    android:layout_alignParentTop="true"
	    android:text="@string/btn1text"
	    />
	<Button
	    android:id="@+id/button2"
	    android:layout_width="wrap_content"
	    android:layout_height="wrap_content"
	    android:layout_alignParentRight="true"
	    android:layout_alignParentEnd="true"
	    android:text="@string/btn2text"
	    />
	<Button
	    android:id="@+id/button3"
	    android:layout_width="wrap_content"
	    android:layout_height="wrap_content"
	    android:layout_centerInParent="true"
	    android:text="@string/btn3text"
	    />
</RelativeLayout>


 527
527


 被折叠的 条评论
为什么被折叠?
被折叠的 条评论
为什么被折叠?
 到【灌水乐园】发言


