


前提 创建容器
private ApplicationContext ioc = new ClassPathXmlApplicationContext(“IOC.xml”);
实验2:根据bean的类型从IOC容器中获取bean的实例★
如果ioc容器中这个类型的bean有多个,查找就会报错
org.springframework.beans.factory.NoUniqueBeanDefinitionException: No qualifying bean of type [com.atguigu.bean.Person] is defined: expected single matching bean but found 2: person01,person02
public void test02() {
        //根据bean的类型从IOC容器中获取bean的实例,此时注意在容器中之注册了一个对象,则能根据类名获取对象
		Person bean = ioc.getBean(Person.class);
		System.out.println(bean);

		 //如果这个容器中person类有多个则报错
		//替代方法 当容器中有多个bean时 既指定类名,又指定对象名
		Person bean2 = ioc.getBean("person02", Person.class);
		System.out.println(bean2);

        //idd对象区别指定类名 区别就是指定类型不用类型转换
        Object bean = ioc.getBean("person02");
        System.out.println(bean);
    }
实验3:通过构造器为bean的属性赋值(name属性)(测试)
原来的<bean id="person01" class="cn.tju.Person"><property name="lastName" value="张三"></property></bean>
是调用类的getter/setter方法来进行赋值
现在使用有参构造参数来赋值
<bean id="person03" class="cn.tju.bean.Person">
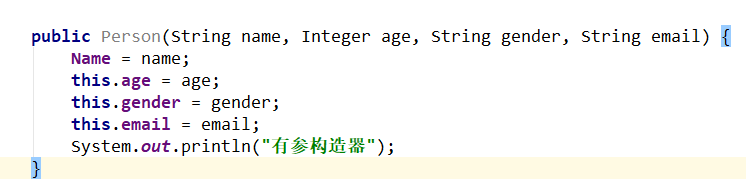
<!--构造方法public Person(String name, Integer age, String gender, String email)-->
<constructor-arg name="name" value="xgh"></constructor-arg>
<constructor-arg name="age" value="13"></constructor-arg>
<constructor-arg name="email" value="@qq"></constructor-arg>
<constructor-arg name="gender" value="male"></constructor-arg>
</bean>
 @Test
    public void test03() {

        Object bean = ioc.getBean("person03");
        System.out.println(bean);
        //有参构造器
		//Person{Name='xgh', age=13, gender='male', email='@qq'}
    }
通过p名称空间为bean赋值
通过p名称空间为bean赋值;导入p名称空间
xmlns:p="http://www.springframework.org/schema/p"
名称空间:在xml中名称空间是用来防止标签重复的
为防止两个name标签重复,加名称空间
eg
   <book>
        <b:name>西游记</b:name>
        <price>19.98</price>
        <author>
            <a:name>吴承恩</a:name>
            <gender>男</gender>
        </author>
    </book>

    带前缀的标签<c:forEach>		<jsp:forward>
eg
1)导入p名称空间
2)写带前缀的标签/属性
<bean id="person04" class="cn.tju.bean.Person"
    p:age="15" p:email="ee" p:name="ee" p:gender="male">
</bean>
实验4:正确的为各种属性赋值
基本类型直接使用自动的进行类型转换;
复杂类型不再能用value 在标签内部赋值

4-1 测试使用null值
默认引用类型就是null(引用类型不赋值默认是null);基本类型是默认值
在标签property 内部进行复杂赋值
<bean id="person01" class="cn.tju.bean.Person">
        <!-- name="null" -->
        <property name="name">
             <!--进行复杂的赋值 -->
            <null />
        </property>
    </bean>
4-2 ref引用外部的值(引用外部bean)
<bean id="car01" class="cn.tju.bean.Car">
        <property name="carName" value="宝马"></property>
        <property name="color" value="绿色"></property>
        <property name="price" value="30000"></property>
    </bean>


    <bean id="person01" class="cn.tju.bean.Person">
        <!-- ref:代表引用外面的一个值 ;引用其他bean car = ioc.getBean("car01") -->
         <property name="car" ref="car01"></property>
    </bean>
public void test05() {
        //取出来person对象
        Person person = (Person) ioc2.getBean("person01");
        System.out.println(person);
        //Person{Name='null', age=null, gender='null', email='null', car=Car [carName=宝马, price=30000, color=绿色], books=null, maps=null, properties=null}

        //person对象的car
        Car car = person.getCar();
        System.out.println("person的car" + person.getCar());//person的carCar [carName=宝马, price=30000, color=绿色]
        //ioc容器的car01对象
        Car car01 = (Car) ioc2.getBean("car01");
        //因为两者的关系是引用 所以相等
        System.out.println(car01 == car); //true


        //修改容器中的car01对象
        car01.setCarName("haha ");
        //引用关系 所以都变了
        System.out.println("我修改了容器中的car,你的car变了没?" + car); //我修改了容器中的car,你的car变了没?Car [carName=haha , price=30000, color=绿色]
        //始终相等
        System.out.println(car01 == car); //true

    }
4-3 引用内部bean
注意内部bean是不能用id获取的
<bean id="person01" class="cn.tju.bean.Person">

        <property name="car">
            <!--对象我们可以使用bean标签创建 car = new Car(); 引用内部bean;不能被获取到,只能内部使用 -->
            <bean class="cn.tju.bean.Car">
                <property name="carName" value="自行车"></property>
            </bean>
        </property>
    </bean>
4-4 List集合类型赋值
 <bean id="book01" class="cn.tju.bean.Book">
        <property name="bookName" value="东游记"></property>
    </bean>

<bean id="person02" class="cn.tju.bean.Person">
    <!-- 如何为list类型赋值 -->
    <property name="books">
        <!-- books = new ArrayList<Book>(); -->
        <list>
            <!-- list标签体中添加每一个元素 -->
            <!--内部引用bean-->
            <bean class="cn.tju.bean.Book" p:bookName="西游记"></bean>
            <!-- 引用外部一个元素 -->
            <ref bean="book01" />
        </list>
    </property>
    </bean>
4-5 Map类型赋值
<bean id="person03" class="cn.tju.bean.Person">
    <!-- Map<String, Object> maps; -->
    <property name="maps">
        <!-- maps = new LinkedHashMap<>(); -->
        <map>
            <!-- 一个entry代表一个键值对 -->
            <entry key="key01" value="张三"></entry>
            <entry key="key02" value="18"></entry>
            <entry key="key03" value-ref="book01"></entry>
            <entry key="key04">
                <bean class="cn.tju.bean.Car">
                    <property name="carName" value="宝马"></property>
                </bean>
            </entry>
            <entry key="key05">
                <value>李四</value>
            </entry>
        </map>
    </property>
    </bean>
{key01=张三, key02=18, key03=Book [bookName=东游记, author=null], key04=Car [carName=宝马, price=null, color=null], key05=李四}
4-6 Properties类型赋值
<bean id="person04" class="cn.tju.bean.Person">
    <!-- private Properties properties; -->
    <property name="properties">
        <!-- properties = new Properties();所有的k=v都是string -->
        <props>
            <!-- k=v都是string;值直接写在标签体中 -->
            <prop key="username">root</prop>
            <prop key="password">123456</prop>
        </props>
    </property>
</bean>
{password=123456, username=root}
4-7 util名称空间创建集合类型的bean
比如有的Map,List想像bean一样被人反复引用
引如名称空间

注意util名称空间创建的集合可以从容器直接根据id获取
Map<String, Object> bean = (Map<String, Object>) ioc2.getBean(“myMap”);
    <!-- util名称空间创建集合类型的bean;方便别人引用 -->
    <bean id="person05" class="cn.tju.bean.Person">
        <property name="maps" ref="myMap"></property>
    </bean>

<!-- map集合方便其他对象引用 -->
    <util:map id="myMap">
        <!-- 添加元素 -->
        <entry key="key01" value="张三"></entry>
        <entry key="key02" value="18"></entry>
        <entry key="key03" value-ref="book01"></entry>
        <entry key="key04">
            <bean class="cn.tju.bean.Car">
                <property name="carName" value="宝马"></property>
            </bean>
        </entry>
        <entry key="key05">
            <value>李四</value>
        </entry>
    </util:map>


    <!--同理list集合方便引用 解释:4个元素
	[[],Person,12,{}]
	 -->
    <util:list id="myList">
        <list></list>
        <bean class="cn.tju.bean.Person"></bean>
        <value>12</value>
        <ref bean="myMap"/>
    </util:list>
4-8 级联属性赋值
级联属性可以修改属性的属性,注意:原来的bean的值可能会被修改
 <bean id="car01" class="cn.tju.bean.Car">
        <property name="carName" value="宝马"></property>
        <property name="color" value="绿色"></property>
        <property name="price" value="30000"></property>
    </bean>

 <!-- 级联属性赋值:   级联属性:属性的属性-->
    <bean id="person06" class="cn.tju.bean.Person">
        <!--为car赋值的时候。改变car的价格  -->
        <property name="car" ref="car01"></property>
        <!--级联属性 改变引用类型car的属性  -->
        <property name="car.price" value="900000"></property>
    </bean>
 @Test
    public void test07(){
        Person person06 = (Person) ioc2.getBean("person06");
        //查看容器中的car01对象
        Object car = ioc2.getBean("car01");
        System.out.println("容器中的car:"+car);//容器中的car:Car [carName=宝马, price=900000, color=绿色]

        //查看Person对象引用的car01对象
        System.out.println("person中的car:"+person06.getCar()); //person中的car:Car [carName=宝马, price=900000, color=绿色]
    }
实验5 通过继承实现bean配置信息的重用
person09自己的name属性赋值,其他属性都继承
   <bean id="person08" class="cn.tju.bean.Person">
        <property name="Name" value="张三"></property>
        <property name="age" value="18"></property>
        <property name="gender" value="男"></property>
        <property name="email" value="zhangsan@atguigu.com"></property>
    </bean>

    <!--parent:指定当前bean的配置信息继承于哪个  -->
    <bean id="person09" class="cn.tju.bean.Person" parent="person08">
        <property name="Name" value="李四"></property>
    </bean>
结果
person08:Person{Name='张三', age=18, gender='男', email='zhangsan@atguigu.com', car=null, books=null, maps=null, properties=null}
person09:Person{Name='李四', age=18, gender='男', email='zhangsan@atguigu.com', car=null, books=null, maps=null, properties=null}
实验6:通过abstract属性创建一个模板bean
abstract=“true”:这个bean的配置是一个抽象的,不能获取他的实例,只能被别人用来继承
<bean id="person08" class="cn.tju.bean.Person" abstract="true">
        <property name="Name" value="张三"></property>
        <property name="age" value="18"></property>
        <property name="gender" value="男"></property>
        <property name="email" value="zhangsan@atguigu.com"></property>
 </bean>
实验7:bean之间的依赖(只是改变创建顺序)
原来是按照配置的顺序创建bean
car被创建…
book被创建
person创建了
  <bean id="car" class="cn.tju.bean.Car" ></bean>
    <bean id="book" class="cn.tju.bean.Book" ></bean>
    <bean id="person" class="cn.tju.bean.Person"></bean>
depends-on可以改变创建顺序,指定依赖的类先创建
person创建了
book被创建
car被创建
<bean id="car" class="cn.tju.bean.Car" depends-on="person book"></bean>
    <bean id="book" class="cn.tju.bean.Book" ></bean>
    <bean id="person" class="cn.tju.bean.Person"></bean>
实验8:测试bean的作用域,分别创建单实例和多实例的bean★
bean的作用域:指定bean是否单实例,bean默认:单实例的
singleton:单实例的;默认的;
1)在容器启动完成之前就已经创建好对象,保存在容器中了。
2)任何获取都是获取之前创建好的那个对象**(唯一)**;
<bean id="book" class="cn.tju.bean.Book" scope="singleton"></bean>
prototype:多实例的;
1)容器启动默认不会去创建多实例bean
2)获取的时候创建这个bean
3)每次获取都会创建一个新的对象(不唯一)
<bean id="book" class="cn.tju.bean.Book" scope="prototype"></bean>
实验9 通过工厂创建bean
静态工厂
调用静态工厂方法创建bean是将对象创建的过程封装到静态方法中。当客户端需要对象时,只需要简单地调用静态方法,而不用关心创建对象的细节。
声明通过静态方法创建的bean需要在bean的class属性里指定静态工厂类的全类名,同时在factory-method属性里指定工厂方法的名称。最后使用<constrctor-arg>元素为该方法传递方法参数。
<!--实验5:配置通过静态工厂方法创建的bean、实例工厂方法创建的bean、FactoryBean★  -->
	<!-- bean的创建默认就是框架利用反射new出来的bean实例 -->
	<!-- 工厂模式;工厂帮我们创建对象;有一个专门帮我们创建对象的类,这个类就是工厂
		AirPlane ap = AirPlaneFactory.getAirPlane(String jzName); -->

		静态工厂:工厂本身不用创建对象;通过静态方法调用,对象 = 工厂类.工厂方法名();
		实例工厂:工厂本身需要创建对象;
				工厂类 工厂对象 = new 工厂类();
				工厂对象.getAirPlane("张三");
<!-- 1、静态工厂(不需要创建工厂本身)factory-method="getAirPlane":
		指定哪个方法是工厂方法
		class:指定静态工厂全类名
		factory-method:指定工厂方法
		constructor-arg:可以为方法传参
	 -->
	<bean id="airPlane01" class="cn.tju.factory.AirPlaneStaticFactory"
		factory-method="getAirPlane">
		<!-- 可以为方法指定参数 -->
		<constructor-arg value="李四"></constructor-arg>
	</bean>
实例工厂
实例工厂方法:将对象的创建过程封装到另外一个对象实例的方法里。当客户端需要请求对象时,只需要简单的调用该实例方法而不需要关心对象的创建细节。
实现方式
①配置工厂类实例的bean
②在factory-method属性里指定该工厂方法的名称
③使用 construtor-arg 元素为工厂方法传递方法参数
<!--2、实例工厂使用
	factory-method;指定这个实例工厂中哪个方法是工厂方法;
 -->
<bean id="airPlaneInstanceFactory"
	class="cn.tju.factory.AirPlaneInstanceFactory"></bean>

<!-- factory-bean:指定当前对象创建使用哪个工厂
	1、先配置出实例工厂对象
	2、配置我们要创建的AirPlane使用哪个工厂创建
		1)、factory-bean:指定使用哪个工厂实例
		2)、factory-method:使用哪个工厂方法
 -->
<bean id="airPlane02" class="com.atguigu.bean.AirPlane"
	factory-bean="airPlaneInstanceFactory"
	factory-method="getAirPlane">
	<constructor-arg value="王五"></constructor-arg>
</bean>
FactoryBean
Spring中有两种类型的bean,一种是普通bean,另一种是工厂bean,即FactoryBean。
工厂bean跟普通bean不同,其返回的对象不是指定类的一个实例,其返回的是该工厂bean的getObject方法所返回的对象。
工厂bean必须实现org.springframework.beans.factory.FactoryBean接口。

<!-- FactoryBean★(是Spring规定的一个接口);
			只要是这个接口的实现类,Spring都认为是一个工厂;
		1、ioc容器启动的时候不会创建实例
		2、FactoryBean;获取的时候的才创建对象
		-->
	<bean id="myFactoryBeanImple"
		class="cn.tju..factory.MyFactoryBeanImple"></bean>
</beans>
实验10 bean的生命周期
-
①Spring IOC容器可以管理bean的生命周期,Spring允许在bean生命周期内特定的时间点执行指定的任务。
-
②Spring IOC容器对bean的生命周期进行管理的过程:
- [1]通过构造器或工厂方法创建bean实例
- [2]为bean的属性设置值和对其他bean的引用
- [3]调用bean的初始化方法
- [4]bean可以使用了
- [5]当容器关闭时,调用bean的销毁方法
-
③在配置bean时,通过init-method和destroy-method 属性为bean指定初始化和销毁方法
-
④bean的后置处理器
- [1] bean后置处理器允许在调用初始化方法前后对bean进行额外的处理
- [2]bean后置处理器对IOC容器里的所有bean实例逐一处理,而非单一实例。其典型应用是:检查bean属性的正确性或根据特定的标准更改bean的属性。
- [3] bean后置处理器时需要实现接口:
org.springframework.beans.factory.config.BeanPostProcessor。在初始化方法被调用前后,Spring将把每个bean实例分别传递给上述接口的以下两个方法:
●postProcessBeforeInitialization(Object, String)
●postProcessAfterInitialization(Object, String)
-
⑤添加bean后置处理器后bean的生命周期
[1]通过构造器或工厂方法创建bean实例
[2]为bean的属性设置值和对其他bean的引用
[3]将bean实例传递给bean后置处理器的postProcessBeforeInitialization()方法
[4]调用bean的初始化方法
[5]将bean实例传递给bean后置处理器的postProcessAfterInitialization()方法
[6]bean可以使用了
[7]当容器关闭时调用bean的销毁方法
<!-- 实验10:创建带有生命周期方法的bean
	生命周期:bean的创建到销毁;
		ioc容器中注册的bean;
			1)、单例bean,容器启动的时候就会创建好,容器关闭也会销毁创建的bean
			2)、多实例bean,获取的时候才创建;
		我们可以为bean自定义一些生命周期方法;spring在创建或者销毁的时候就会调用指定的方法;
		自定义初始化方法和销毁方法; The method must have no arguments,but may throw any exception

	-->
	<bean id="book01" class="cn.tju.bean.Book"
		destroy-method="myDestory" init-method="myInit" ></bean>

<!--实验11:测试bean的后置处理器:BeanPostProcessor
	Spring有一个接口:后置处理器:可以在bean的初始化前后调用方法;
	  -->
	<bean id="beanPostProcessor" class="cn.tju.bean.MyBeanPostProcessor"></bean>
实验11 引用外部属性文件
当bean的配置信息逐渐增多时,查找和修改一些bean的配置信息就变得愈加困难。这时可以将一部分信息提取到bean配置文件的外部,以properties格式的属性文件保存起来,同时在bean的配置文件中引用properties属性文件中的内容,从而实现一部分属性值在发生变化时仅修改properties属性文件即可。这种技术多用于连接数据库的基本信息的配置。
①直接配置
<!-- 直接配置 -->
    <bean id="datasource" class="com.mchange.v2.c3p0.ComboPooledDataSource">
        <property name="user" value="root"></property>
        <property name="password" value="xgh961120"></property>
        <property name="jdbcUrl" value="jdbc:mysql://localhost:3306/commandsystem"/>
        <property name="driverClass" value="com.mysql.jdbc.Driver"></property>
    </bean>
②创建properties属性文件
jdbc.userName=root
jdbc.password=xgh961120
jdbc.url=jdbc:mysql://localhost:3306/commandsystem
jdbc.driverClass=com.mysql.jdbc.Driver
③引入context名称空间
xmlns:context="http://www.springframework.org/schema/context"
④指定properties属性文件的位置
<!-- 指定properties属性文件的位置 -->
<!-- classpath:xxx 表示属性文件位于类路径下 -->
<context:property-placeholder location="classpath:jdbc.properties"/>
⑤从properties属性文件中引入属性值
<!-- 从properties属性文件中引入属性值 -->
<bean id="dataSource" class="com.mchange.v2.c3p0.ComboPooledDataSource">
	<property name="user" value="${prop.userName}"/>
	<property name="password" value="${prop.password}"/>
	<property name="jdbcUrl" value="${prop.url}"/>
	<property name="driverClass" value="${prop.driverClass}"/>
</bean>
实验12 自动装配
①自动装配的概念
[1]手动装配:以value或ref的方式明确指定属性值都是手动装配。
[2]自动装配:根据指定的装配规则,不需要明确指定,Spring自动将匹配的属性值注入bean中。
②装配模式
[1]根据类型自动装配:将类型匹配的bean作为属性注入到另一个bean中。若IOC容器中有多个与目标bean类型一致的bean,Spring将无法判定哪个bean最合适该属性,所以不能执行自动装配
[2]根据名称自动装配:必须将目标bean的名称和属性名设置的完全相同
[3]通过构造器自动装配:当bean中存在多个构造器时,此种自动装配方式将会很复杂。不推荐使用。
③选用建议
相对于使用注解的方式实现的自动装配,在XML文档中进行的自动装配略显笨拙,在项目中更多的使用注解的方式实现。
<!-- 为Person里面的自定义类型的属性赋值
	property:手动赋值
	自动赋值(自动装配):

自动装配:(仅限于对自定义类型的属性有效)
autowire="default/no":不自动装配;不自动为car属性赋值

//按照某种规则自动装配
autowire="byName":按照名字;
		private Car car;
			1)、以属性名(car)作为id去容器中找到这个组件,给他赋值;如果找不到就装配null;
			car = ioc.getBean("car");
autowire="byType":
		private Car car;
			1)、以属性的类型作为查找依据去容器中找到这个组件;如果容器中有多个这葛类型的组件,报错;
			NoUniqueBeanDefinitionException:
			No qualifying bean of type [com.atguigu.bean.Car] is defined:
			expected single matching bean but found 2: car01,car02
			2)、没找到呢?装配null
			car = ioc.getBean(Car.class);

autowire="constructor":
	public Person(Car car)
		按照构造器进行赋值;
		1)、先按照有参构造器参数的类型进行装配(成功就赋值);没有就直接为组件装配null即可。
		2)、如果按照类型找到了多个;参数的名作为id继续匹配;找到就装配;找不到就null;
		3)、不会报错;

自动的为属性赋值:
-->
实验13 SpEL
简介
Spring Expression Language,Spring表达式语言,简称SpEL。支持运行时查询并可以操作对象图。
和JSP页面上的EL表达式、Struts2中用到的OGNL表达式一样,SpEL根据JavaBean风格的getXxx()、setXxx()方法定义的属性访问对象图,完全符合我们熟悉的操作习惯。
基本语法
SpEL使用#{…}作为定界符,所有在大框号中的字符都将被认为是SpEL表达式。
使用字面量
●整数:<property name="count" value="#{5}"/>
●小数:<property name="frequency" value="#{89.7}"/>
●科学计数法:<property name="capacity" value="#{1e4}"/>
●String类型的字面量可以使用单引号或者双引号作为字符串的定界符号
<property name=“name” value="#{'Chuck'}"/>
<property name='name' value='#{"Chuck"}'/>
●Boolean:<property name="enabled" value="#{false}"/>
引用其他bean
<bean id="emp04" class="com.parent.bean.Employee">
	<property name="empId" value="1003"/>
	<property name="empName" value="Kate"/>
	<property name="age" value="21"/>
	<property name="detp" value="#{dept}"/>
</bean>
引用其他bean的属性值作为自己某个属性的值
<bean id="emp05" class="com..parent.bean.Employee">
	<property name="empId" value="1003"/>
	<property name="empName" value="Kate"/>
	<property name="age" value="21"/>
	<property name="deptName" value="#{dept.deptName}"/>
</bean>
调用非静态方法
<!-- 创建一个对象,在SpEL表达式中调用这个对象的方法 -->
<bean id="salaryGenerator" class="com.atguigu.spel.bean.SalaryGenerator"/>

<bean id="employee" class="com.atguigu.spel.bean.Employee">
	<!-- 通过对象方法的返回值为属性赋值 -->
	<property name="salayOfYear" value="#{salaryGenerator.getSalaryOfYear(5000)}"/>
</bean>
调用静态方法
<bean id="employee" class="com.atguigu.spel.bean.Employee">
	<!-- 在SpEL表达式中调用类的静态方法 -->
	<property name="circle" value="#{T(java.lang.Math).PI*20}"/>
</bean>
运算符
①算术运算符:+、-、*、/、%、^
②字符串连接:+
③比较运算符:<、>、==、<=、>=、lt、gt、eq、le、ge
④逻辑运算符:and, or, not, |
⑤三目运算符:判断条件?判断结果为true时的取值:判断结果为false时的取值
⑥正则表达式:matches


 511
511


 被折叠的 条评论
为什么被折叠?
被折叠的 条评论
为什么被折叠?
 到【灌水乐园】发言


